1. Specifications:
|
| - MP3 (MPEG1 Audio Layer I/II/III & 2.5), | |
| File Type |
| Bit rate : 32kbps ~ 320 kbps CBR. |
| - WMA, Bit rate: 32Kbps ~ 320Kbps, CBR | ||
|
| ||
Audio |
| - Audio CD | |
| Equalizer | Jazz / | |
| 90db | ||
| ID3 |
| With ID3, can support |
| FM Recording | Voice recording from | |
| Voice Recording | Encoding: MP3 , 112K ~ 192kbps | |
|
|
| Compact FlashTM Card type I/type II (CF) |
|
|
| Memory Stick® (MS) |
Photo |
|
| Secure Digital Card (SD) |
Storage | Support Memory |
| MultiMedia Card (MMC) |
|
| IBM ®MicroDrive | |
| Card Interfaces |
| |
|
|
| |
|
|
| |
|
|
| MS Duo (with adapter), |
|
| MS Pro Duo (with adapter). | |
FM | Frequency Range |
| 87.5 ~ 108KHZ |
Tuner |
| ||
|
|
| |
| Hard Disk Size | 2.5” 9mm unlimited capacity | |
| Display |
| dot matrix LCD with LED backlight |
| Interface |
| USB 2.0 (compatible USB 1.1) |
General | AC Adaptor |
| 5V/2.5A DC IN |
| |||
|
| ||
|
| Model : FUJIFILM | |
| Battery | Up to 11 hours | |
| |||
|
| ||
|
| Model : FUJIFILM | |
|
| Up to 7 hours | |
| Dimensions (Lx W x H) |
| 120 x 80 x 28 mm |
| Weight | VP3320 : 274gr ( Included 2.5” HDD & battery pack ) | |
|
| ! | Windows98/98SE with driver |
|
| ! | Windows XP/ Win 2000 SP3 above without driver |
| System OS | ! Linux Kernel version 2.4 or above without driver | |
|
| ! | Mac OS 10.01 above without driver |
6
A_B | Allows you set a starting point and then press the “AB” button |
| again to set the end point. The song will be played cyclically |
| !This function will effect under Music Playback Mode. |
DISK | Allows you to select desired source or target disk drive. |
SELECT
DC In |
|
|
|
|
|
|
| MENU |
|
| USB port | ||
|
|
|
| |||
|
|
|
|
|
|
|
| Power Switch Lock | Power On/ Off | ||||
MicroDrive
CF card slot
Memory Stick® (MS) |
|
| RESET | |
|
| |||
Secure Digital Card | (SD) | LINE IN | ||
LINE OUT | ||||
MultiMedia Card (MMC) | ||||
IBM ®MicroDrive |
| Earphone Jack | ||
MS Duo (with adapter),
MS Pro Duo (with adapter).
8
!Partition the HDD ( refer to
!Don’t formatted the 32G above Hard Disk under Windows 2000 or
Windows XP
Note: Win 2K/ Win XP can not support Format Disk for 30G above Hard Drive.
2)Please don't use force when connecting the flat cable with the unit and Hard Drive .
3)To keep your hard drive in better operating performance , we recommend to periodically run Scan Disk and Disk Defragmenter .
4)Hard Drive must be formatted to the FAT or
5)Please carefully insert and remove the memory card from each slot .
6)Do not drop, jar , bump , shock the unit , or expose to severe vibration
while data is being transmitted .
7)To reduce the risk of electronic shock , do not remove cover (or back )
8)To reduce the risk of fire or shock hazard, do not expose this equipment to rain ,any liquid or moisture.
9)Keep it plugged into the AC adapter/charge while connected to your computer .
23
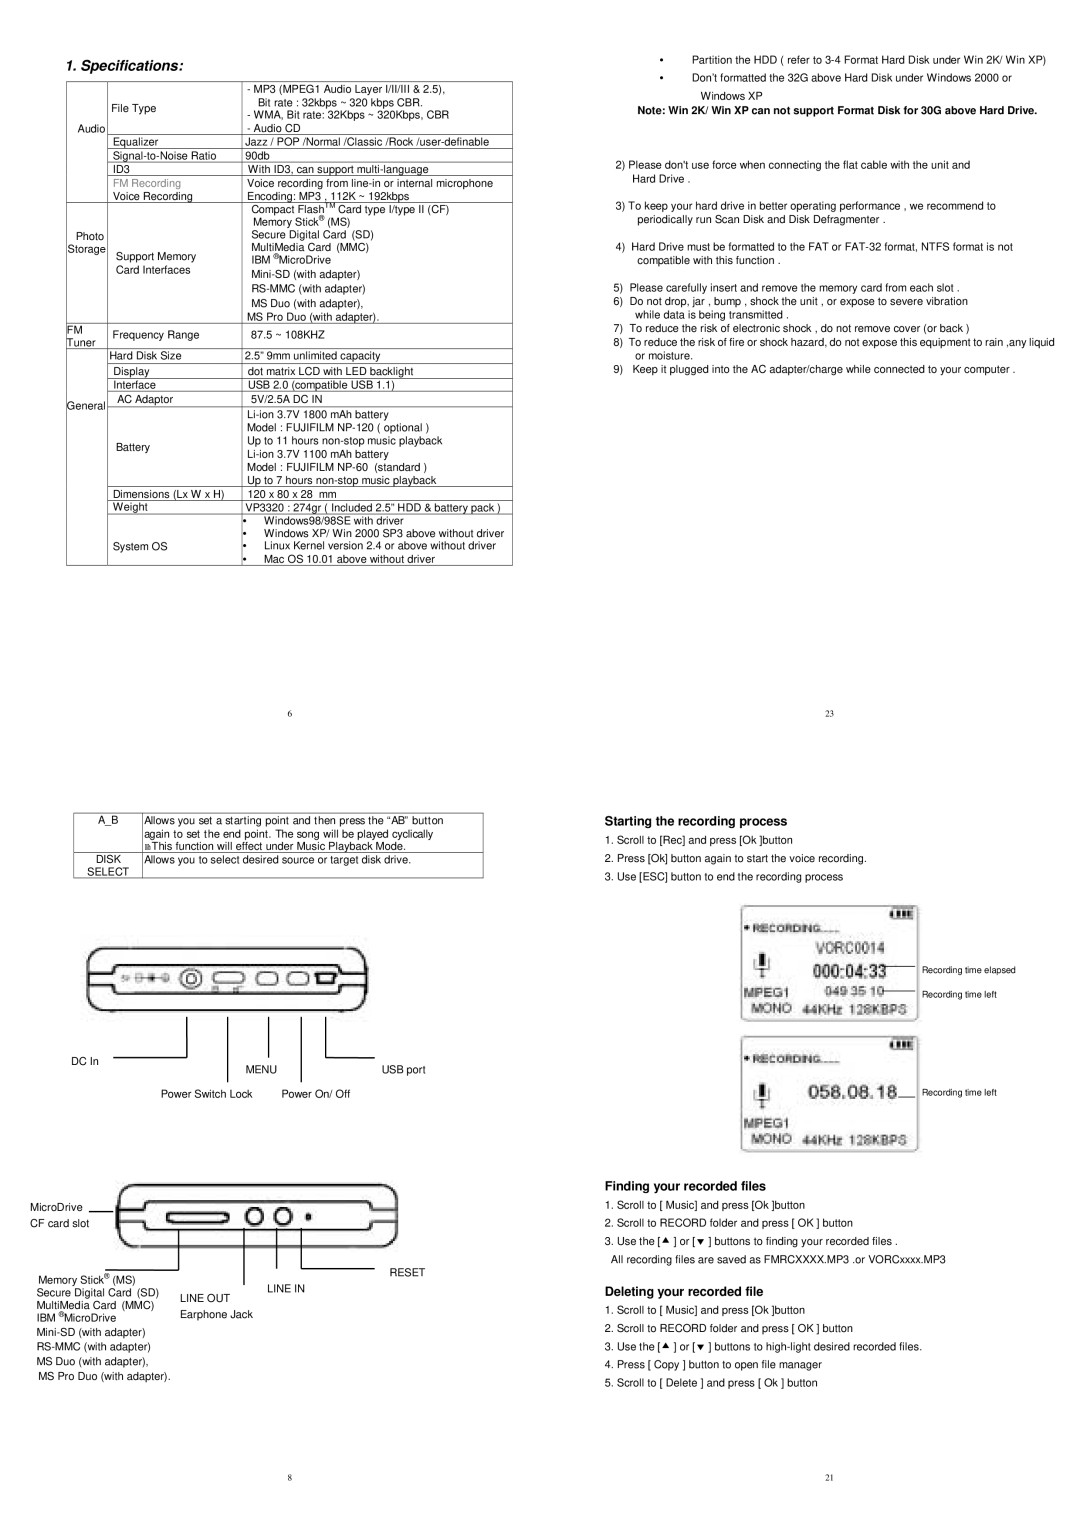
Starting the recording process
1.Scroll to [Rec] and press [Ok ]button
2.Press [Ok] button again to start the voice recording.
3.Use [ESC] button to end the recording process
Recording time elapsed
Recording time left
Recording time left
Finding your recorded files
1.Scroll to [ Music] and press [Ok ]button
2.Scroll to RECORD folder and press [ OK ] button
3.Use the [! ] or [" ] buttons to finding your recorded files .
All recording files are saved as FMRCXXXX.MP3 .or VORCxxxx.MP3
Deleting your recorded file
1.Scroll to [ Music] and press [Ok ]button
2.Scroll to RECORD folder and press [ OK ] button
3.Use the [! ] or [" ] buttons to
4.Press [ Copy ] button to open file manager
5.Scroll to [ Delete ] and press [ Ok ] button
21