FlashPro 8000
2.Press [ MENU ] button to open function menu .
3.Scroll to [REC INPUT ]
4.Use [! ] or [ " ] button to set REC INPUT at [ MIC IN ]
Recording from Line-in
You can use a line
1.Scroll to [REC ] and press [Ok ]button
2.Press [ MENU ] button and scroll to [REC INPUT ]
3.Use [! ] or [" ] button to set REC INPUT at [ LINE IN ]
Key Lock
!To lock the FlashPro 8000 front panel buttons from being accidentally pressed,
scroll ![]() and press [ OK ] button.
and press [ OK ] button.
!Press [ MENU ] to
Starting the recording process
1.Scroll to [Rec] and press [Ok ]button
2.Press [Ok] button again to start the voice recording.
20
FlashPro 8000
7. Listen to FM Radio
Remember to connect the earphone to earphone jack .
The earphone acts as the FM antenna.
Presetting a Channel
Auto tuning:
1.Scroll to [ Radio ] and press [Ok ]button
2.Press and hold the [ # ] or [ $] buttons for more than 0.5 seconds ; then release to auto scan FM radio stations . The tuner will stop at the first receivable broadcast station.
3.Press [ Ok ] button The current FM station will be set to a preset channel number. You can store up to 20 stations in memory.
4.To stop auto tuning, press the [ ESC ] button .
Manual tuning :
1.Scroll to [ Radio ] and press [Ok ]button
2.Press the [ # ] or [ $] buttons to tune into the desired station
To recall a memorized station:
1.Scroll to [ Radio ] and press [Ok ]button
2.Press [Ok ] button , “ PRESET” will appear in the display.
3.Press the [ # ] and [ $] buttons to switch to other preset radio bands.
4.To go back to the manual tuning, just press [ Ok] button again.
Notes:
- The last station tuned in will be recalled, even after switching the unit.
Deleting a channel preset
1.Scroll to [ RADIO ] and press [OK ]button
2.Press [OK ] button , “ PRESET” will appear in the display.
3.Use the [ # ] and [ $] buttons to find the desired file you want to delete.
4.Press and hold [ copy ] button for 2 seconds to remove the preset band
FlashPro 8000
3. Using the FlashPro 8000
3-1 Starting up
_________________________________________________________________
1)Charge the batteries
!Before using for the first time, charge the batteries for a full four hours.
2)Power On /Off
!Press the power button. The green light will go on and the operating system will boot up.
!To shut off the unit, press the power button.
Windows Me and Windows XP HomeEdition and Professional Edition ,Win2000 Professional SP 3 above
Windows Me and Windows XP HomeEdition and Professional Edition, Win2000 Professional SP 3 above users do not need to install any drivers. Windows will automatically detect your device as following figure.
Windows 98/98 SE
1Insert your driver Installation into your
2Browse your
3Restart your computer after installation is complete
4
Under Windows 98 , the removable disk drives look like drives G , I and J in the following figure.
9
FlashPro 8000
1.Switch on your FlashPro 8000
2.Press [ DISK SELECT] button to select desired source or target.
3-7 Auto Power off Function
There is an auto screen- off function to save battery power . If the unit is idle for 35 seconds it will shut off.
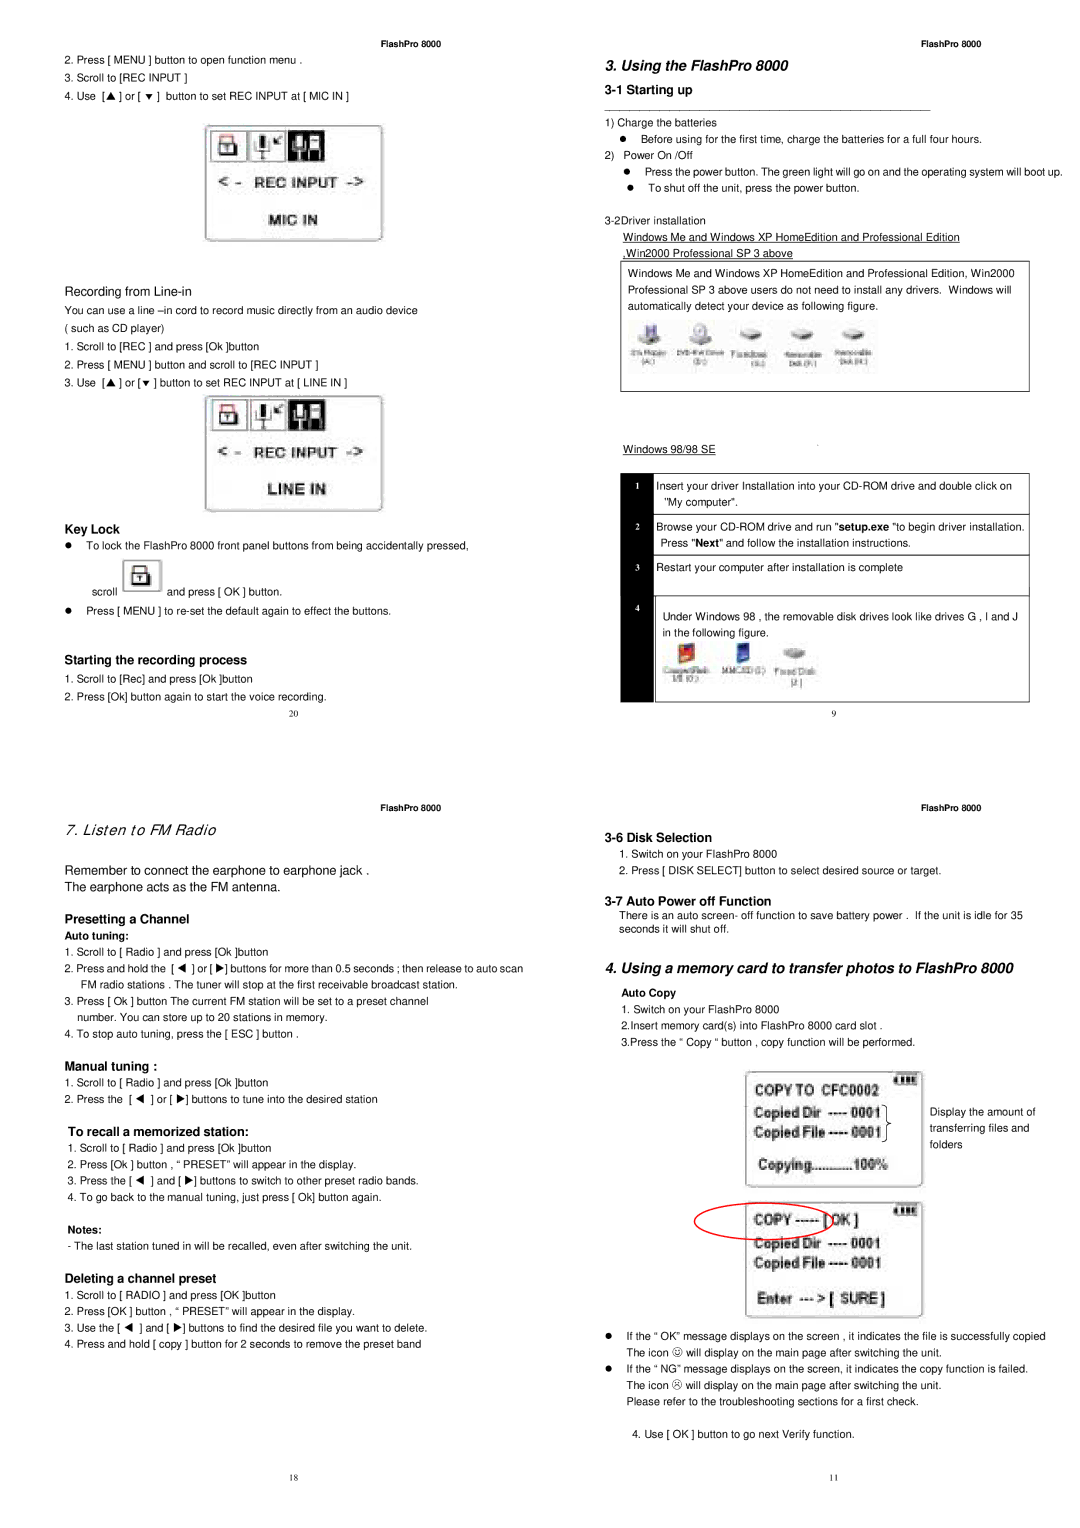
4. Using a memory card to transfer photos to FlashPro 8000
Auto Copy
1. Switch on your FlashPro 8000
2.Insert memory card(s) into FlashPro 8000 card slot . 3.Press the “ Copy “ button , copy function will be performed.
Display the amount of transferring files and folders
!If the “ OK” message displays on the screen , it indicates the file is successfully copied The icon ☺ will display on the main page after switching the unit.
!If the “ NG” message displays on the screen, it indicates the copy function is failed. The icon ∃ will display on the main page after switching the unit.
Please refer to the troubleshooting sections for a first check.
4.Use [ OK ] button to go next Verify function.
18 | 11 |