BW180-3, BW126Q-3, BW126-3, BW180Q-3 specifications
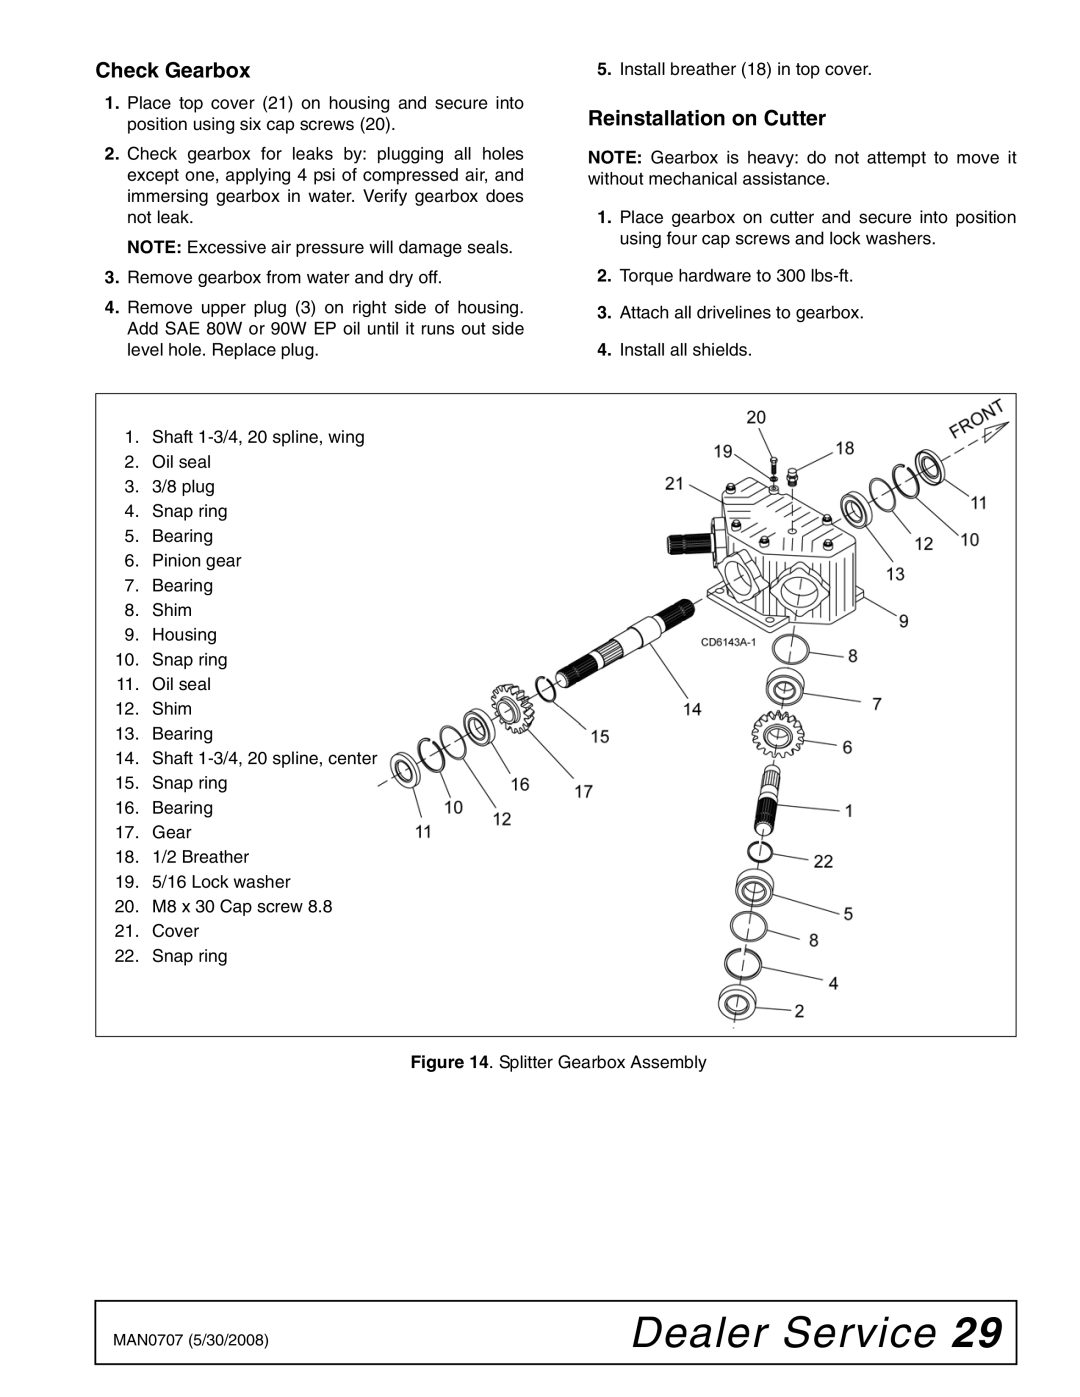
Woods Equipment Company has long been a leader in manufacturing innovative agricultural and landscape maintenance products. Among its popular offerings are the BW180-3, BW180Q-3, BW126-3, and BW126Q-3 models, which are designed to meet the needs of both professional and amateur users.The BW180-3 is an impressive rotary cutter with a cutting width of 60 inches, making it ideal for tackling overgrown fields, pastures, and other large mowing areas. It features a rugged, all-steel construction that ensures durability and longevity, even in the toughest of conditions. The cutter is equipped with a heavy-duty gearbox, ensuring efficient power transfer while minimizing wear and tear. The innovative design of the BW180-3 also includes an adjustable tail wheel that provides stability and ease of maneuverability.
For those seeking advanced functionality, the BW180Q-3 model introduces quick-attach capabilities, allowing users to easily connect and disconnect the cutter from the tractor without the need for additional tools. This feature not only saves time but also enhances user convenience, making it an excellent choice for busy farms and landscaping operations. With a similar cutting width as the BW180-3, this model maintains the robust construction and drivetrain specifications that make Woods Equipment cutters a trusted choice.
On the smaller side, the BW126-3 offers a 48-inch cutting width, perfect for maintaining smaller fields and lawn areas. Designed with the same enduring quality, it is lightweight yet powerful enough to handle tough mowing tasks. The BW126-3 comes with a versatile hitch design that makes it compatible with a wide range of tractors.
The BW126Q-3 shares the core features of the BW126-3 but incorporates the quick-attach technology for enhanced user efficiency. This model combines flexibility with reliability and is particularly suited for operators who need to switch quickly between attachments throughout their workday.
Overall, the Woods Equipment BW180-3, BW180Q-3, BW126-3, and BW126Q-3 models provide a variety of features and technologies that make them indispensable for anyone looking to efficiently manage land. Whether you need the extra cutting width and power of the BW180 series or the nimble ease of the BW126 series, Woods Equipment offers versatile solutions for diverse agricultural and landscaping needs.

