4.Grease slip joint on driveline.
NOTE: Check gearbox oil level daily after initial start up.
Figure 3. Lubrication Points
INSTALL 3-POINT PINS
NOTE: Stump grinder includes Category 1 and Cate- gory 2 hitch pins. Install hitch pins as instructed.
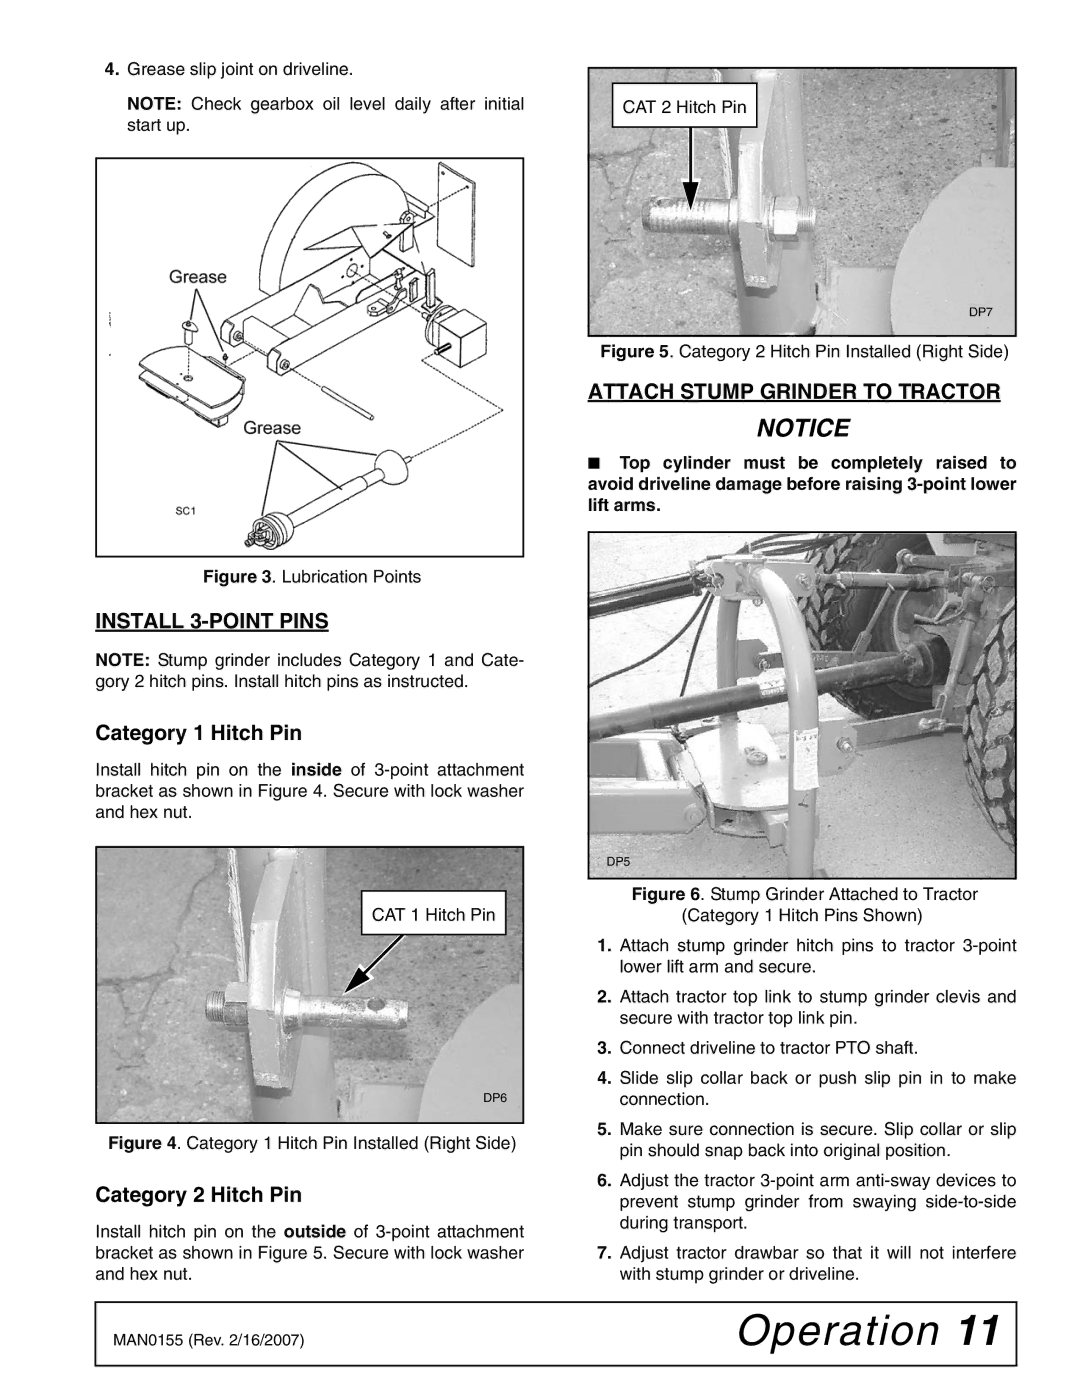
Category 1 Hitch Pin
Install hitch pin on the inside of
CAT 1 ![]() Hitch Pin
Hitch Pin
DP6
Figure 4. Category 1 Hitch Pin Installed (Right Side)
Category 2 Hitch Pin
Install hitch pin on the outside of
CAT 2 Hitch Pin
DP7
Figure 5. Category 2 Hitch Pin Installed (Right Side)
ATTACH STUMP GRINDER TO TRACTOR
NOTICE
■Top cylinder must be completely raised to avoid driveline damage before raising
DP5
Figure 6. Stump Grinder Attached to Tractor (Category 1 Hitch Pins Shown)
1.Attach stump grinder hitch pins to tractor 3-point lower lift arm and secure.
2.Attach tractor top link to stump grinder clevis and secure with tractor top link pin.
3.Connect driveline to tractor PTO shaft.
4.Slide slip collar back or push slip pin in to make connection.
5.Make sure connection is secure. Slip collar or slip pin should snap back into original position.
6.Adjust the tractor 3-point arm anti-sway devices to prevent stump grinder from swaying side-to-side during transport.
7.Adjust tractor drawbar so that it will not interfere with stump grinder or driveline.
MAN0155 (Rev. 2/16/2007) | Operation 11 |
|
|