QUICK START
Perform the following basic steps to begin using the
Installing Batteries
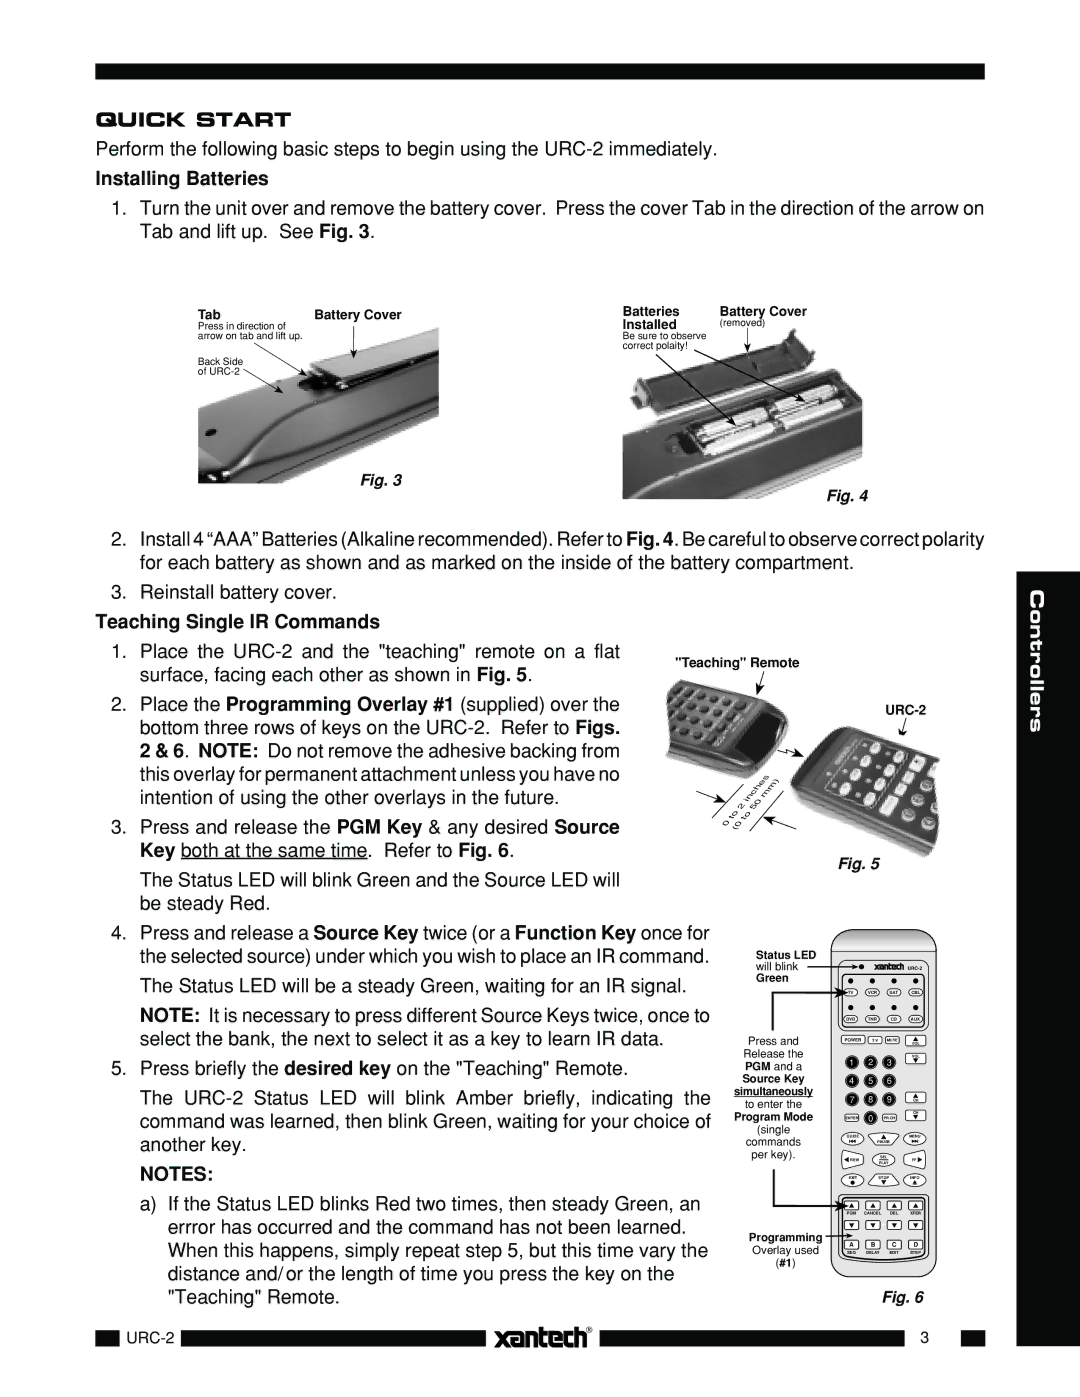
1.Turn the unit over and remove the battery cover. Press the cover Tab in the direction of the arrow on Tab and lift up. See Fig. 3.
Tab | Battery Cover | Batteries | Battery Cover |
Press in direction of |
| Installed | (removed) |
arrow on tab and lift up. |
| Be sure to observe |
|
|
| correct polaity! |
|
Back Side |
|
|
|
of |
|
|
|
Fig. 3
Fig. 4
2.Install 4 “AAA” Batteries (Alkaline recommended). Refer to Fig. 4. Be careful to observe correct polarity for each battery as shown and as marked on the inside of the battery compartment.
3.Reinstall battery cover.
Teaching Single IR Commands
1. Place the
surface, facing each other as shown in Fig. 5.
"Teaching" Remote
2.Place the Programming Overlay #1 (supplied) over the bottom three rows of keys on the
2 & 6. NOTE: Do not remove the adhesive backing from this overlay for permanent attachment unless you have no intention of using the other overlays in the future.
3.Press and release the PGM Key & any desired Source Key both at the same time. Refer to Fig. 6.
The Status LED will blink Green and the Source LED will be steady Red.
4.Press and release a Source Key twice (or a Function Key once for the selected source) under which you wish to place an IR command.
The Status LED will be a steady Green, waiting for an IR signal.
NOTE: It is necessary to press different Source Keys twice, once to select the bank, the next to select it as a key to learn IR data.
5.Press briefly the desired key on the "Teaching" Remote.
The
URC-2
|
|
| inches | ||
|
| 2 |
| 50 | mm) |
| to | to |
| ||
0 |
|
|
| ||
(0 |
|
|
| ||
Fig. 5
Status LED |
|
|
|
|
will blink |
|
|
| |
Green |
|
|
|
|
| TV | VCR | SAT | CBL |
| DVD | TNR | CD | AUX |
Press and | POWER | T/V | MUTE | VOL |
Release the | 1 | 2 | 3 | VOL |
PGM and a |
| |||
Source Key | 4 | 5 | 6 |
|
simultaneously | 7 | 8 | 9 |
|
to enter the | CH | |||
|
|
|
| |
Program Mode |
| 0 |
| CH |
ENTER | PR.CH |
| ||
(single | GUIDE |
|
| MENU |
commands |
|
| ||
| PAUSE |
| ||
per key). | REW |
| SEL | FF |
|
|
| PLAY |
|
Controllers
NOTES: |
| EXIT | STOP | INFO | ||
a) If the Status LED blinks Red two times, then steady Green, an |
| PGM | CANCEL | DEL | XFER | |
errror has occurred and the command has not been learned. | Programming |
|
|
|
| |
When this happens, simply repeat step 5, but this time vary the | A | B | C | D | ||
Overlay used | ||||||
SEQ | DELAY | EDIT | STEP | |||
distance and/ or the length of time you press the key on the | (#1) |
|
|
|
| |
|
|
|
|
| ||
"Teaching" Remote. |
|
|
| Fig. 6 | ||
|
|
|
|
| 3 | |
|
|
|
| |||