
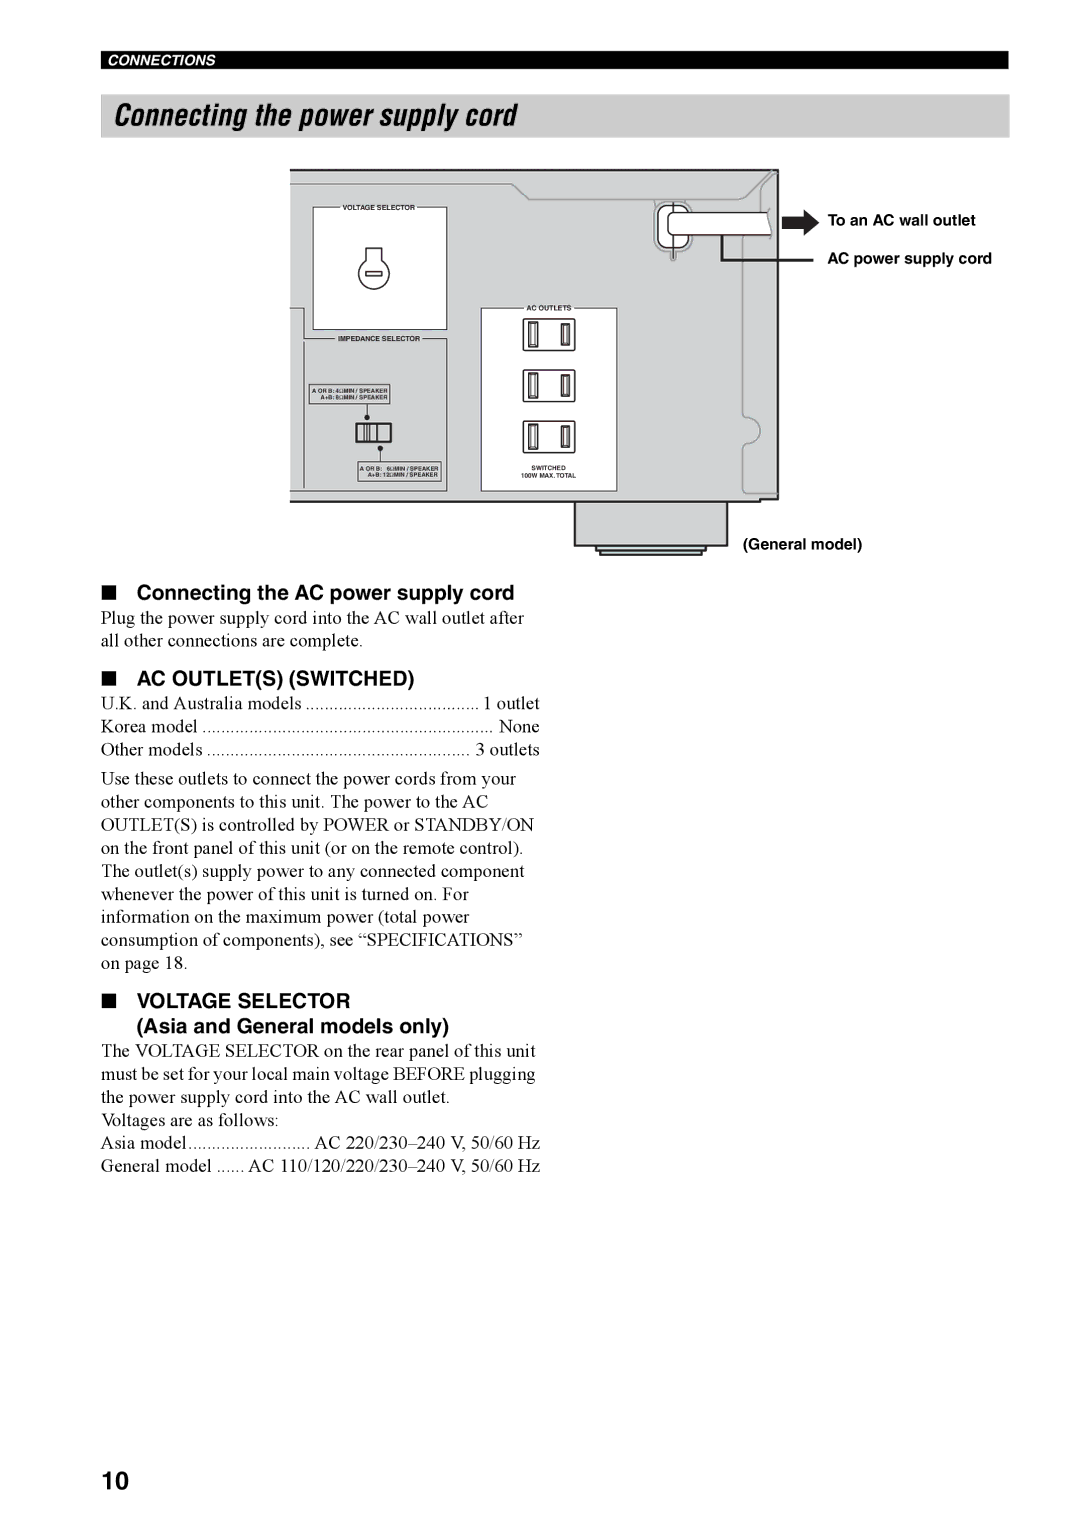
AX-397, AX-497 specifications
The Yamaha AX-497 and AX-397 are two notable integrated amplifiers from Yamaha's renowned hi-fi audio lineup, designed to deliver exceptional sound quality and performance for audiophiles and music enthusiasts alike. While both models share a strong foundation, they exhibit distinct features and technologies that cater to different listening preferences.The Yamaha AX-497 is the more advanced of the two, boasting a power output of 80 watts per channel at 8 ohms, which provides ample power for driving various speakers effectively. The AX-497 utilizes Yamaha's proprietary ToP-ART (Total Purity Audio Reproduction Technology) design, which focuses on preventing signal degradation and ensuring a clean, natural sound. This model features a discrete amplifier configuration, providing lower distortion levels and a more dynamic soundstage.
One of the standout features of the AX-497 is its comprehensive tone control system. Users can finely adjust the bass, treble, and balance, allowing for personalized sound tailored to individual preferences and room acoustics. Additionally, the AX-497 includes a direct input for bypassing tone controls during critical listening sessions, effectively providing an uncolored sound reproduction.
On the other hand, the Yamaha AX-397 offers a slightly reduced power output of 60 watts per channel at 8 ohms, making it suitable for smaller speaker systems and listening environments. Despite this lower output, the AX-397 still maintains an impressive sound quality, thanks to a similar ToP-ART design that ensures purity in audio reproduction.
The AX-397 is equipped with a high-quality phono stage, allowing for a seamless connection with turntables, which is becoming increasingly popular among vinyl enthusiasts. Additionally, it features a simple yet elegant user interface with easy-to-use controls for volume, input selection, and tone adjustments.
Both models utilize a robust build quality, reflecting Yamaha's commitment to durability and longevity. The sleek design of the amplifiers complements any audio setup, adding a touch of sophistication.
In summary, the Yamaha AX-497 and AX-397 integrated amplifiers are distinguished by their power outputs, features, and target users. The AX-497 is ideal for those seeking higher power and extensive control over sound, while the AX-397 suits casual listeners who appreciate quality sound in a more compact form. Regardless of the choice, both amplifiers exemplify Yamaha's dedication to delivering superior audio experiences.