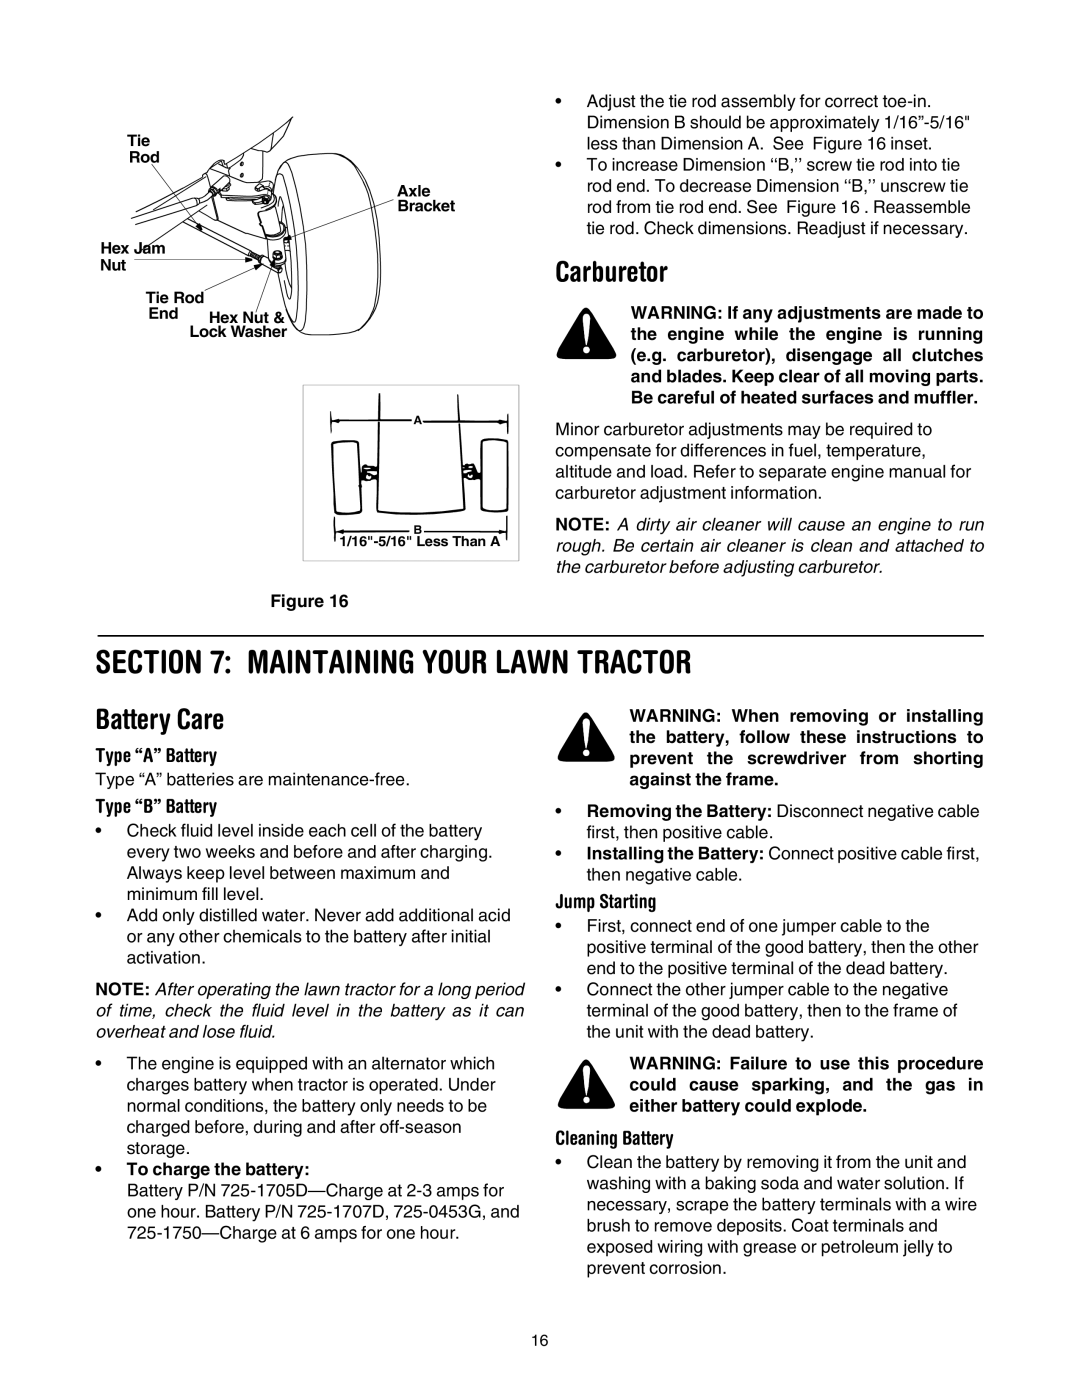
Tie
Rod
Axle
Bracket
Hex Jam
Nut
Tie Rod
End Hex Nut & ![]()
![]()
Lock Washer ![]()
A |
B |
Figure 16
•Adjust the tie rod assembly for correct
•To increase Dimension ‘‘B,’’ screw tie rod into tie rod end. To decrease Dimension ‘‘B,’’ unscrew tie rod from tie rod end. See Figure 16 . Reassemble tie rod. Check dimensions. Readjust if necessary.
Carburetor
WARNING: If any adjustments are made to the engine while the engine is running (e.g. carburetor), disengage all clutches and blades. Keep clear of all moving parts. Be careful of heated surfaces and muffler.
Minor carburetor adjustments may be required to compensate for differences in fuel, temperature, altitude and load. Refer to separate engine manual for carburetor adjustment information.
NOTE: A dirty air cleaner will cause an engine to run rough. Be certain air cleaner is clean and attached to the carburetor before adjusting carburetor.
SECTION 7: MAINTAINING YOUR LAWN TRACTOR
Battery Care
Type “A” Battery
Type “A” batteries are
Type “B” Battery
•Check fluid level inside each cell of the battery every two weeks and before and after charging. Always keep level between maximum and minimum fill level.
•Add only distilled water. Never add additional acid or any other chemicals to the battery after initial activation.
NOTE: After operating the lawn tractor for a long period of time, check the fluid level in the battery as it can overheat and lose fluid.
•The engine is equipped with an alternator which charges battery when tractor is operated. Under normal conditions, the battery only needs to be charged before, during and after
•To charge the battery:
Battery P/N
WARNING: When removing or installing the battery, follow these instructions to prevent the screwdriver from shorting against the frame.
•Removing the Battery: Disconnect negative cable first, then positive cable.
•Installing the Battery: Connect positive cable first, then negative cable.
Jump Starting
•First, connect end of one jumper cable to the positive terminal of the good battery, then the other end to the positive terminal of the dead battery.
•Connect the other jumper cable to the negative terminal of the good battery, then to the frame of the unit with the dead battery.
WARNING: Failure to use this procedure could cause sparking, and the gas in either battery could explode.
Cleaning Battery
•Clean the battery by removing it from the unit and washing with a baking soda and water solution. If necessary, scrape the battery terminals with a wire brush to remove deposits. Coat terminals and exposed wiring with grease or petroleum jelly to prevent corrosion.
16