
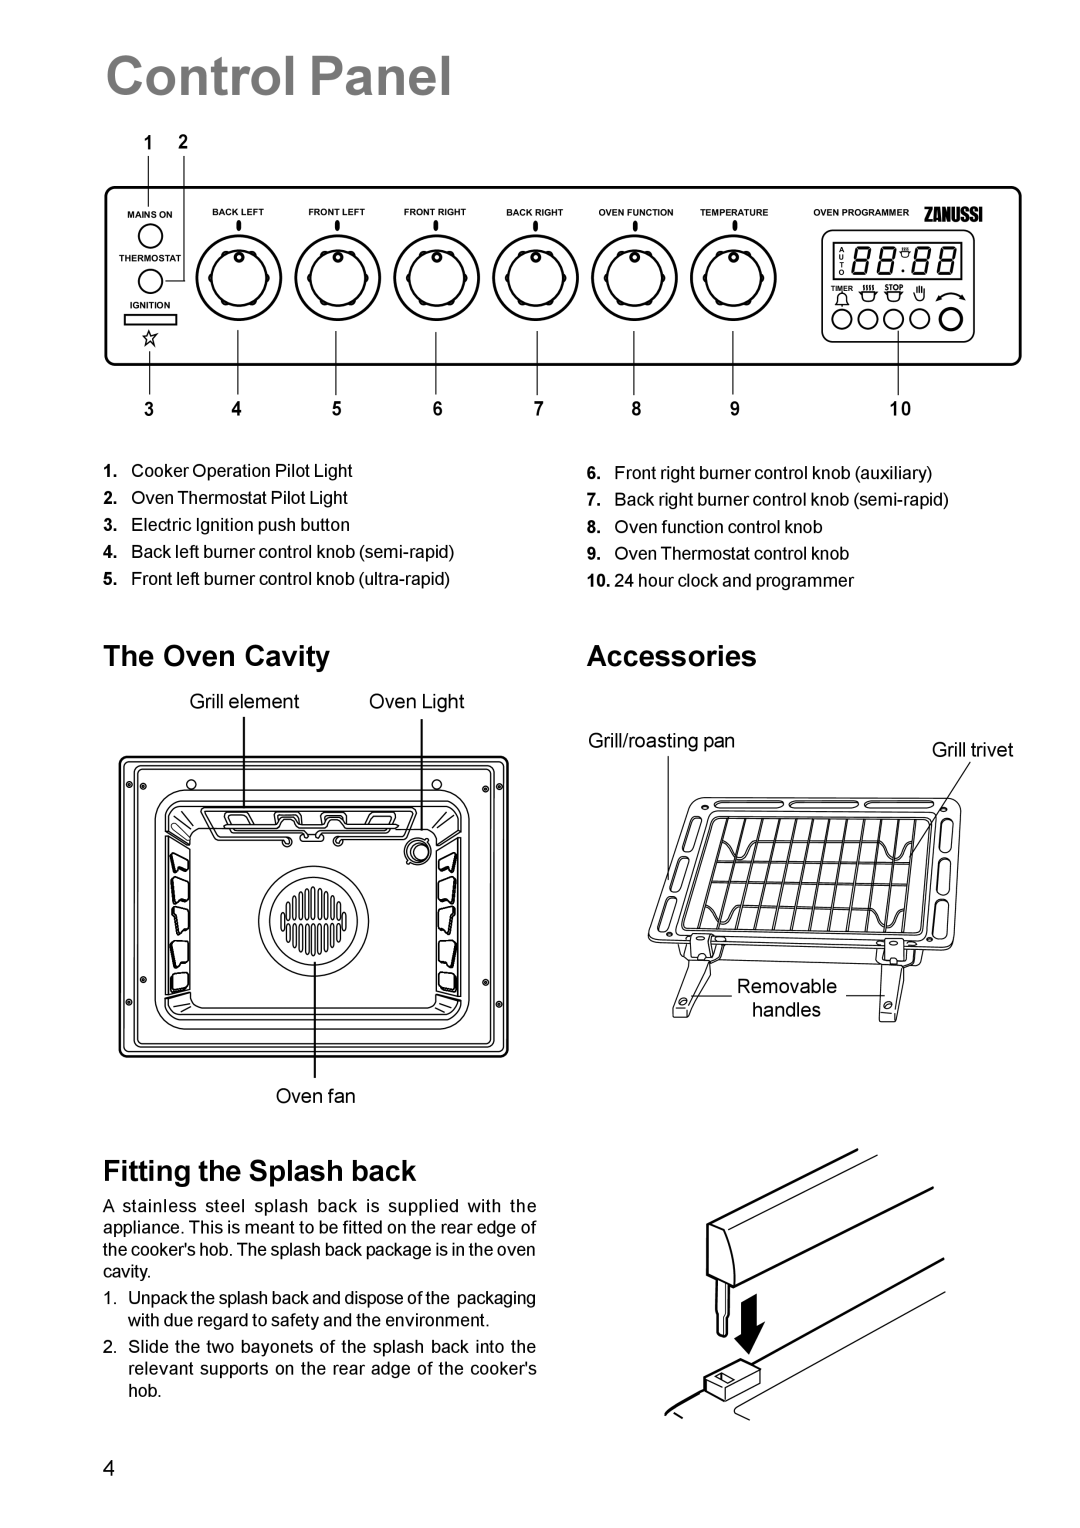
ZCM 631 specifications
The Zanussi ZCM 631 is a versatile and efficient cooking appliance that perfectly balances performance and style for your kitchen. Renowned for its practical features and advanced technologies, this gas cooker is ideal for both budding home cooks and experienced chefs alike.One of the standout features of the ZCM 631 is its powerful gas hob, which comes equipped with four burners of varying sizes. This allows for maximum flexibility when preparing meals, accommodating everything from small saucepans to larger pots for boiling or stewing. The burners are designed for efficient heat distribution, ensuring that your food cooks evenly and quickly. The inclusion of a heavy-duty cast iron pan support not only adds strength and stability but also provides a professional look to the cooker.
Another impressive aspect of the Zanussi ZCM 631 is its integrated oven, which offers a spacious capacity that can handle a variety of dishes, from roasts to baked goods. The oven features a fan-assisted cooking system, ensuring even heat distribution throughout the cavity to achieve consistently excellent results. Whether you're baking a delicate soufflé or roasting a joint of meat, the ZCM 631 provides the perfect environment for all your culinary creations.
Ease of use is a priority in the design of the ZCM 631. The appliance includes user-friendly controls that are straightforward and intuitive, allowing you to adjust temperatures and settings effortlessly. Additionally, the automatic ignition feature ensures that lighting the burners is a breeze, eliminating the need for matches or lighters.
Cleaning is made easy with this model, thanks to its enamel-coated surfaces which are resistant to stains and easy to wipe down. The oven door is also designed for easy removal, allowing for convenient access when it comes to deep cleaning.
In terms of safety, the Zanussi ZCM 631 is equipped with flame failure devices that automatically cut off the gas supply if the flame goes out, providing peace of mind while cooking.
With its stylish design, practical features, and innovative technologies, the Zanussi ZCM 631 is a fantastic addition to any kitchen, making it easier than ever to create delicious meals with confidence. Whether you’re a fan of traditional cooking methods or looking to modernize your culinary skills, the ZCM 631 offers everything you need to explore and enhance your cooking experience.