Product description
General overview
2 3 4
1
9
8
Oven accessories
•Oven shelf
For cookware, cake tins, roasts.
•Deep grill roasting pan
Before first use
5
6
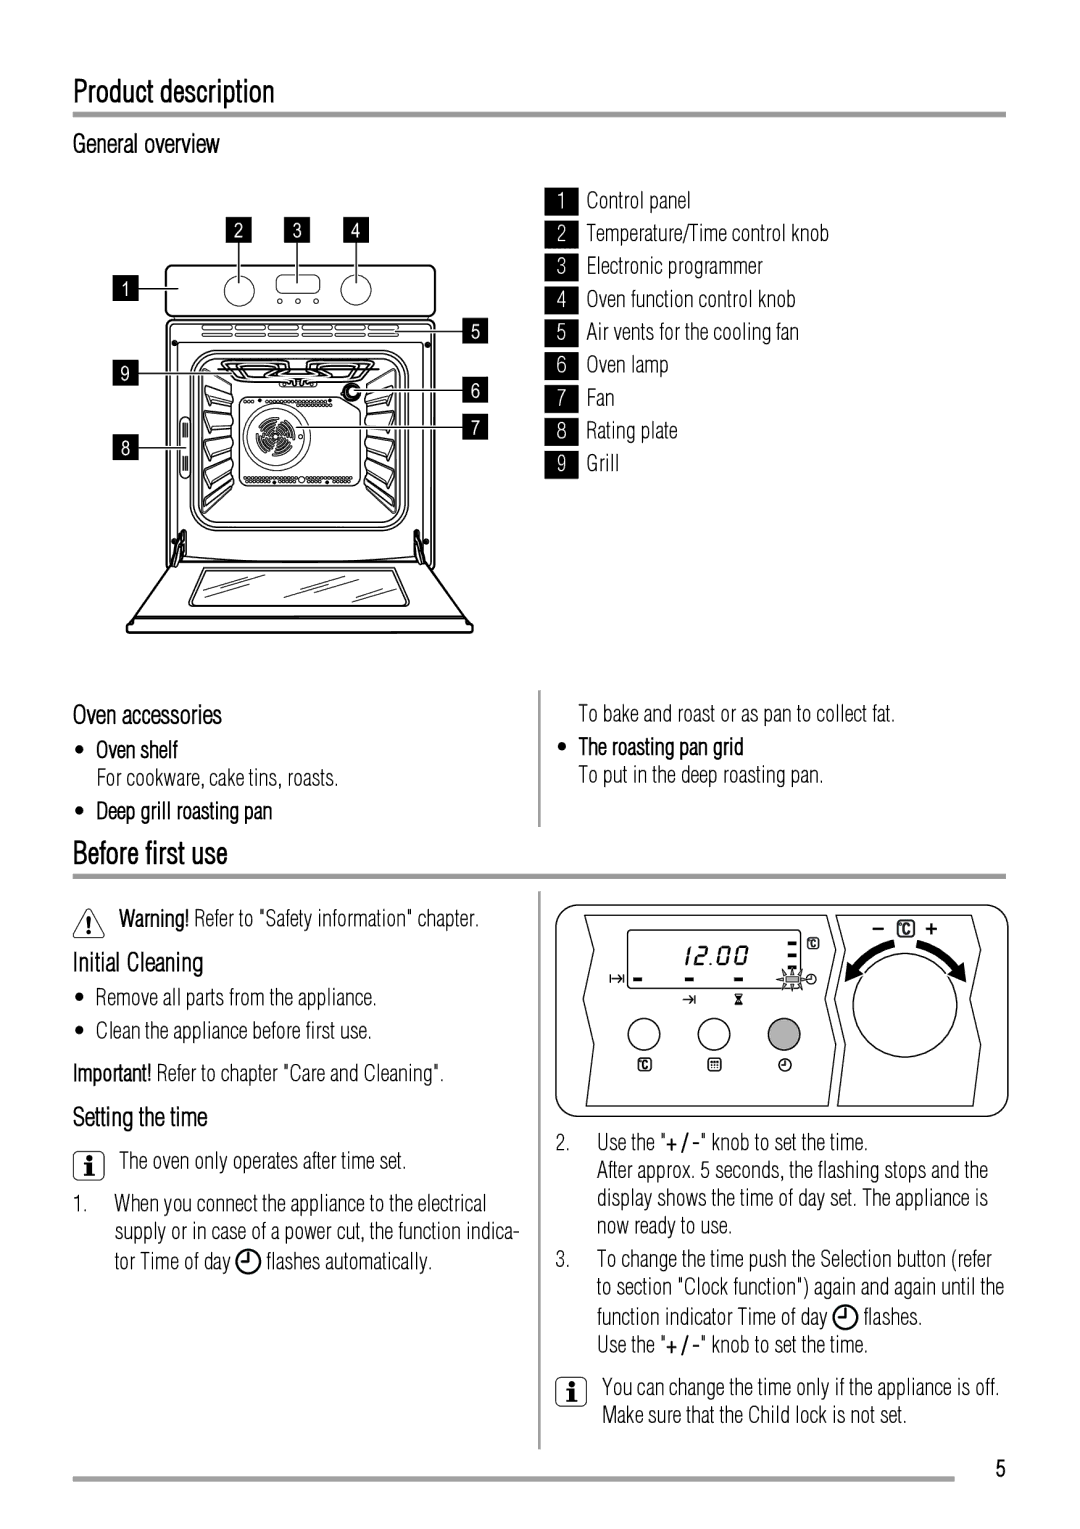
1Control panel
2Temperature/Time control knob
3Electronic programmer
4Oven function control knob
5Air vents for the cooling fan
6Oven lamp
7Fan
8Rating plate
9Grill
To bake and roast or as pan to collect fat.
•The roasting pan grid
To put in the deep roasting pan.
Warning! Refer to "Safety information" chapter.
Initial Cleaning
•Remove all parts from the appliance.
•Clean the appliance before first use.
Important! Refer to chapter "Care and Cleaning".
Setting the time
The oven only operates after time set.
1.When you connect the appliance to the electrical supply or in case of a power cut, the function indica- tor Time of day ![]() flashes automatically.
flashes automatically.
2.Use the "+ / -" knob to set the time.
After approx. 5 seconds, the flashing stops and the display shows the time of day set. The appliance is now ready to use.
3.To change the time push the Selection button (refer to section "Clock function") again and again until the
function indicator Time of day ![]() flashes. Use the "+ /
flashes. Use the "+ /
You can change the time only if the appliance is off. Make sure that the Child lock is not set.
5