Clock functions
Electronic programmer
2
3
654
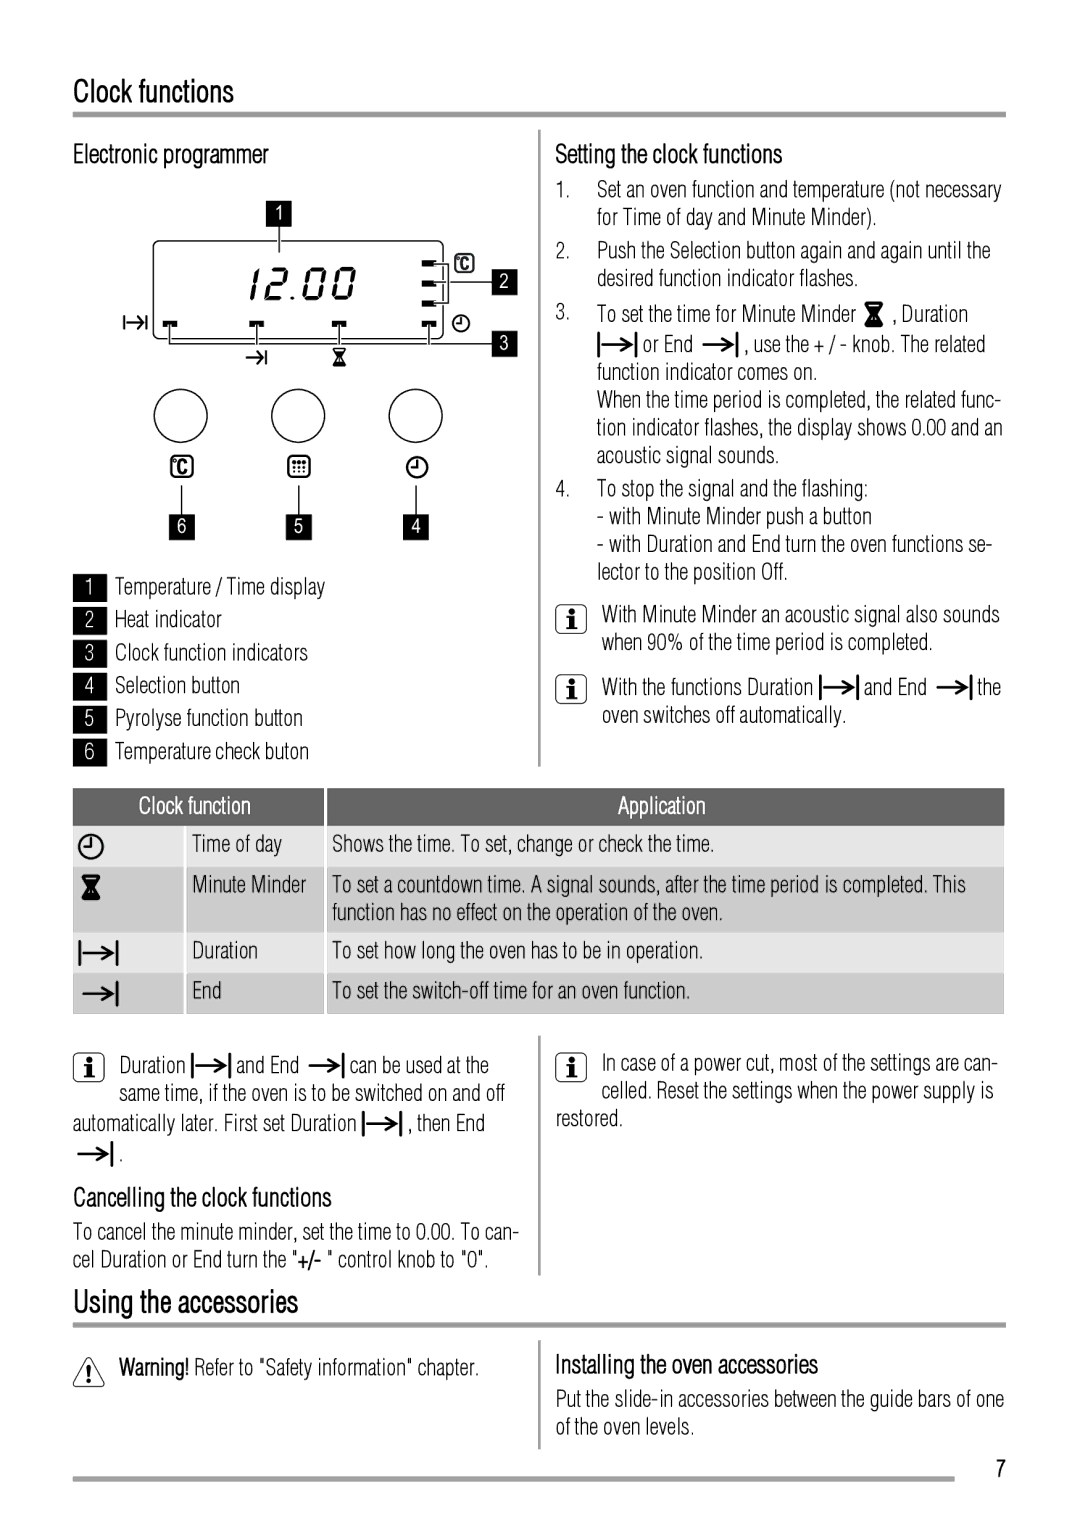
1Temperature / Time display
2Heat indicator
3Clock function indicators
4Selection button
5Pyrolyse function button
6Temperature check buton
Setting the clock functions
1.Set an oven function and temperature (not necessary for Time of day and Minute Minder).
2.Push the Selection button again and again until the desired function indicator flashes.
3.To set the time for Minute Minder  , Duration
![]()
![]()
![]() or End
or End ![]()
![]() , use the + / - knob. The related function indicator comes on.
, use the + / - knob. The related function indicator comes on.
When the time period is completed, the related func- tion indicator flashes, the display shows 0.00 and an acoustic signal sounds.
4.To stop the signal and the flashing:
-with Minute Minder push a button
-with Duration and End turn the oven functions se- lector to the position Off.
With Minute Minder an acoustic signal also sounds when 90% of the time period is completed.
With the functions Duration ![]()
![]()
![]() and End
and End ![]()
![]() the oven switches off automatically.
the oven switches off automatically.
Clock function
![]() Time of day
Time of day
![]() Minute Minder
Minute Minder
![]() Duration
Duration
![]() End
End
Application
Shows the time. To set, change or check the time.
To set a countdown time. A signal sounds, after the time period is completed. This function has no effect on the operation of the oven.
To set how long the oven has to be in operation.
To set the
Duration ![]()
![]()
![]() and End
and End ![]()
![]() can be used at the same time, if the oven is to be switched on and off
can be used at the same time, if the oven is to be switched on and off
automatically later. First set Duration ![]()
![]()
![]() , then End
, then End
![]()
![]() .
.
Cancelling the clock functions
To cancel the minute minder, set the time to 0.00. To can- cel Duration or End turn the "+/- " control knob to "0".
Using the accessories
In case of a power cut, most of the settings are can- celled. Reset the settings when the power supply is
restored.
Warning! Refer to "Safety information" chapter.
Installing the oven accessories
Put the
7