Part D:
Connect your HDTV to coax cabling
Follow this Get Going Guide until prompted to follow steps on your HDTV.
Begin Part D when you have been instructed to do so by the Zv Installation Wizard
1.Check to see what’s attached to the antenna input on your HDTV.
2.If there’s a coaxial cable from the wall connected to the HDTV’s antenna input, your HDTV is con- nected correctly and you can skip to Part E.
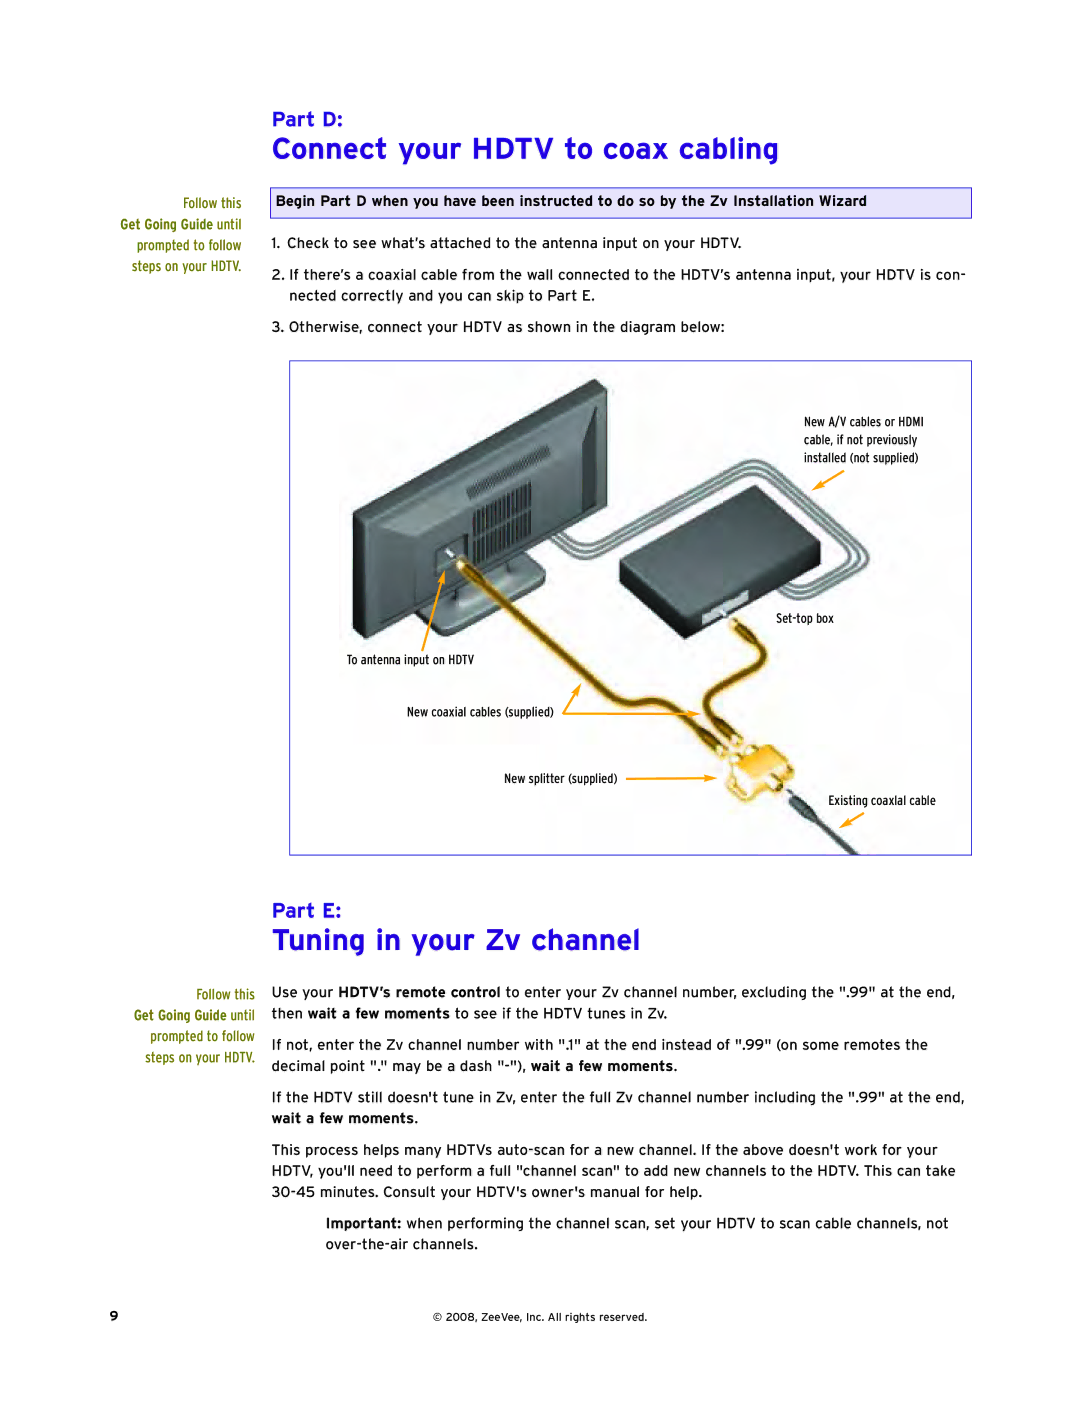
3.Otherwise, connect your HDTV as shown in the diagram below:
New A/V cables or HDMI cable, if not previously installed (not supplied)
To antenna input on HDTV
New coaxial cables (supplied)
New splitter (supplied)
Existing coaxlal cable
Part E:
Tuning in your Zv channel
Follow this Get Going Guide until prompted to follow steps on your HDTV.
Use your HDTV’s remote control to enter your Zv channel number, excluding the ".99" at the end, then wait a few moments to see if the HDTV tunes in Zv.
If not, enter the Zv channel number with ".1" at the end instead of ".99" (on some remotes the decimal point "." may be a dash
If the HDTV still doesn't tune in Zv, enter the full Zv channel number including the ".99" at the end, wait a few moments.
This process helps many HDTVs
Important: when performing the channel scan, set your HDTV to scan cable channels, not
9 | © 2008, ZeeVee, Inc. All rights reserved. |