Laptop users:
The default settings on many laptops turn off the computer’s video output port(s), which will prevent ZvBox from working properly.
Check to make sure your laptop’s external video port(s) are active. For help, consult the user’s guide for your laptop.
Tip: look for a topic such as “using an external monitor”.
Part B:
Connect ZvBox to the computer
Software to operate Zv is stored on the ZvBox, and automatically loads when you connect the USB cable. Once the install begins, the latest version of Zv software for your computer and the ZvBox is downloaded from our servers.
1. Before starting, the computer should be on and have a working Internet connection.
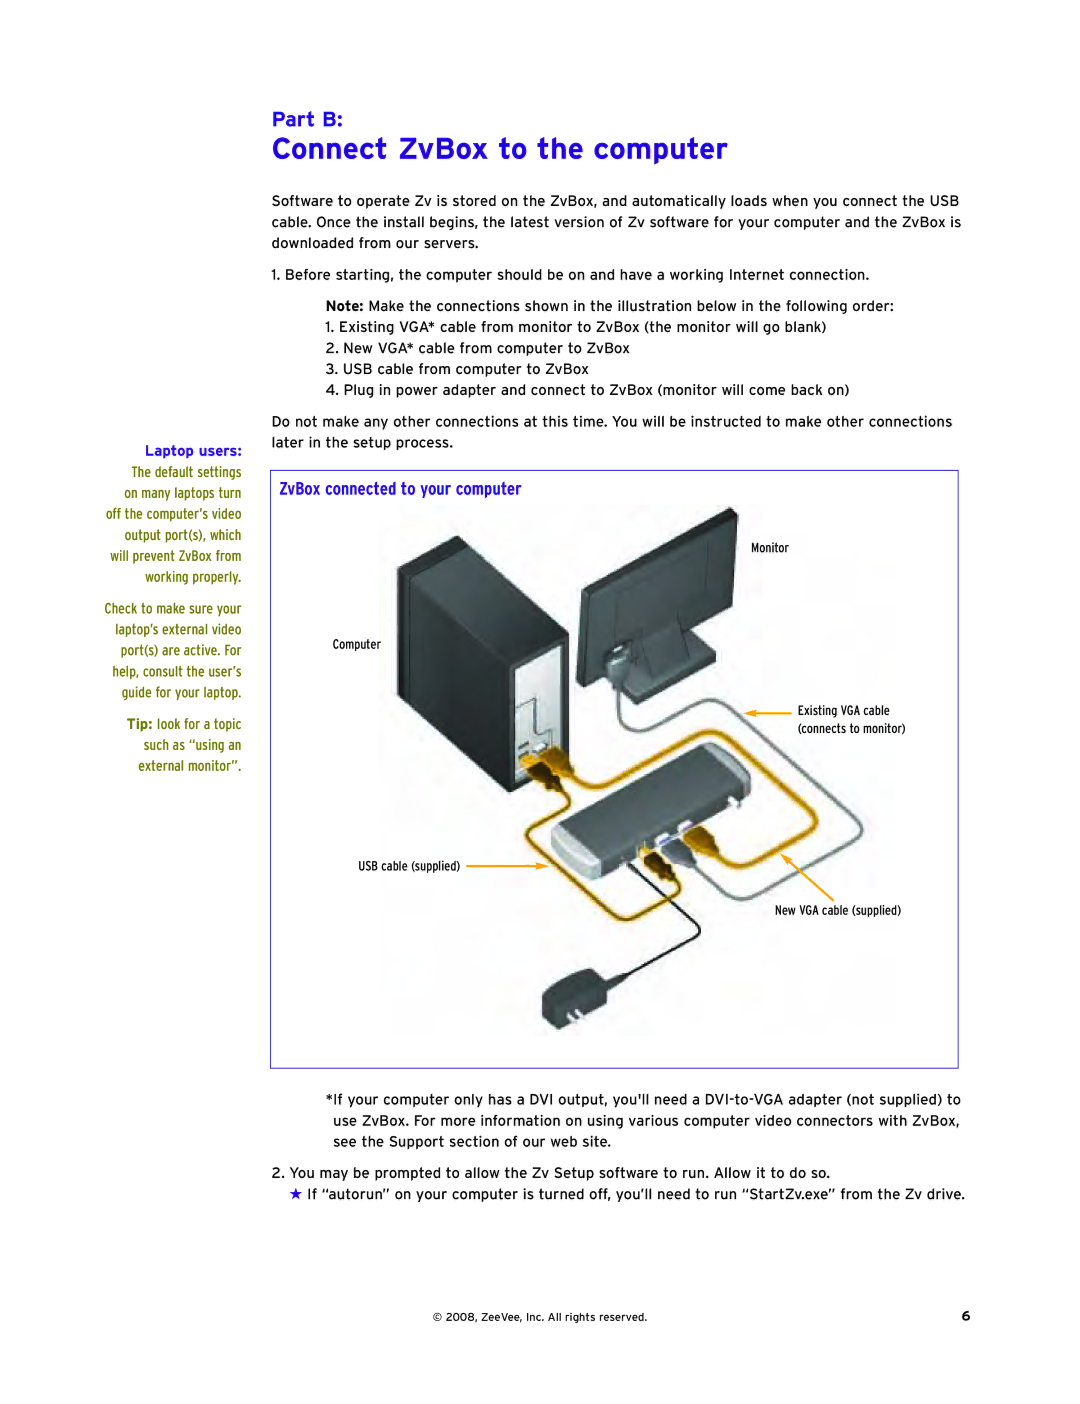
Note: Make the connections shown in the illustration below in the following order:
1.Existing VGA* cable from monitor to ZvBox (the monitor will go blank)
2.New VGA* cable from computer to ZvBox
3.USB cable from computer to ZvBox
4.Plug in power adapter and connect to ZvBox (monitor will come back on)
Do not make any other connections at this time. You will be instructed to make other connections later in the setup process.
ZvBox connected to your computer
Monitor
Computer
![]() Existing VGA cable (connects to monitor)
Existing VGA cable (connects to monitor)
USB cable (supplied) ![]()
New VGA cable (supplied)
*If your computer only has a DVI output, you'll need a
2.You may be prompted to allow the Zv Setup software to run. Allow it to do so.
★ If “autorun” on your computer is turned off, you’ll need to run “StartZv.exe” from the Zv drive.
© 2008, ZeeVee, Inc. All rights reserved. | 6 |