


ASSEMBLY
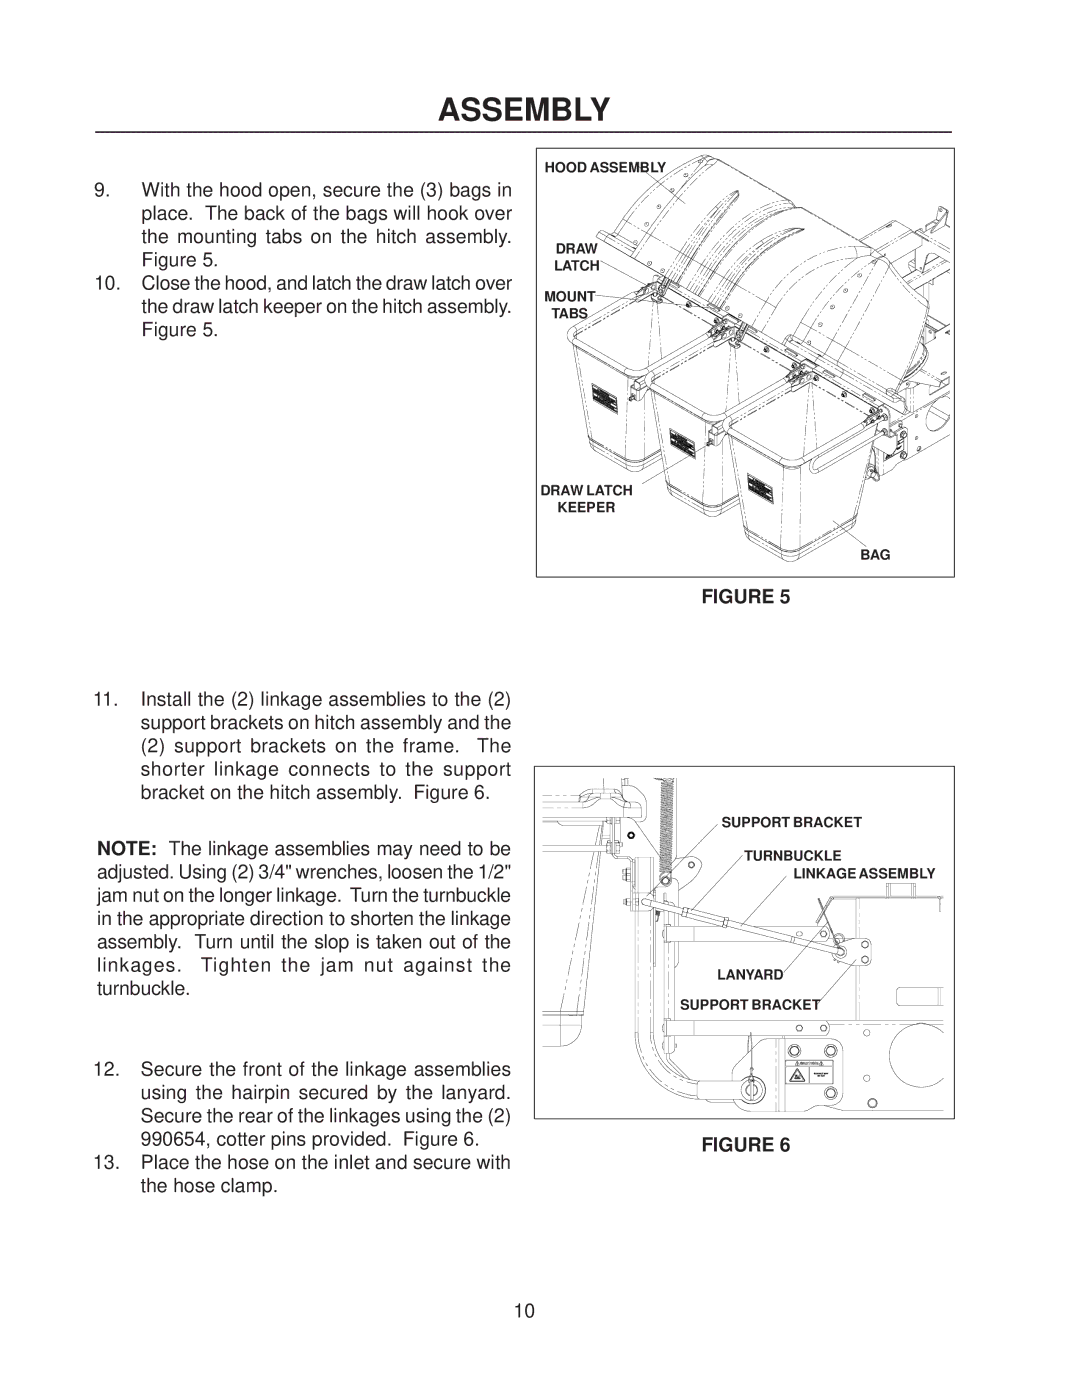
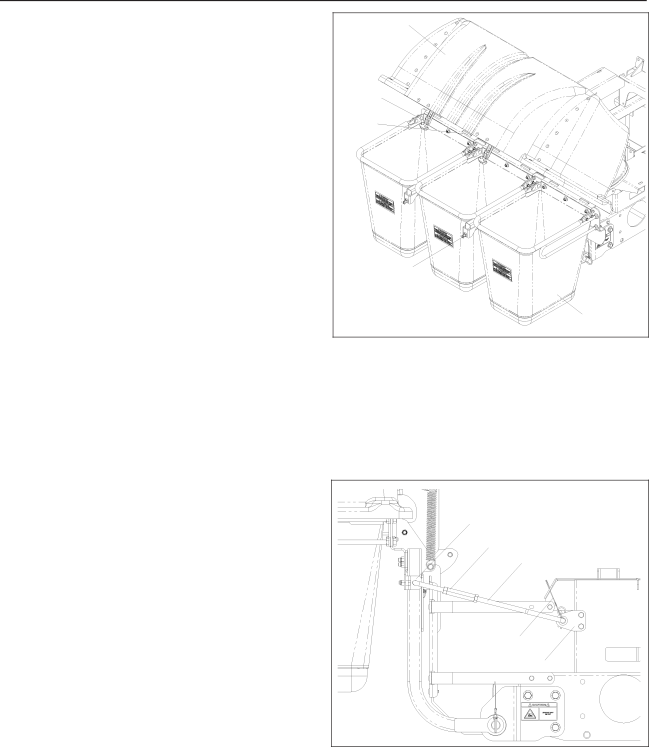
9.With the hood open, secure the (3) bags in place. The back of the bags will hook over the mounting tabs on the hitch assembly. Figure 5.
10.Close the hood, and latch the draw latch over the draw latch keeper on the hitch assembly. Figure 5.
11.Install the (2) linkage assemblies to the (2) support brackets on hitch assembly and the
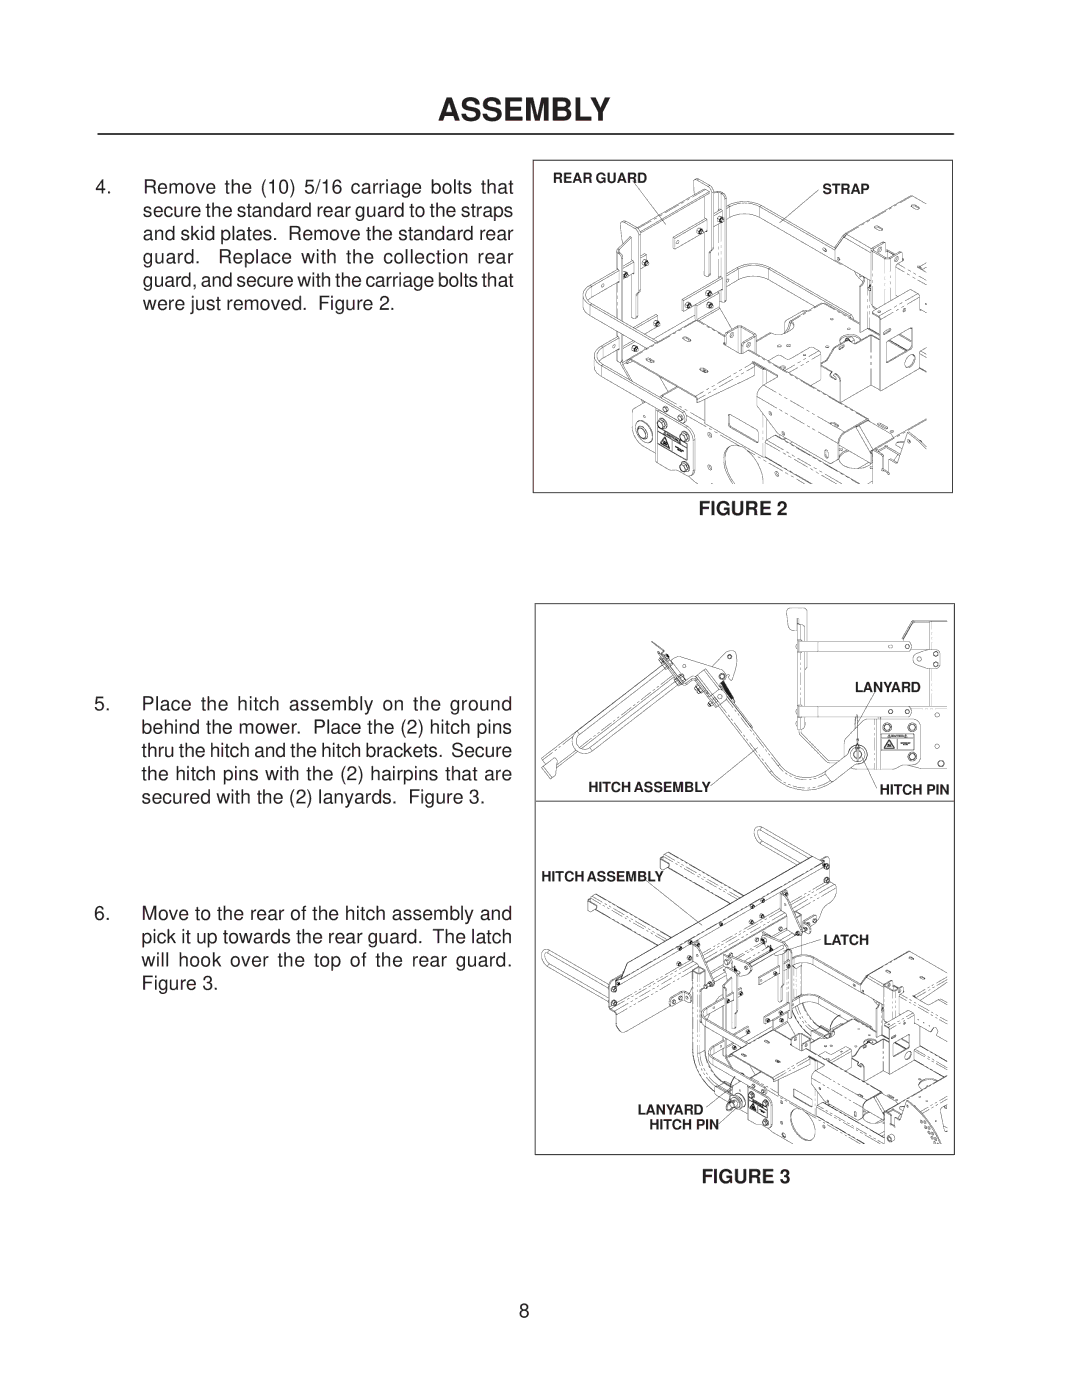
(2)support brackets on the frame. The shorter linkage connects to the support bracket on the hitch assembly. Figure 6.
NOTE: The linkage assemblies may need to be adjusted. Using (2) 3/4" wrenches, loosen the 1/2" jam nut on the longer linkage. Turn the turnbuckle in the appropriate direction to shorten the linkage assembly. Turn until the slop is taken out of the linkages. Tighten the jam nut against the turnbuckle.
12.Secure the front of the linkage assemblies using the hairpin secured by the lanyard. Secure the rear of the linkages using the (2) 990654, cotter pins provided. Figure 6.
13.Place the hose on the inlet and secure with the hose clamp.
HOOD ASSEMBLY |
DRAW |
LATCH |
MOUNT |
TABS |
DRAW LATCH |
KEEPER |
BAG |
FIGURE 5
SUPPORT BRACKET |
TURNBUCKLE |
LINKAGE ASSEMBLY |
LANYARD |
SUPPORT BRACKET |
FIGURE 6
10