Adjusting the Projected Image (“SCR - ADJ” menu)
Menu operation n Page 37
|
|
|
|
|
|
|
|
|
|
|
|
|
|
|
| Picture | SCR - ADJ | PRJ - ADJ |
| Help |
| ||
1 |
|
|
| Resize |
|
| Normal |
|
|
| |
|
|
|
|
|
|
|
| ||||
2 |
|
|
| Image Shift | 0 |
|
|
|
|
| |
3 |
|
|
| AutoKeystoneKeystone | 0 |
|
|
|
|
| |
|
|
|
|
|
|
|
| ||||
Off |
|
|
| ||||||||
|
|
|
|
|
|
|
| ||||
4 |
|
|
| OSD Display |
|
| On |
|
|
| |
|
|
|
|
|
|
|
| ||||
5 |
|
|
| Background |
|
| Logo |
|
|
| |
|
|
|
|
|
|
|
| ||||
6 |
|
|
| Setup Guide |
|
| On |
|
|
| |
|
|
|
|
|
|
|
| ||||
7 |
|
|
| PRJ Mode |
|
| Front |
|
|
| |
|
|
|
|
|
|
|
| ||||
8 |
|
|
| Language |
|
| English |
|
|
| |
|
|
|
|
|
|
|
| ||||
|
|
|
|
|
|
|
|
|
| ||
|
|
|
| SEL./ADJ. | ENTER |
|
| END |
| ||
|
|
|
|
|
|
|
|
|
|
|
|
1Setting the Resize Mode
![]() Note
Note
•For details of the Resize mode, see pages 32 and 33.
•You can also press HRESIZE on the remote control to set the resize mode. (See page 32.)
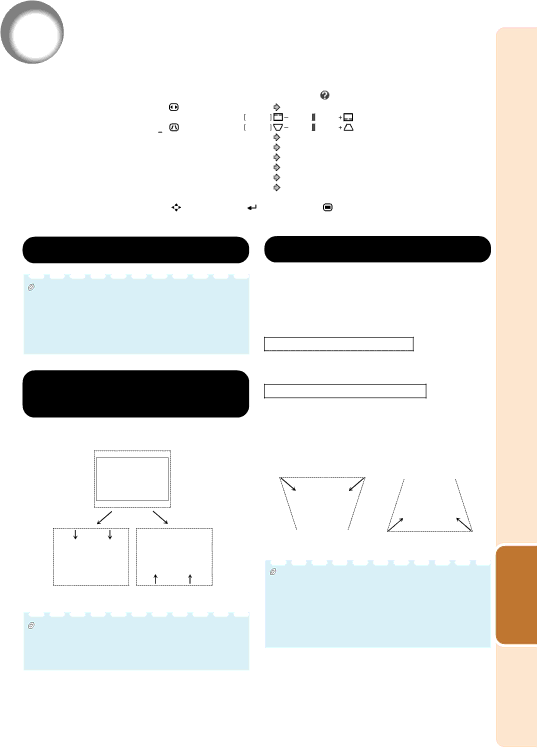
3Keystone Correction
When the image is projected either from the top or from the bottom towards the screen at an angle, the image becomes distorted trapezoidally. The function for correcting trap- ezoidal distortion is called Keystone Correction.
For Auto Keystone Correction
2Adjusting the Image Position
You can move the projected image vertically.
O button |
| Q button | ||
|
|
|
|
|
|
|
|
|
|
|
|
|
|
|
![]() Note
Note
•You cannot set this item when “Resize” is set to “Normal”.
Set “Auto Keystone” on the “SCR - ADJ” menu to “On”.
For Manual Keystone Correction
Set “Auto Keystone” on the “SCR - ADJ” menu to “Off”, select “Keystone”, and then adjust with the slide bar.
Manual Correction
Q or P button | O or R button | ||||
|
|
|
|
|
|
|
|
|
|
|
|
|
|
|
|
|
|
|
|
|
|
|
|
See page 31 for details of Keystone Correction.
![]() Note
Note
•The Keystone Correction can be adjusted up to an angle of approximately ±13 degrees with the “Auto Keystone” and up to an angle of approximately ±13 degrees with the manual “Keystone” (when “Resize” is set to “Normal”).
Features | Useful |
41