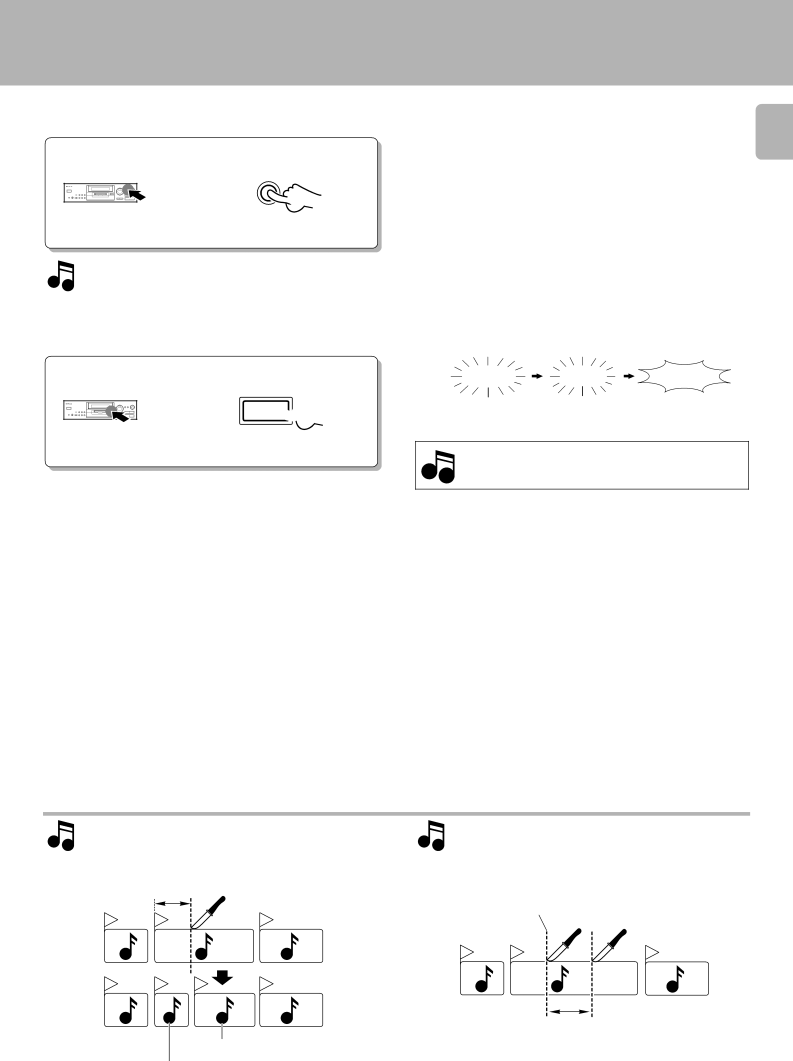
Kenwood DM-9090 Image of preview, Execute the track divide operation, Image of track division

Page 37

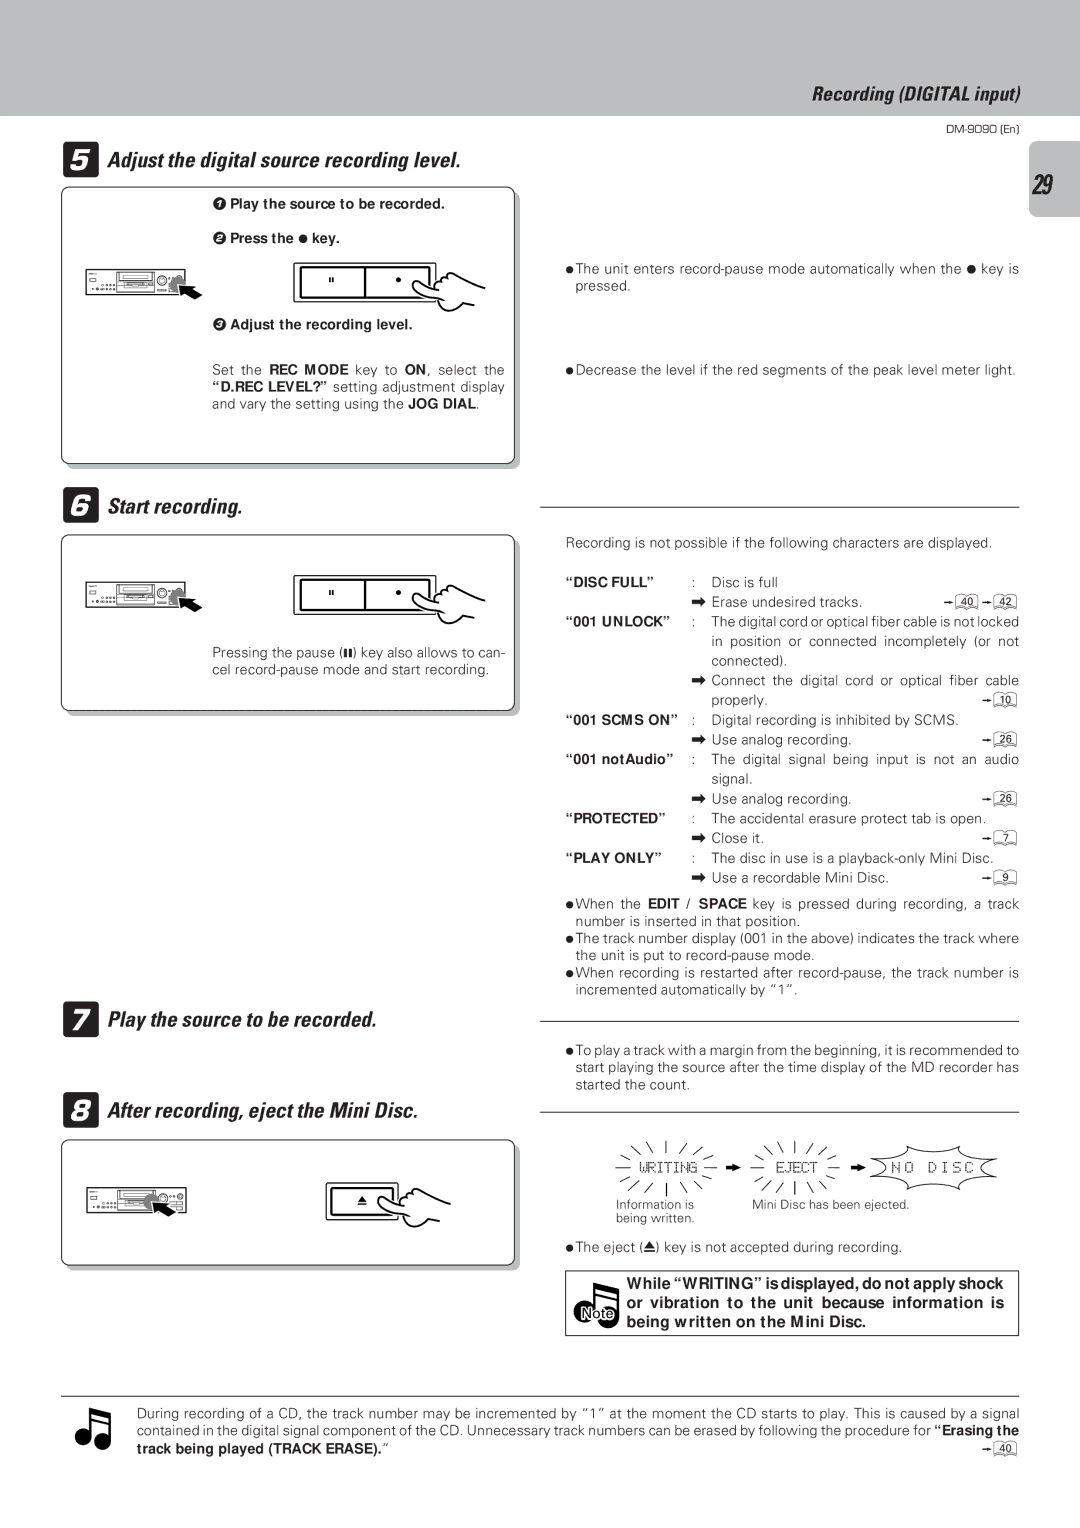
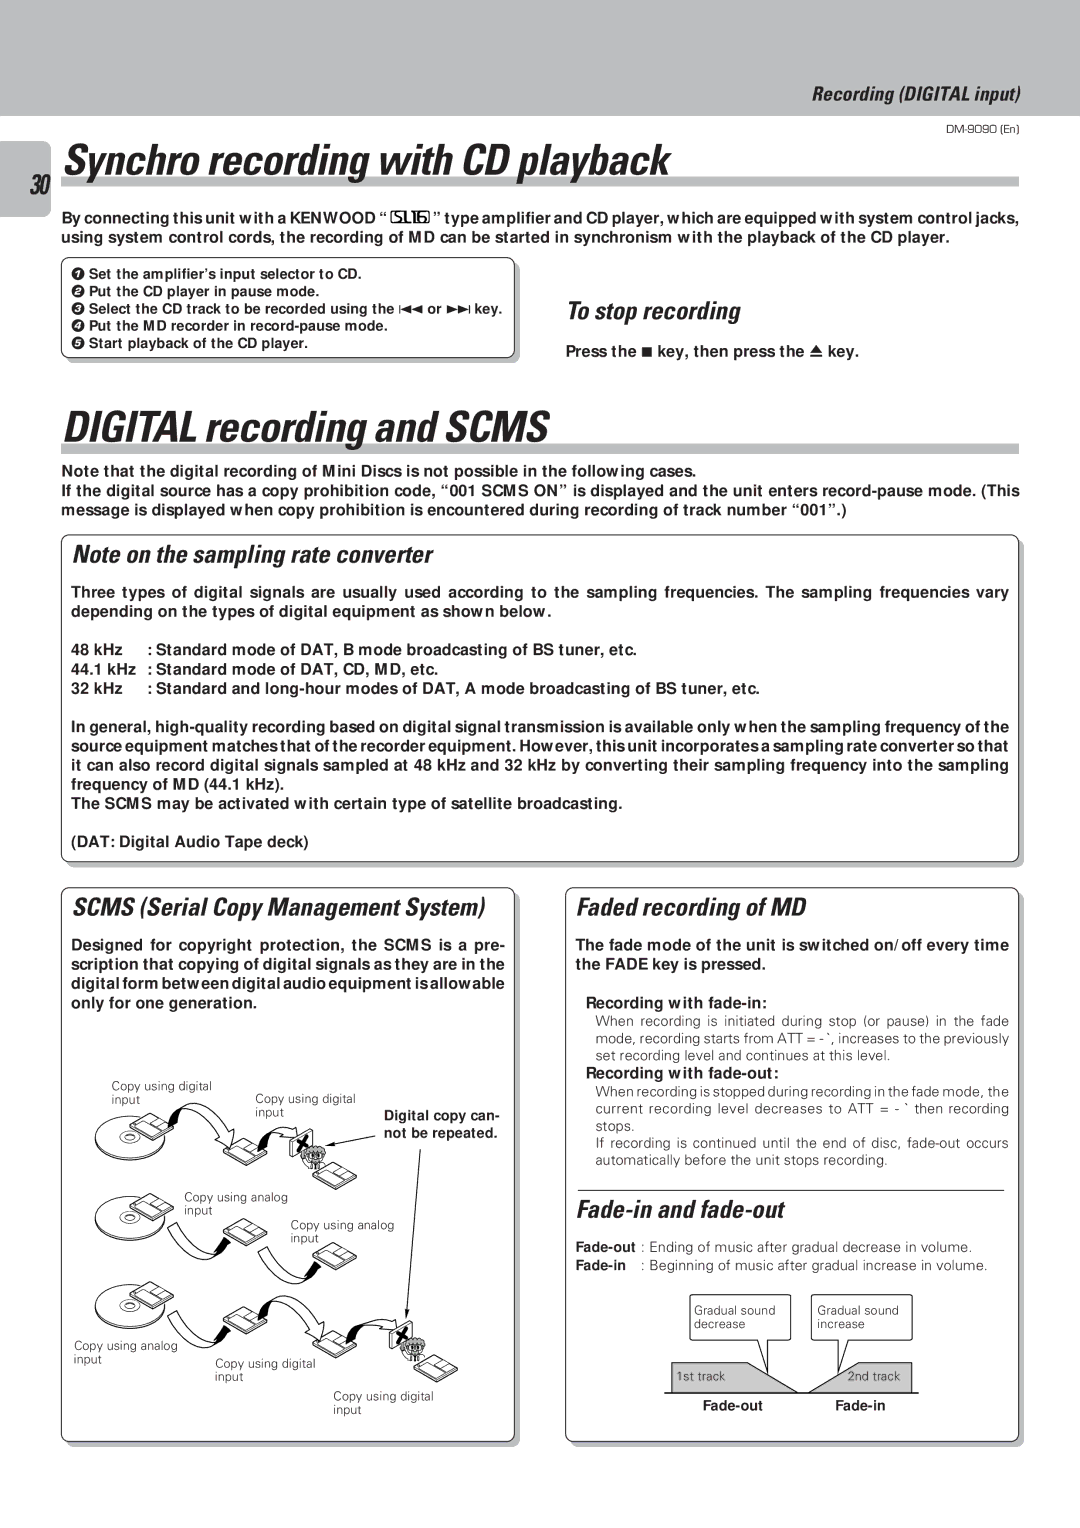
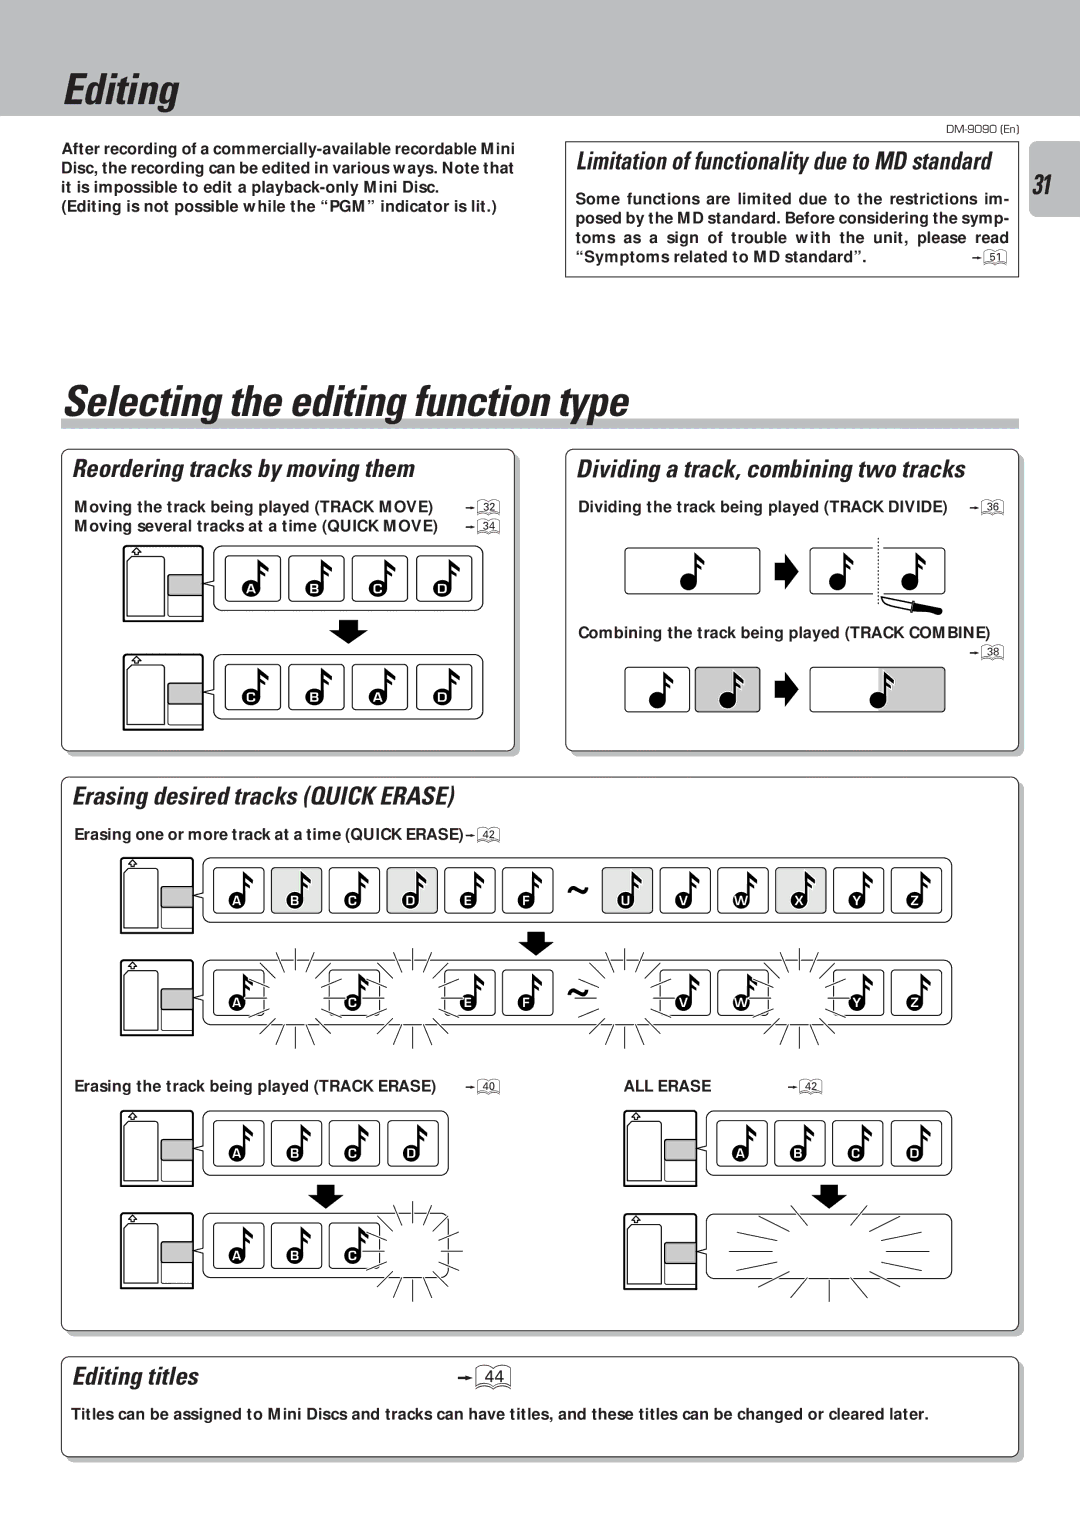
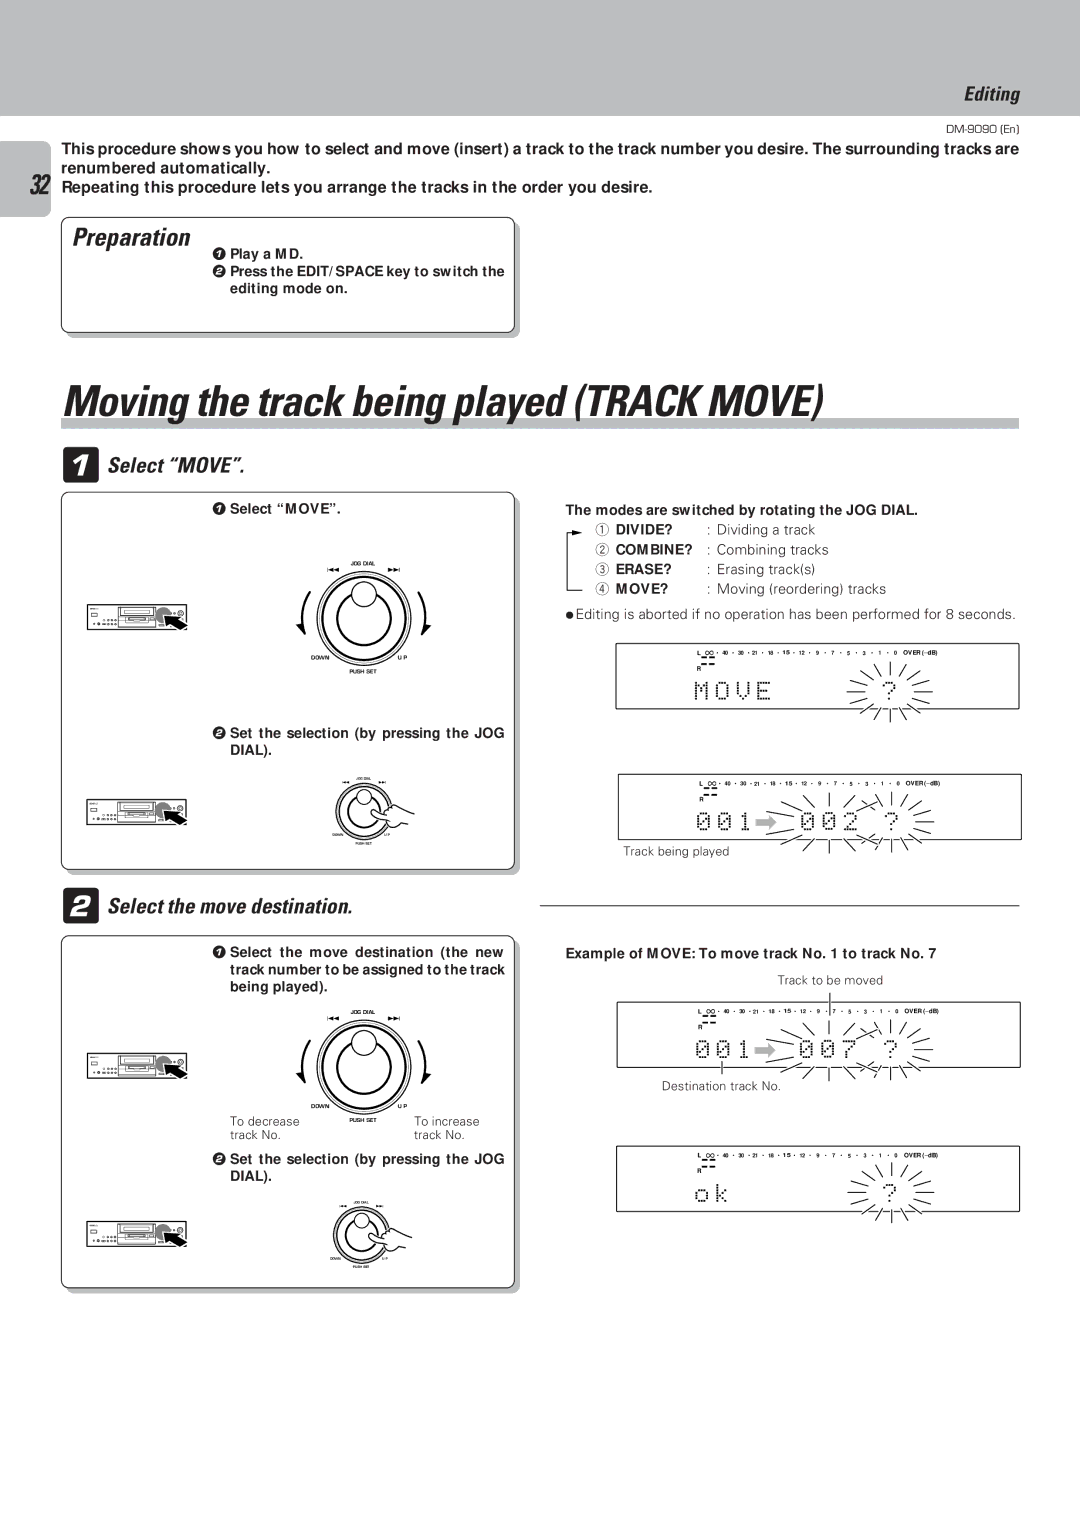
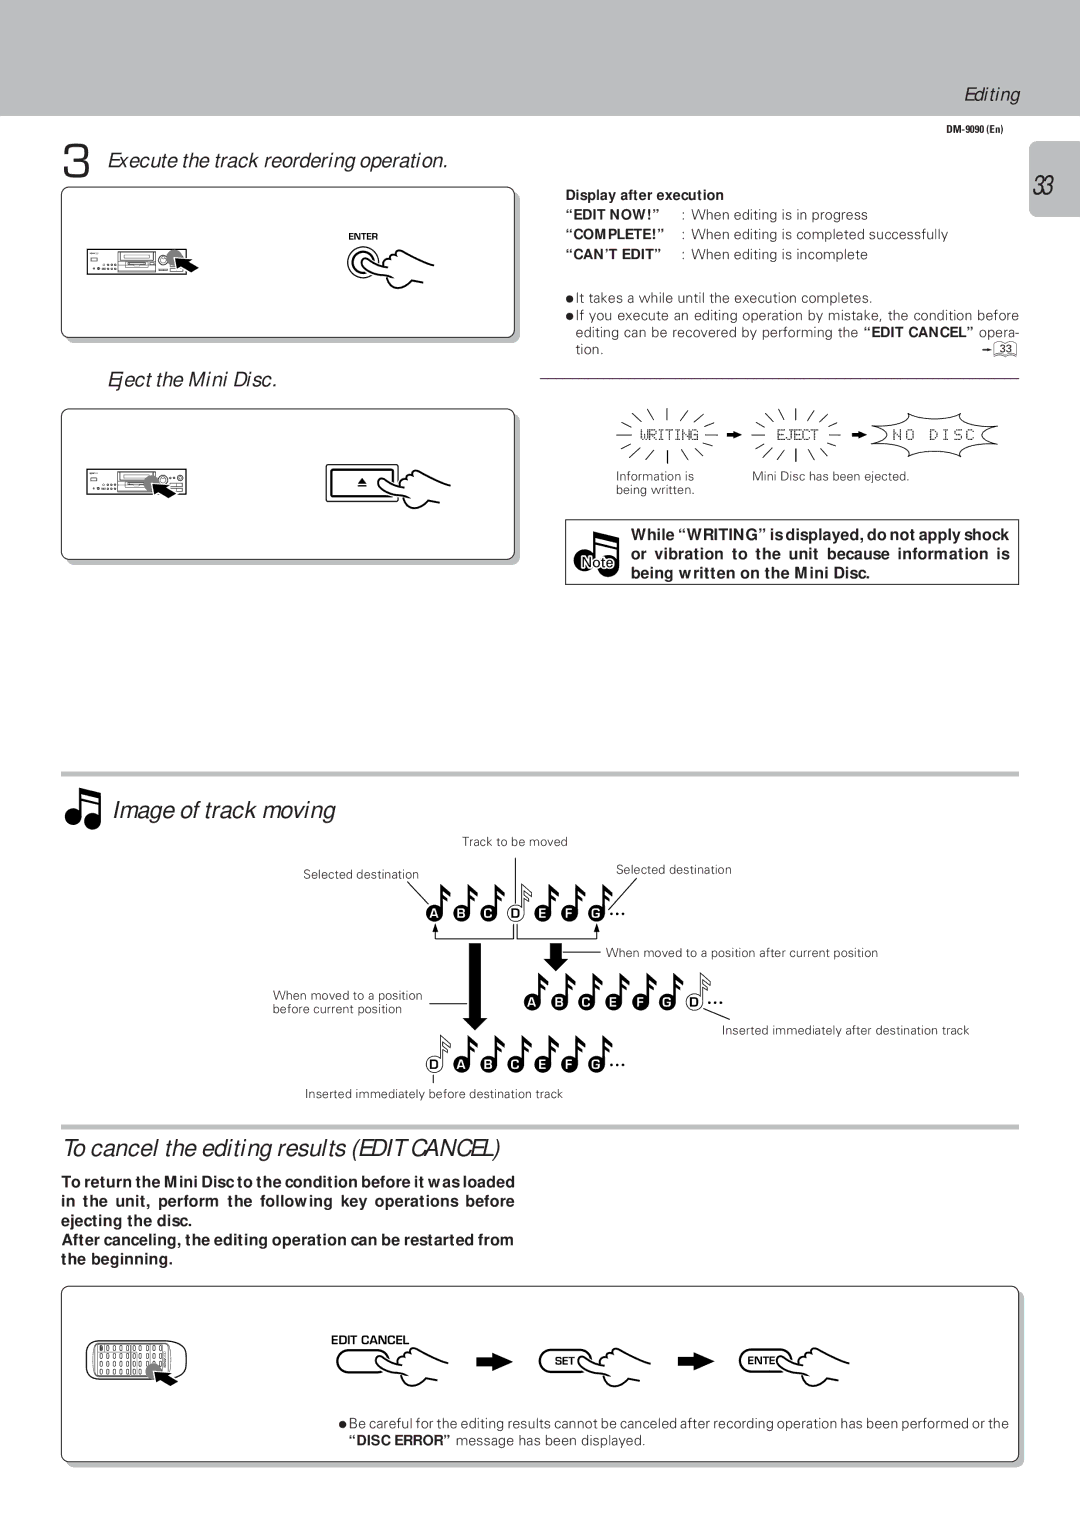
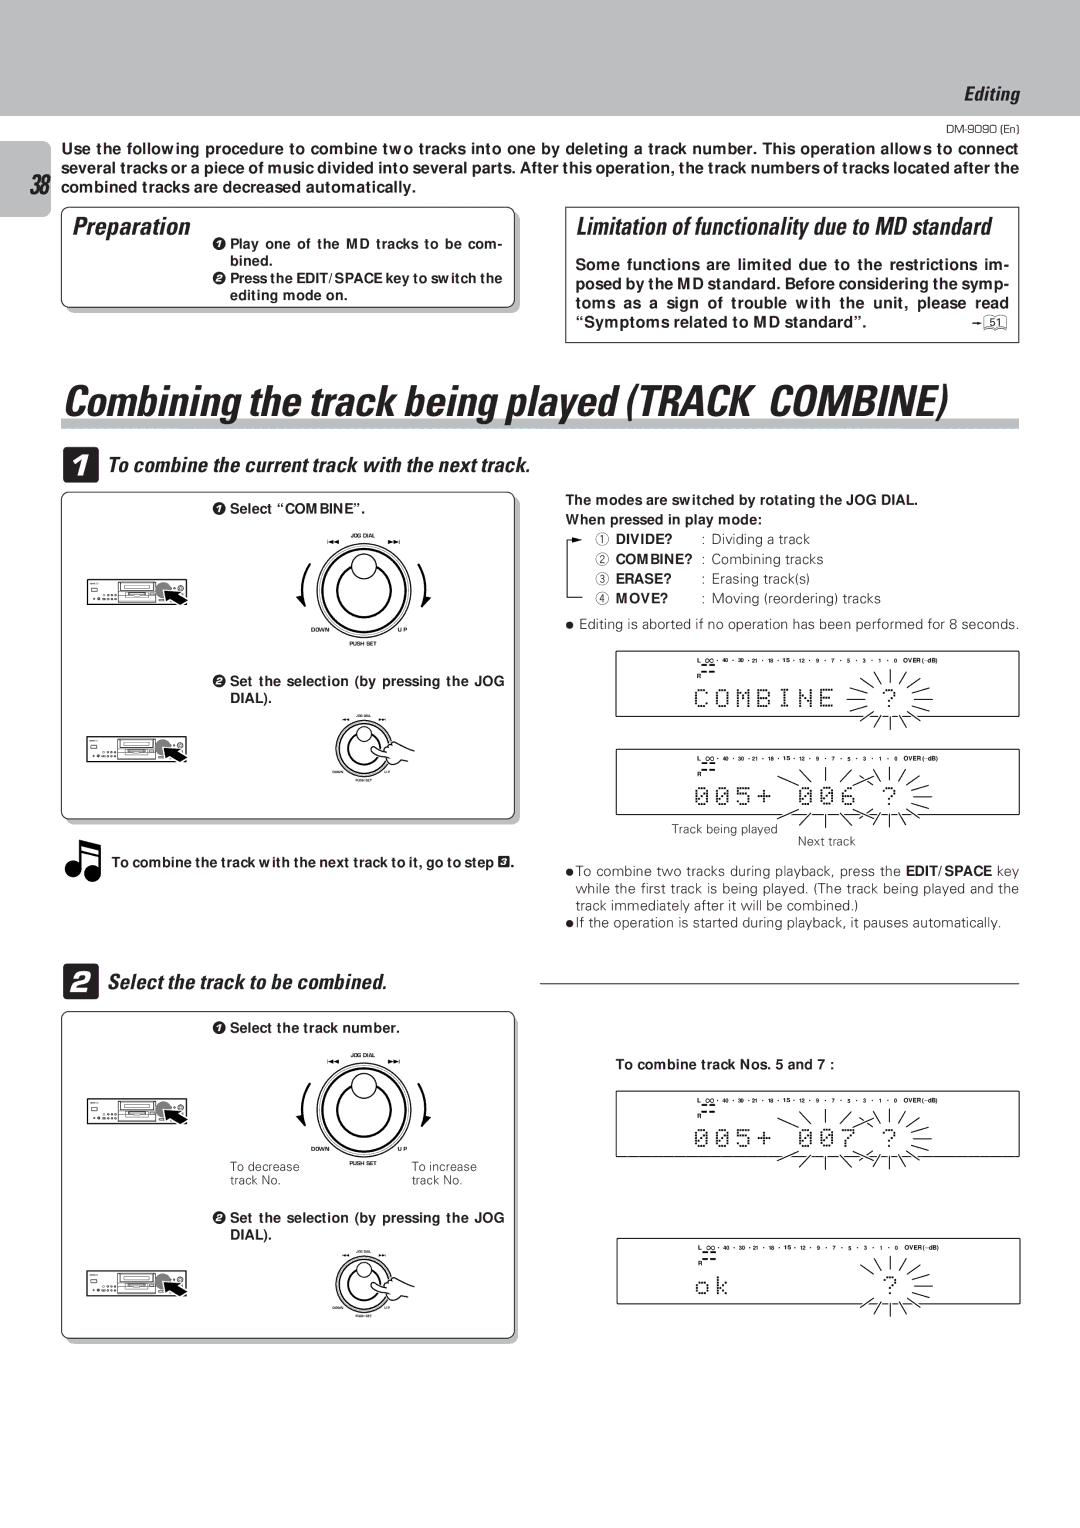
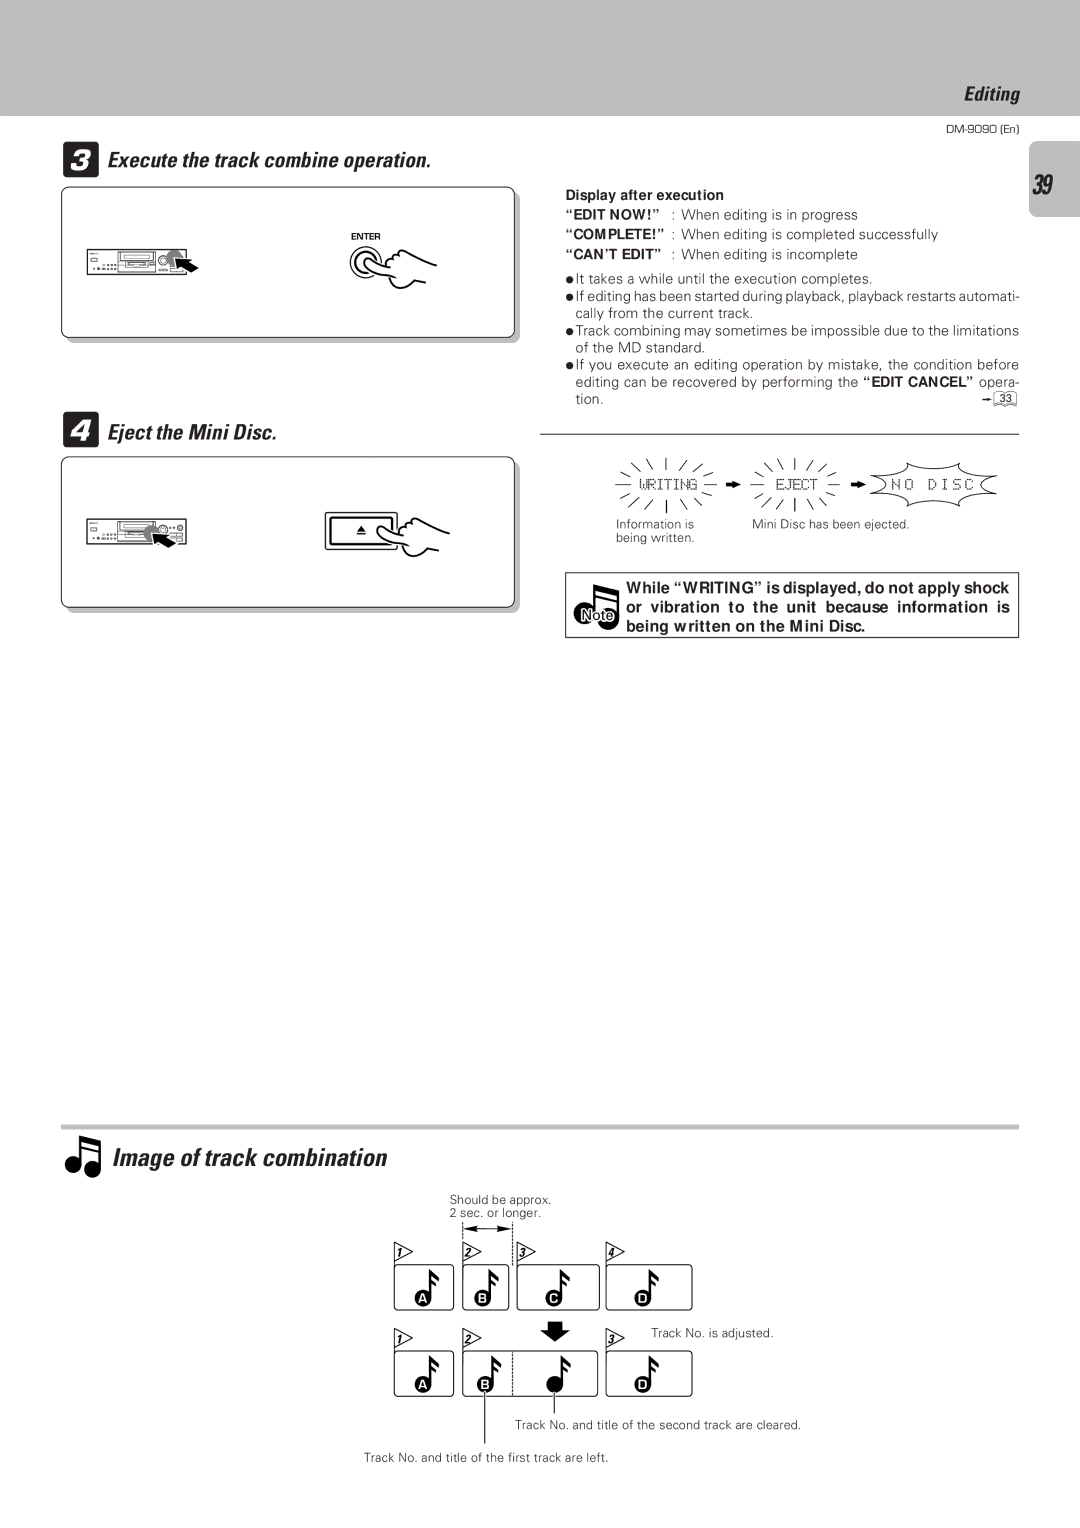
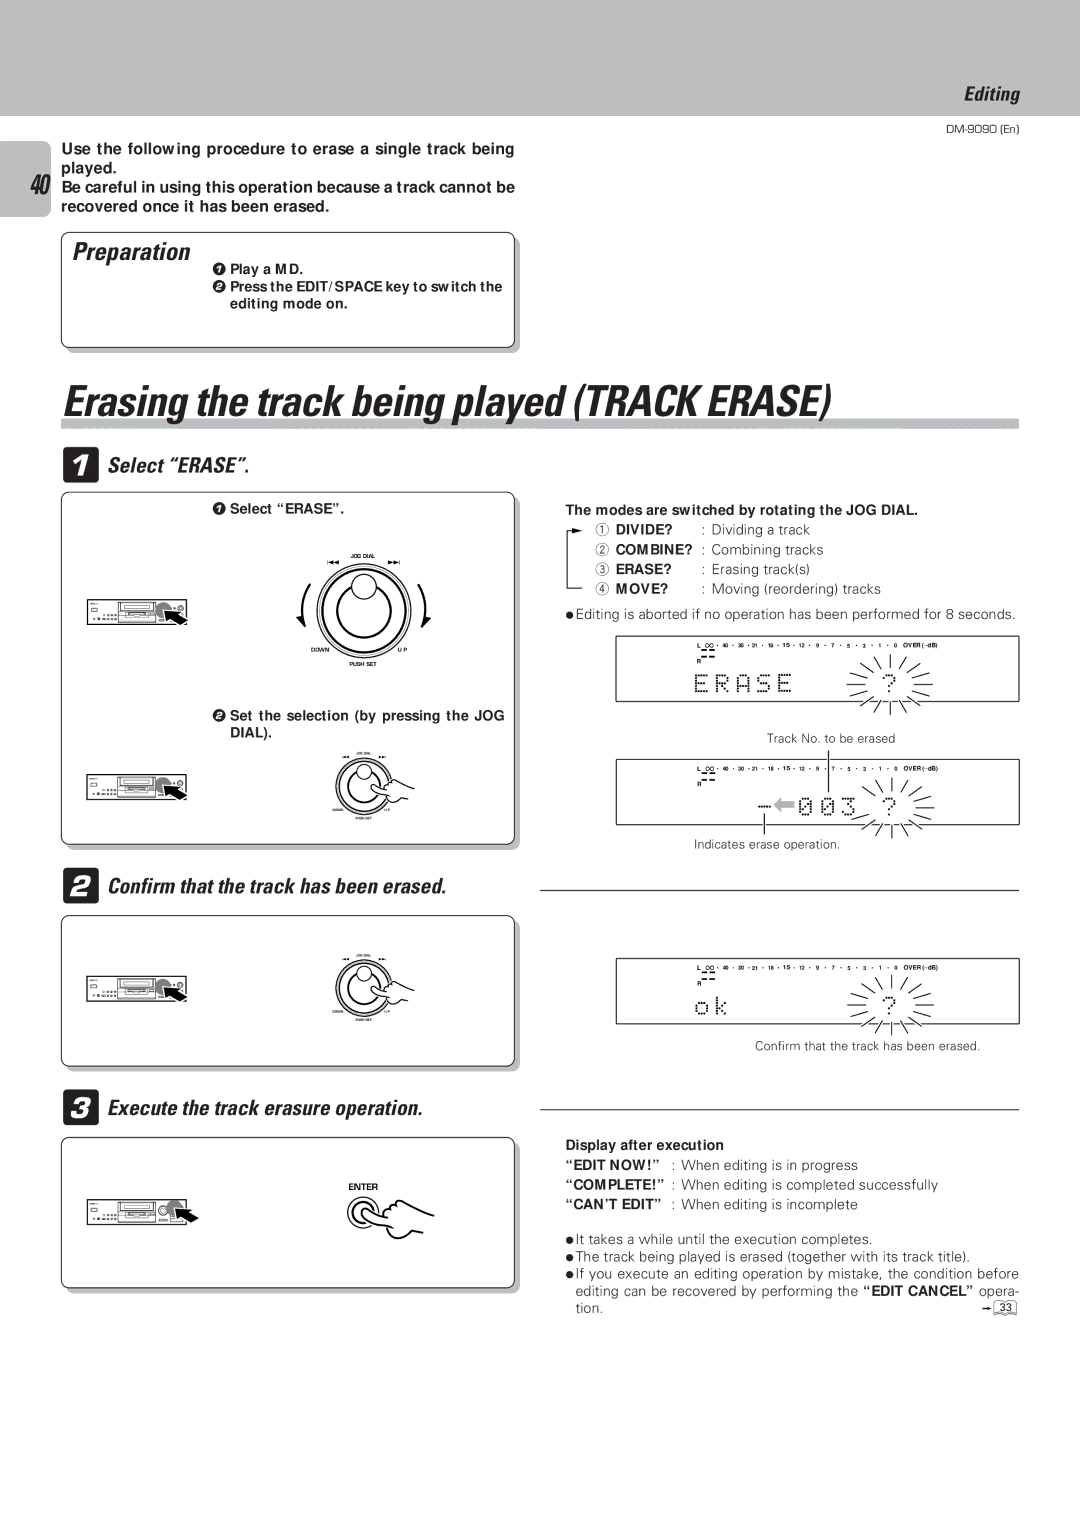
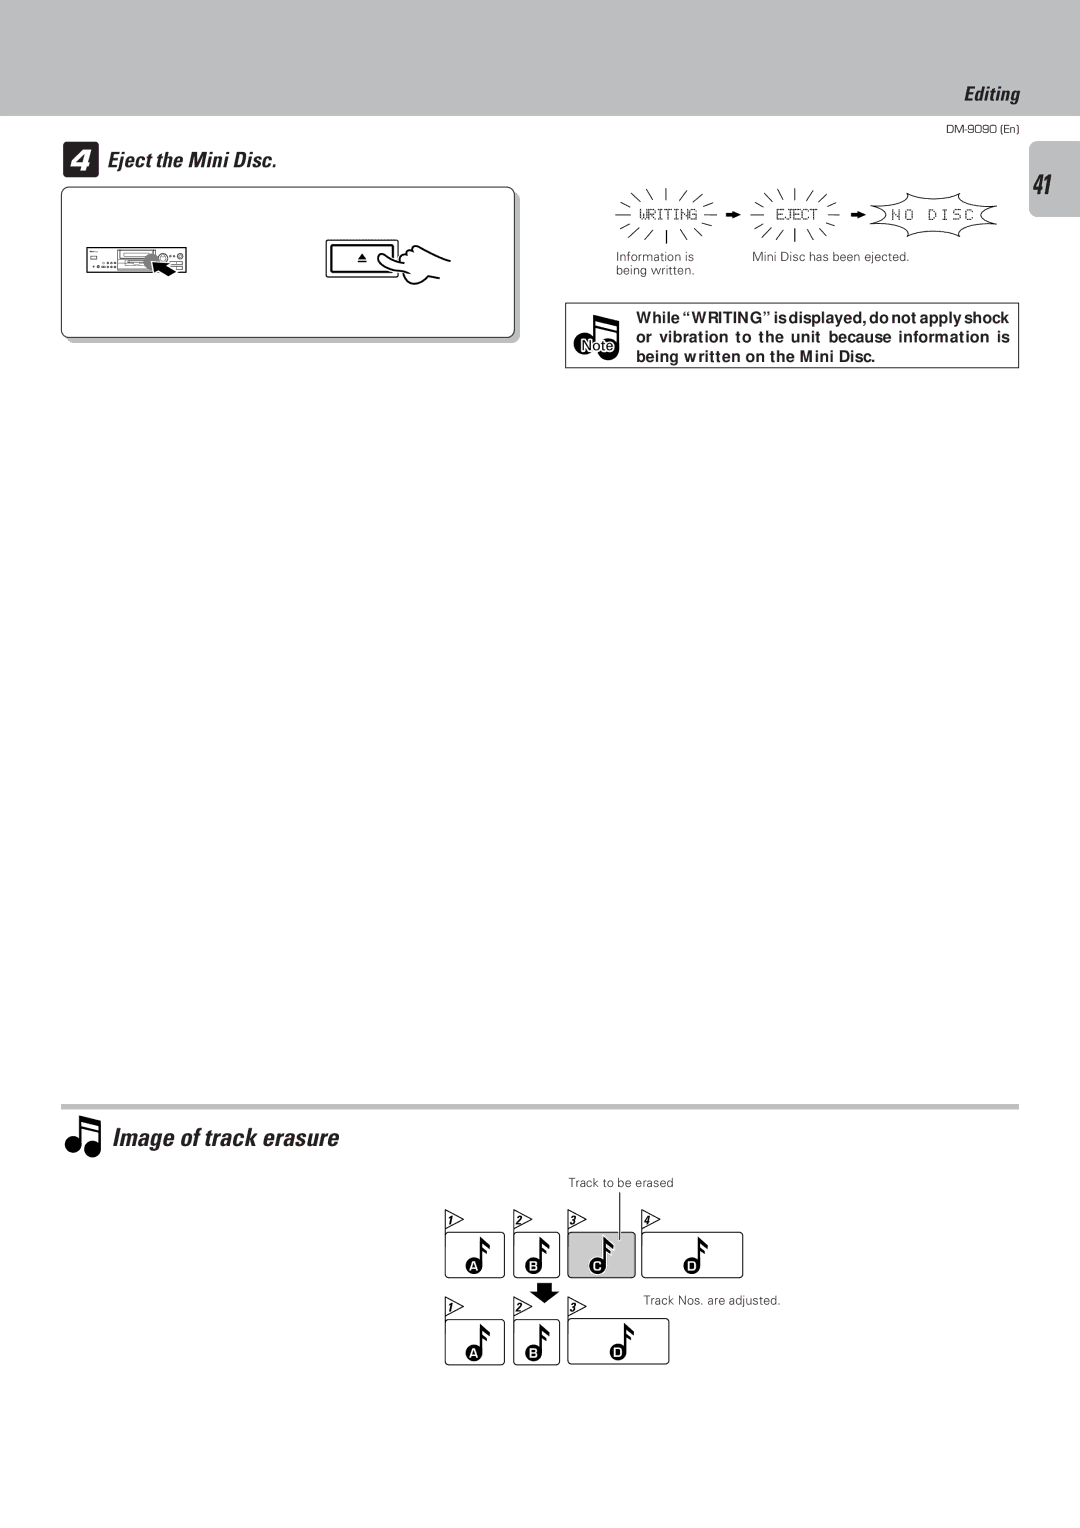
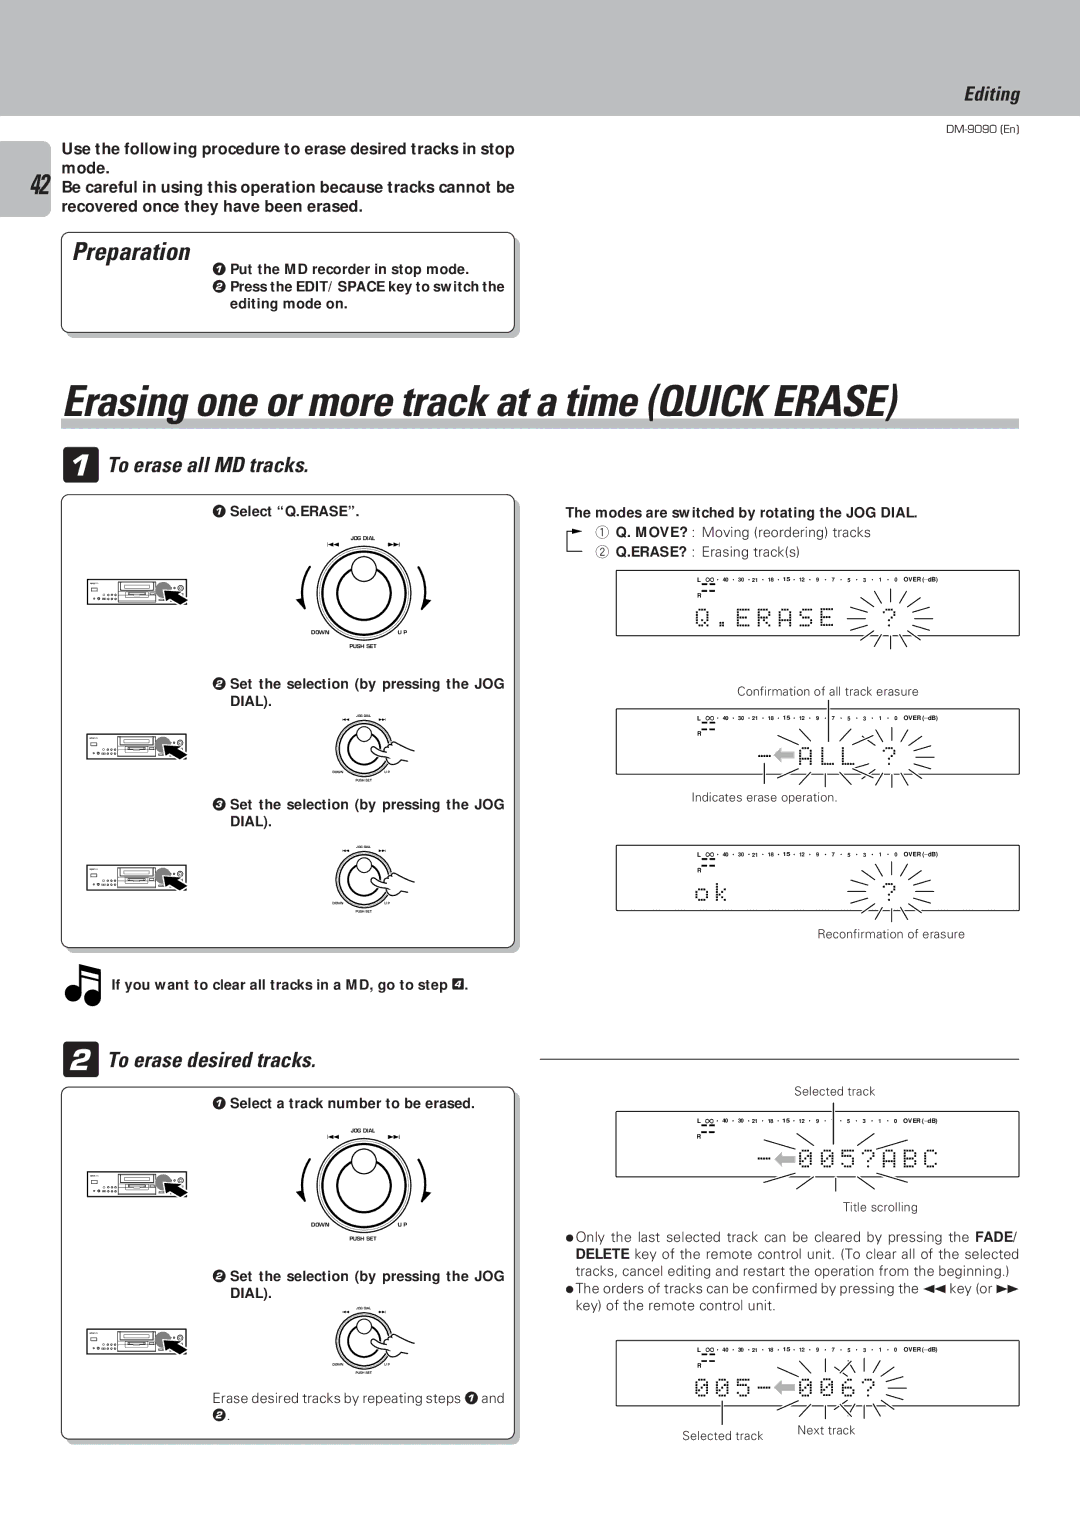
3Execute the track divide operation.

ENTER

Up to 255 track numbers can be inserted additionally by repeating 1 to 3 for each of them.

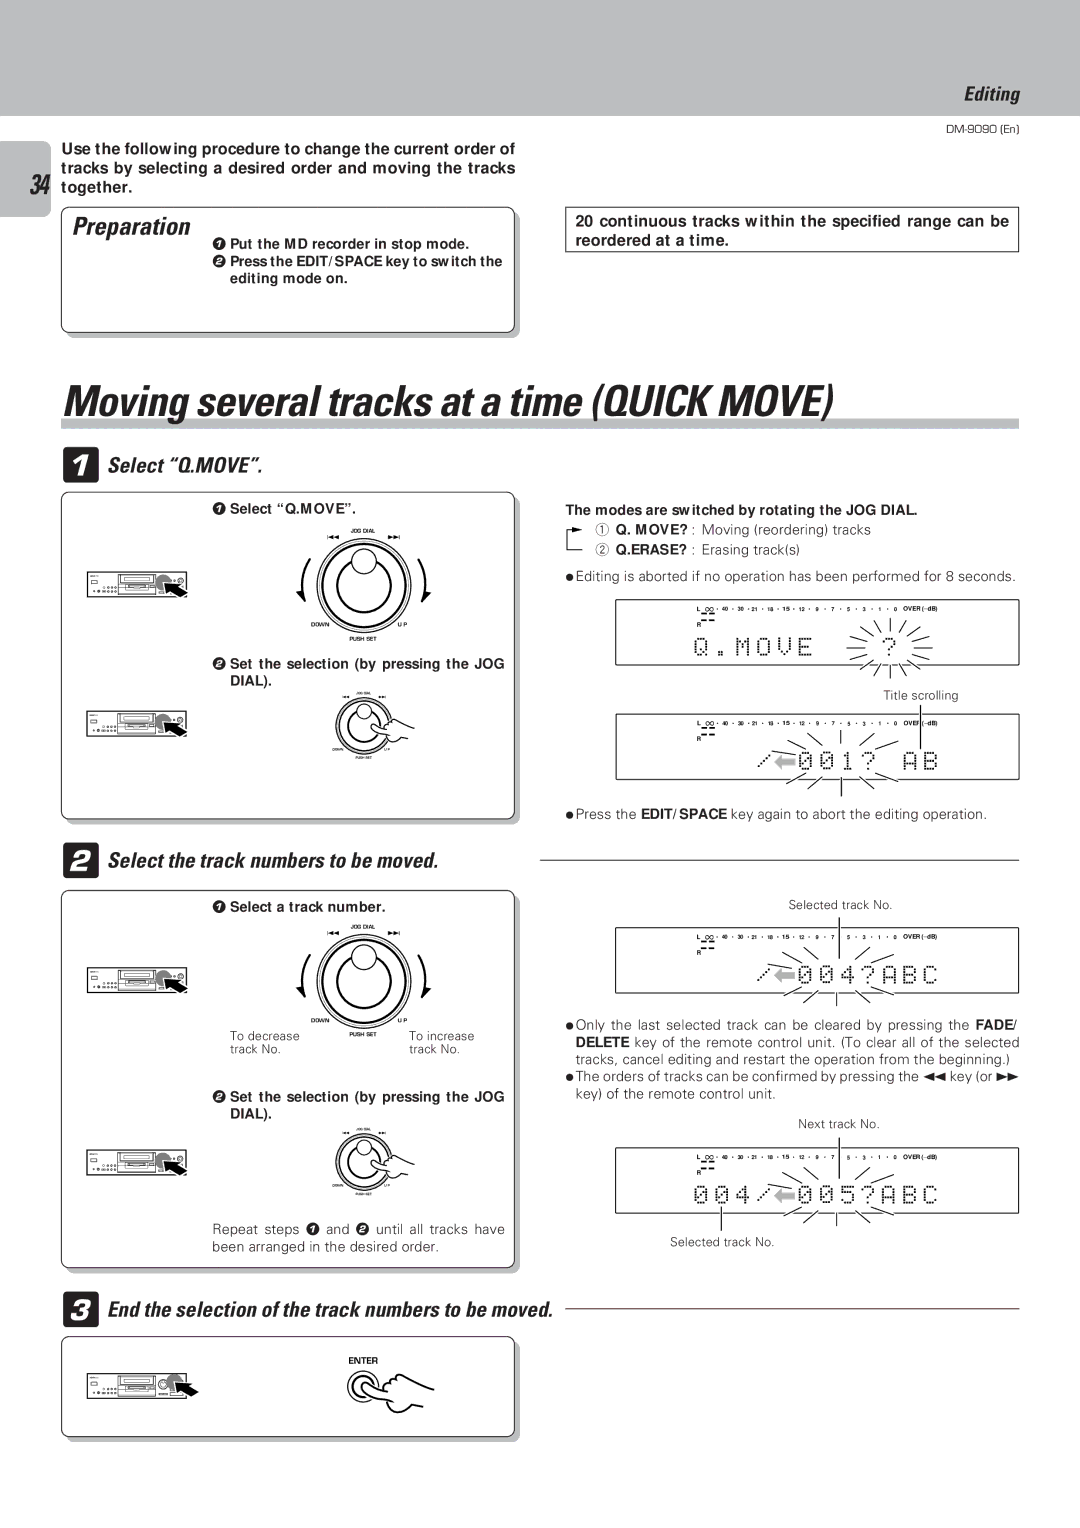
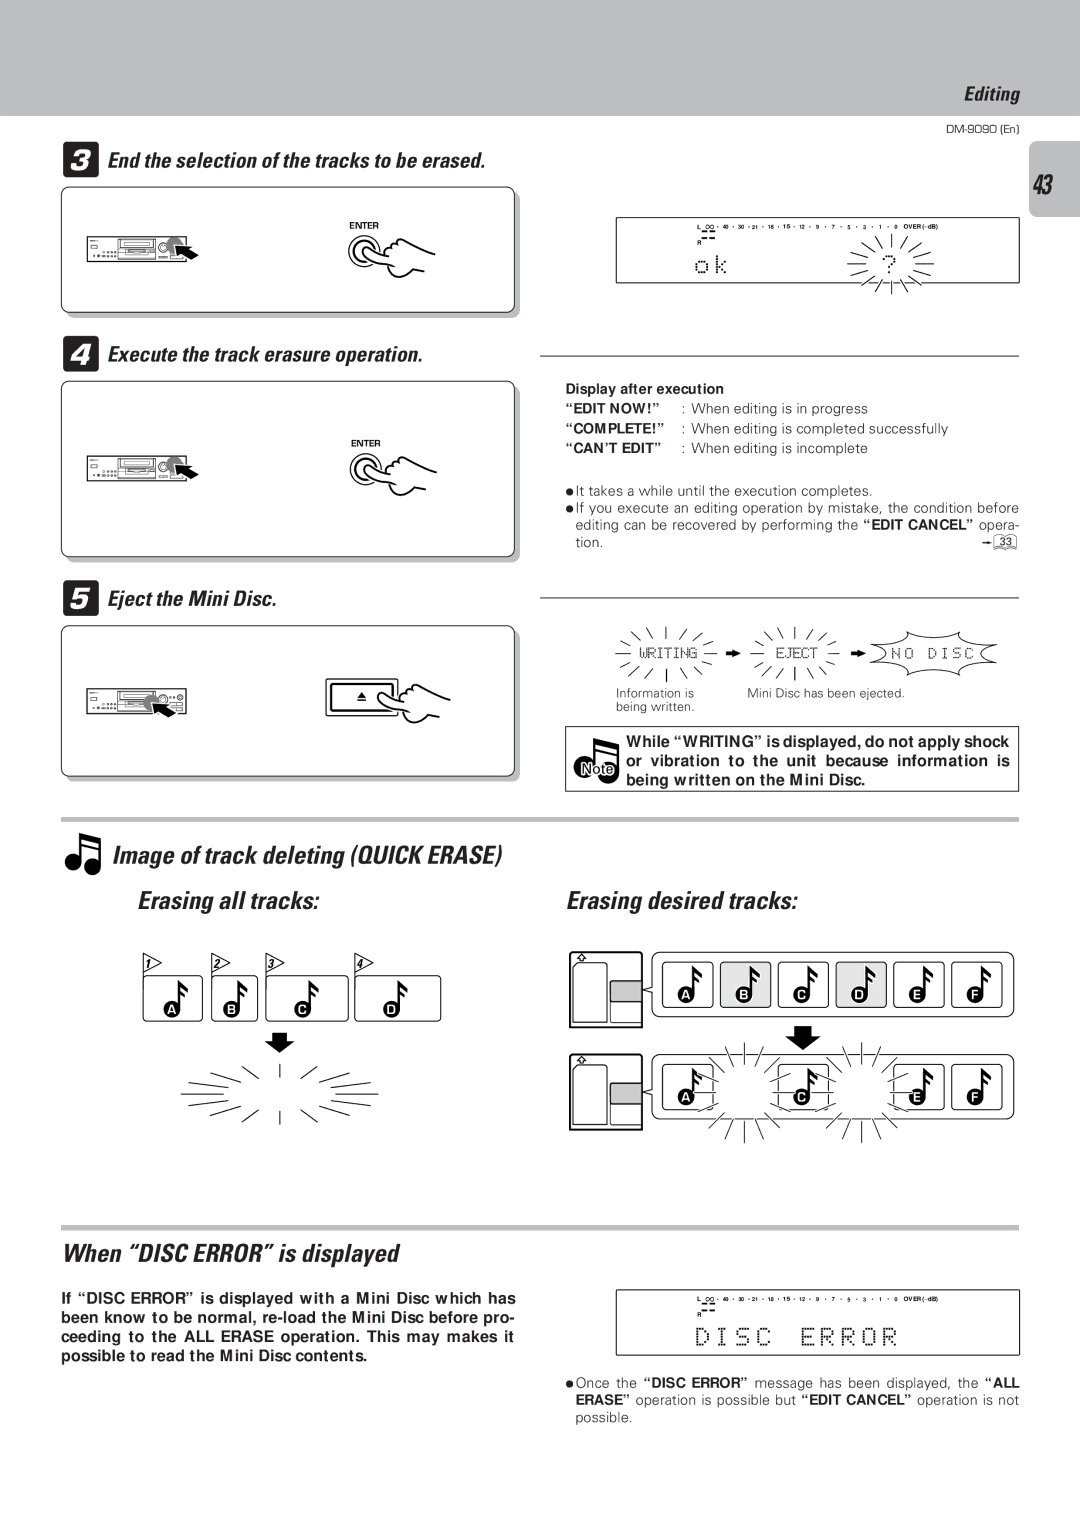
4Eject the Mini Disc.

0


Editing


DM-9090 (En)

Display after execution.

37

“EDIT NOW!” : When editing is in progress

“COMPLETE!” : When editing is completed successfully

“CAN’T EDIT” : When editing is incomplete

ÖIt takes a while until the execution completes.

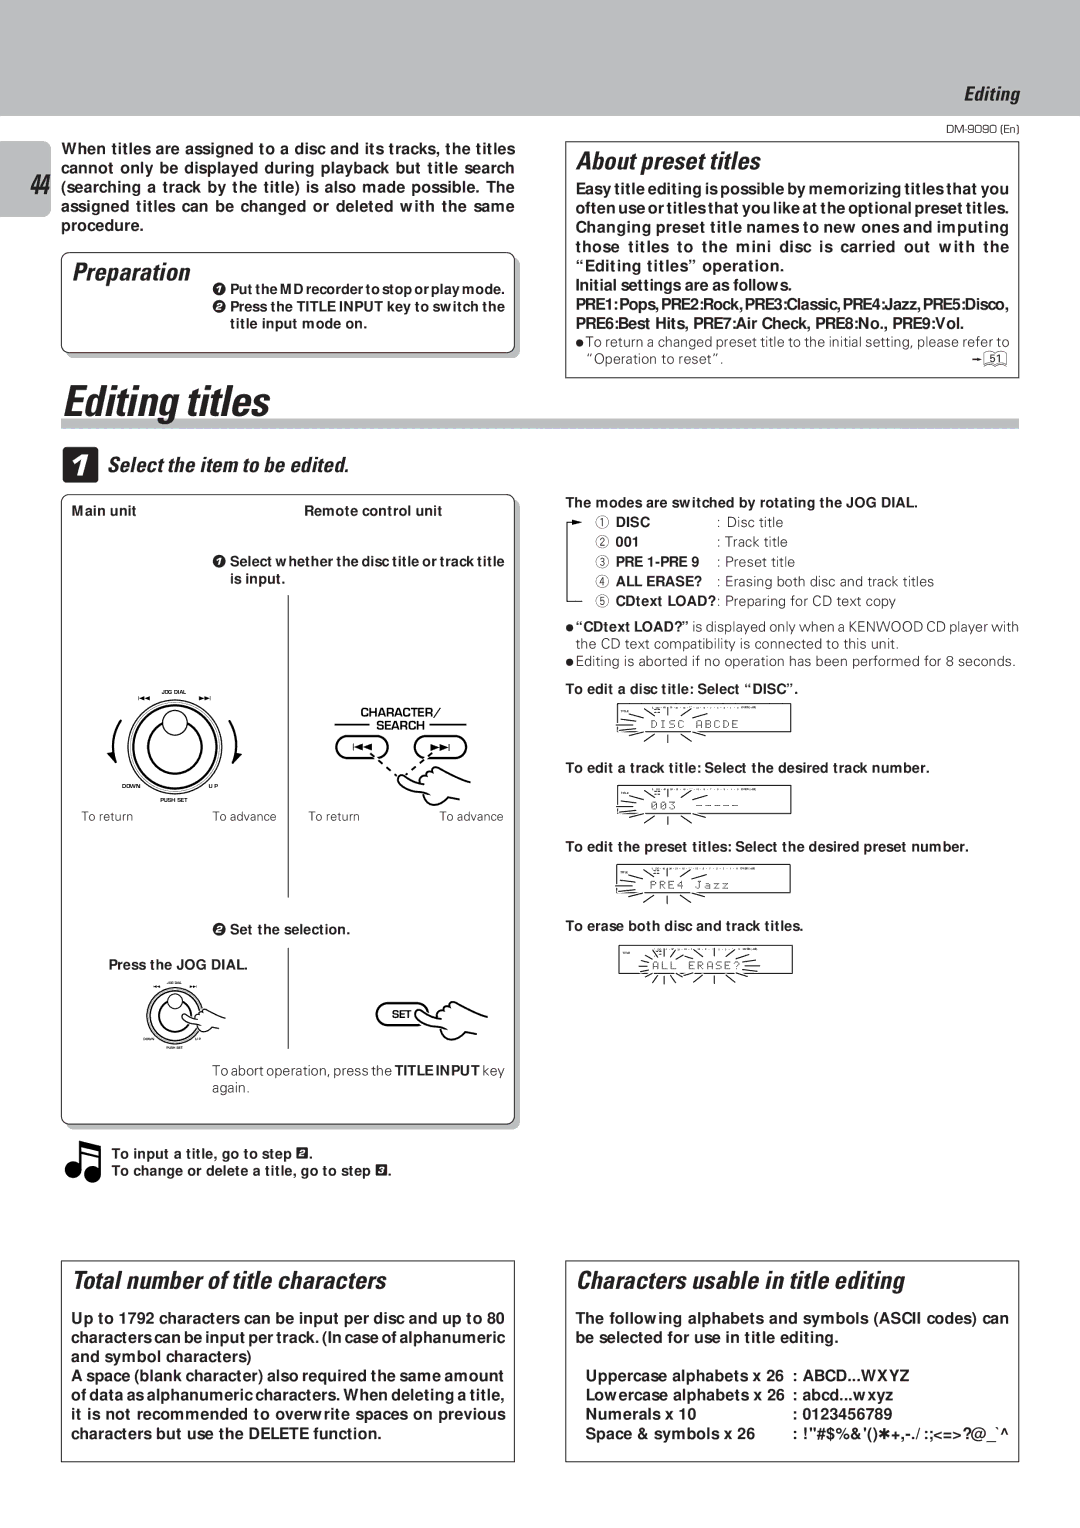
ÖThe track is divided into two tracks.

ÖThe unit enters pause mode at the second track.

ÖThere is no blank space left between the two tracks.

ÖTrack division may sometimes be impossible due to the limitations of the MD standard.

ÖIf you execute an editing operation by mistake, the condition before

editing can be recovered by performing the “EDIT CANCEL” opera-

tion.

Ü


WRITING

EJECT

N O D I S C

Information is

Mini Disc has been ejected.


being written.


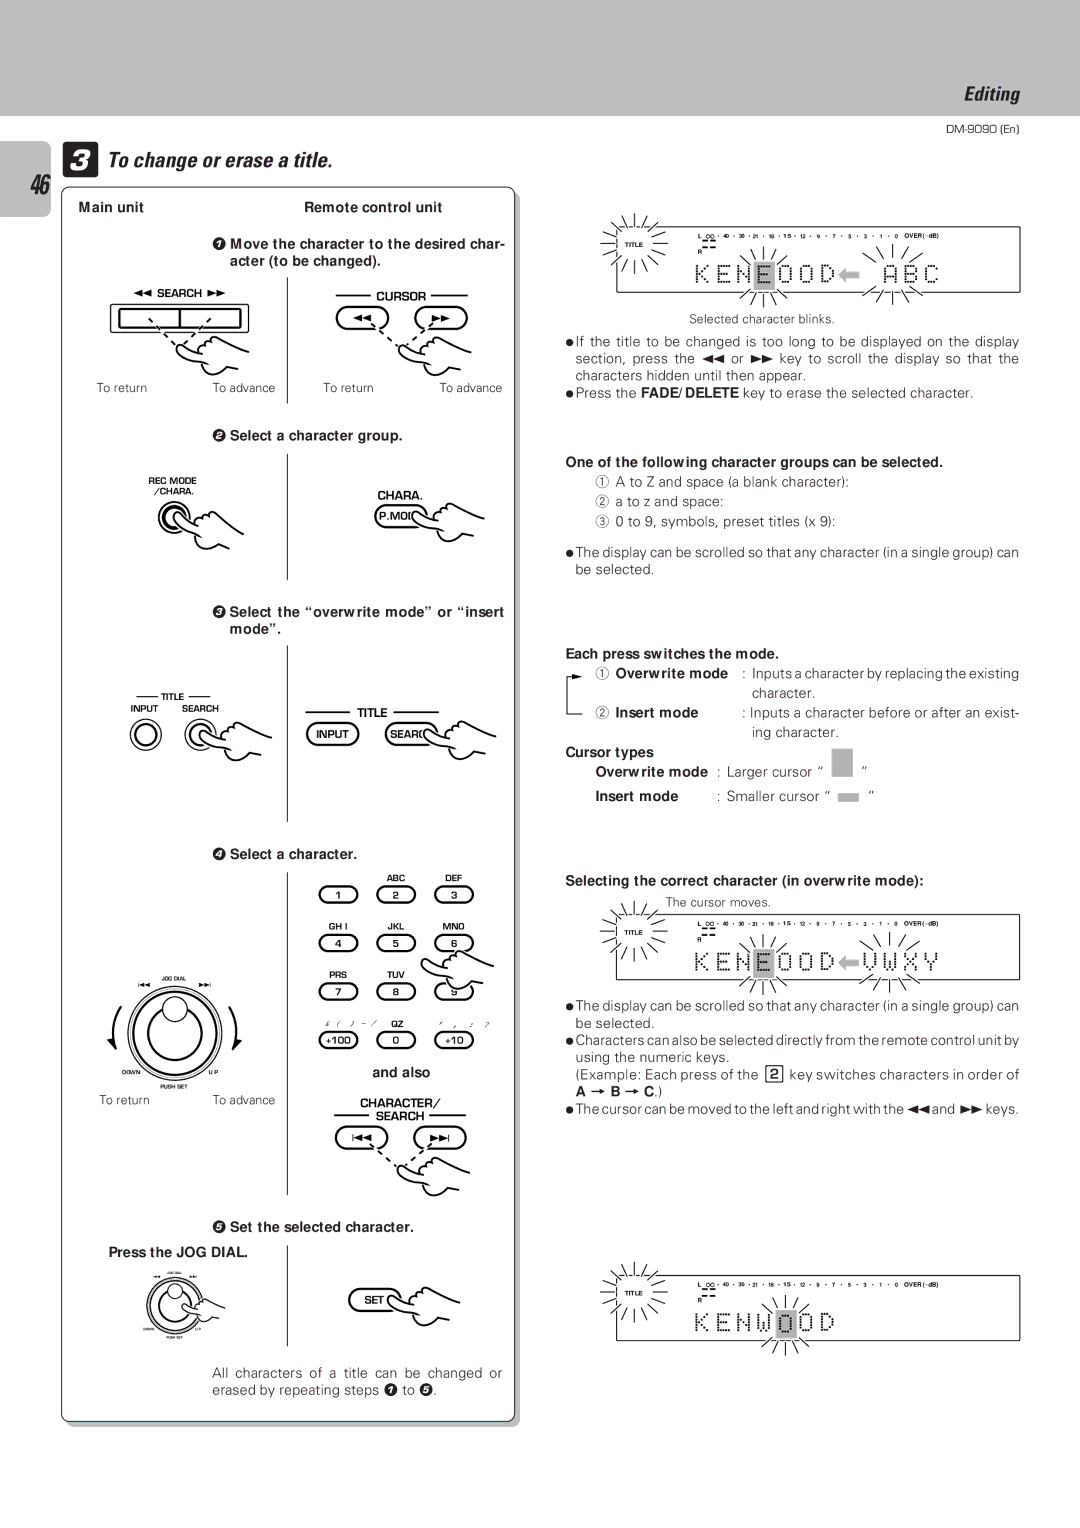
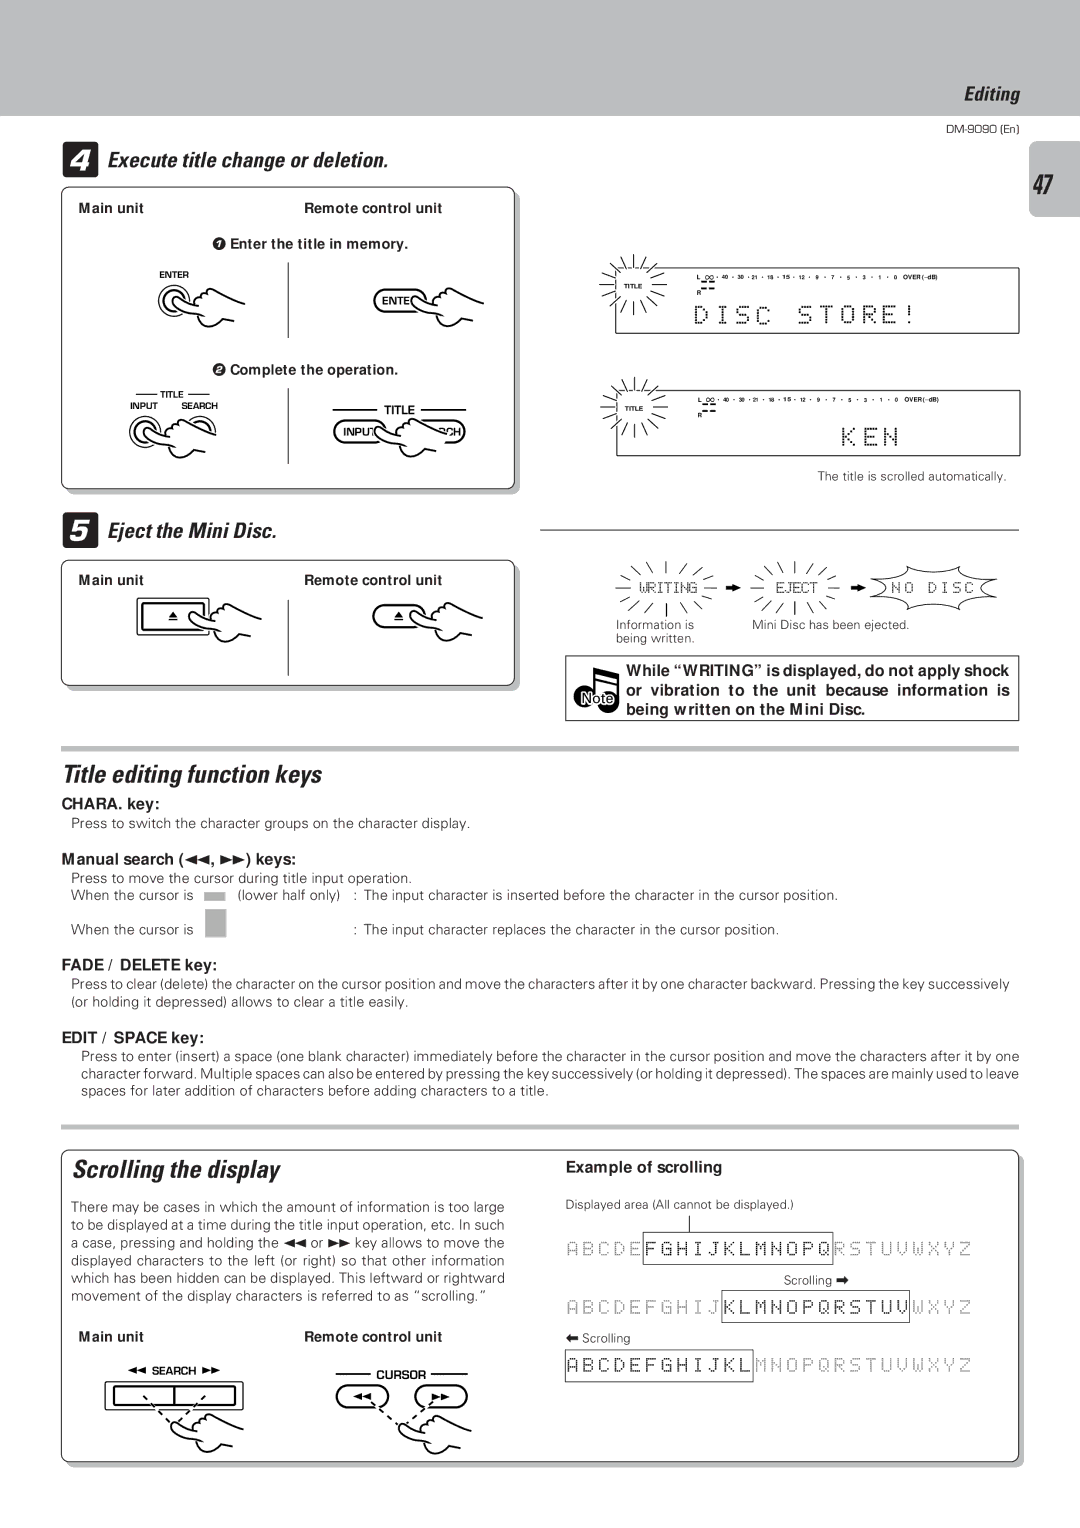
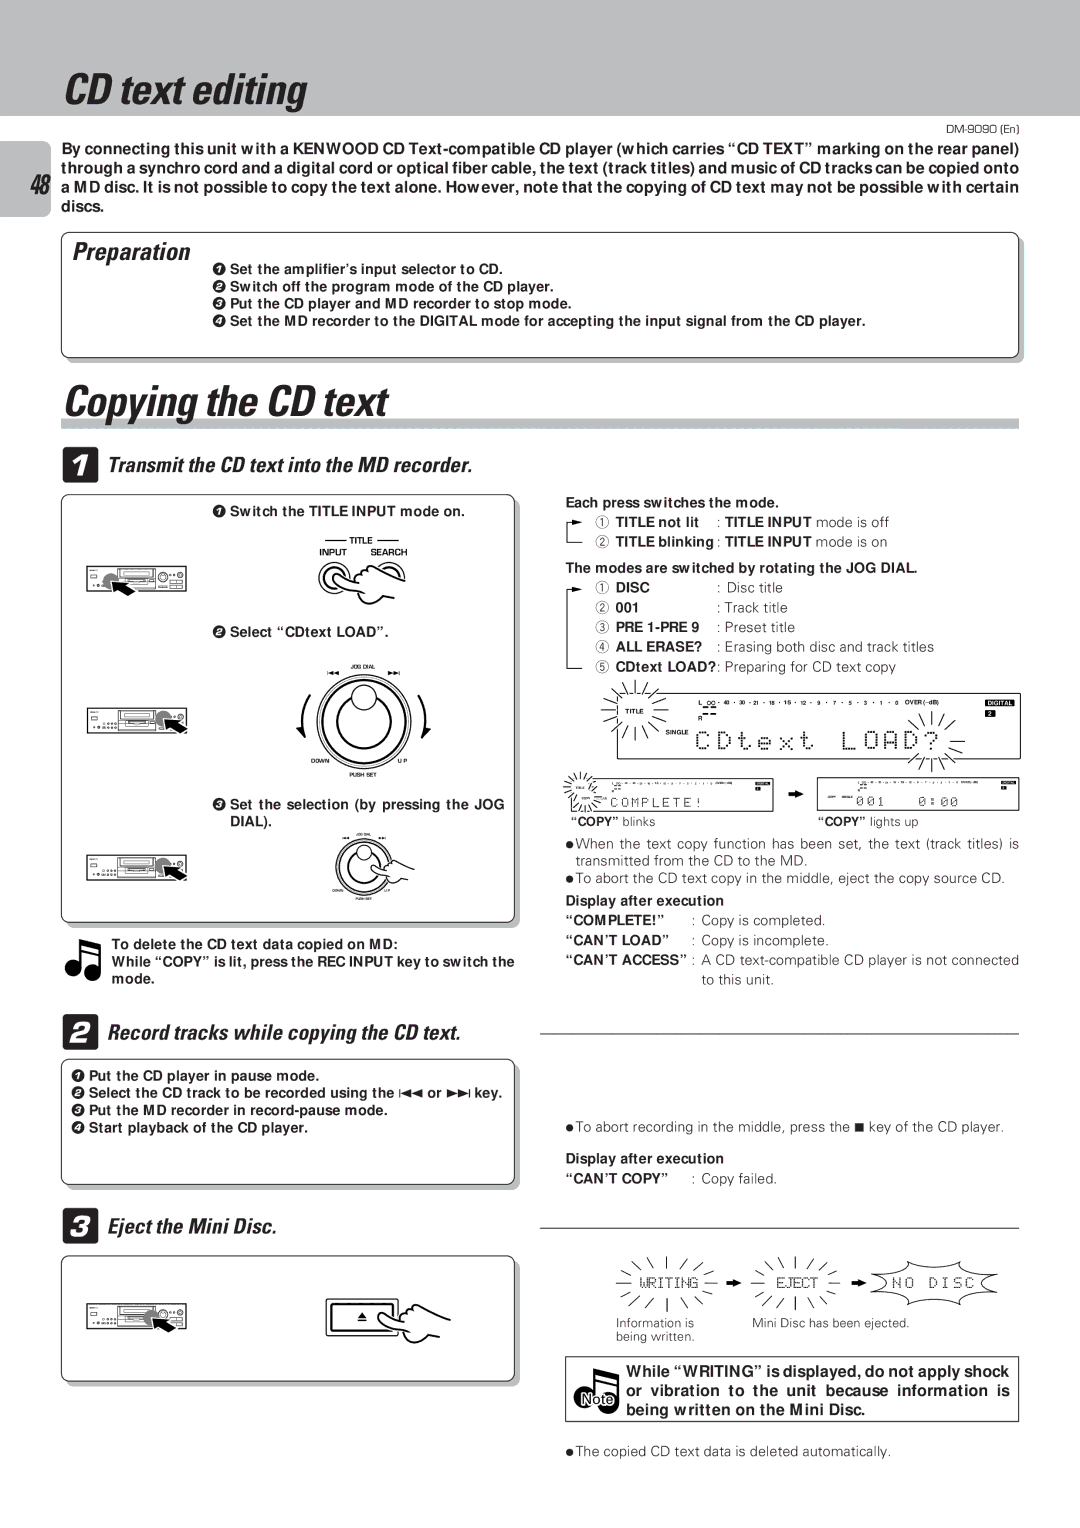
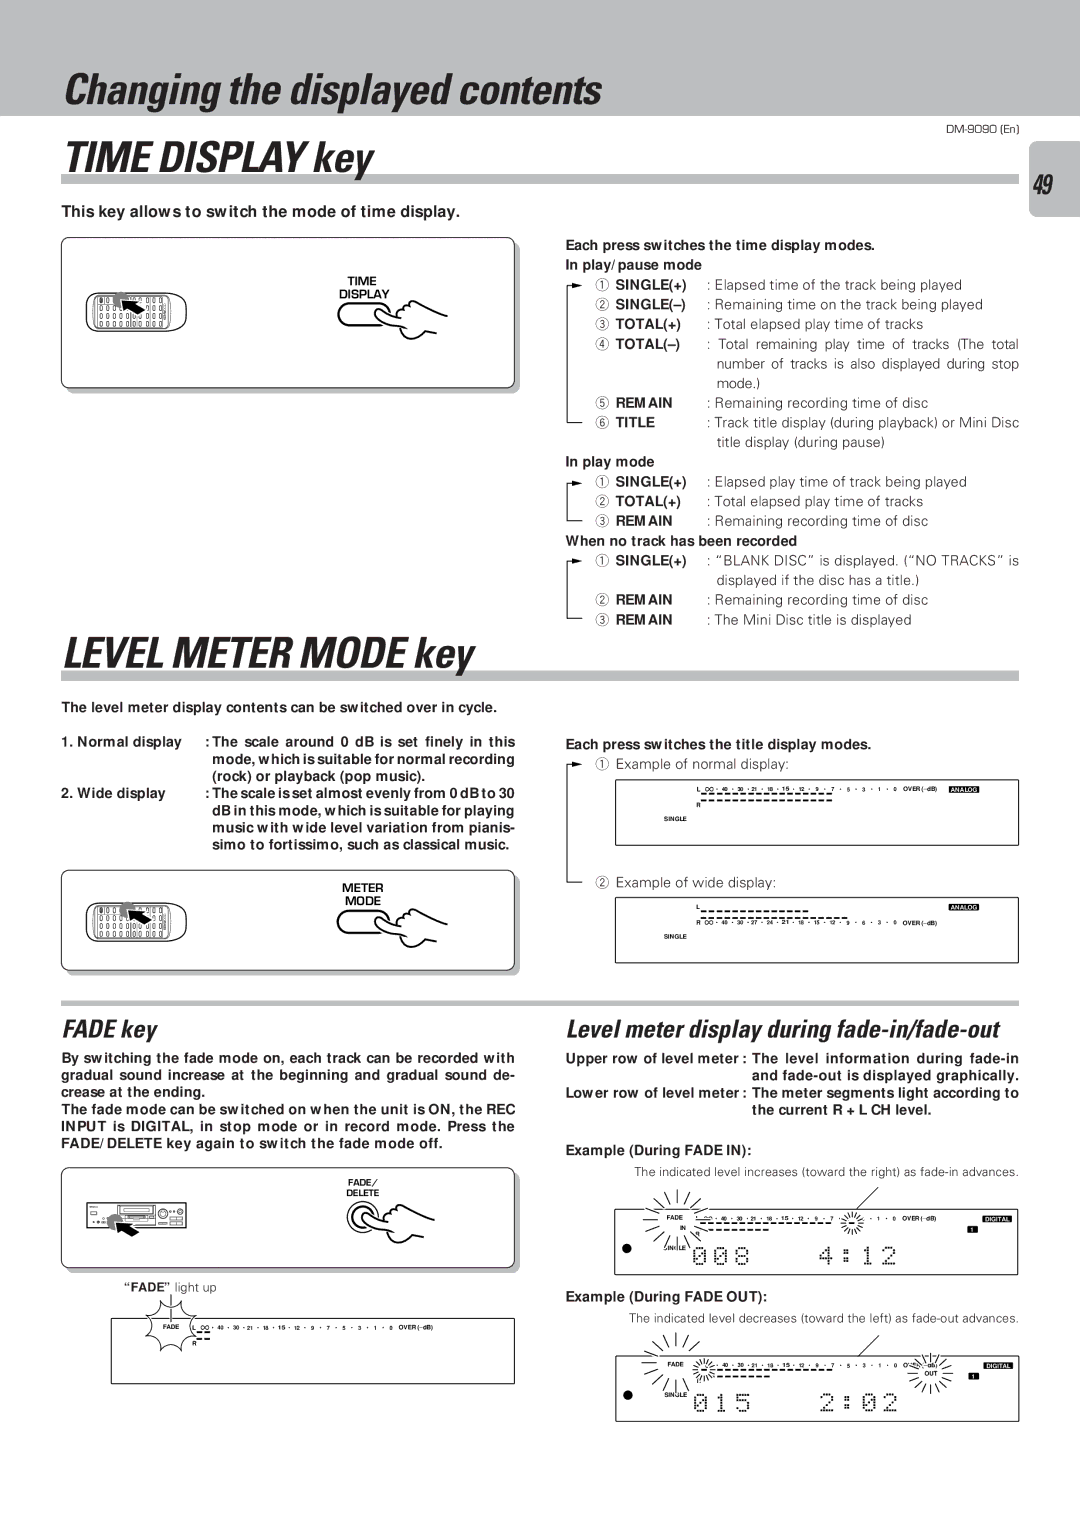
While “WRITING” is displayed, do not apply shock Note or vibration to the unit because information is

being written on the Mini Disc.

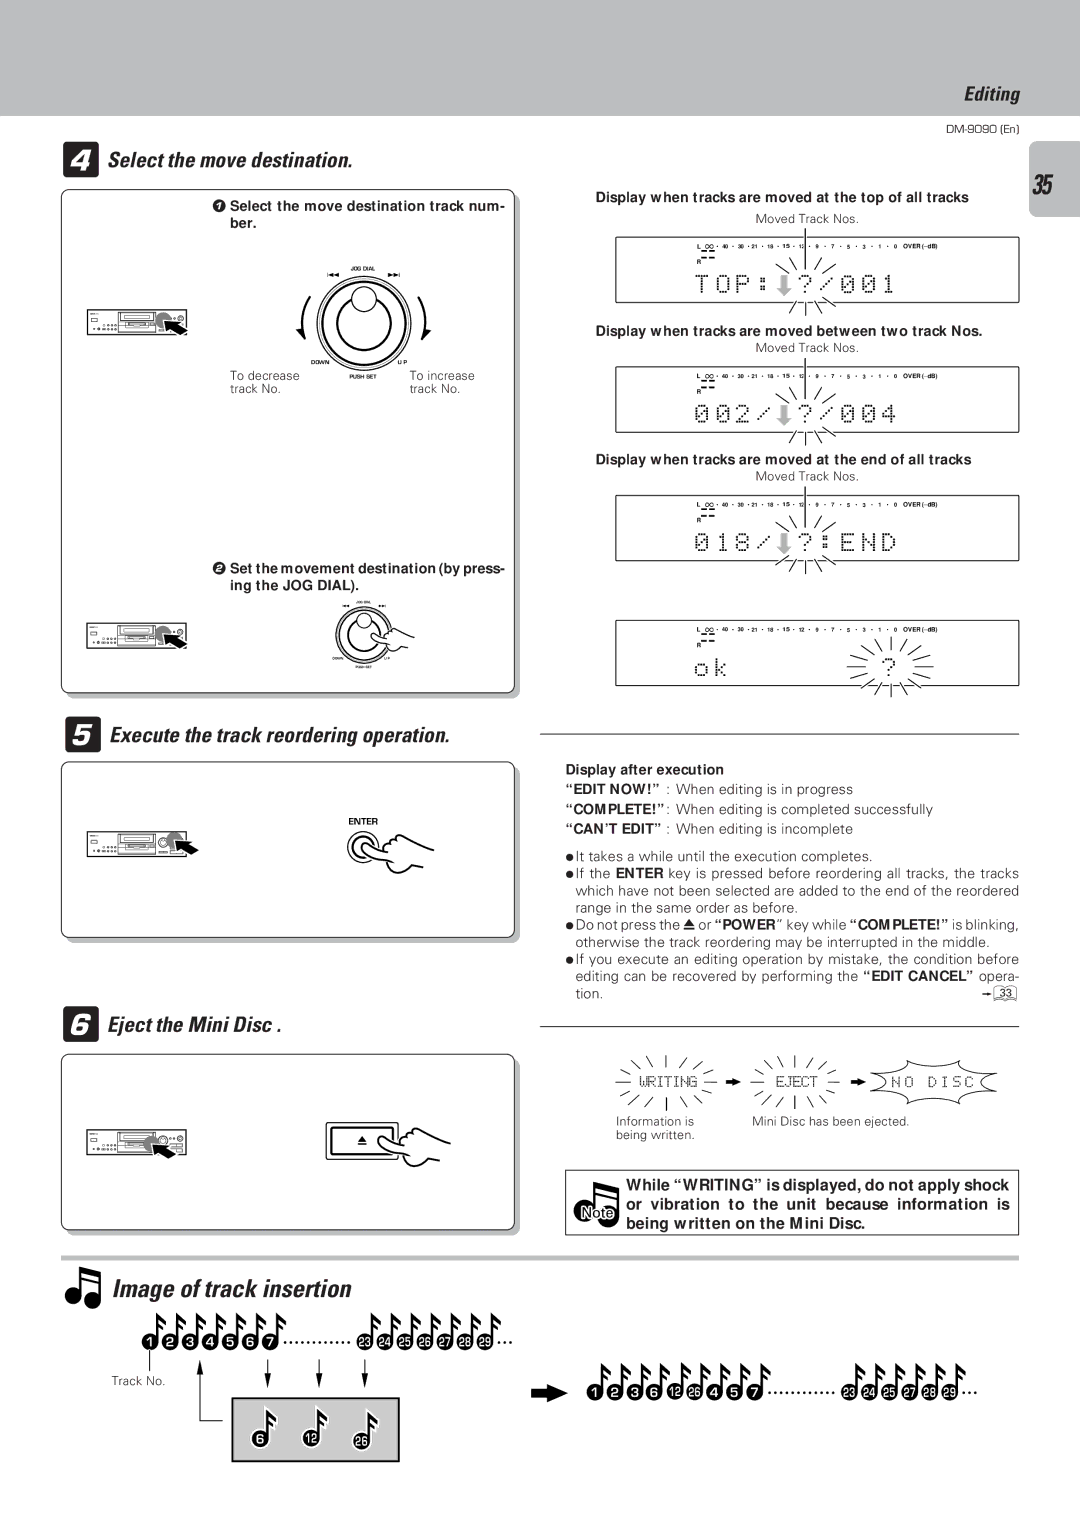
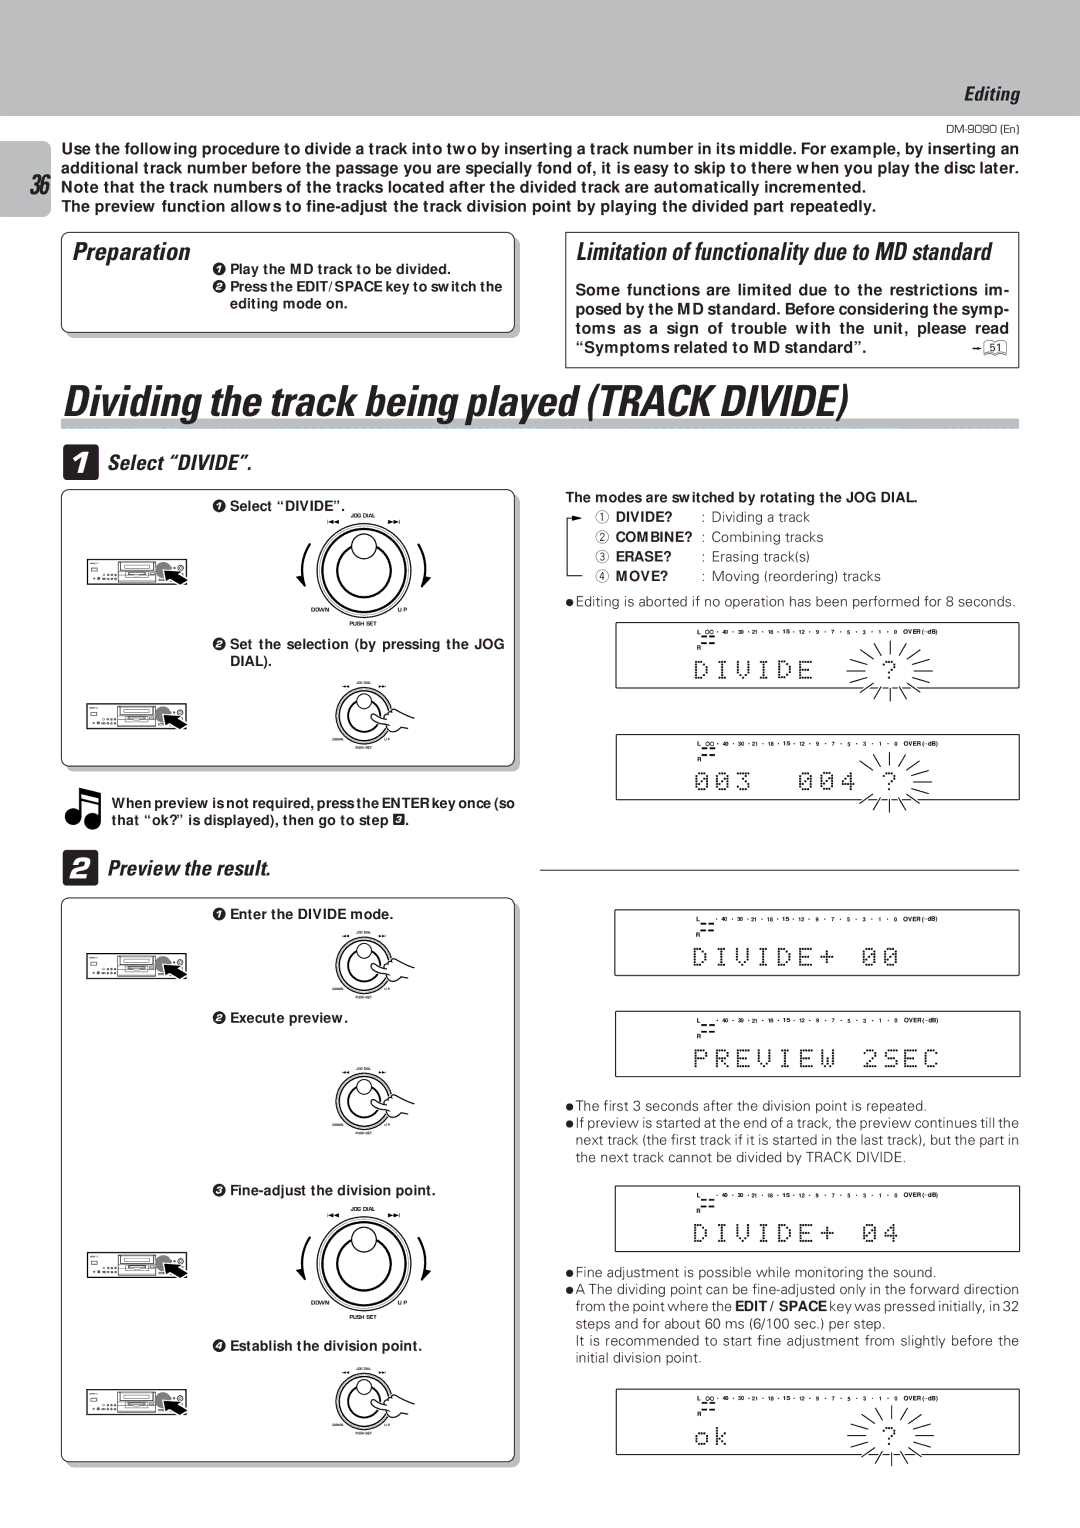
Image of track division


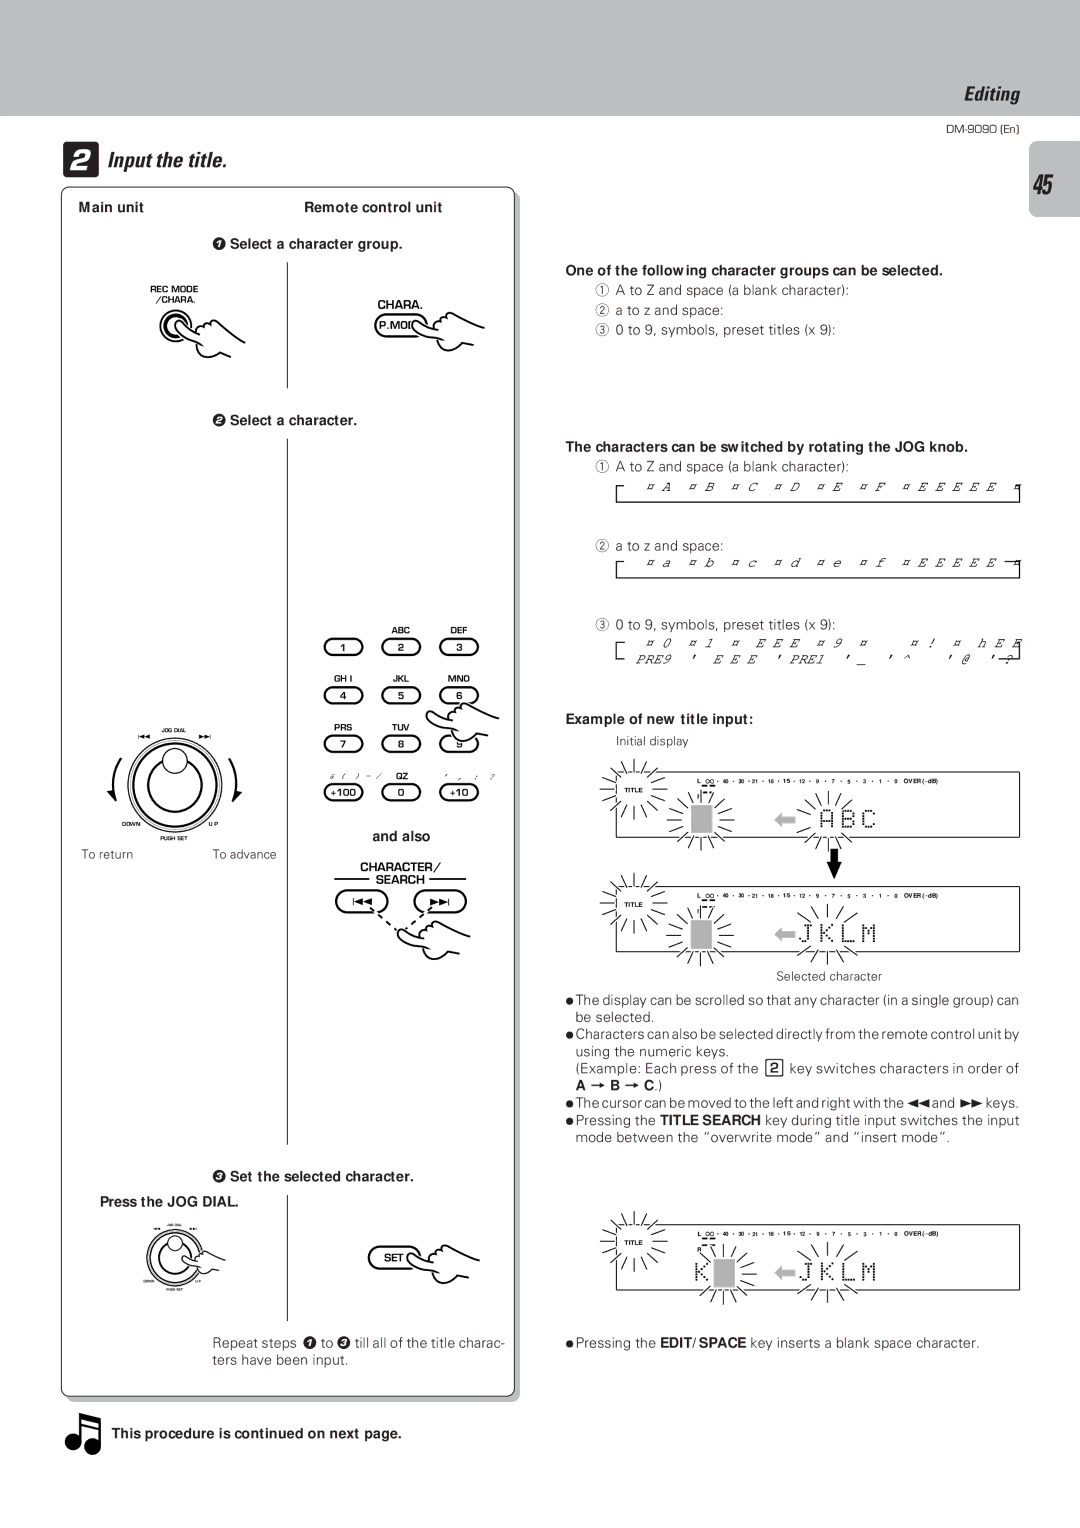
Image of preview


Should be approx.


2 sec. or longer.


The point where the EDIT / SPACE key is pressed

1

2


3


A


B

C

1

2

3

1

2

3

4

A

B

C

A


B

C


Approx. 2 sec.


Divided track (second half)


Fine adjustment range in 32 steps


Divided track (first half)
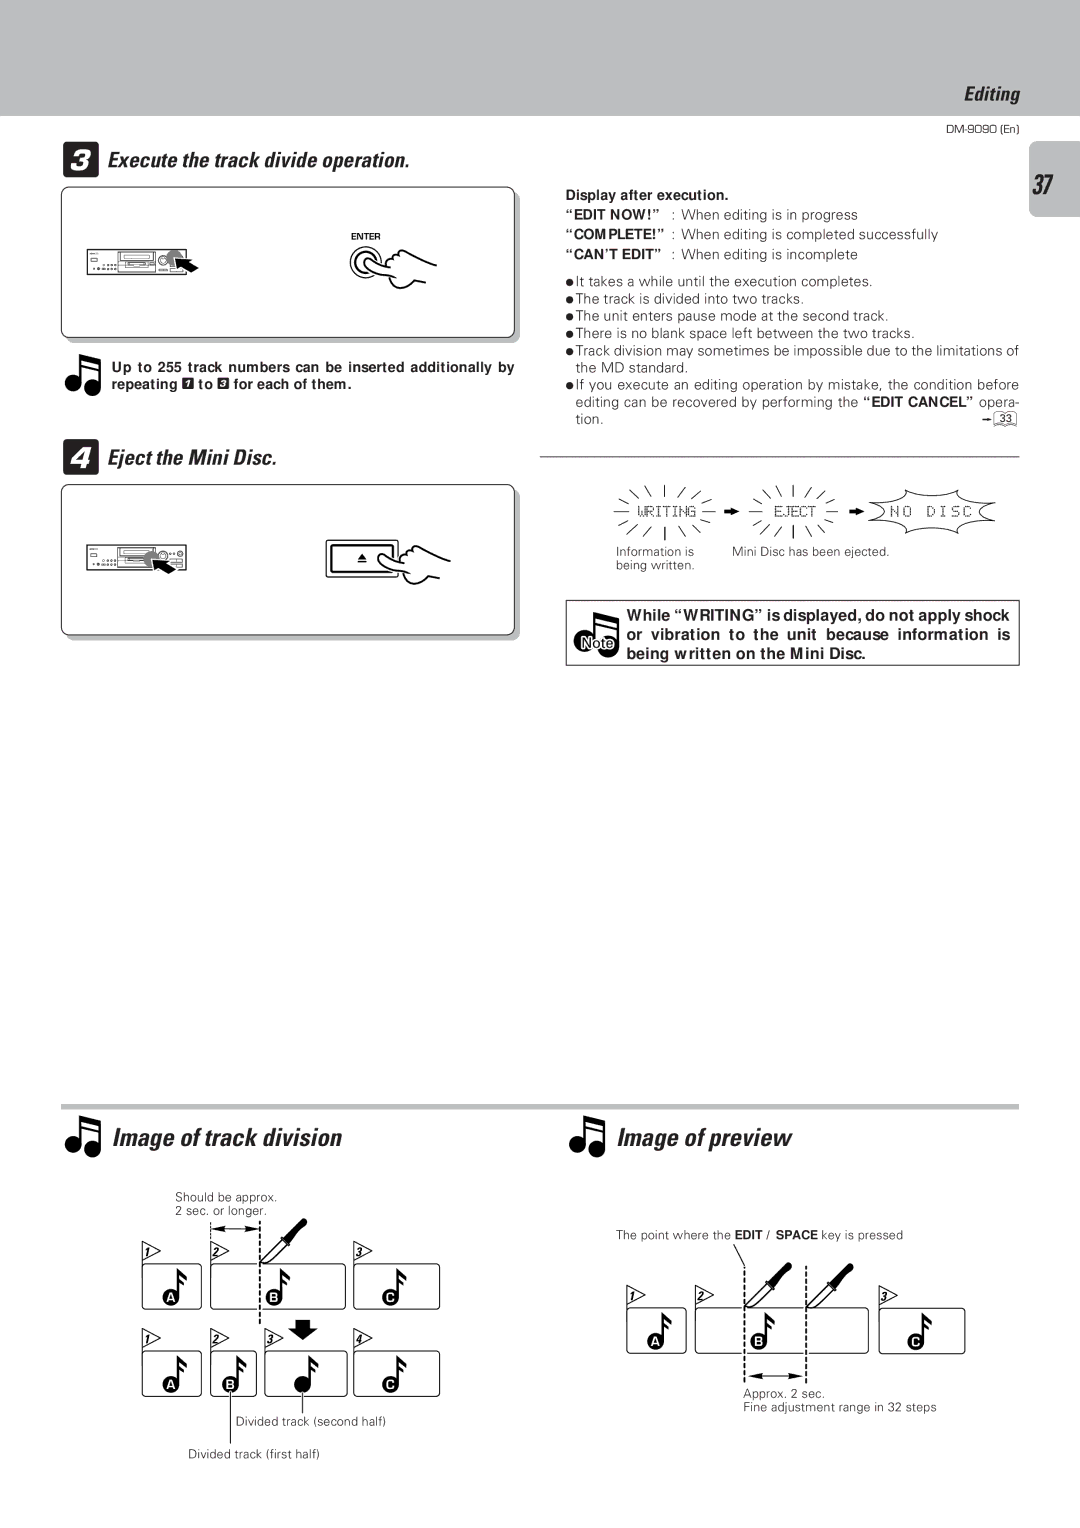
Image 37
Contents DM-9090 Safety precautions Introduction Before applying powerUnits are designed for operation as follows Factory fitted moulded mains plugContents Accessories Special featureImportant Safeguards Power OFF Installation position Safety Precautions Handling of Mini DiscInformation that you should know Dust countermeasureMemory backup Maintenance CleaningReference notes Beware of condensation Be especially careful in the following conditionsMD system Digital input / output jacks Optical System connectionsAbout the system control operations About the system control connectionsStandby mode Listening through headphonesNames and functions of parts Display / Main unitDescription of main unit keys Model RC-M0702 Infrared ray system Remote control unitLoading batteries Operation of remote control unitOperation 1Remove the cover.2Insert batteries.3Close the coverPlayback of Mini Disc Disc recorded in monaural modePlaying tracks in order from track No Before playing a MDPress the Title Search key PreparationSelect the desired title T L EEnter the track mode 1Enter the track modeRandom playback Select the desired track numberSearching in a track Skipping tracksTo pause playback To stop playbackProgramming Initiate the program modeProgramming tracks in a desired order Select track numbers in the order you want to play themChecking the order of tracks To add a track to the programTo clear tracks from the program Clearing tracks from the endTo repeat only the programmed tracks Repeated playbackTo stop repeated playback To repeat the entire discMonitor key Recording-related keys AUTO/MANUAL keySelect before starting recording Selecting the setting adjustment mode REC Mode keyREC LEVEL? Auto TIME?When Auto TIME? is displayed When D.REC LEVEL? is selectedWhen Auto LEVEL? is displayed When Fade TIME? is displayedRecording Analog input 1Adjust the settings if requiredAnalog recording Select Analog or MonoSelect Auto or Manual Adjust the recording level. Main unit onlyStart recording After recording, eject the Mini DiscDigital recording Recording Digital inputSelect one of Digital 1, 2 To fade in and fade out the musicUnlock Adjust the digital source recording levelTrack being played Track Erase Digital recording and Scms Synchro recording with CD playbackSelecting the editing function type EditingReordering tracks by moving them Erasing desired tracks Quick EraseSelect Move Moving the track being played Track MoveV E Select the move destinationImage of track moving To cancel the editing results Edit CancelExecute the track reordering operation Eject the Mini Disc1Select Q.MOVE Moving several tracks at a time Quick Move2Select the track numbers to be moved End the selection of the track numbers to be movedP Ç? / 0 0 Image of track insertion2 / Ç? 8 / Ç? ESelect Divide Dividing the track being played Track Divide2Preview the result V I D E +Execute the track divide operation Image of previewImage of track division 2Select the track to be combined 5 +5 + Combined tracks are decreased automaticallyExecute the track combine operation Image of track combinationSelect Erase Erasing the track being played Track EraseA S E Confirm that the track has been erasedImage of track erasure R a S E 1To erase all MD tracks2To erase desired tracks 5 ? a B CS C Error When Disc Error is displayedImage of track deleting Quick Erase Erasing desired tracksEditing titles About preset titlesTotal number of title characters Characters usable in title editingL M Input the titleL M N E O O D a B C 3To change or erase a titleN W O O D Scrolling the display Title editing function keysExecute title change or deletion S CCopying the CD text CD text editing1Transmit the CD text into the MD recorder Single C D t e x tThis key allows to switch the mode of time display Changing the displayed contentsTime Display key Fade keyTimer playback, timer recording Timer operationsSymptoms related to MD standard Operation to resetSymptom Cause Case of difficultyDisplayed Message Meaning Action Symptom Cause Remedy Other symptomsSpecifications Memo For your records