System Menu
The SYSTEM menu is where most of the advanced settings for the DVR hide out. Most of the time, there isn’t much you’ll need to change here. However, a few settings might need tweaking from time to time, so here’s a quick rundown of what’s what.
Auto Maintain
To maintain the operational integrity of the DVR, it is suggested that it be rebooted periodically. In much the same way that a computer can become unstable if left on for an extremely long time, the DVR can become unstable. It is strongly suggested that the DVR be rebooted at least once per month. However, as this can be a hassle (particularly if the DVR is stashed away somewhere inconvenient) you can set the DVR up to reboot itself.
To configure the AUTO REBOOT feature:
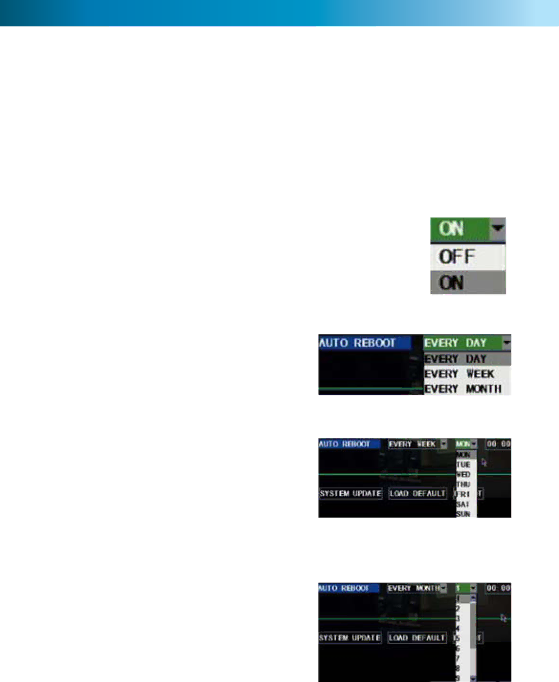
•Enter the SYSTEM MAINTAIN submenu, located in the SYSTEM menu.
•Using the arrow buttons or the mouse highlight the AUTO MAINTAIN
•Change the value to ON, and confirm by left clicking or pressing SELECT.
You will see several new fields pop up, being the AUTO REBOOT frequency settings. The first thing you’ll need to choose is how often you’d like the DVR to reboot itself. You can choose between EVERY DAY, EVERY WEEK and EVERY MONTH.
To select the AUTO REBOOT frequency:
•Using the mouse or the arrow buttons, highlight the AUTO REBOOT frequency
•Choose the frequency that best suits your needs. We suggest weekly or monthly rebooting as being sufficient: however, if your DVR’s performance is unstable, try increasing the reboot frequency.
To select the AUTO REBOOT time:
•Depending on your AUTO REBOOT frequency setting, you will be presented with different options for specifically timing when your DVR reboots.
•In the case of daily rebooting, enter the time of day you’d like the DVR to reboot in the numerical field.
•If you choose weekly rebooting, you’ll need to select the day of the week (from MON through SUN) and the time that you’d like the DVR to reboot.
•If you chose monthly rebooting, you can choose the date of the month that you’d like the DVR to reboot, and then the time on that date.
•Note that, if you chose monthly rebooting and you enter the 31st as the date you’d like the DVR to reboot, there are several months of the year that don’t have a 31st day. It is suggested that this date be avoided, for that reason.
When the DVR is rebooted, no settings will be lost, and it will automatically resume its recording mode and schedule without alteration. The reboot primarily refreshes the software and gives the hardware a moment of ‘time out’, aiding the ongoing smooth functionality of the DVR. It will not lose your settings.
22