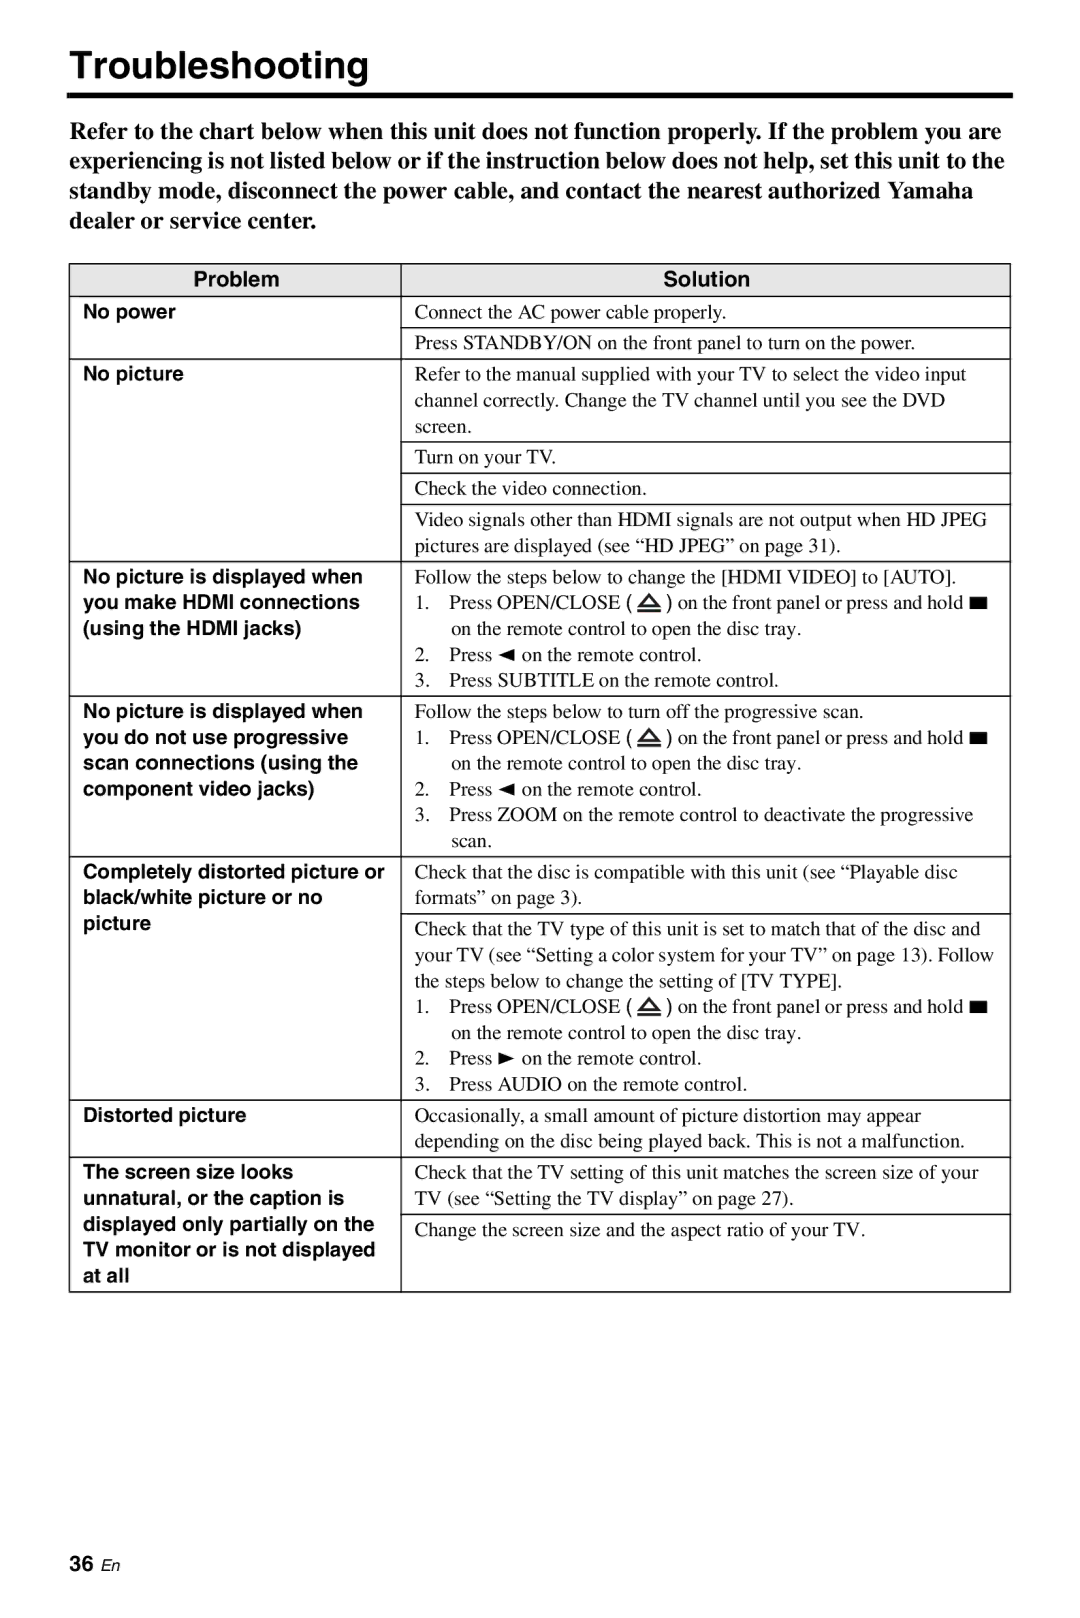
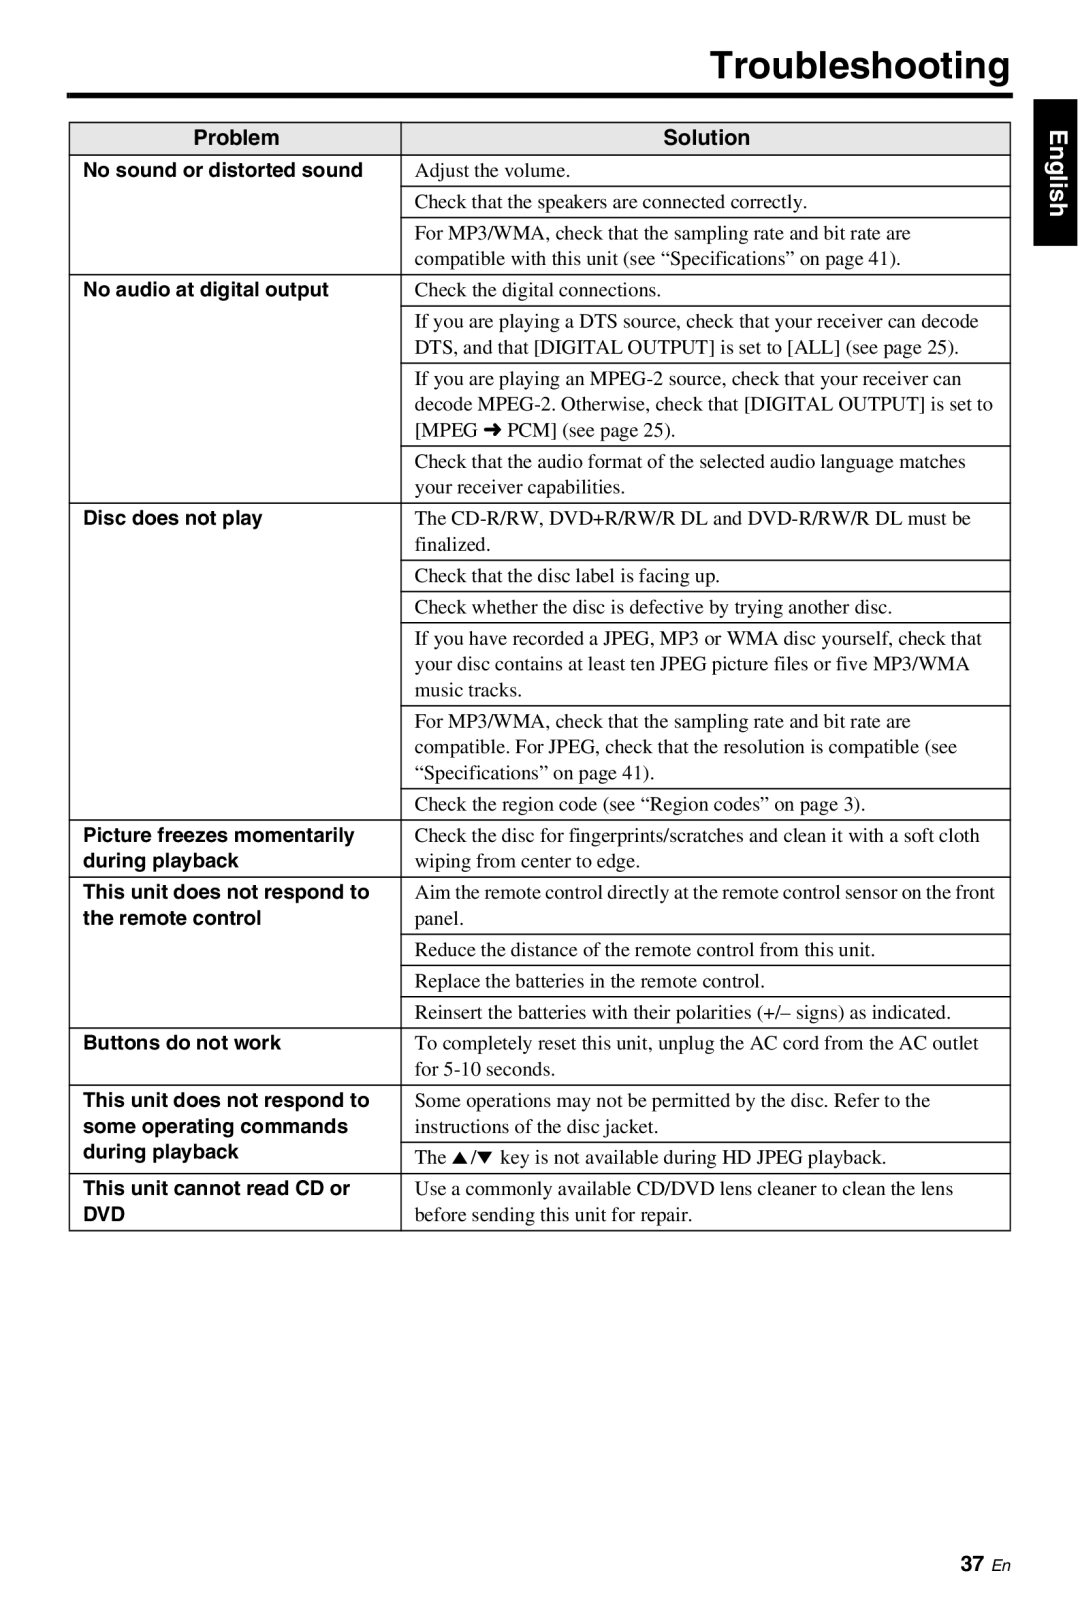
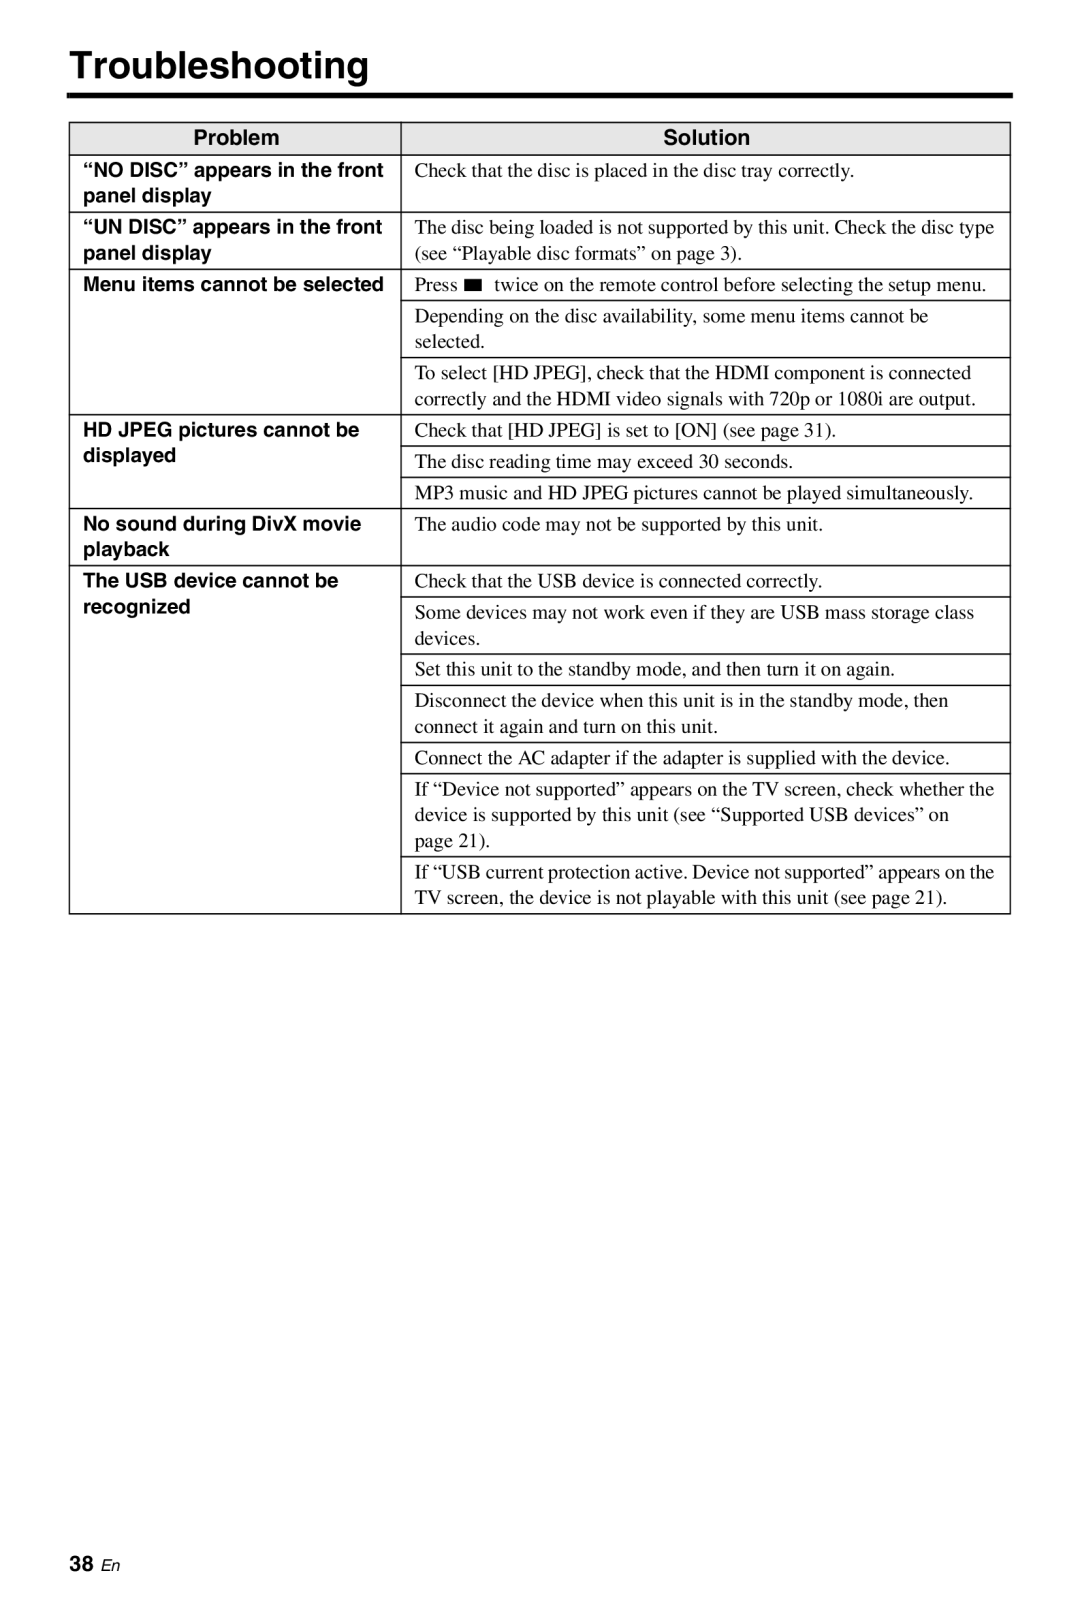
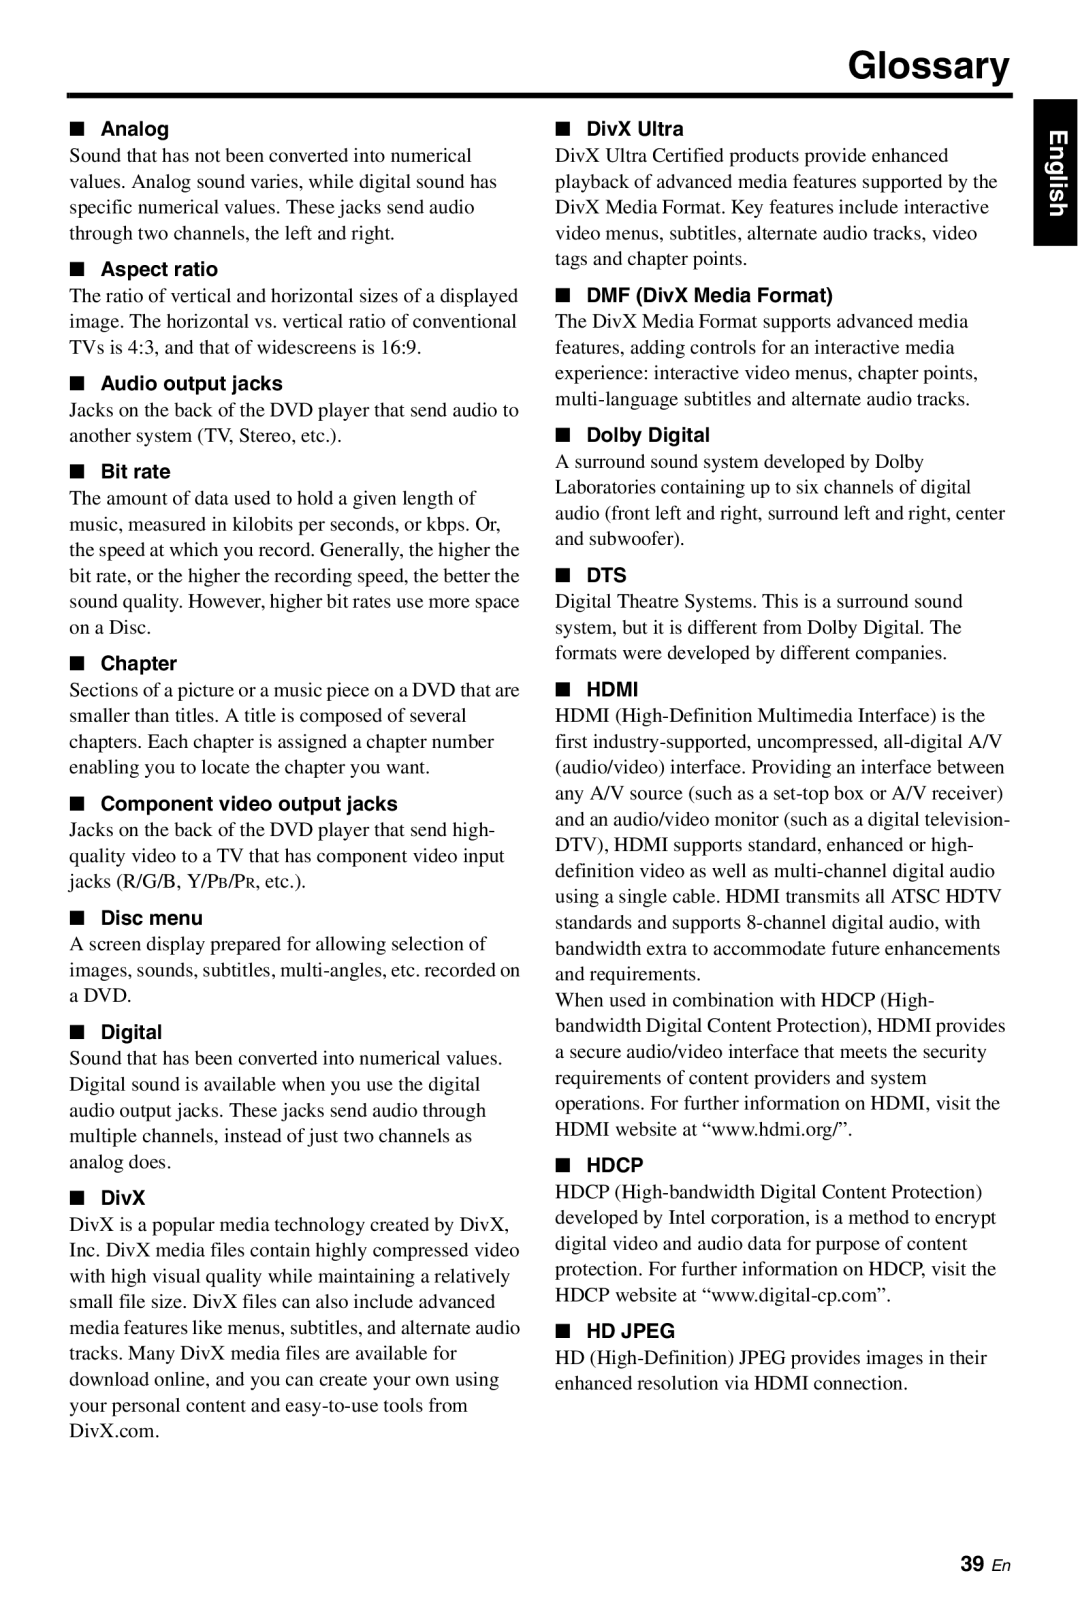
Yamaha DVD-S661 Turning the progressive scan function on/off, When the aspect ratio of your TV is

Page 32

Setup Menu

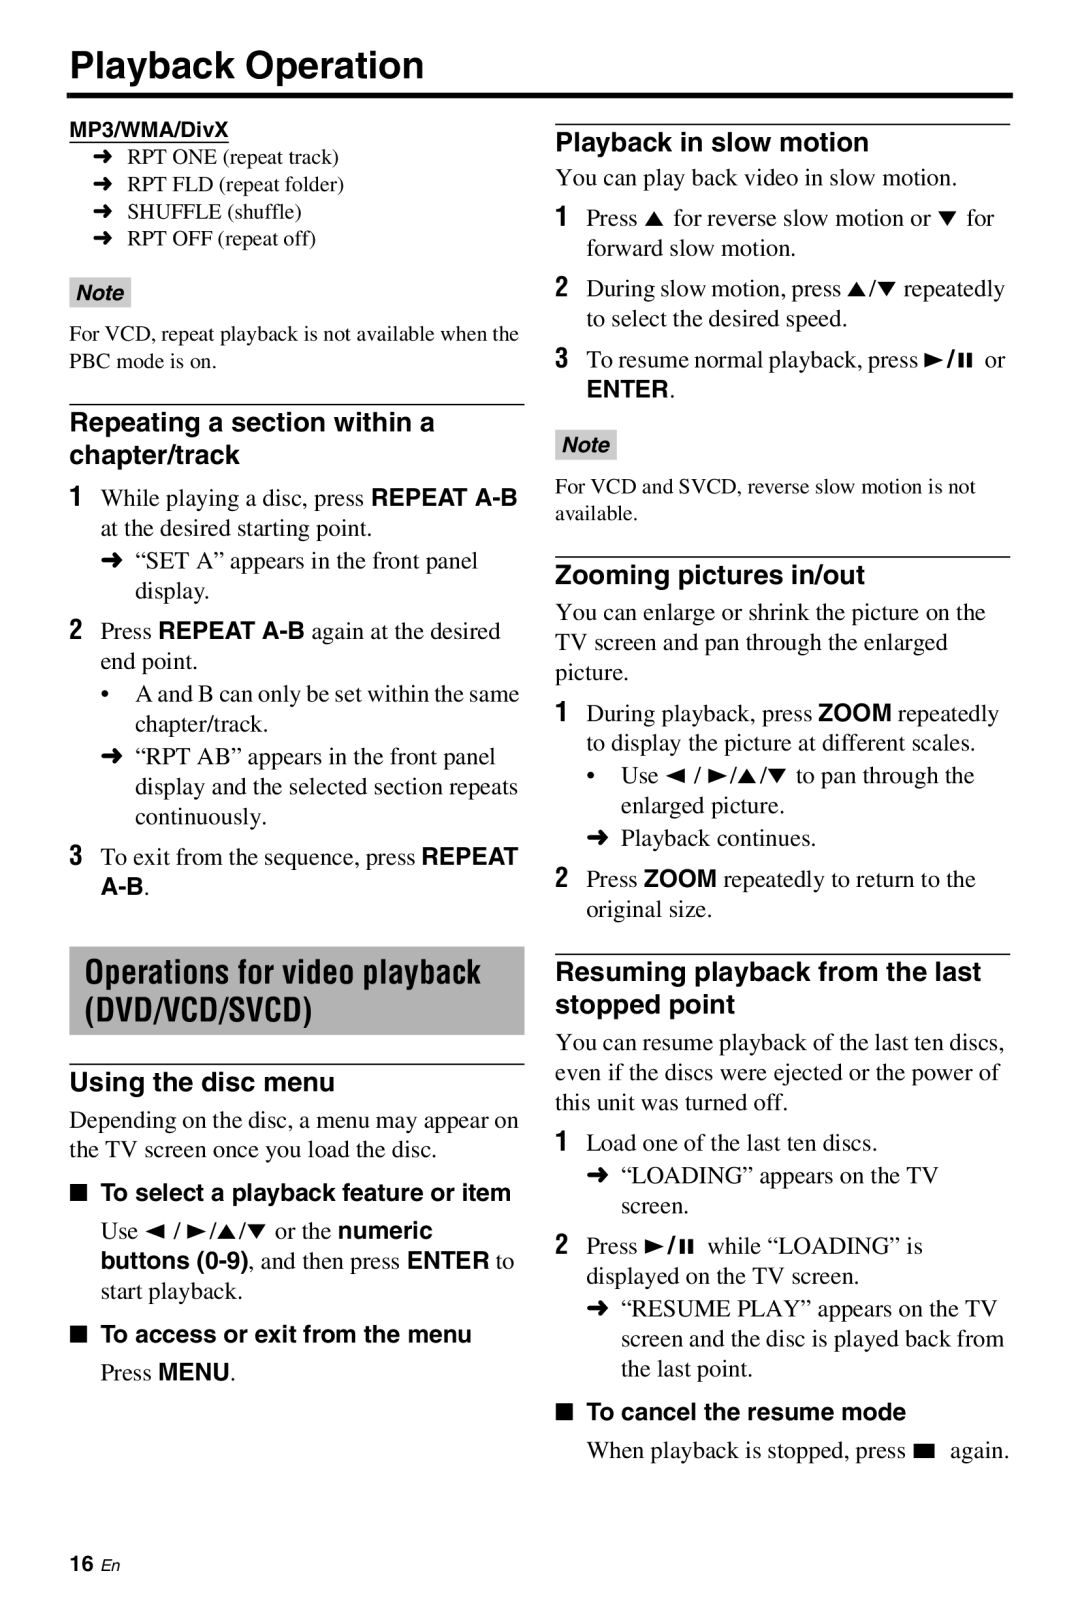
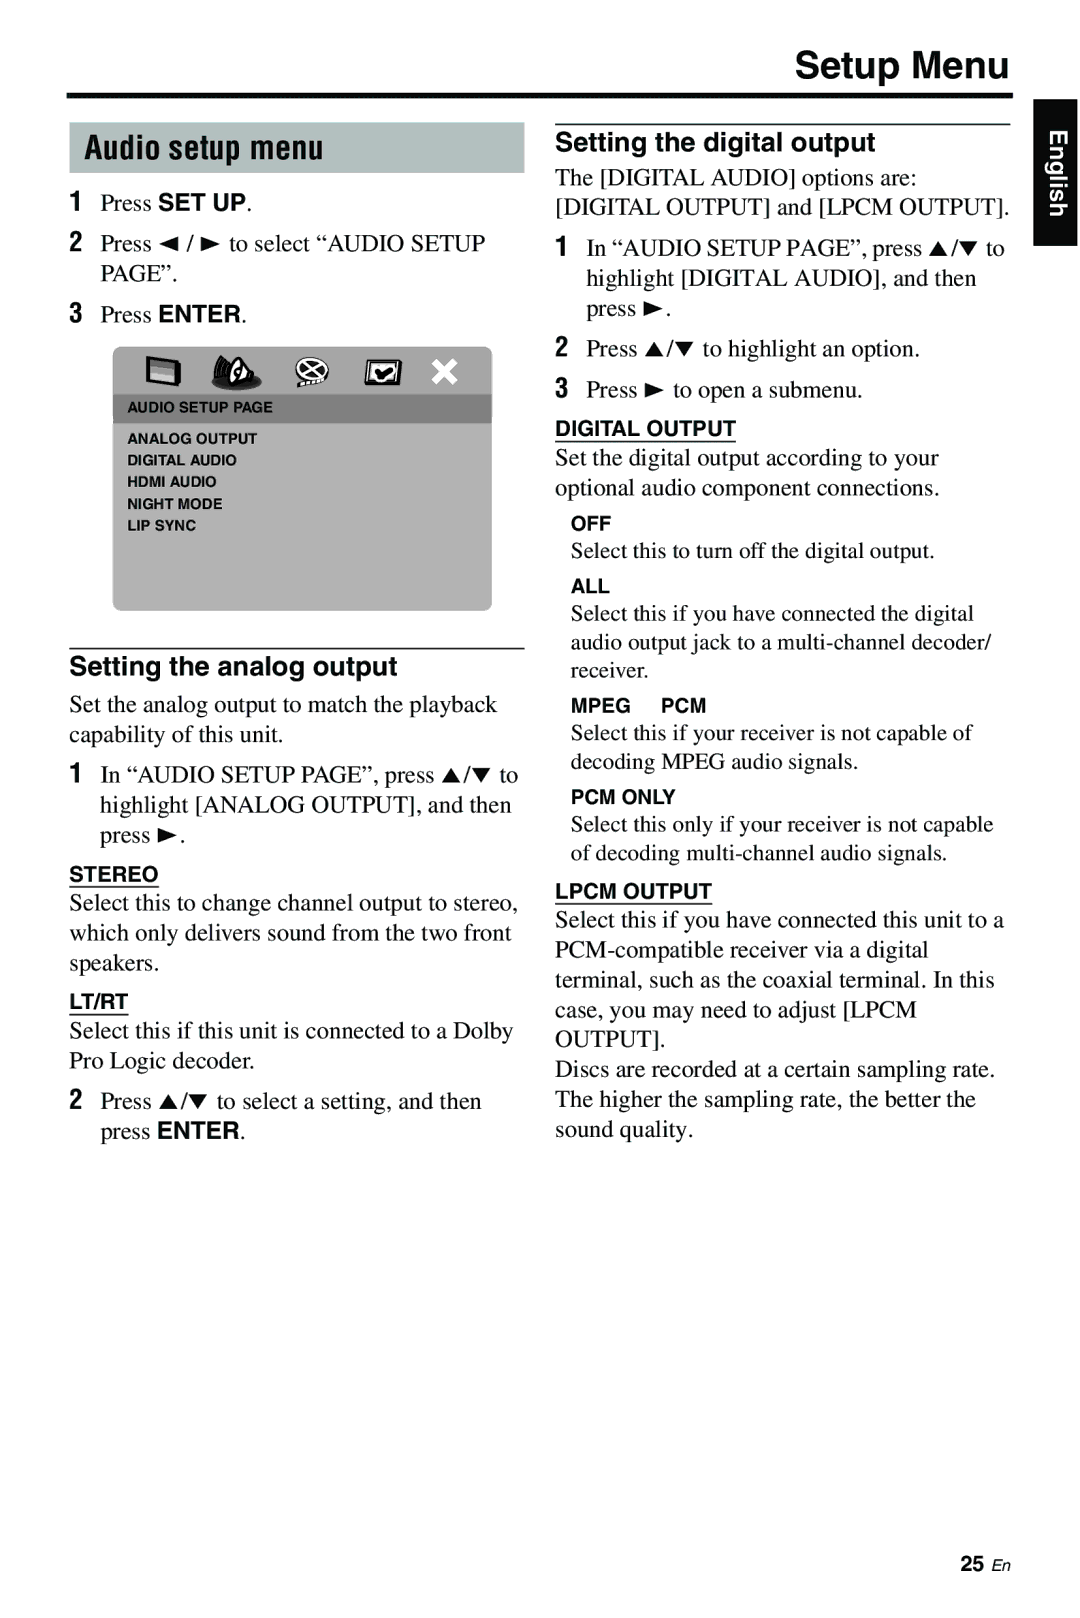
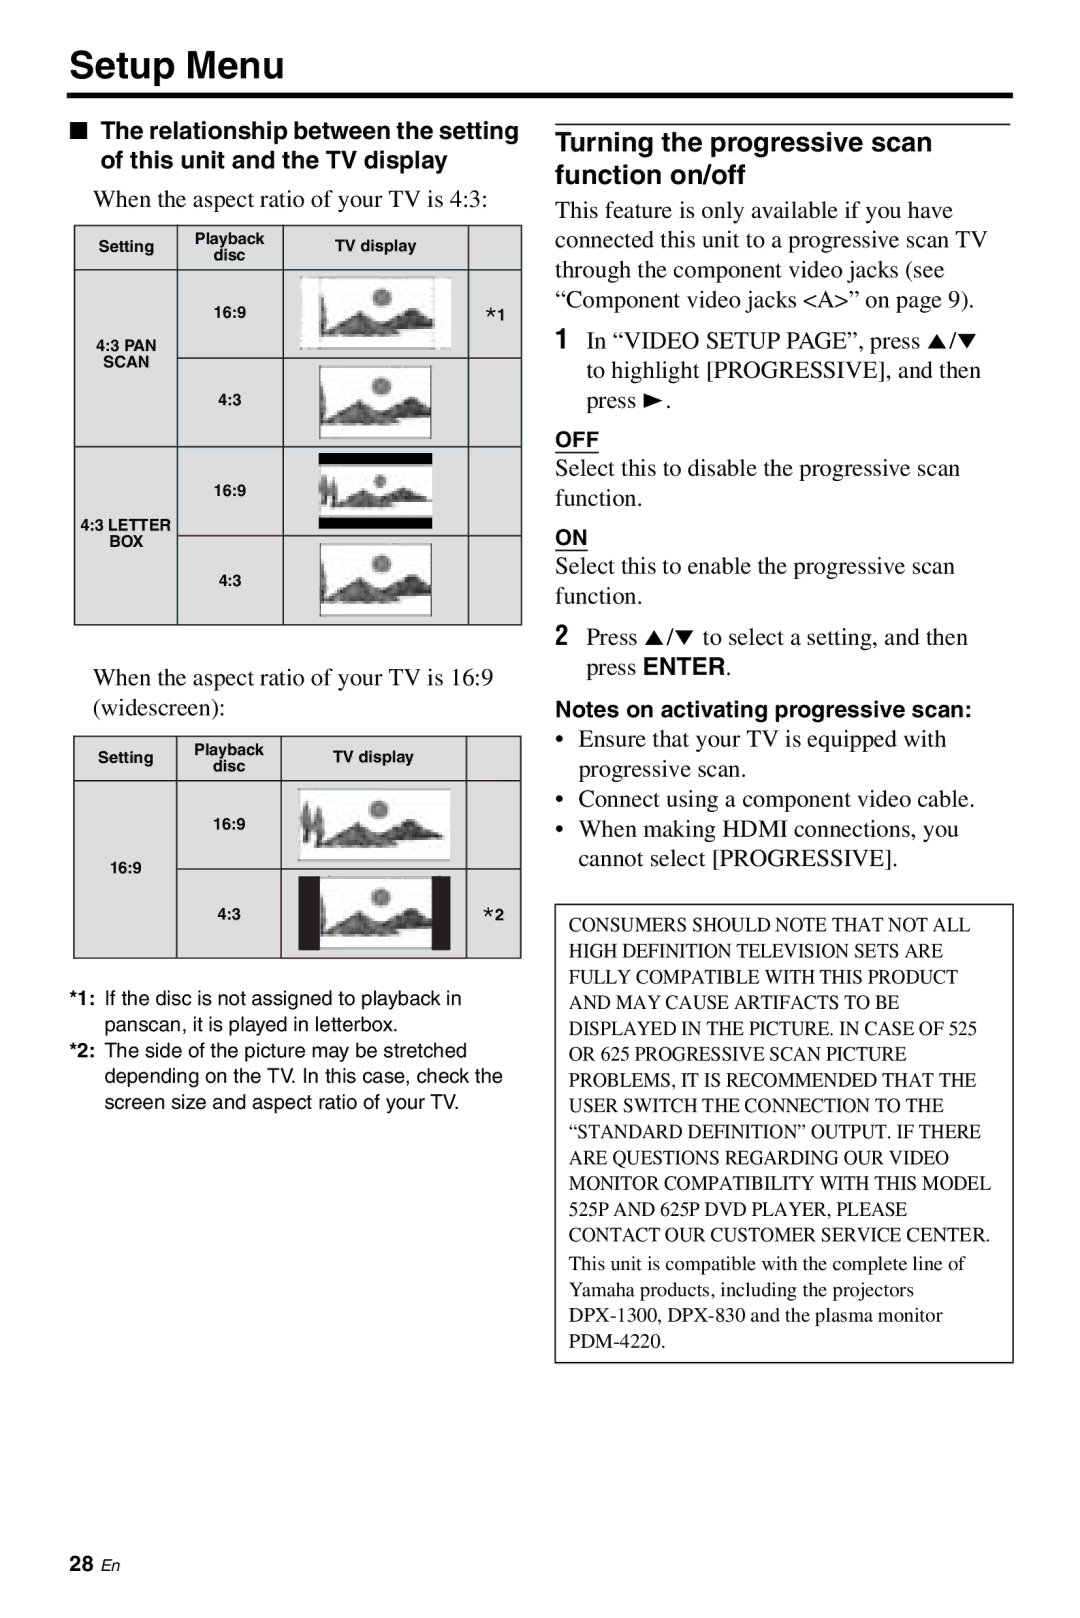
The relationship between the setting of this unit and the TV display

When the aspect ratio of your TV is 4:3:

Setting

Playback


TV display

disc


4:3 PAN

16:9


*1


SCAN


4:3


16:9

4:3 LETTER

BOX

4:3

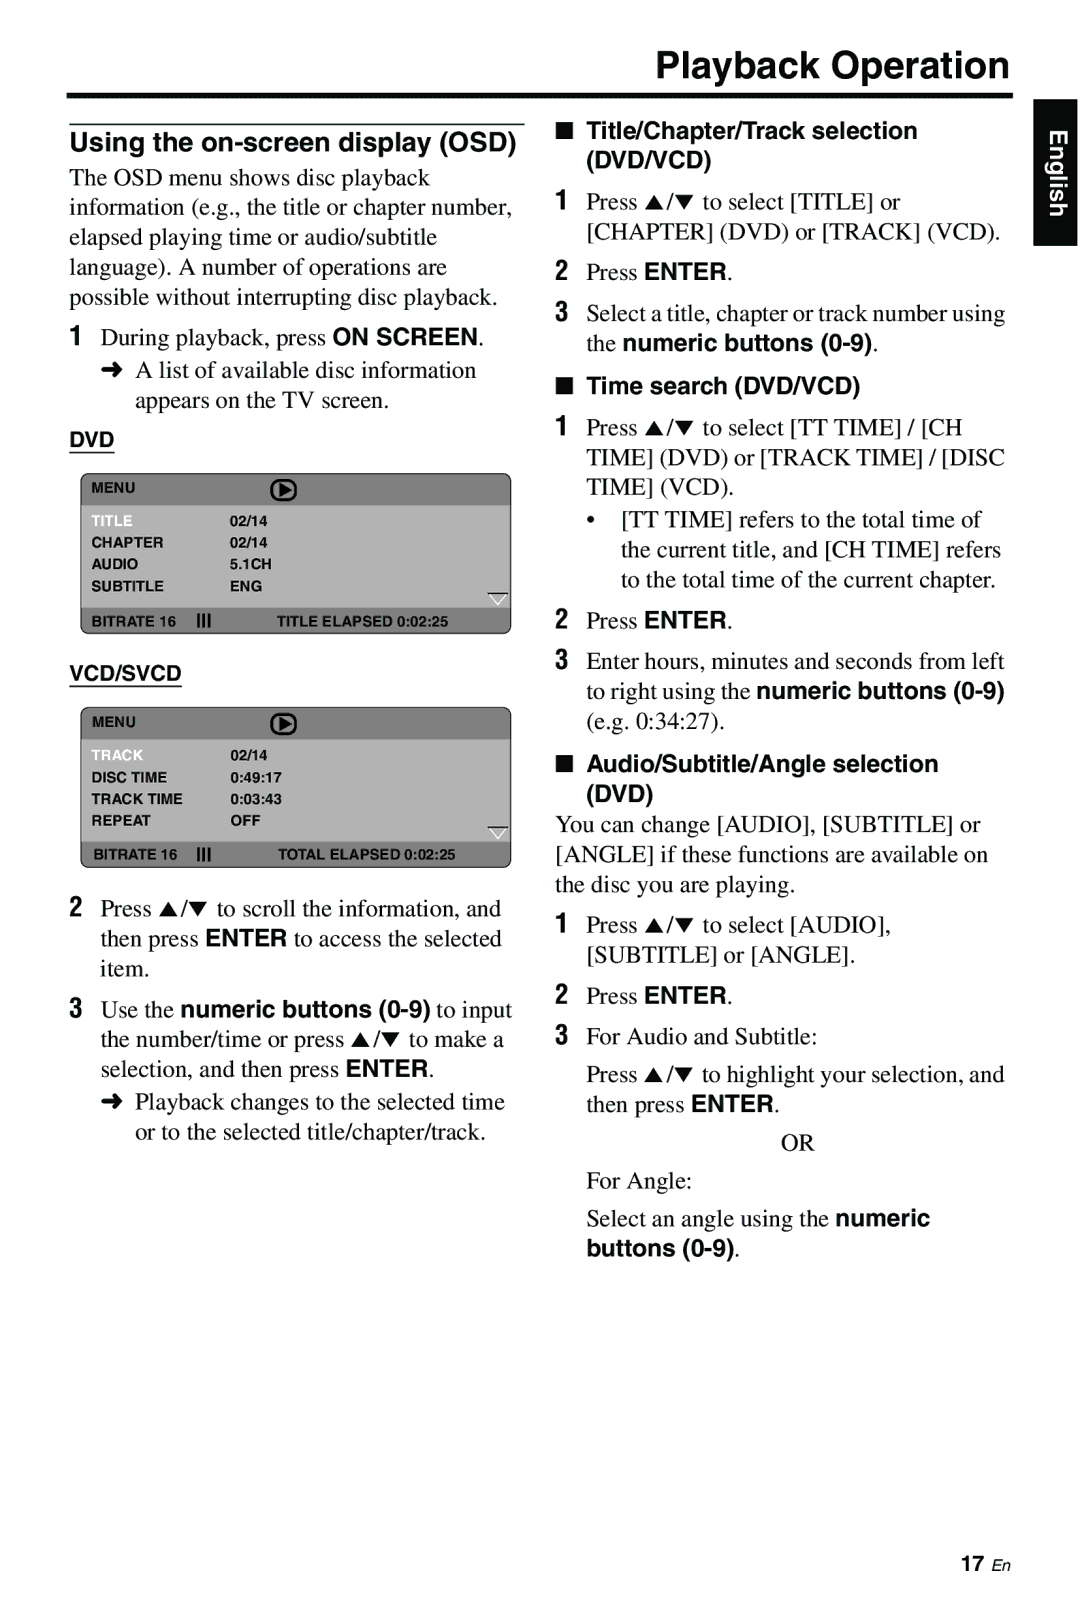
When the aspect ratio of your TV is 16:9 (widescreen):

Setting

Playback


TV display


disc


16:9


16:9


4:3


*2


*1: If the disc is not assigned to playback in panscan, it is played in letterbox.

*2: The side of the picture may be stretched depending on the TV. In this case, check the screen size and aspect ratio of your TV.

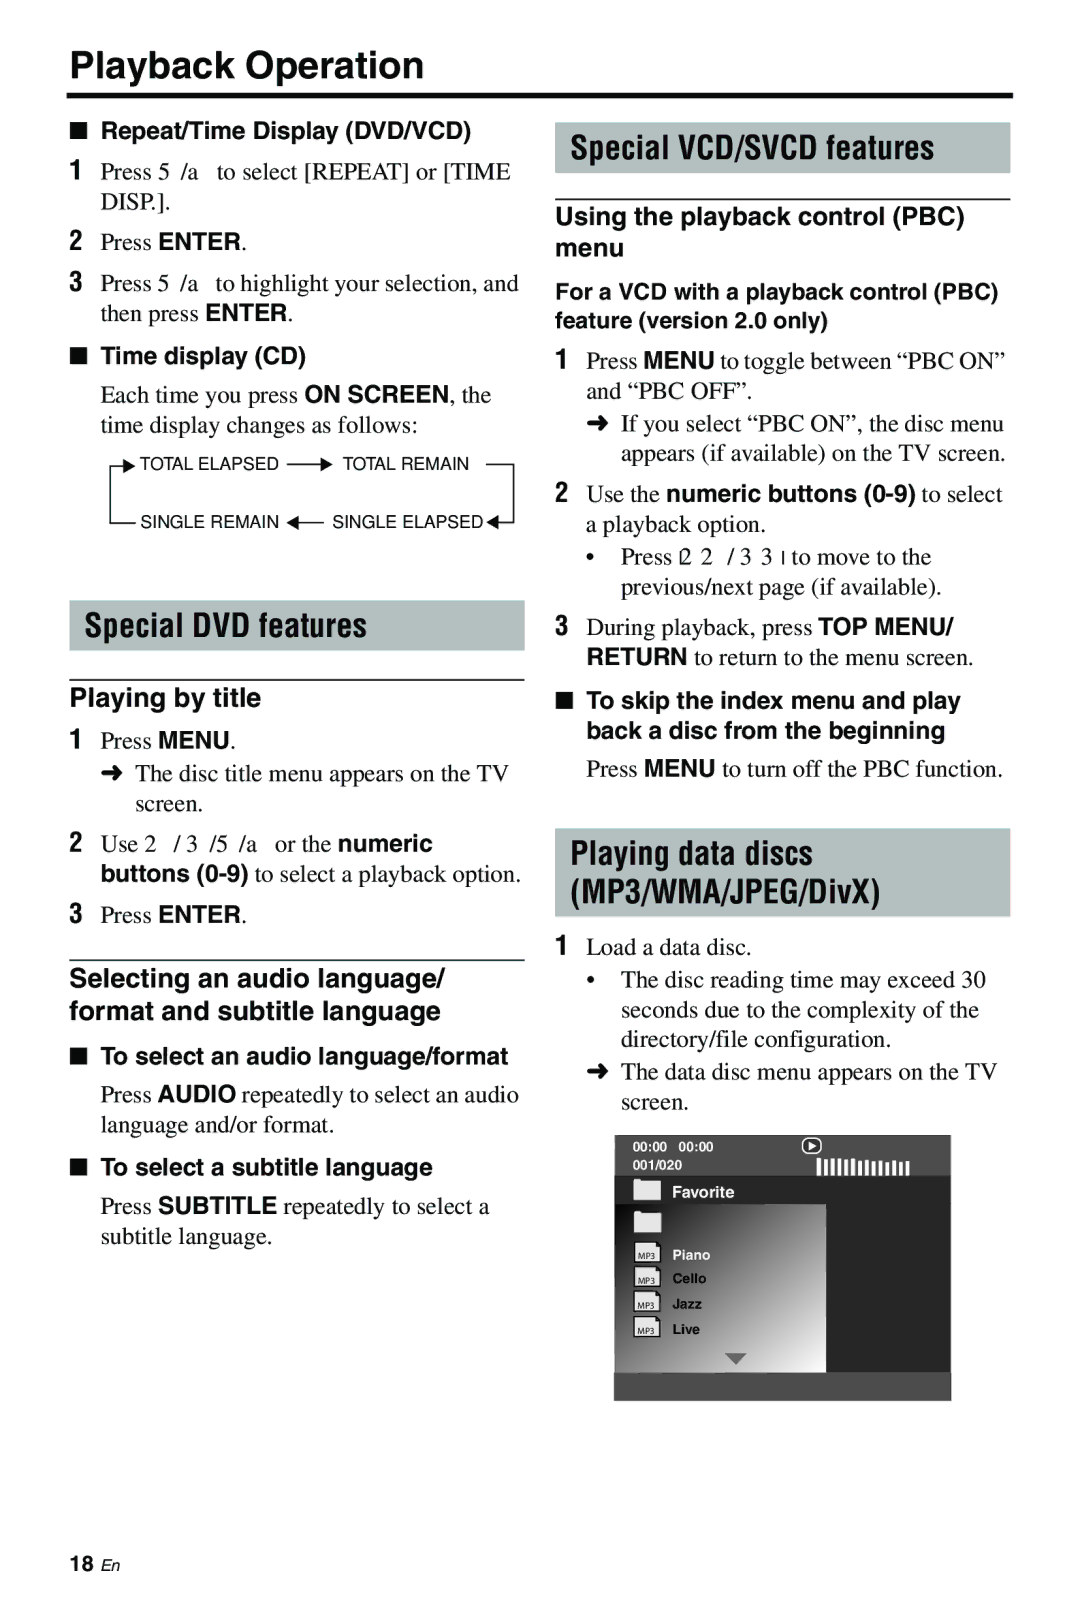
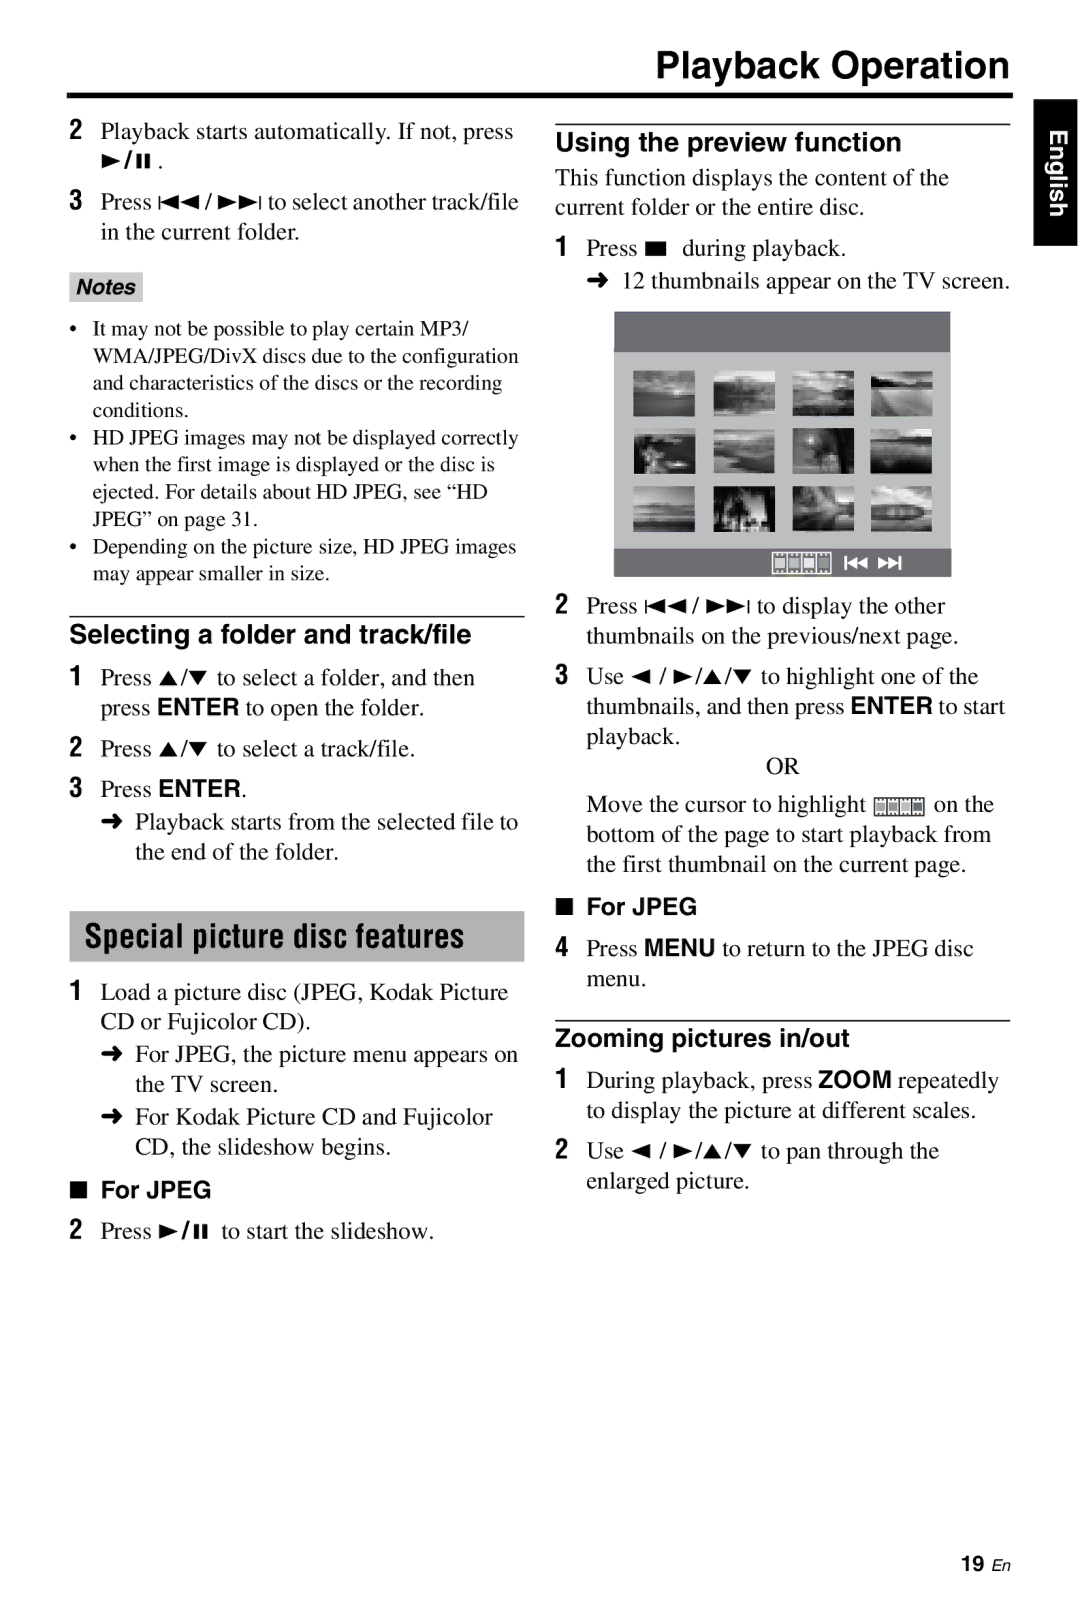
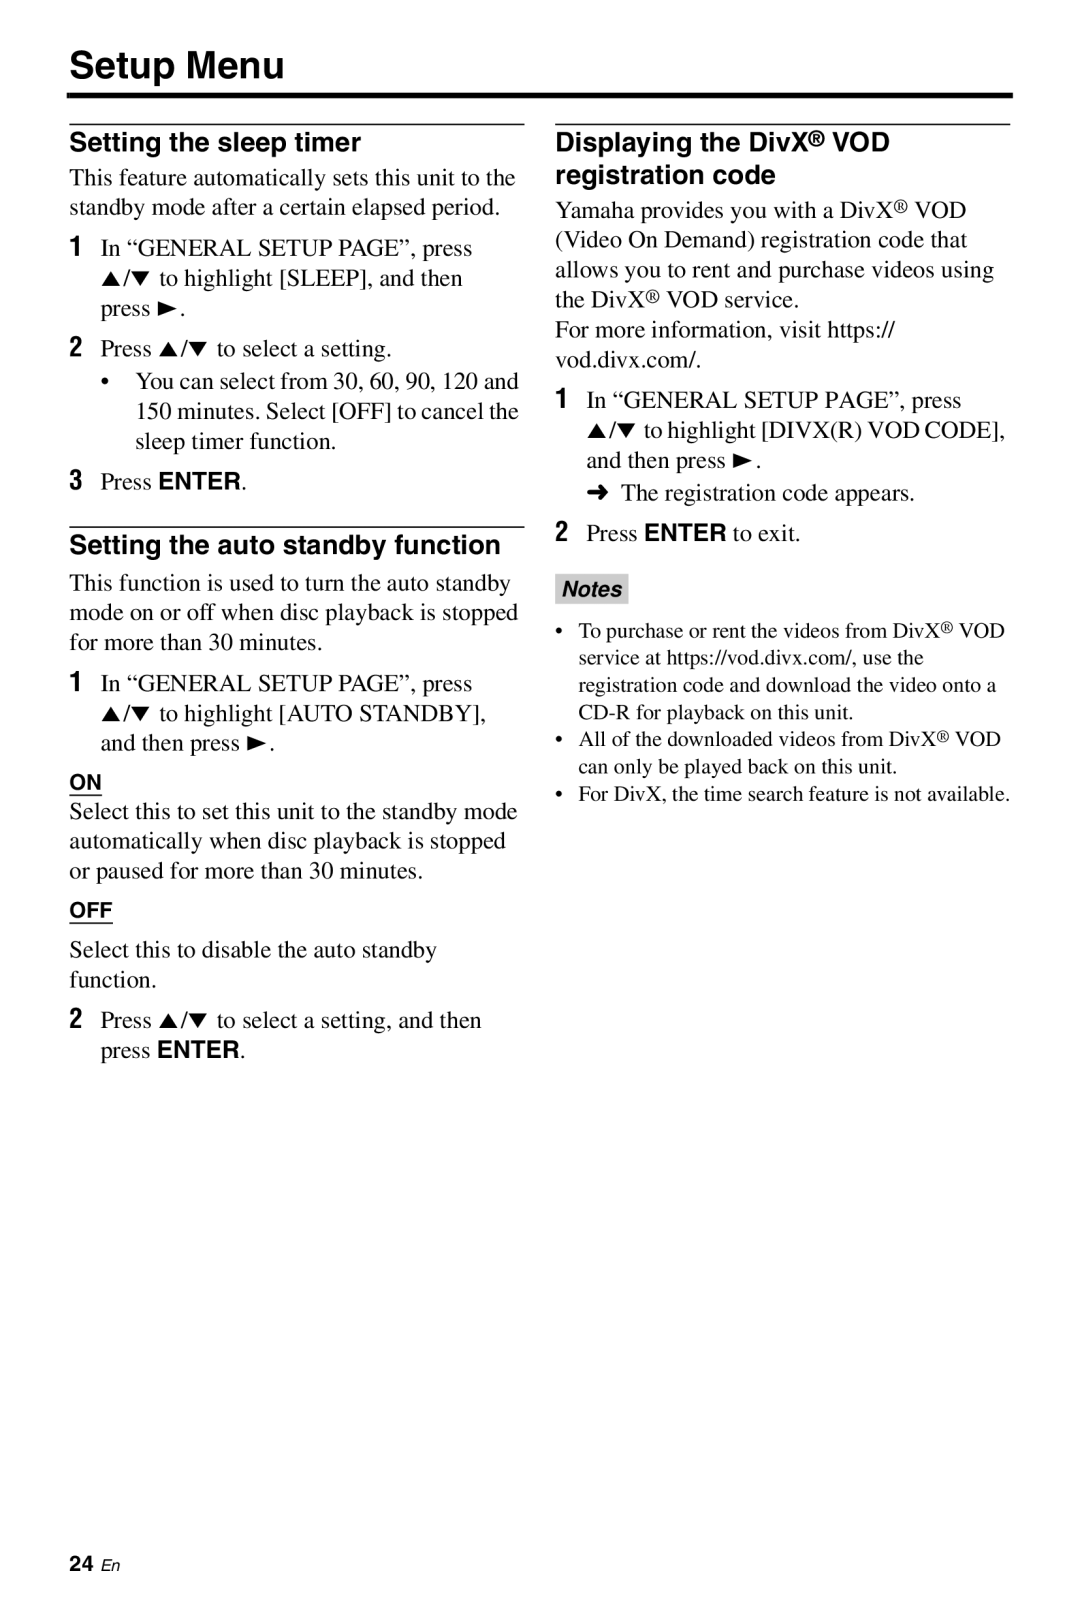
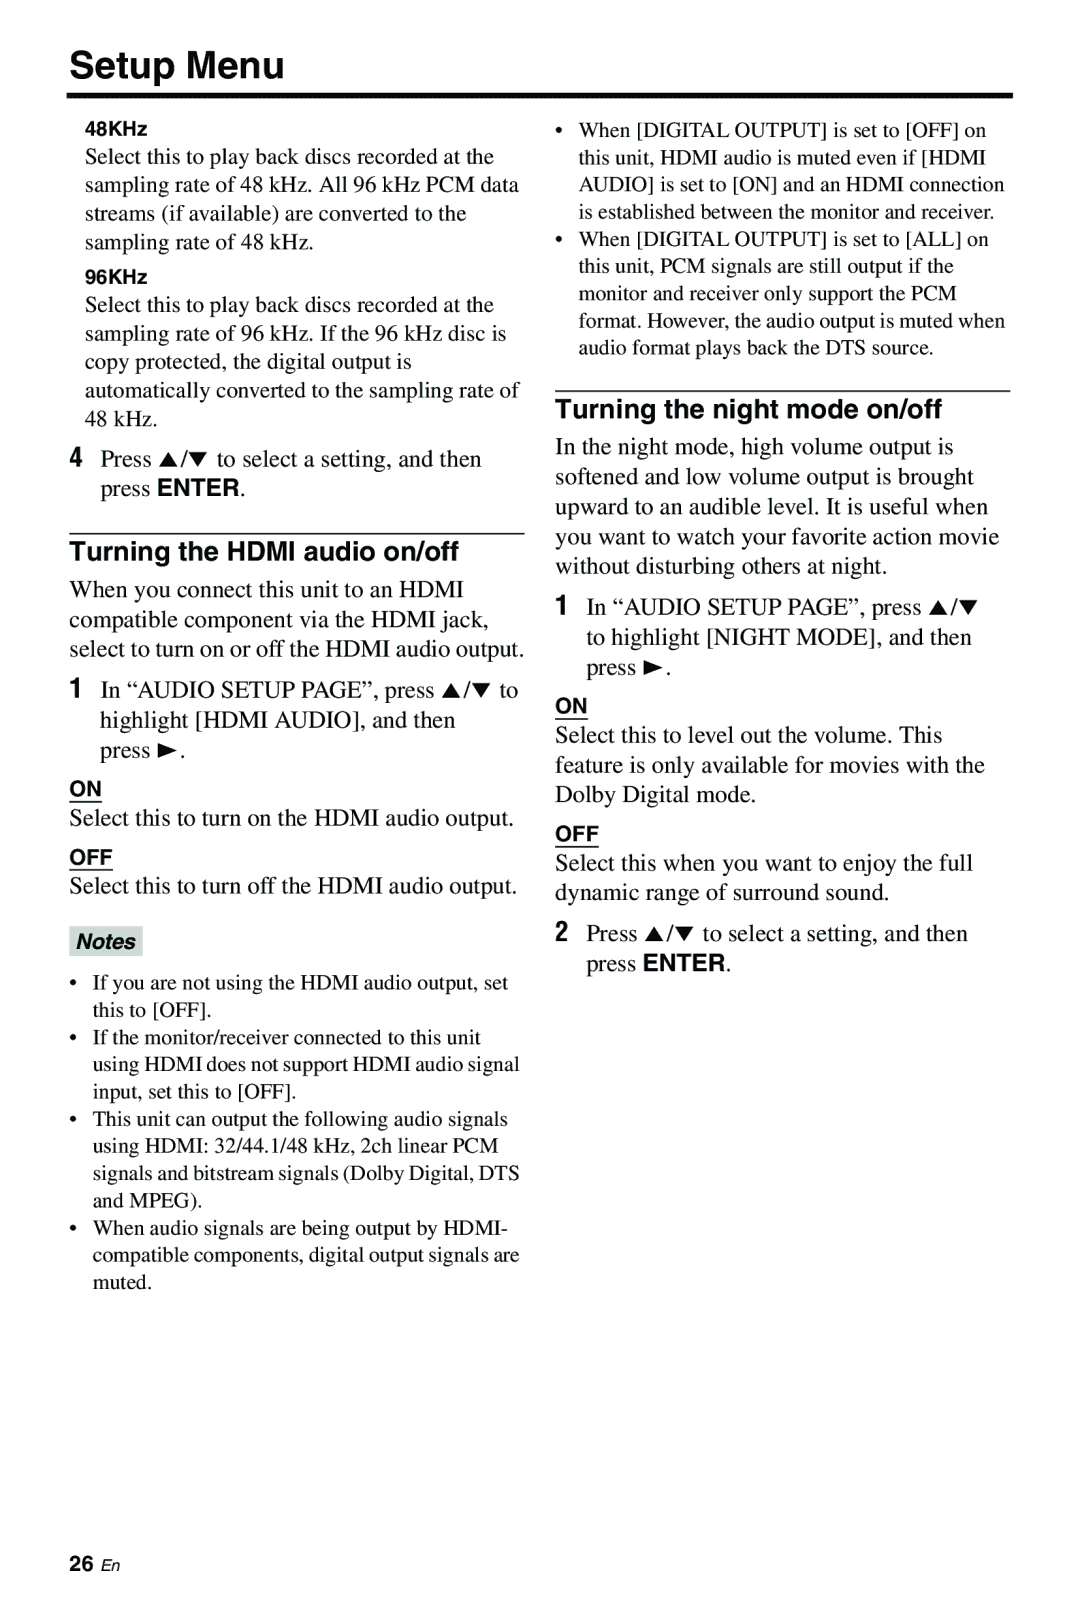
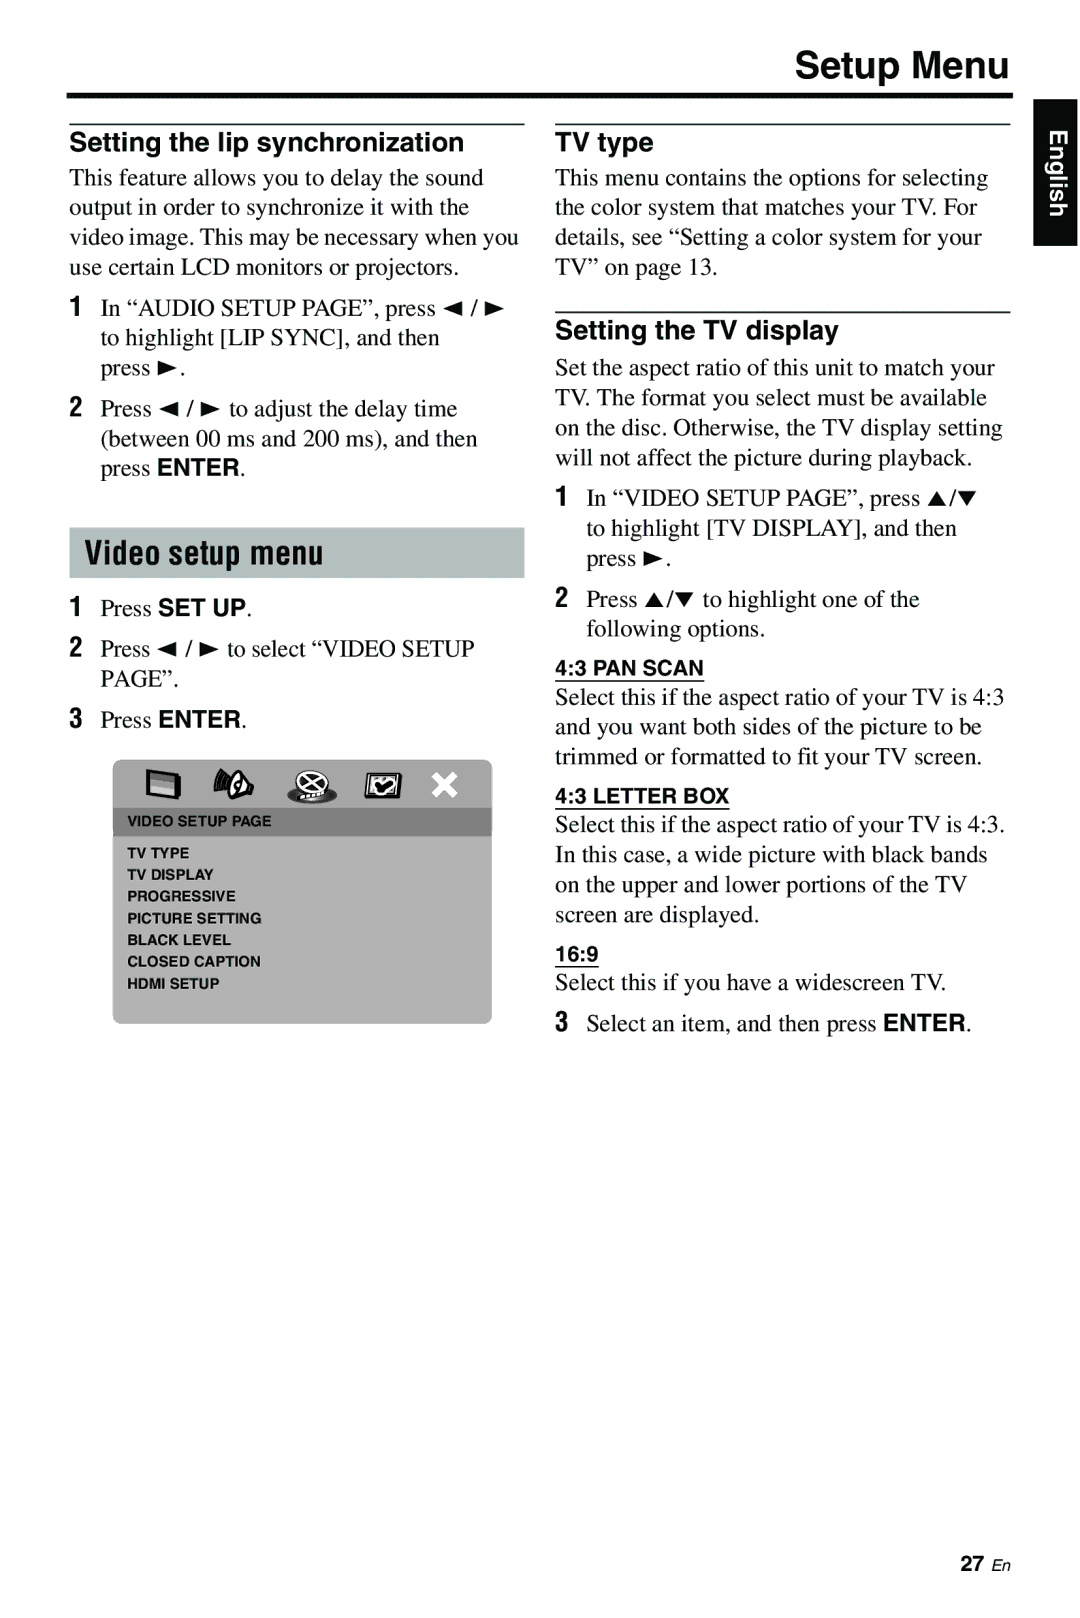
Turning the progressive scan function on/off

This feature is only available if you have connected this unit to a progressive scan TV through the component video jacks (see “Component video jacks <A>” on page 9).

1In “VIDEO SETUP PAGE”, press 5/a to highlight [PROGRESSIVE], and then press 3.

OFF

Select this to disable the progressive scan function.

ON

Select this to enable the progressive scan function.

2Press 5/a to select a setting, and then press ENTER.

Notes on activating progressive scan:

Ensure that your TV is equipped with progressive scan.

Connect using a component video cable.

When making HDMI connections, you cannot select [PROGRESSIVE].

CONSUMERS SHOULD NOTE THAT NOT ALL HIGH DEFINITION TELEVISION SETS ARE FULLY COMPATIBLE WITH THIS PRODUCT AND MAY CAUSE ARTIFACTS TO BE DISPLAYED IN THE PICTURE. IN CASE OF 525 OR 625 PROGRESSIVE SCAN PICTURE PROBLEMS, IT IS RECOMMENDED THAT THE USER SWITCH THE CONNECTION TO THE “STANDARD DEFINITION” OUTPUT. IF THERE ARE QUESTIONS REGARDING OUR VIDEO MONITOR COMPATIBILITY WITH THIS MODEL 525P AND 625P DVD PLAYER, PLEASE CONTACT OUR CUSTOMER SERVICE CENTER. This unit is compatible with the complete line of Yamaha products, including the projectors DPX-1300, DPX-830 and the plasma monitor PDM-4220.

28En

Image 32
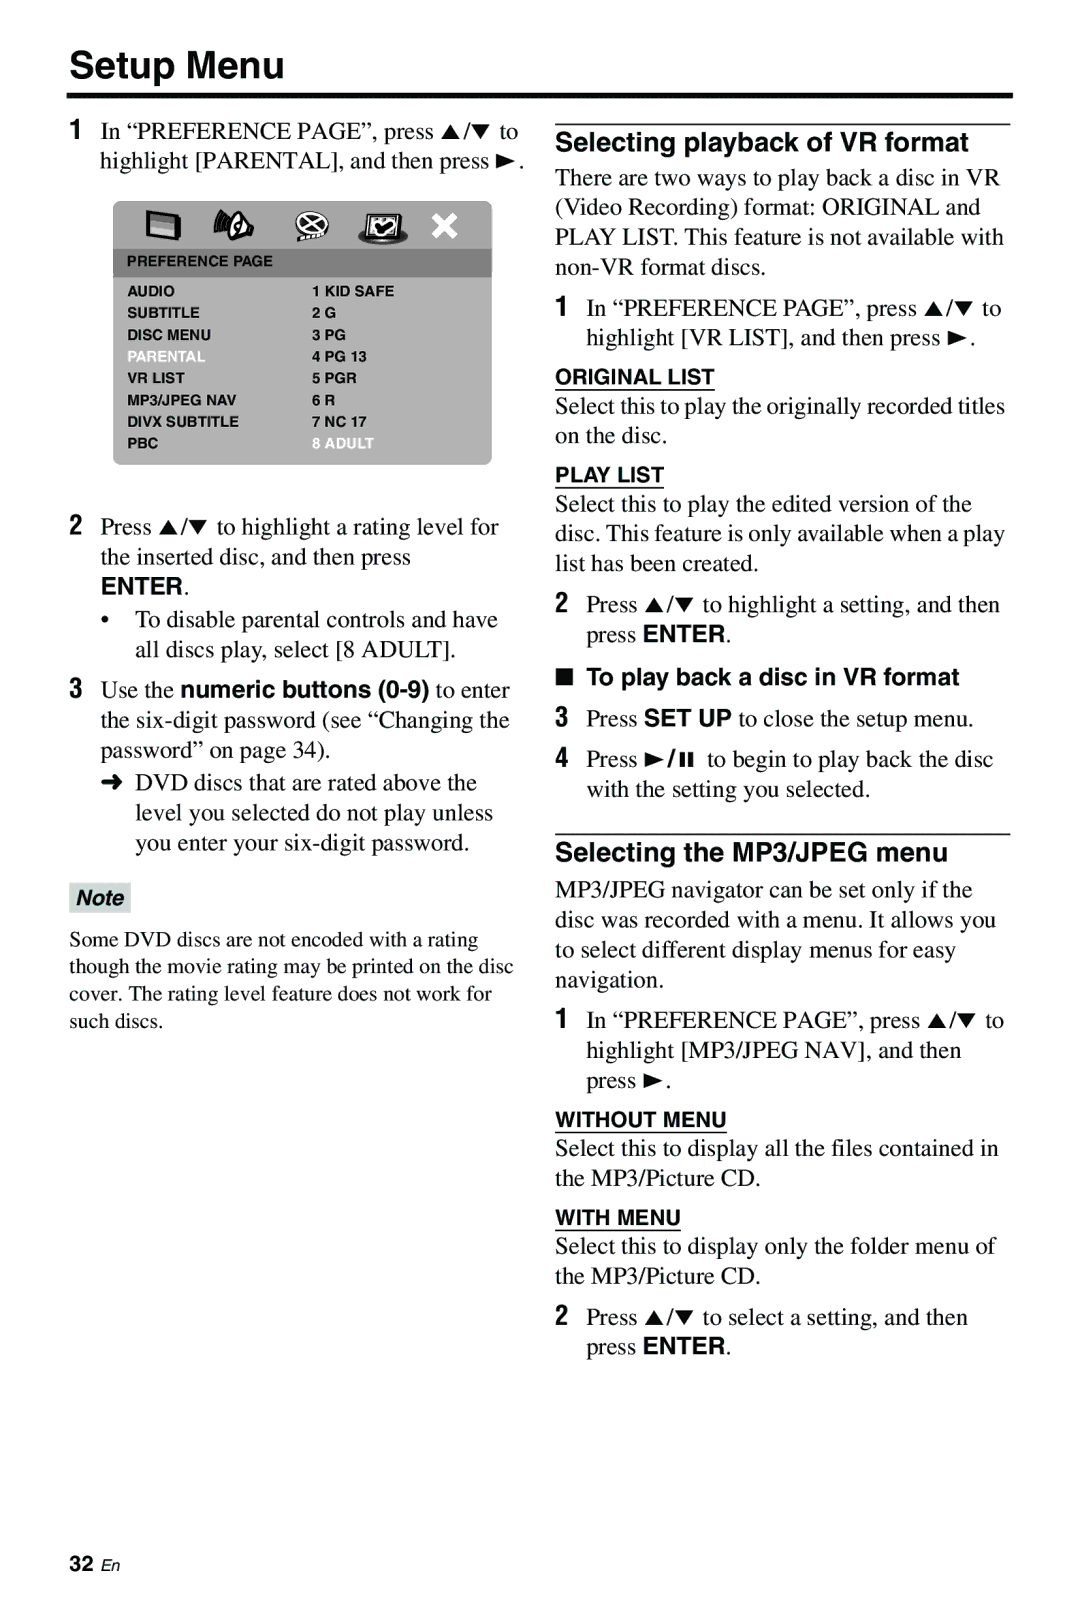
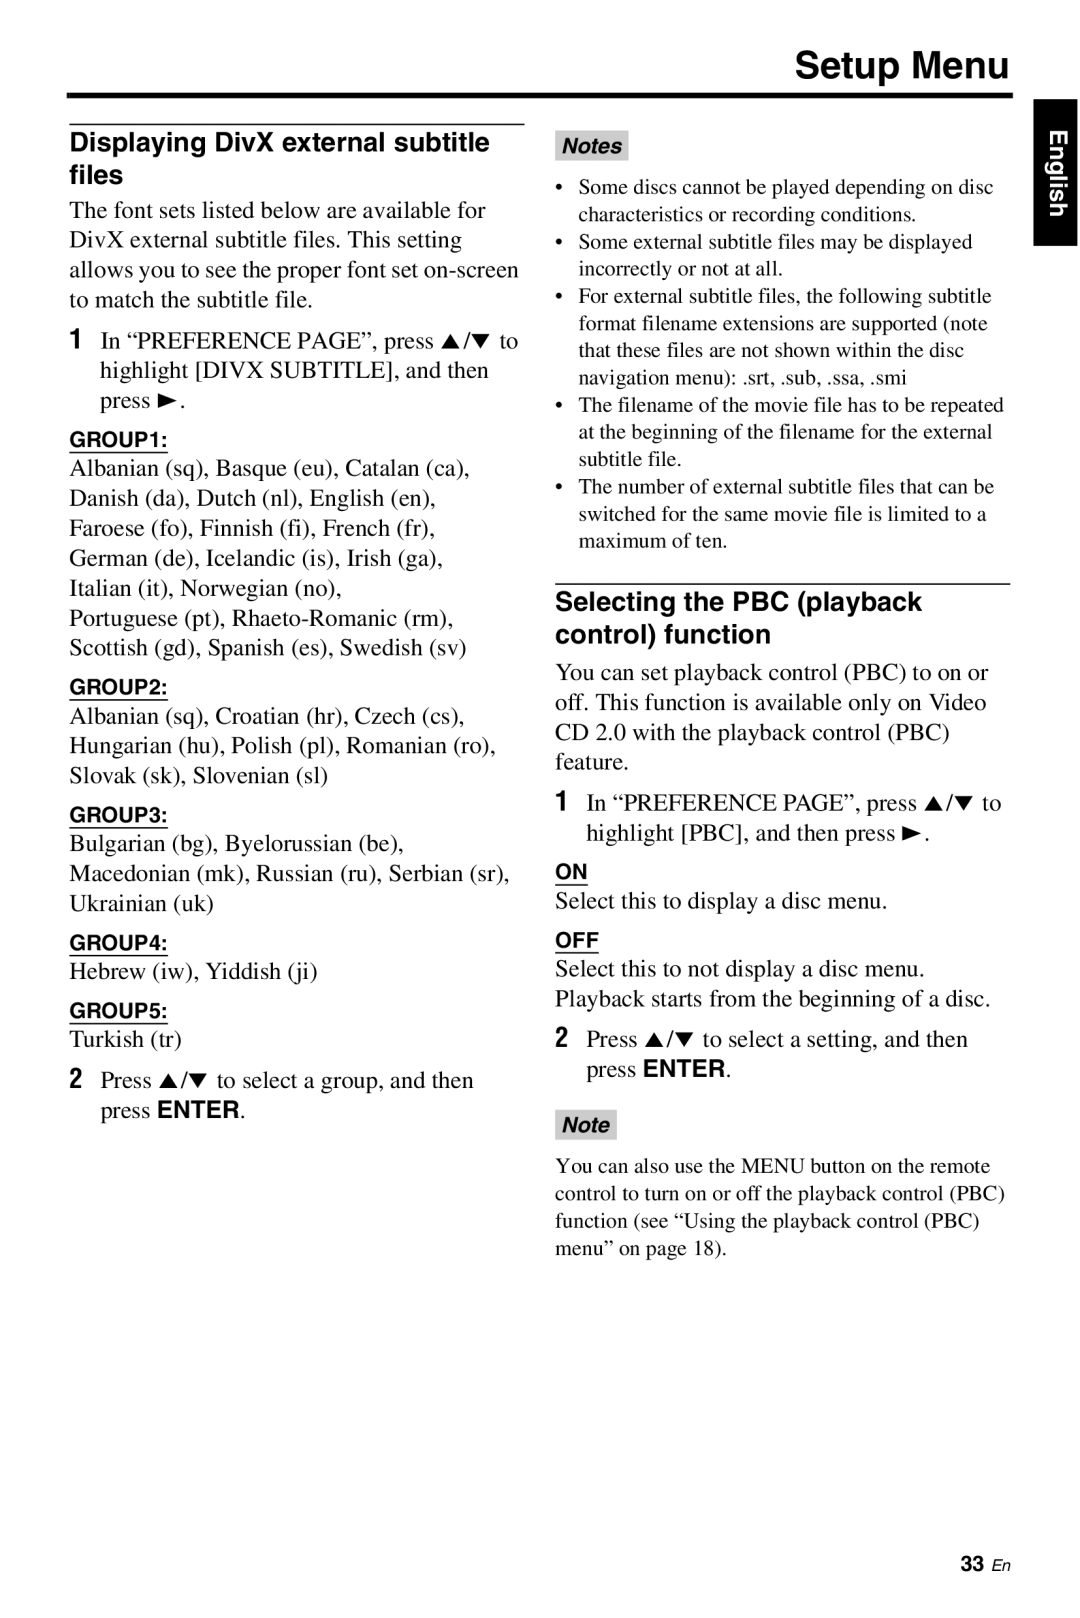
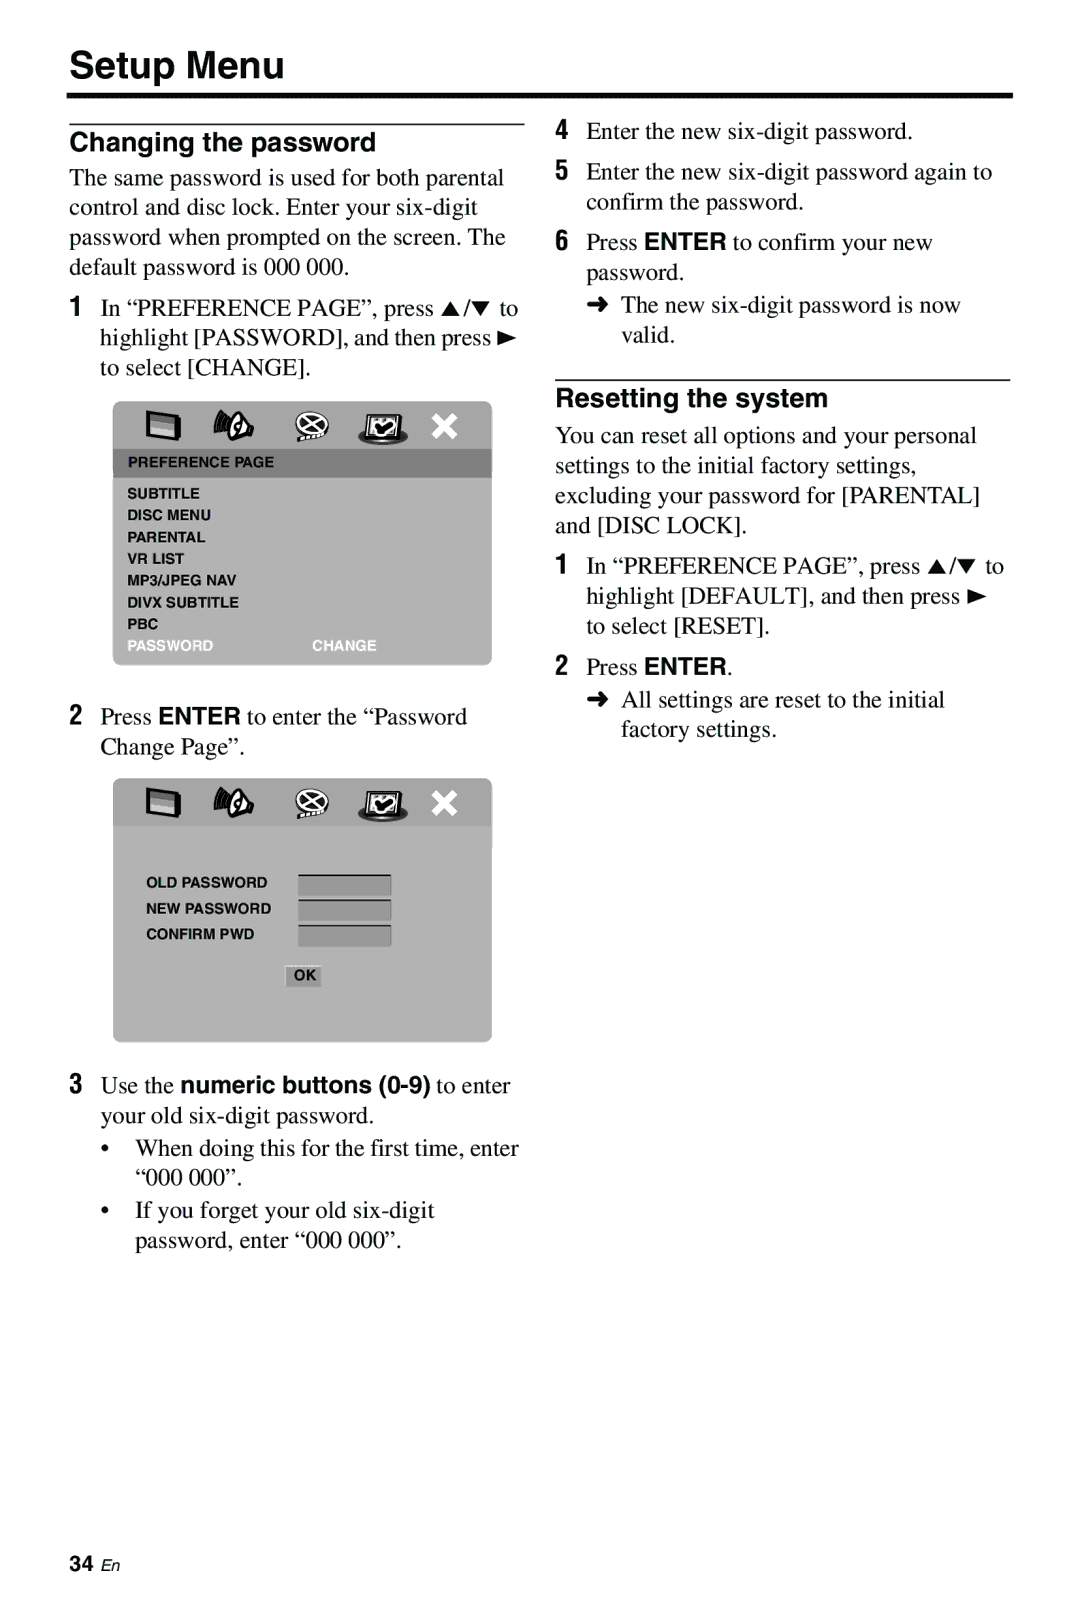
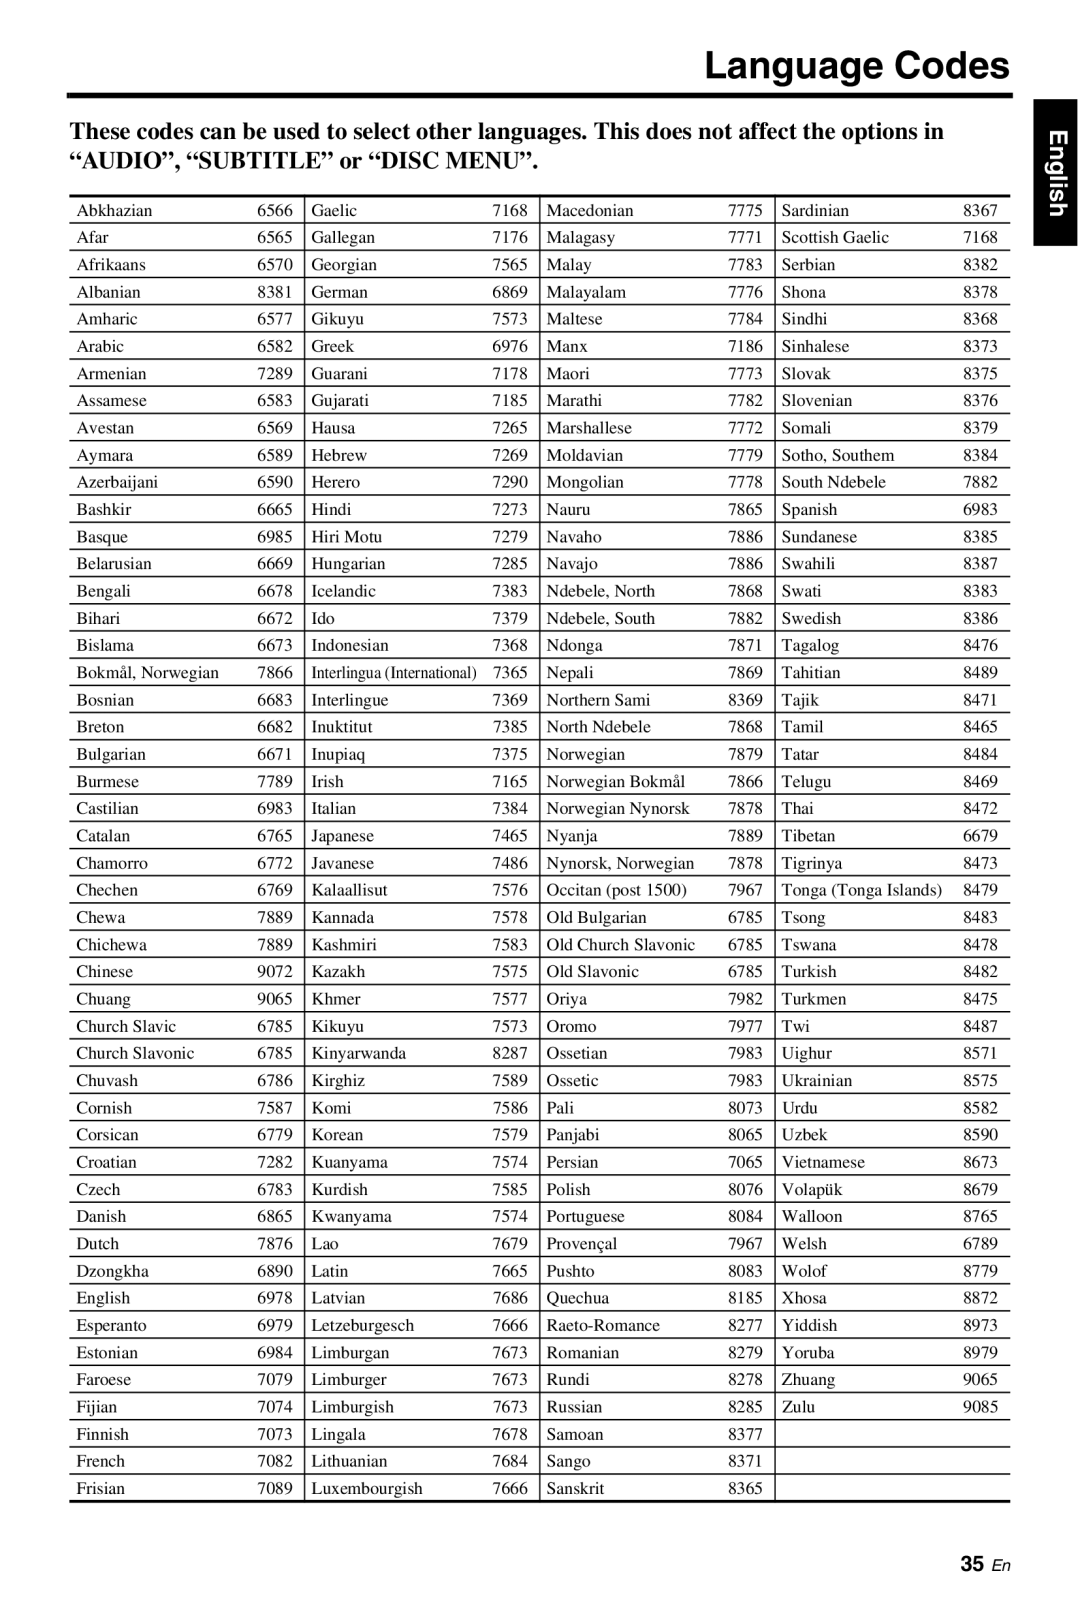
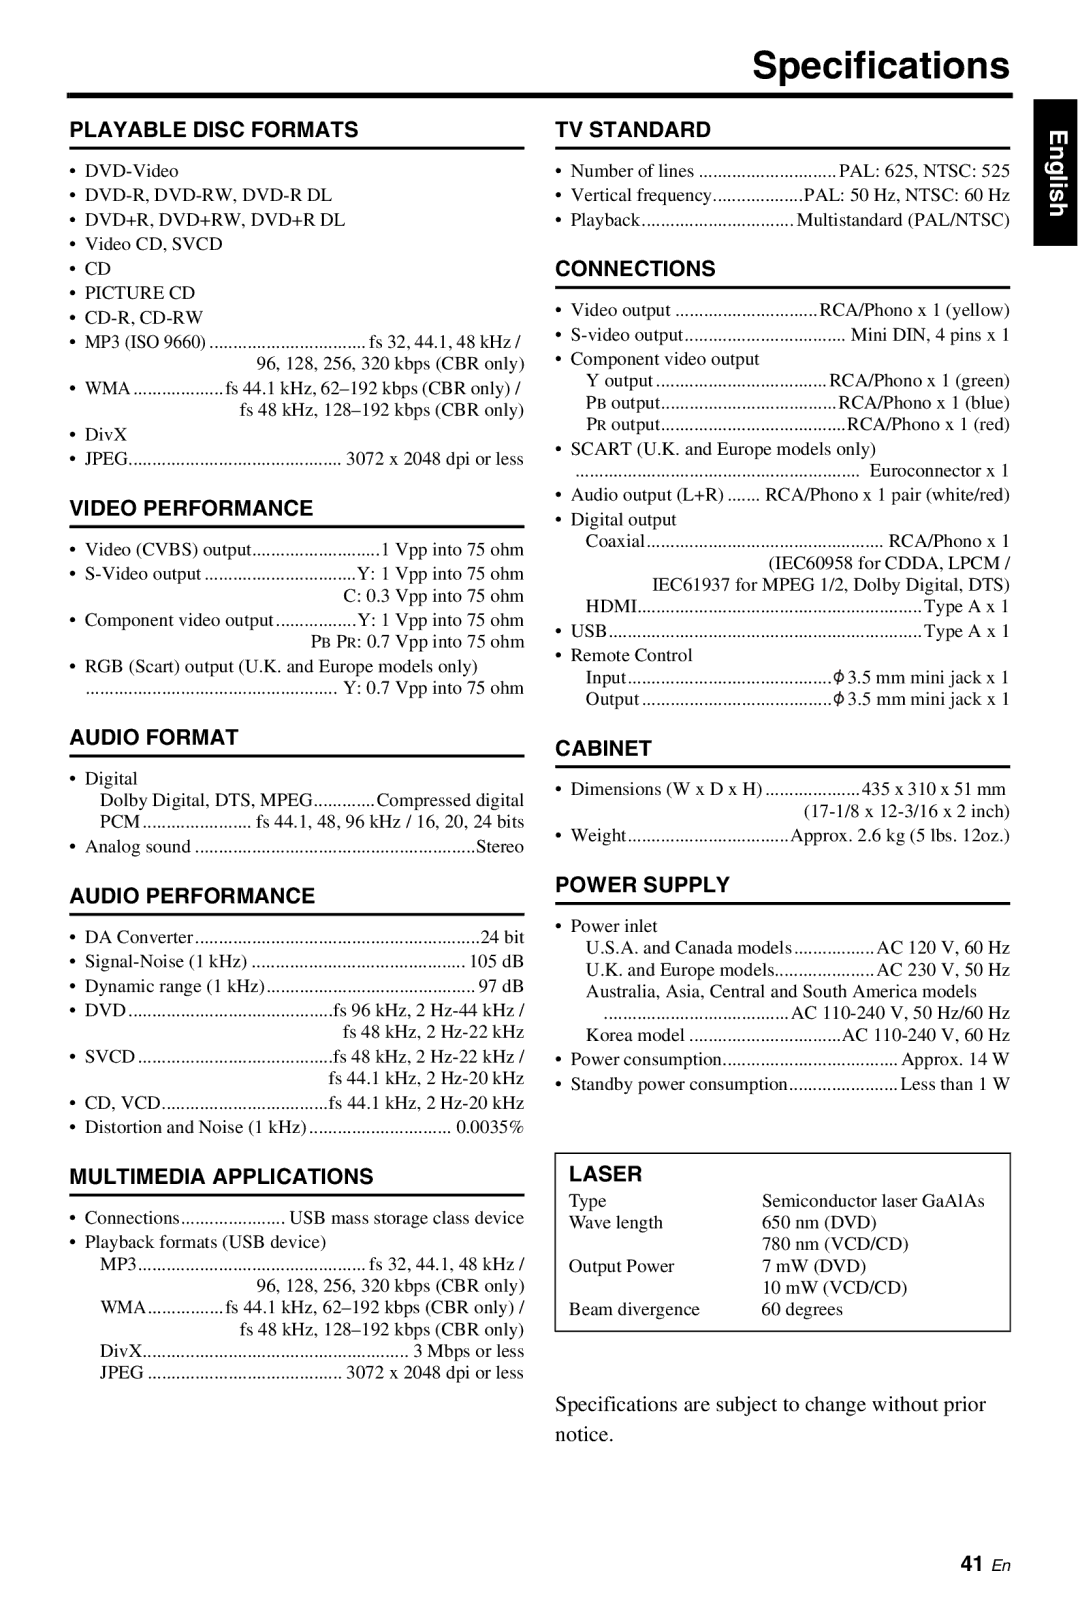
Contents DVD-S661 Important Safety Instructions We Want You Listening For a Lifetime FCC Information for US customersFor Customer Use AvertissementIii Laser SafetyFor Canadian Customers Contents Setup Menu Language Codes Troubleshooting Glossary SpecificationsSupplied accessories IntroductionPlayable disc formats Region codesCleaning discs Patent informationFunctional Overview Front panelSTANDBY/ON OPEN/CLOSERear panel Video OUT Component Y, PB, PR33l Remote control3/5/a Connections General notes on connectionsAudio connections Digital connectionVideo connections Component video jacks aVideo jack B Composite video jack CHdmi connection Hdmi jackUSB port Remote control jacksOther connections Inserting batteries into the remote control Turning on the powerUsing the remote control Getting StartedSetting an aspect ratio for your TV Setting a TV type/display and languageSetting a color system for your TV Select Others in Audio or Subtitle or Disc Menu Setting the OSD LanguageTo select a language not in the list Repeat/Shuffle functions Playback OperationBasic operation Using the disc menu Repeating a section within a chapter/trackPlayback in slow motion Zooming pictures in/outUsing the on-screen display OSD Title/Chapter/Track selection DVD/VCDTime search DVD/VCD Audio/Subtitle/Angle selection DVDSpecial DVD features Special VCD/SVCD featuresUsing the playback control PBC menu Playing by titleSpecial picture disc features Using the preview functionSelecting a folder and track/file For JpegSpecial DivX features Using the interactive menuPlayback with multi-angles Selecting an audio/subtitle languageUsing a USB device To exit from the USB modeSupported USB devices Playing data filesSetup Menu General setup menuLocking/Unlocking the disc for viewing Dimming the front panel displaySetting the screen saver OSD languageTo remove a track To start program playbackDisplaying the DivX VOD registration code Setting the sleep timerSetting the auto standby function Audio setup menu Setting the digital outputSetting the analog output Press SET UP Press 2 / 3 to select Audio Setup Press EnterTurning the night mode on/off Turning the Hdmi audio on/offSelect this to turn off the Hdmi audio output 48KHzVideo setup menu Setting the lip synchronization TV typeSetting the TV display Press SET UP Press 2 / 3 to select Video Setup Press EnterTurning the progressive scan function on/off When the aspect ratio of your TV isWhen the aspect ratio of your TV is 169 widescreen Adjusting picture settings Turning the black level on/offSetting the Hdmi video Set the resolution depending on the monitor you are usingTurning the closed caption on/off Wide Screen FormatPreference setup menu Audio, subtitle and disc menuRestricting playback with parental control Press SubtitleTo play back a disc in VR format Selecting playback of VR formatSelecting the MP3/JPEG menu Hebrew iw, Yiddish ji Displaying DivX external subtitle filesSelecting the PBC playback control function Press Enter to enter the Password Change Changing the passwordResetting the system Language Codes Troubleshooting Problem SolutionSome operating commands No sound or distorted soundNo audio at digital output Disc does not playNo Disc appears in the front Panel display UN Disc appears in the frontPanel display Menu items cannot be selectedGlossary Interactive menu MP3Parental control PCM Pulse Code ModulationSpecifications 3139 245