Patton electronic SL4050/10 manual Connecting the SL4050/2 SIP Phone

Page 23

SmartLink 4050 Series Getting Started Guide

2 • Installing the SmartLink SIP Phone


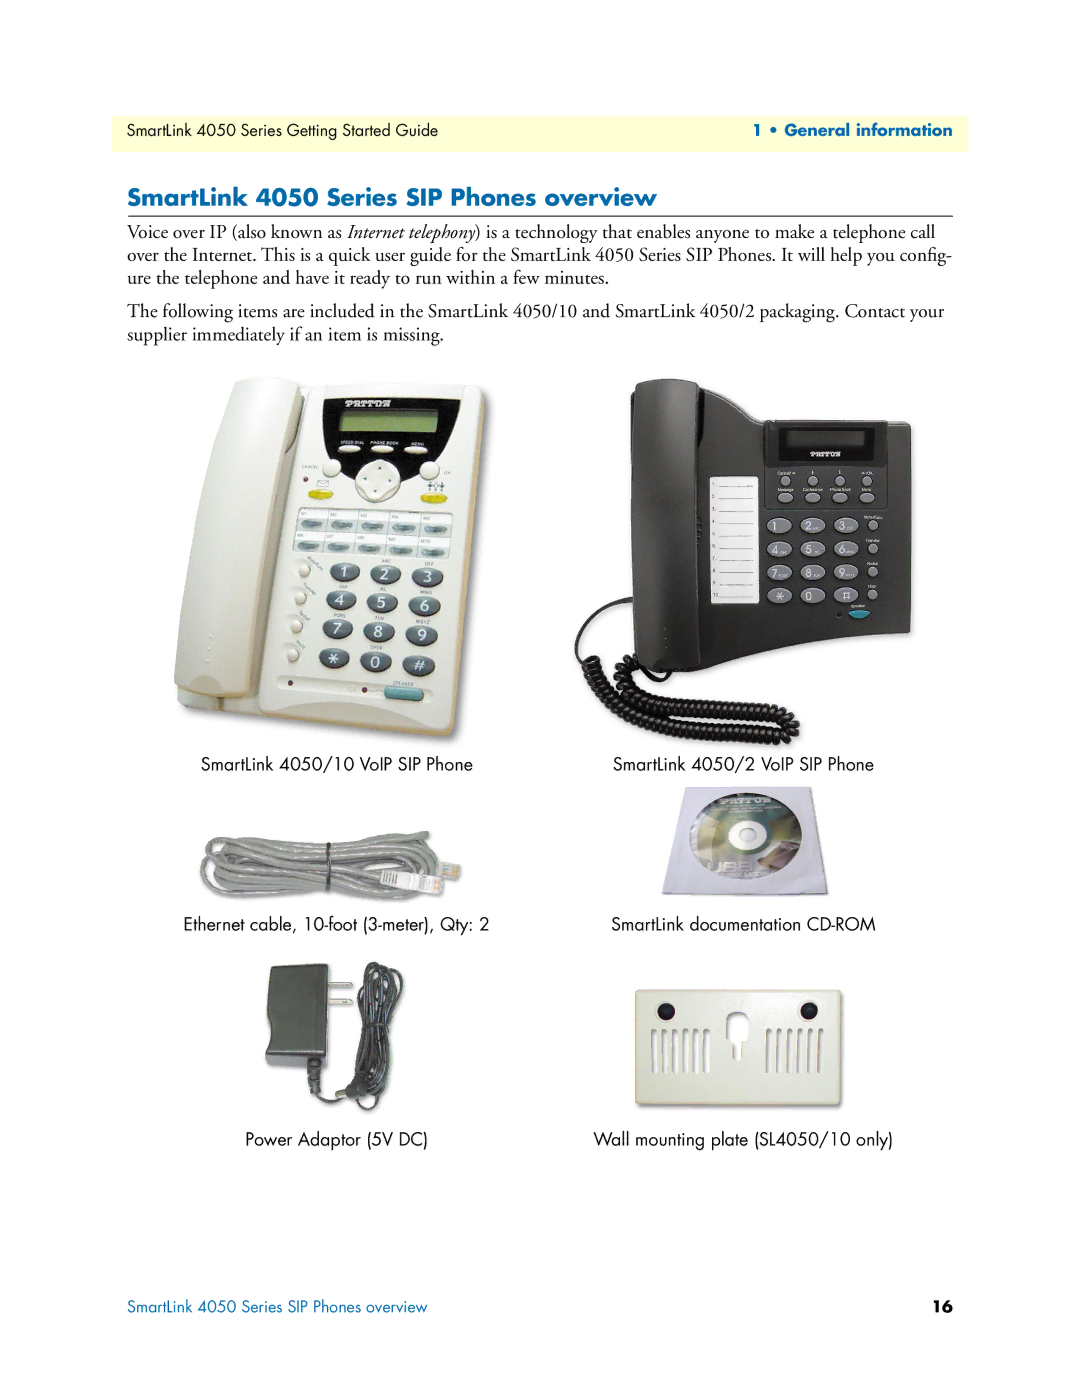
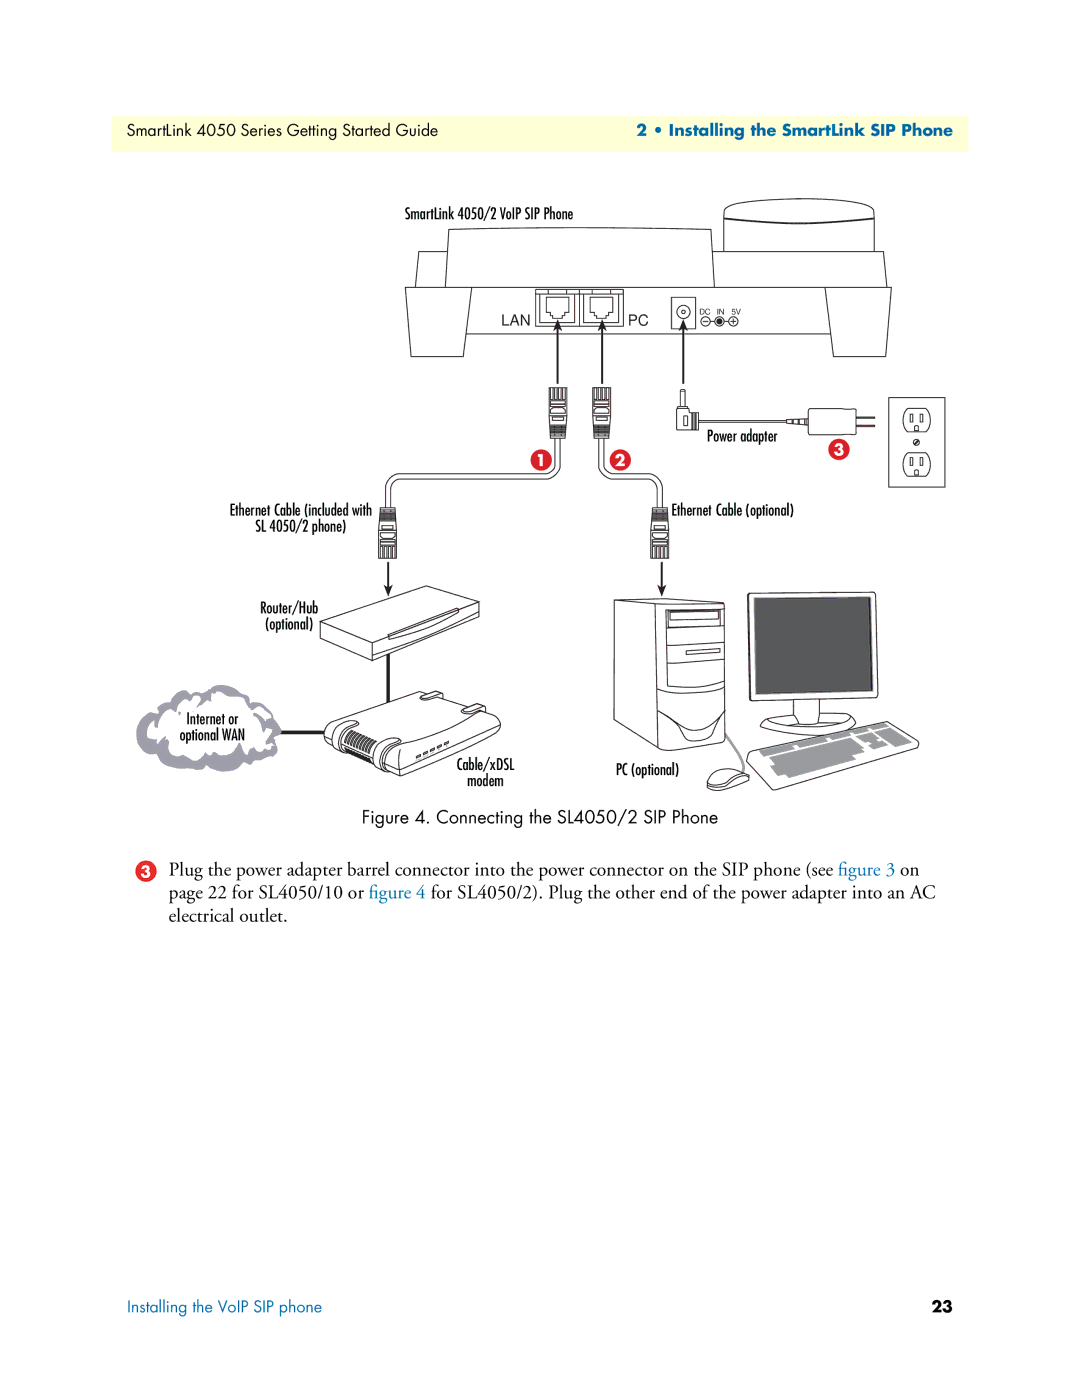
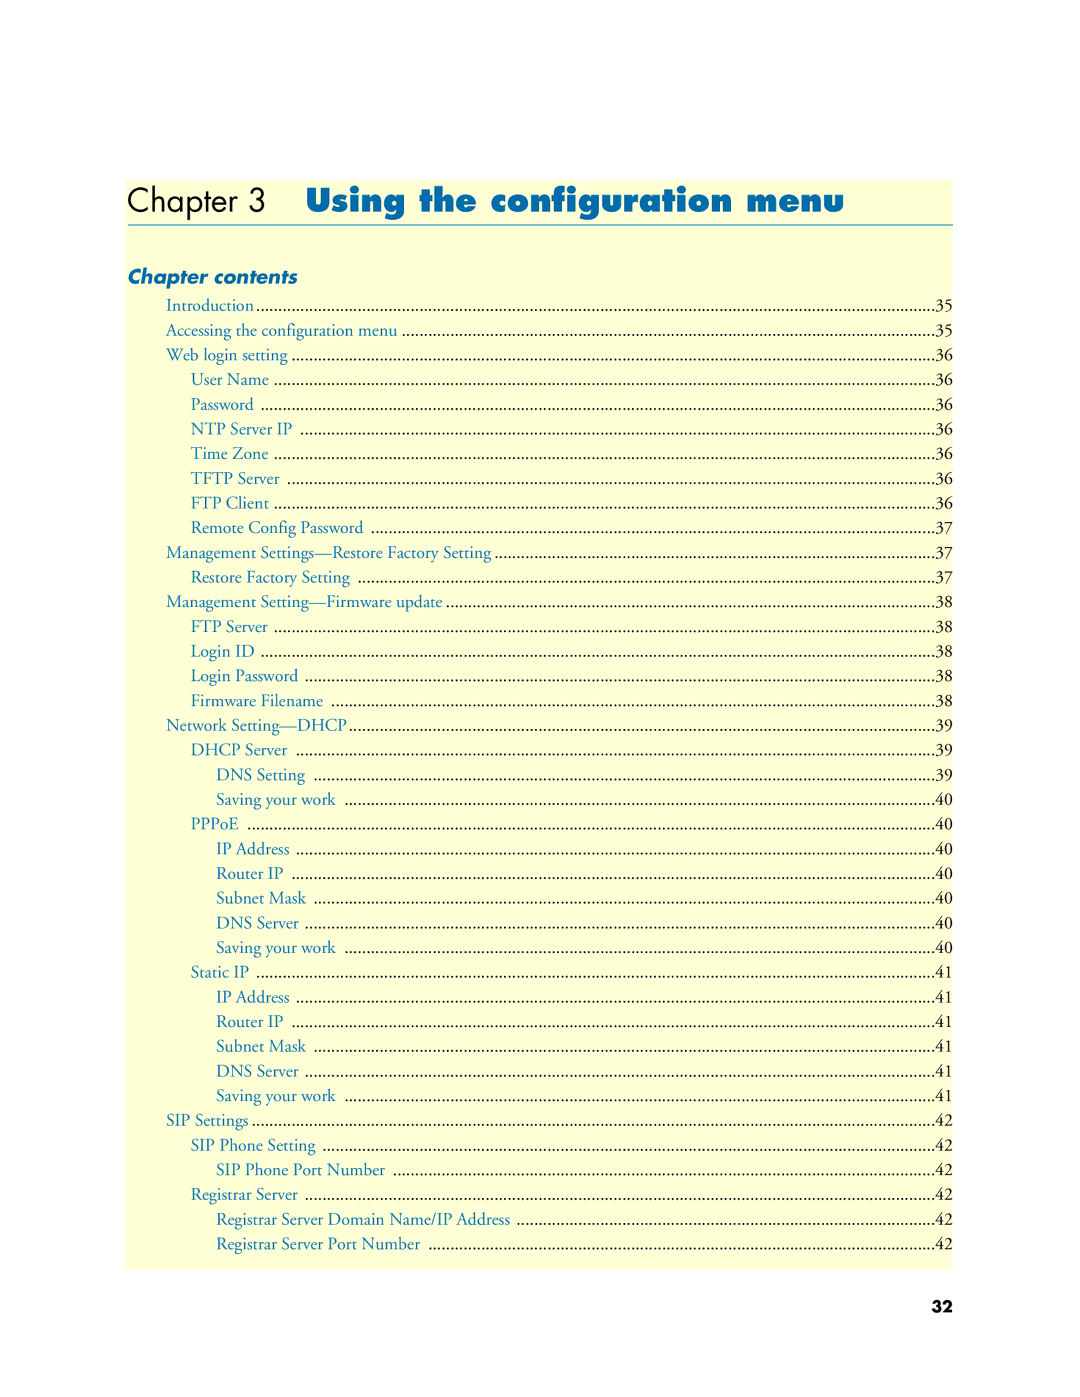
SmartLink 4050/2 VoIP SIP Phone

LAN

PC

DC IN 5V

Power adapter

1

2

3

Ethernet Cable (included with

SL 4050/2 phone)

Router/Hub

(optional)

Internet or

optional WAN

Cable/xDSL

modem

Ethernet Cable (optional)

PC (optional)

Figure 4. Connecting the SL4050/2 SIP Phone

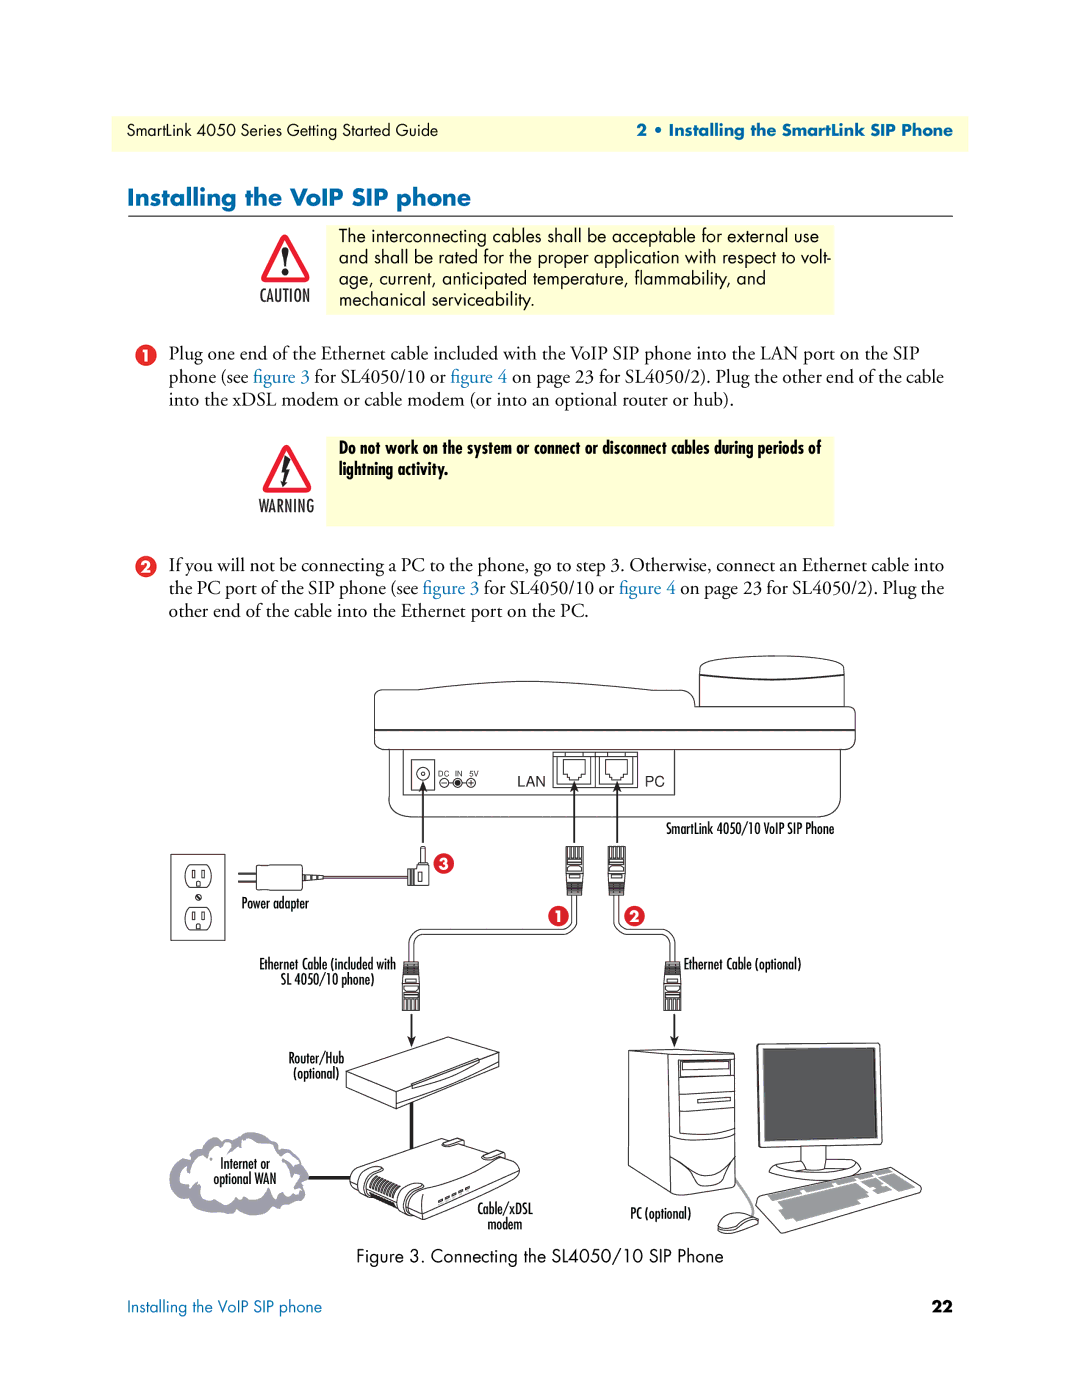
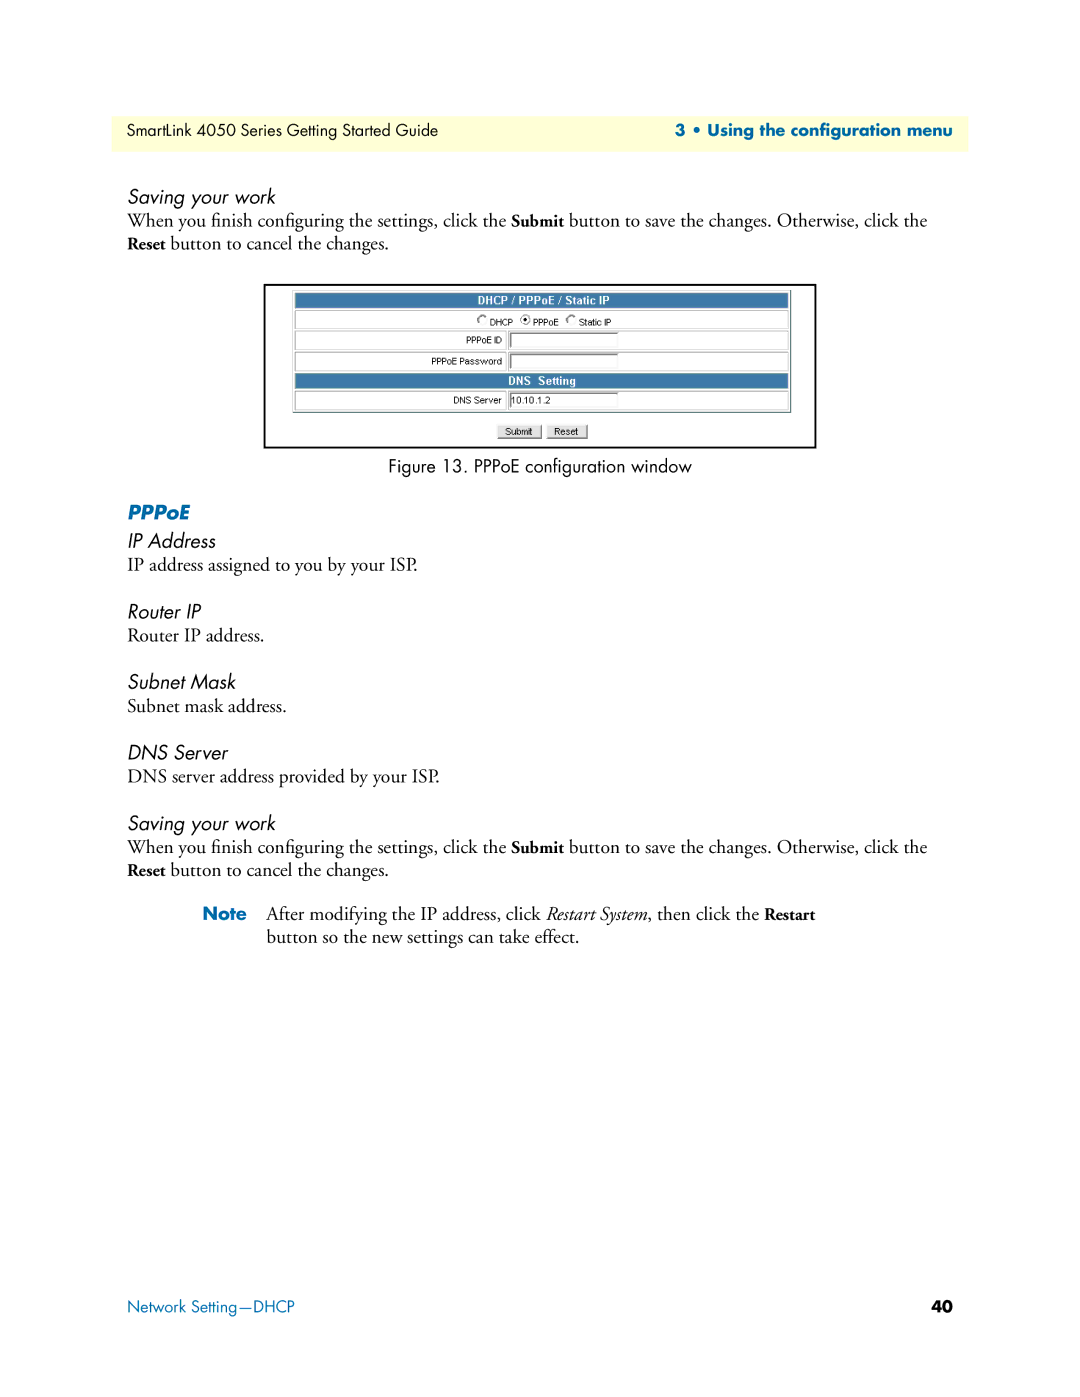
3Plug the power adapter barrel connector into the power connector on the SIP phone (see figure 3 on page 22 for SL4050/10 or figure 4 for SL4050/2). Plug the other end of the power adapter into an AC electrical outlet.

Installing the VoIP SIP phone

23

Image 23
Contents Getting Started Guide Mailsupport@patton.com Summary Table of Contents Table of Contents Using the configuration menu VAD Operating the VoIP SIP phone Troubleshooting TCP/IP List of Figures List of Tables Structure About this guideAudience Safety when working with electricity PrecautionsGeneral conventions Typographical conventions used in this documentGeneral observations General information Chapter contentsSmartLink 4050 Series SIP Phones overview Power Adaptor 5V DC Wall mounting plate SL4050/10 onlyDescription Overview of SL4050/10 key functionsDescription Overview of SL4050/2 key functions SmartLink 4050/2 SIP Phone controls and indicators Description Installing the SmartLink SIP Phone Ethernet Cable optional Installing the VoIP SIP phoneConnecting the SL4050/2 SIP Phone Menu summary Setting up the VoIP SIP phoneMenu summary, page 2 Display Name Enable Adsl dialupDhcp Dynamic Host Configuration Protocol Disable Adsl dialupCall forwarding DNS Server IPSntp Server IP Do Not DisturbAnony Call Rej anonymous call rejection CF call forward User BusyCF call forward No Answer Anonymous CallTime Format MAC AddressVersion Language SelectionHandset Volume Volume AdjustmentRinger Volume Speaker VolumeUsing the configuration menu Using the configuration menu Using the configuration menu Introduction Accessing the configuration menuWeb login setting Restore Factory Setting Management Settings-Restore Factory SettingRemote Config Password FTP Server Management Setting-Firmware updateLogin ID Login PasswordDhcp Server Network Setting-DHCPDNS Setting PPPoE Static IP configuration window Static IPRegistrar Server SIP SettingsSIP Phone Setting Others Outbound Proxy ServerMessage Server Park ServerSaving your work SIP Account SettingsDefault Account SIP User Name Authentication User NameAuthentication Password Account ActiveStun Domain Name/IP Address Stun & UPnP SettingsStun Server Setting UPnP SettingRTP Packet Length Voice SettingsVoice Setting CodecVlan Priority QoSVoice TOS Phone Setting Phone SettingsTimer Auto Speaker Off Call Tracing LogNumber Phone Book SettingPhone Book NameSpeed Dial Speed Dial Setting Maximum 63 CharTelephone Number Line Key SettingsKey Type Documentation link DocumentationRestart System window Restart SystemOperating the VoIP SIP phone Speed Dialing Switching to another lineDialing an IP address Dialing a SIP numberLast Dialed Number MuteCall Transfer RedialOne-Touch Dialing On HoldCall Forwarding Call Waiting internal/externalThree-Way Conferencing Using the Phone Book Editing a Phone Book listing Dialing from the Phone BookStoring a number Deleting a Phone Book listing Troubleshooting Symptom Recommended action Contacting Patton for assistance Patton support headquarters in the USA Contact informationRMA numbers Warranty coverageReturns for credit Return for credit policyAppendix a Compliance information CE-Mark Warning ComplianceFCC Warning Radio and TV Interference Appendix B Specifications Voice Codec Call FeaturesProtocol Network InterfaceDial Methods Firmware UpgradeSecurity QoSConfiguration TCP/IP