Woodstock W1709 instruction manual Maintenance, General, Lubrication

Page 28

MAINTENANCE

MAINTENANCE

TURN-OFF and LOCK your master power switch when performing maintenance, so no power is available to the sander! If you ignore this warning serious electrical shock may occur causing injury or death!

General

Regular maintenance on your Model W1709 will ensure its optimum performance. Make a habit of inspecting your machine each time you use it. And at the end of the day remove the sanding belt and clean the back side of the sanding belt and the drums. Also vacuum wood and abrasive dust from the inside of the machine.

Check for the following conditions and repair or replace when necessary:

Loose mounting bolts.

Worn switches.

Worn or damaged cords and plugs.

Damaged belts.

Any other condition that could hamper the safe operation of this machine.

Check the entire air system for leaks.

Lubrication

Wipe off all sawdust and abrasives on grease zerks and plugs before lubrication. When lubricating machine parts, your goal is to achieve adequate lubrication to prevent rust, and a thin layer of lubricant to prevent metal- to-metal friction. Too much lubrication will attract dirt and sawdust, and as a result, these parts could lose freedom of movement.

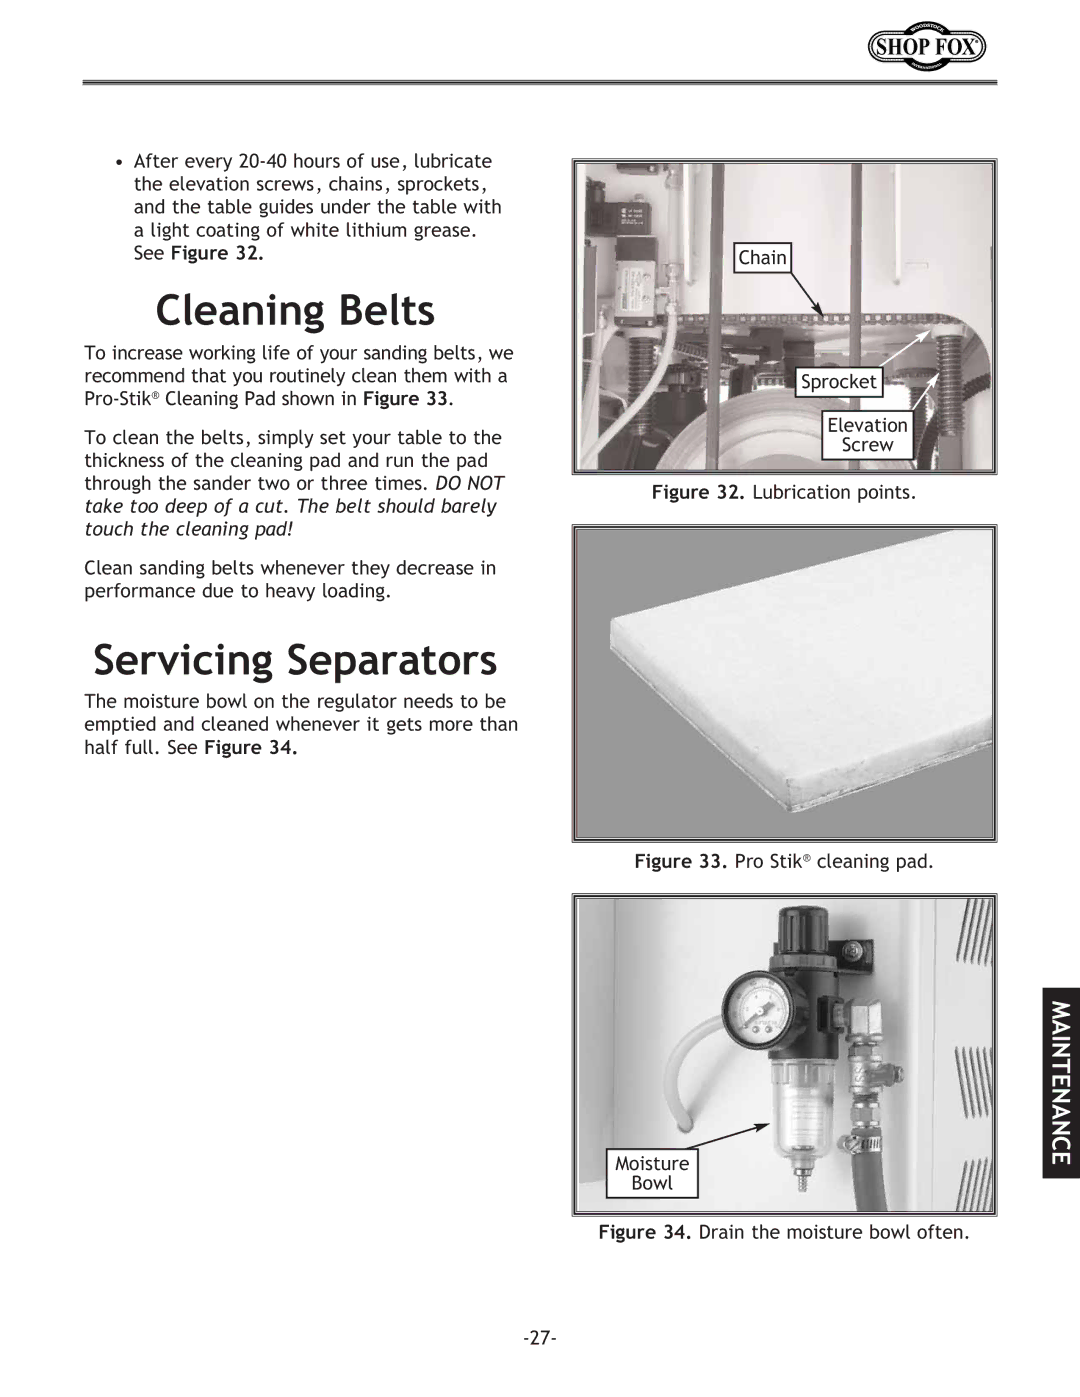
After 150 hours of use lubricate the bearings with one squirt of automotive- grade grease at the designated points, see Figure 31.

All other bearings are sealed and permanently lubricated, simply leave them alone until they need to be replaced. Do not lubricate them.

-26-

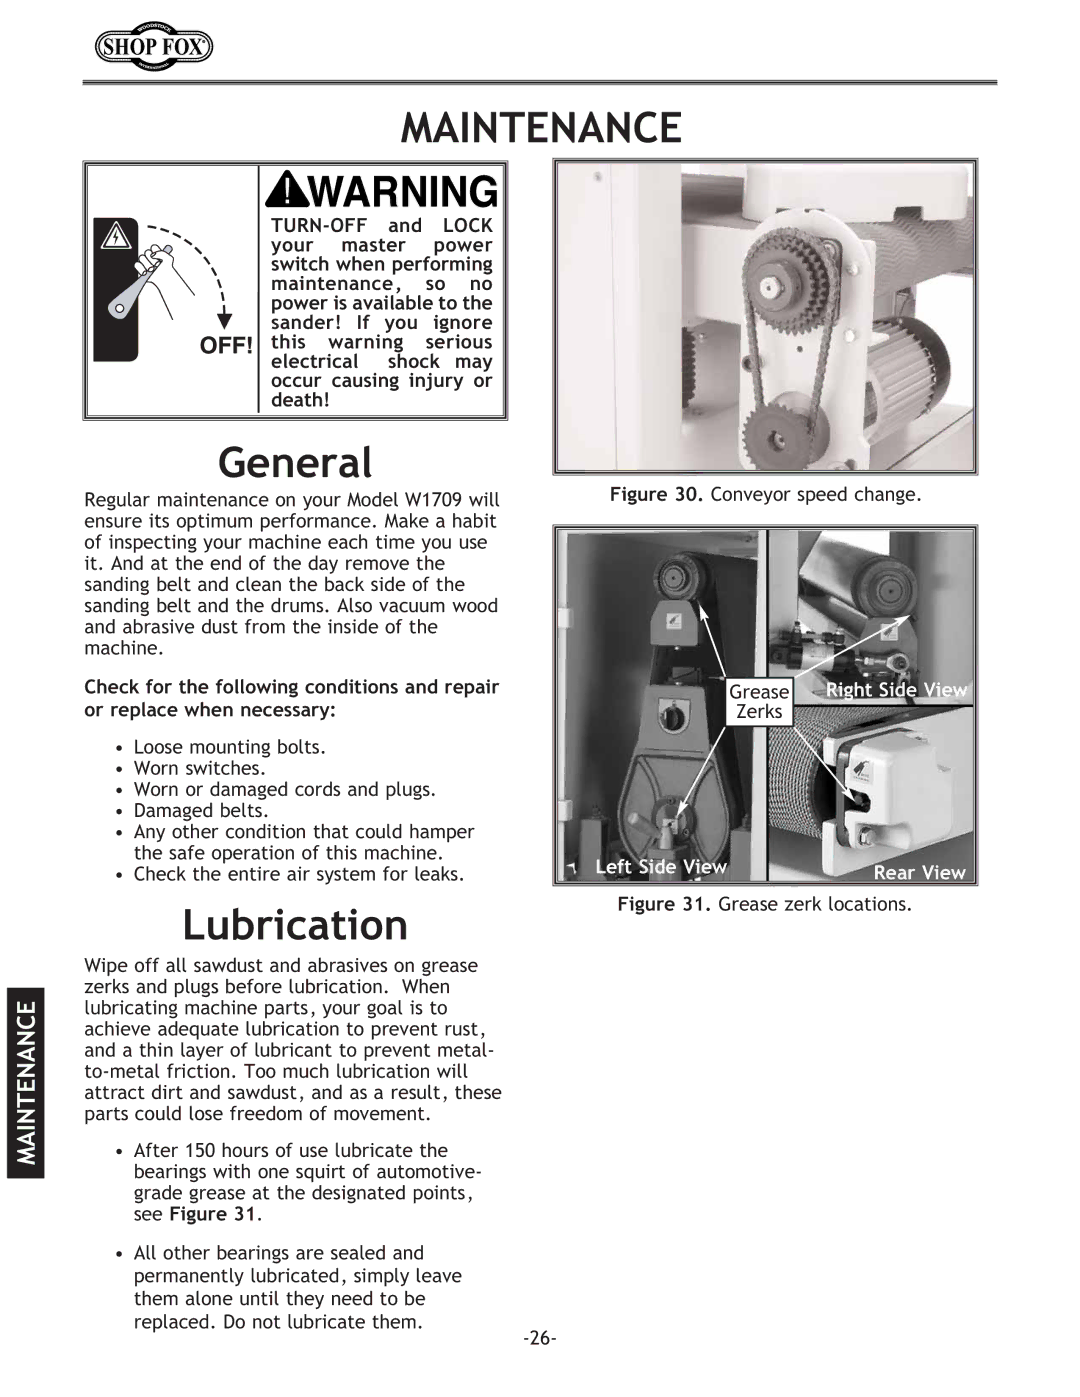
Figure 30. Conveyor speed change.

Grease

Right Side View

Zerks


Left Side View

Rear View

Figure 31. Grease zerk locations.

Image 28
Contents Wide Belt Sander Page Contents Introduction Woodstock Service and SupportAbout Your New Sander Warranty and Returns SpecificationsStandard Safety Instructions Safety FirstDisconnect machine when cleaning, adjusting or servicing Keep stable footing and balance at all times Additional Safety Instructions for Sanders Avoiding Potential Injuries Correct body and hand positioningElectrical Requirements 220V OperationExtension Cords GroundingBox Contents AssemblyUnpacking Cleaning Machine Shop PreparationAir Hose Installation Sanding Belt InstallationDust Collection Dust collection adaptersGeneral Information AdjustmentsPhoto-Electric Eye Belt tracking adjustment location Belt TrackingBelt oscillation adjustment Belt Oscillation SpeedBelt Tracking Safety Switch To adjust the belt tracking safety switches, do these stepsTo adjust the pressure rollers, do these steps Pressure RollersBelt Tension To tension the V-belts, do these stepsTo adjust the feed belt tension and tracking, do these steps Feed Belt Tension TrackingTo adjust table stop switches, do these steps Table Stop SwitchesDown Key Operations Control PanelSelecting Sandpaper Test RunTo complete the test run, do these steps Using the Load Meter Setting Feed SpeedTo change the feed belt speed do these steps Emergency Stop Keypad and DisplayCalibrating the Table To apply the emergency stop, do these stepsQuick Tip Basic SandingTo sand a workpiece, do these steps General MaintenanceLubrication Cleaning Belts Servicing SeparatorsBrake assembly Pads Servicing BrakeChanging V-Belts FiguresTroubleshooting Symptom Possible Cause HOW to RemedyW1709 Wiring Diagram W1709 Control Panel Wiring Connections W1709 Switch Box Wiring Connections Parts Tool BOX Parts Elevation Screw Parts Conveyor Table Parts Piston Roller Shaft Parts Parts Parts Electrical Control BOX Accessories D3003 15 x 20 Cleaning Pad for Wide-Belt SandersWarranty Card BOX BELLINGHAM, WA