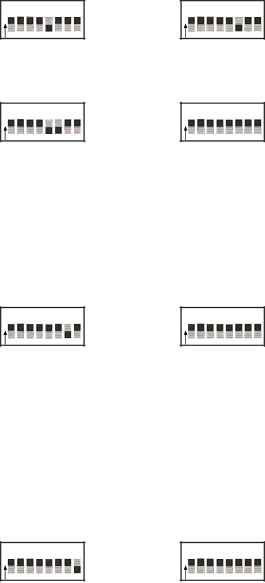
Switches 5 and 6 allow you to set a permanent EQ in that particular zone. You can set that zone to have a +4dB boost at 100Hz, a +4dB boost at 10kHz, a +4dB boost at both frequencies, or a flat response (Fig. 10).
Fig. 10: Switches 5 & 6, Zone EQ Presets
+4dB Boost | +4dB Boost |
at 100Hz | at 10kHz |
O 1 2 3 4 5 6 7 8 | O 1 2 3 4 5 6 7 8 |
N | N |
+4dB Boost
at 100Hz and 10kHz
O 1 | 2 | 3 | 4 | 5 | 6 | 7 | 8 |
N |
|
|
|
|
|
|
|
Flat Response
O 1 | 2 | 3 | 4 | 5 | 6 | 7 | 8 |
N |
|
|
|
|
|
|
|
Switch 7 allows you to group multiple keypads so that when a source is changed on one grouped keypad, all other grouped keypads will also change. This is handy for open floor plans where you might not want different sources interfering with each other. Source grouping is active when switch 7 is in the up position
(Fig. 11).
Switch 8 allows you to have the volume reset itself to a low level at power off. If this switch is in the up position, the audio volume will reset to a preset low level when
power is restored to that zone. If the switch is in the
down position, then the audio volume will return to its
previous volume level when the zone was turned off (Fig. 12).
Once the DIP switches for each zone are set, they can be installed in most standard
Fig. 11: Switch 7, Zone Grouping
Zone Group ON | Zone Group OFF |
O 1 2 3 4 5 6 7 8 | O 1 2 3 4 5 6 7 8 |
N | N |
Fig. 12: Switch 8, Zone Volume Preset Volume low-level preset Set volume level
O 1 2 3 4 5 6 7 8 | O 1 2 3 4 5 6 7 8 |
N | N |
Page 11