Installation Instructions
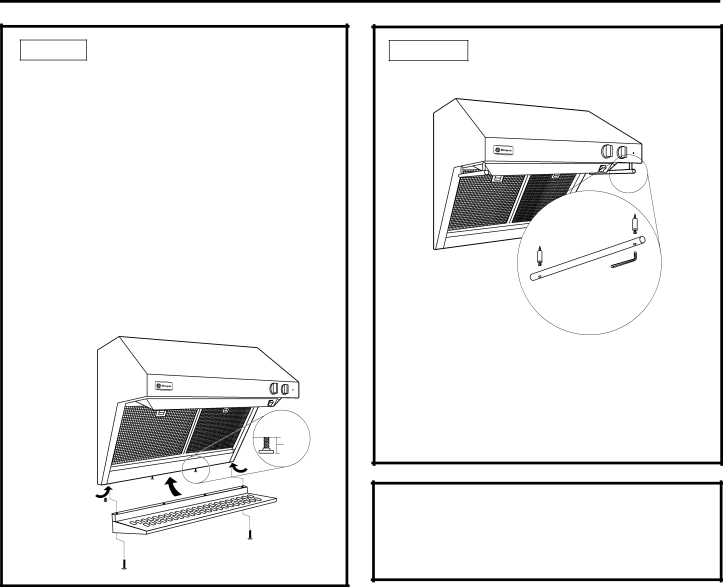
STEP 9 INSTALL SHELF “ONLY”
•Remove shelf packaging and protective film.
•If installing the shelf alone, without the backguard, place shelf against the bottom of the hood and mark screw hole locations “B” on the wall.
•Drill two 1/8" pilot holes.
•If drill did not enter studs, enlarge holes to 3/8".
•Insert wall anchors into enlarged holes. Remove screws from wall anchors.
•Install two shoulder screws into holes “D” in the bottom of hood flange leaving 1/8" gap.
•Engage shoulder screws into the keyhole slots in the top of the shelf. Slide shelf towards the left to lock into place.
•Install two 3/4" long machine screws through the bottom of the shelf into the bottom hood flange, location “E”.
STEP 10 INSTALL IMPLEMENT RODS
Screw |
Into |
Hood |
Use Allen Wrench to Secure Rod to
D
E
![]() B
B
Mounting Holes
for Shelf (B)
1/8"
Gap
E
D B![]()
•Use a flat blade screwdriver to install
•Align implement rod to
•Follow the same procedure on the opposite side.
FINALIZE INSTALLATION
•Install the supplied infrared bulb(s).
•See the Owner’s Manual for instructions to test operation.
15