Greenheck Fan Outdoor Air Ventilator manual Install Supply Unit, Complete Installation

Page 5

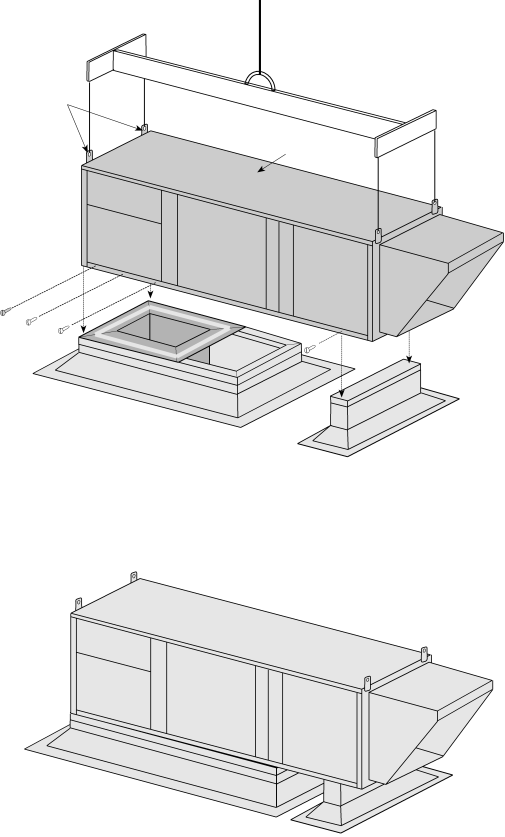
Step 5 Install Supply Unit

Use a crane and a spreader bar hooked to the factory lifting lugs (as shown in the diagram) to lift and center the NV unit on the curb and equipment support. Use self-tapping sheet metal screws to fasten unit to the curb and equipment support through holes provided.

Electrical and pipes connections can be made at this time.

Complete Installation

Illustration shows the complete installation of downblast NV with filter section and weatherhood.

Lifting Lugs

(4 places)

Model TSU Supply Unit

5

Image 5
Contents Greenheck Table of Contents Typical Installations Installation Instructions forMounting the Unit Attach Ductwork to Unit DischargeInstall Ductwork Install Roof Curb Equipment SupportNV-45 w/Downblast Discharge Roof OpeningComplete Installation Install Supply Unit1a. Slab Construction 1b. Install UnitCurb Mounting Rail MountingDischarge Opening Sizes Optional Up-stream Heating CoilLocate and Cut Roof Opening Install CurbAssemble Roof Curb Detail a Install UnitAttach Weatherhood Install Birdscreen or Optional Weatherhood FiltersAttach Support Legs Electrical Instructions Sequence for wiring NV unitFor units without control centers For units with control centersSettings for Optional Components Air Volume Check and MeasurementSpecial Tools Required Check Voltage Check Blower RotationSteam Coils Instructions for CoilsMain Steam Direct Expansion CoilsCleaning Coil MaintenanceWater Coils FiltersBlower Unit Elevation View General Dimensions and WeightsWeeks after startup MaintenanceEvery 3 Months YearlyField Start-Up Documentation Maintenance Documentation