OPERATION
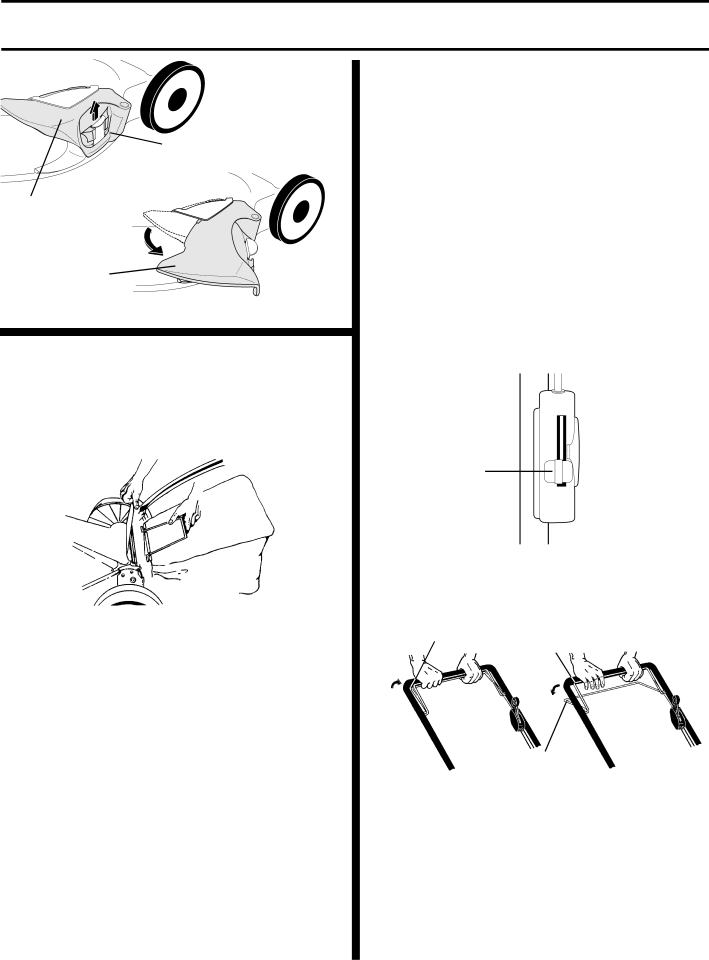
LIFT LATCH
TO UNLOCK
AND OPEN
DISCHARGE GUARD
CLOSED POSITION
OPEN POSITION
FIG. 6B
TO EMPTY GRASS CATCHER (See Fig. 7)
•To remove grass catcher, release operator presence control bar to stop engine.
•Lift up rear door and remove the grass catcher by the handle.
•Do not drag the bag when emptying; it will cause unnecessary wear.
FIG. 7
GROUND DRIVE THREE SPEEDS (See Fig. 8A)
Your lawn mower provides three (3) speeds to let you select the speed that suits you best.
•Speed 1 is for slow, heavy/thick grass cutting or trimming.
•Speed 2 is for normal grass cutting or trimming.
•Speed 3 is for light cutting and for ground transport.
TO OPERATE DRIVE SYSTEM (See Figs. 8A & 8B)
•Select ground speed by moving speed control lever to desired position.
•To start forward motion, lift drive control bar up to handle.
•To stop forward motion, release drive control bar.
IMPORTANT: ALWAYS KEEP DRIVE CONTROL BAR FULLY ENGAGEDAGAINSTHANDLEWHENINUSE.BEFORESTARTING ENGINE
3
2
1
DRIVE SPEED
CONTROL LEVER
| FIG. 8A | |
DRIVE CONTROL | OPERATOR | |
PRESENCE | ||
ENGAGED | ||
CONTROL | ||
| ||
| BAR |
DRIVE
CONTROL
DISENGAGED
FIG. 8B
6