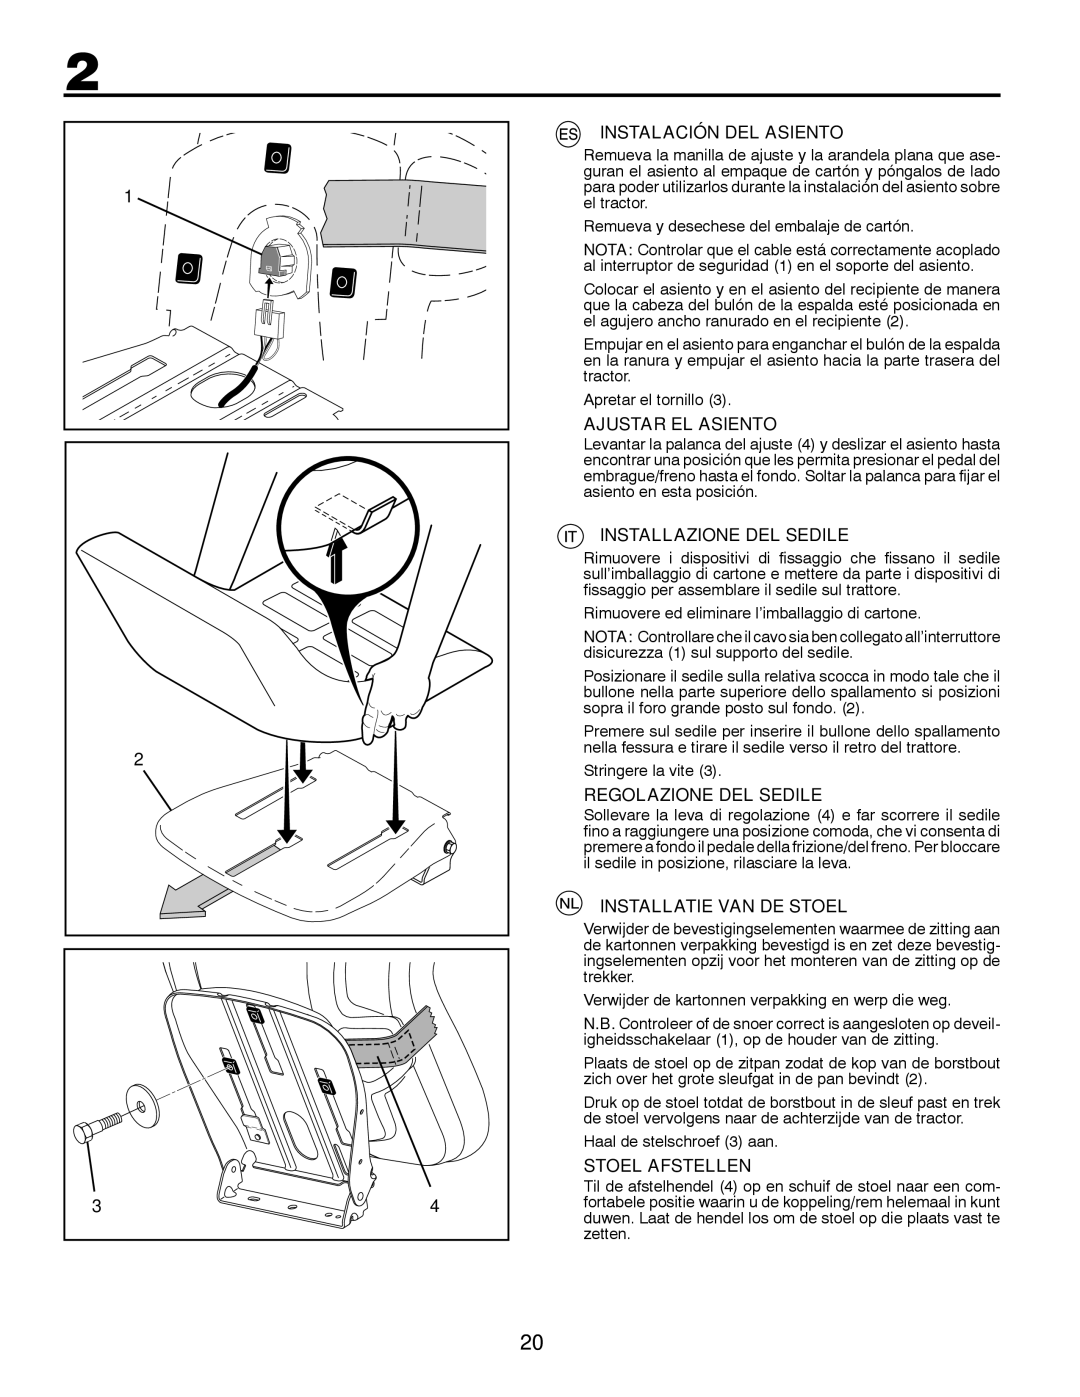
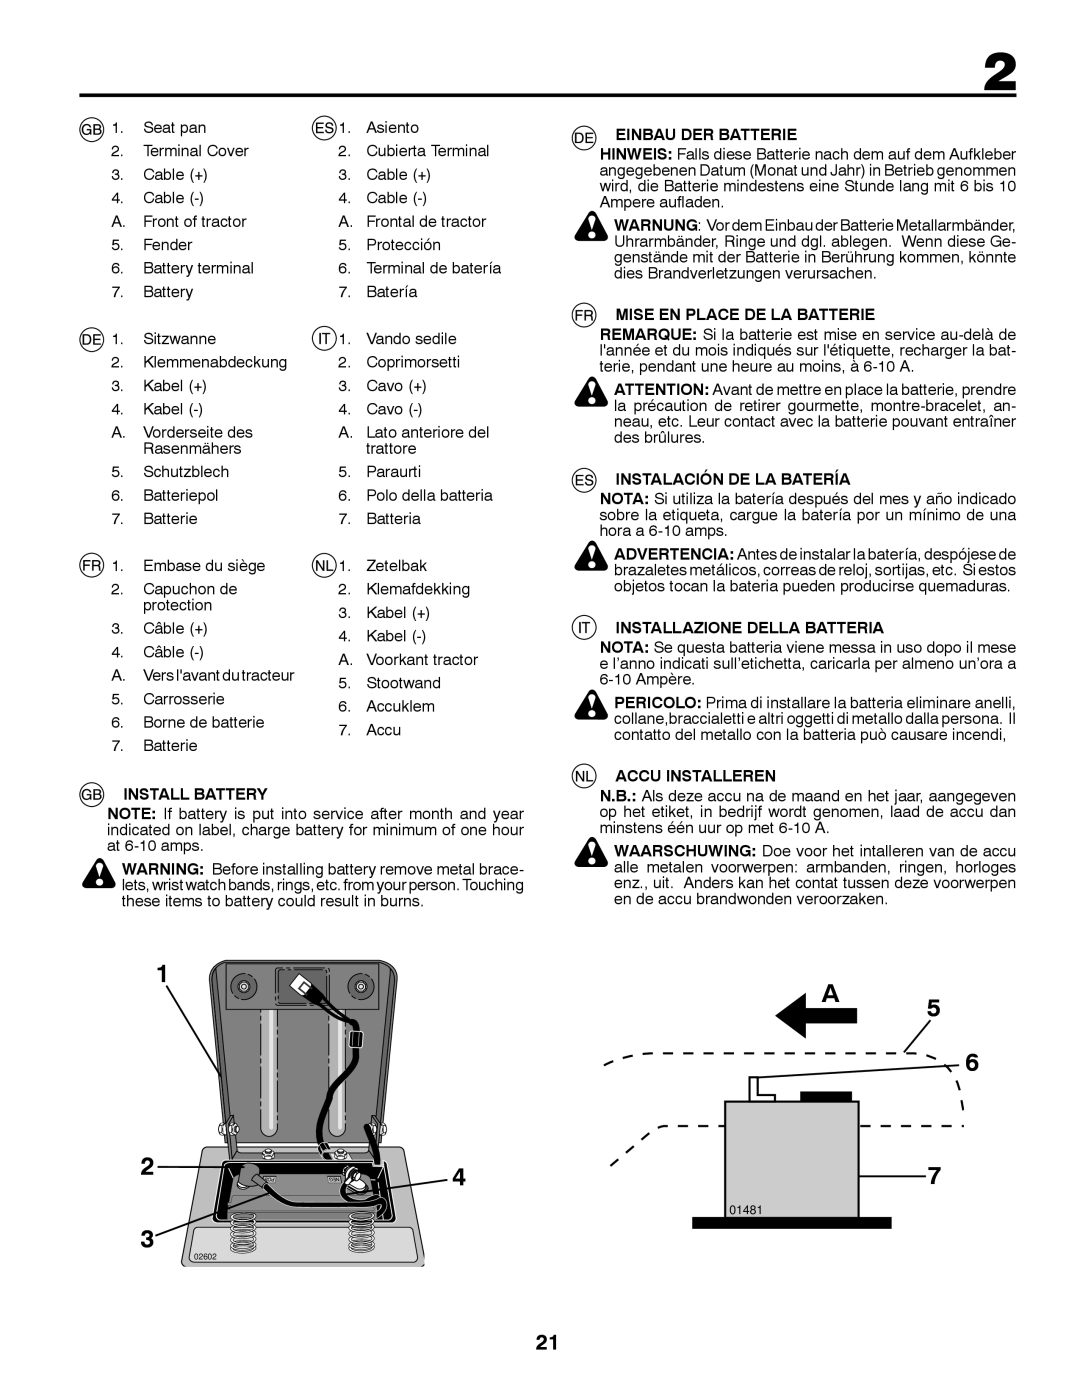
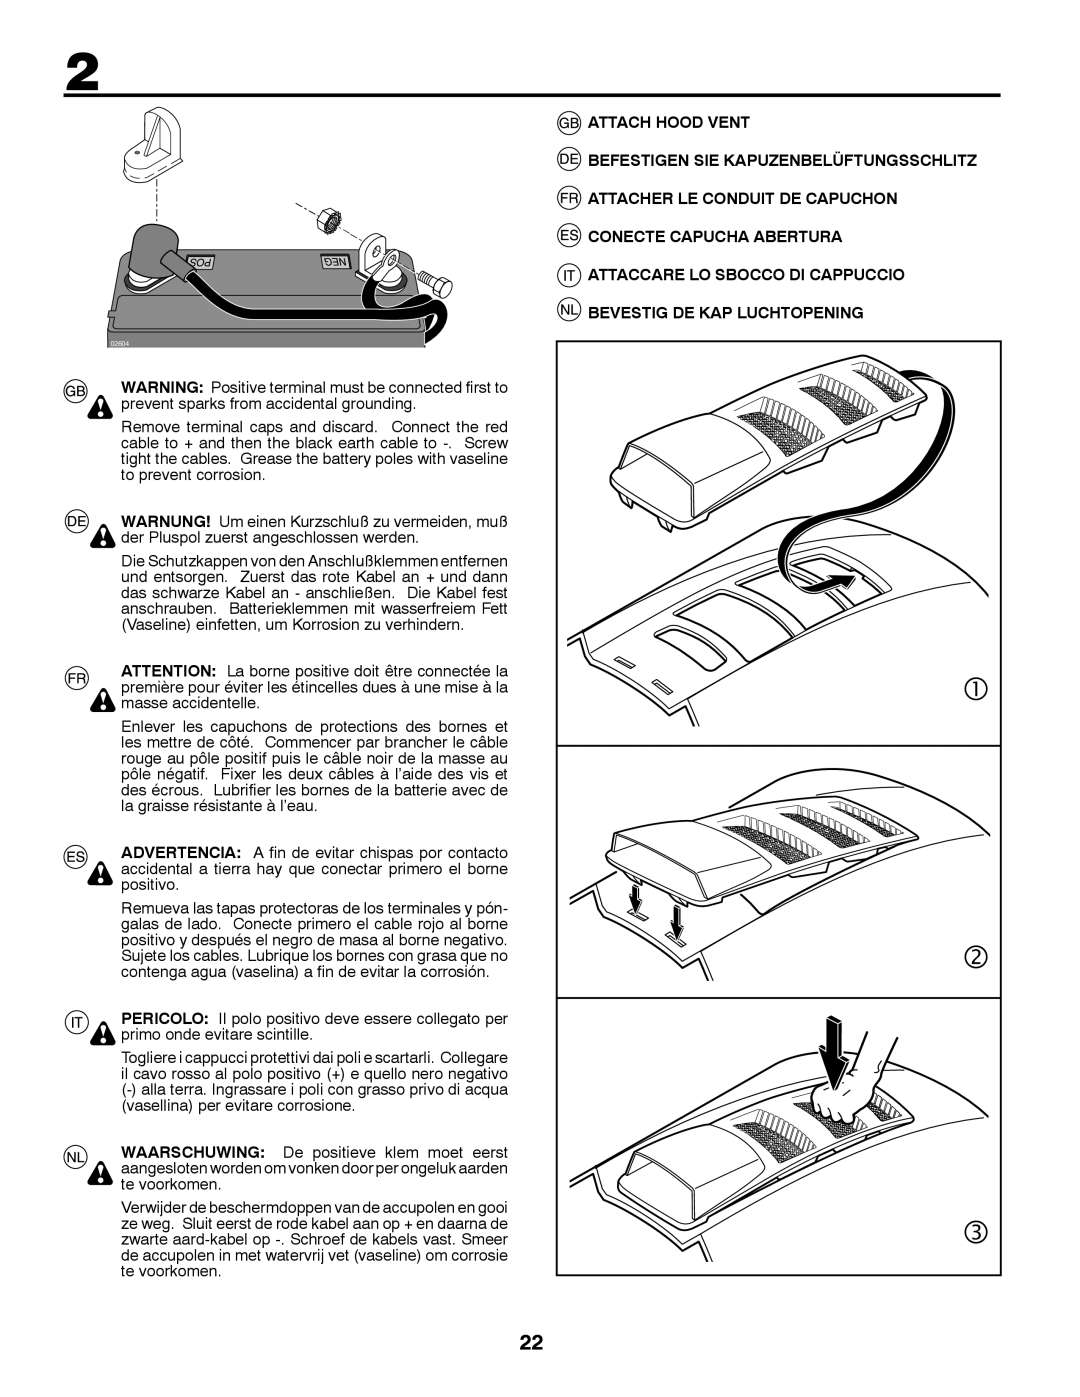
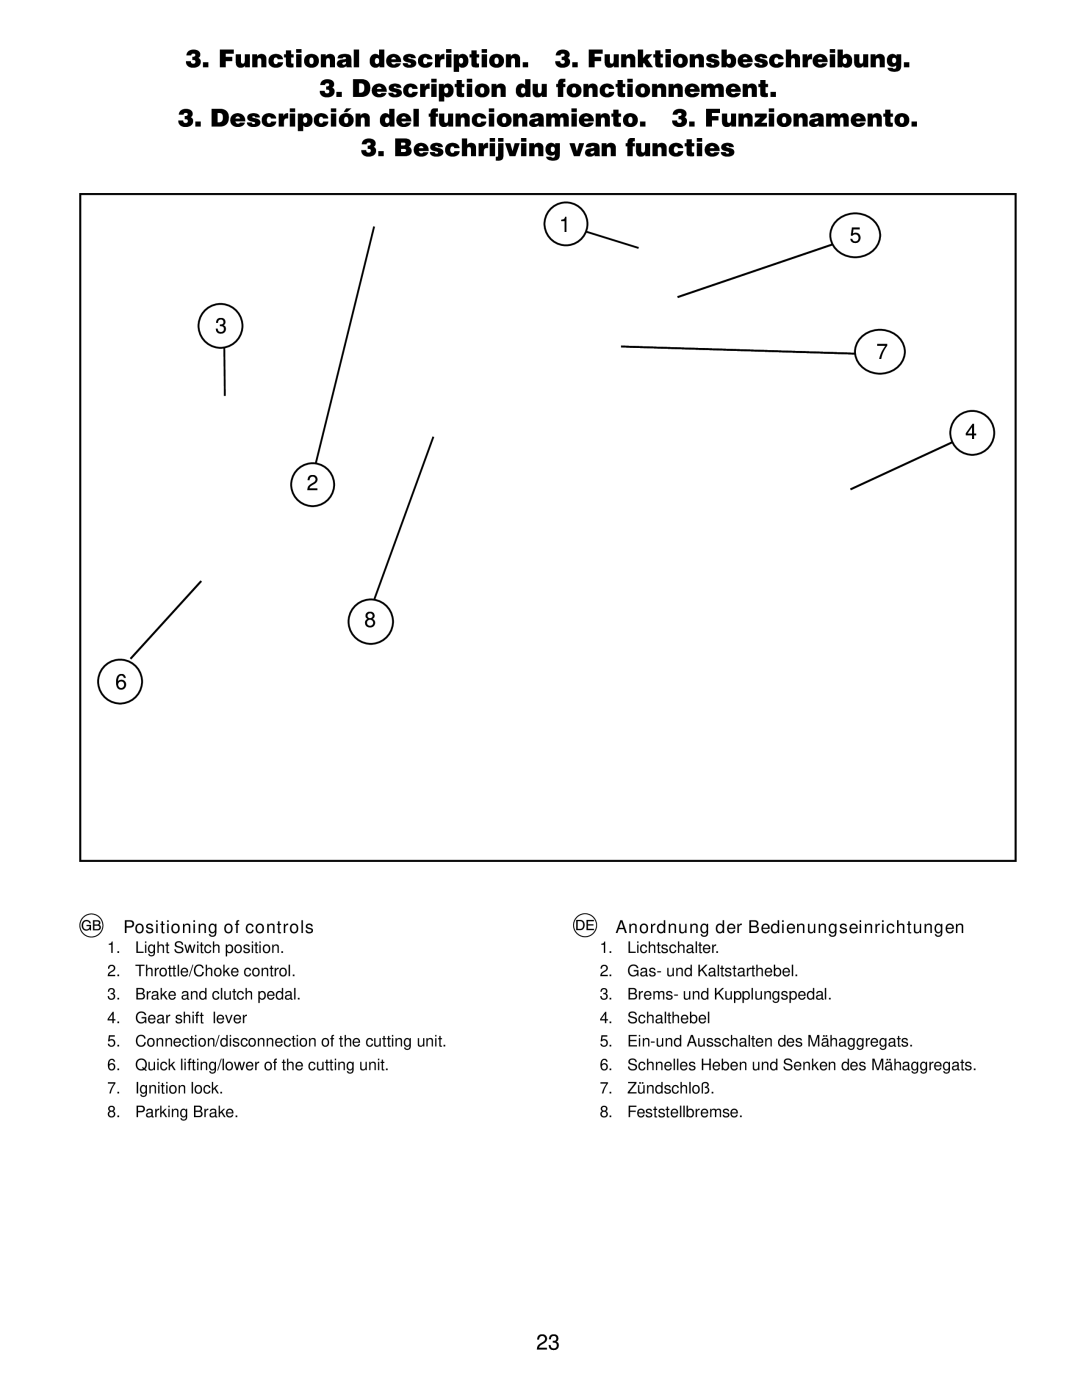
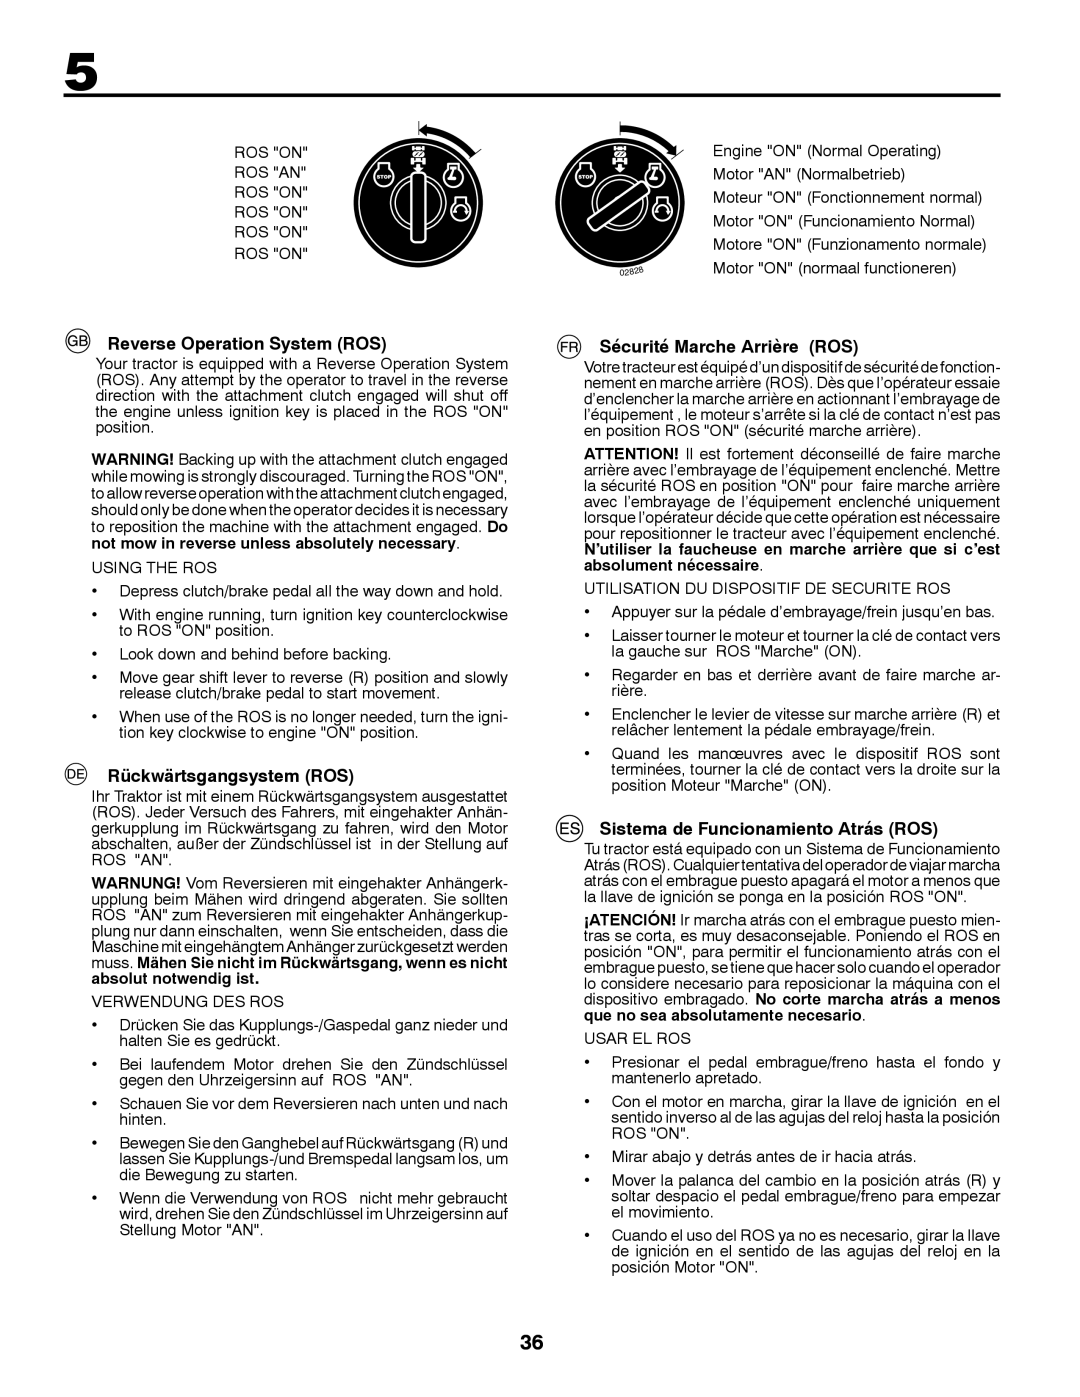
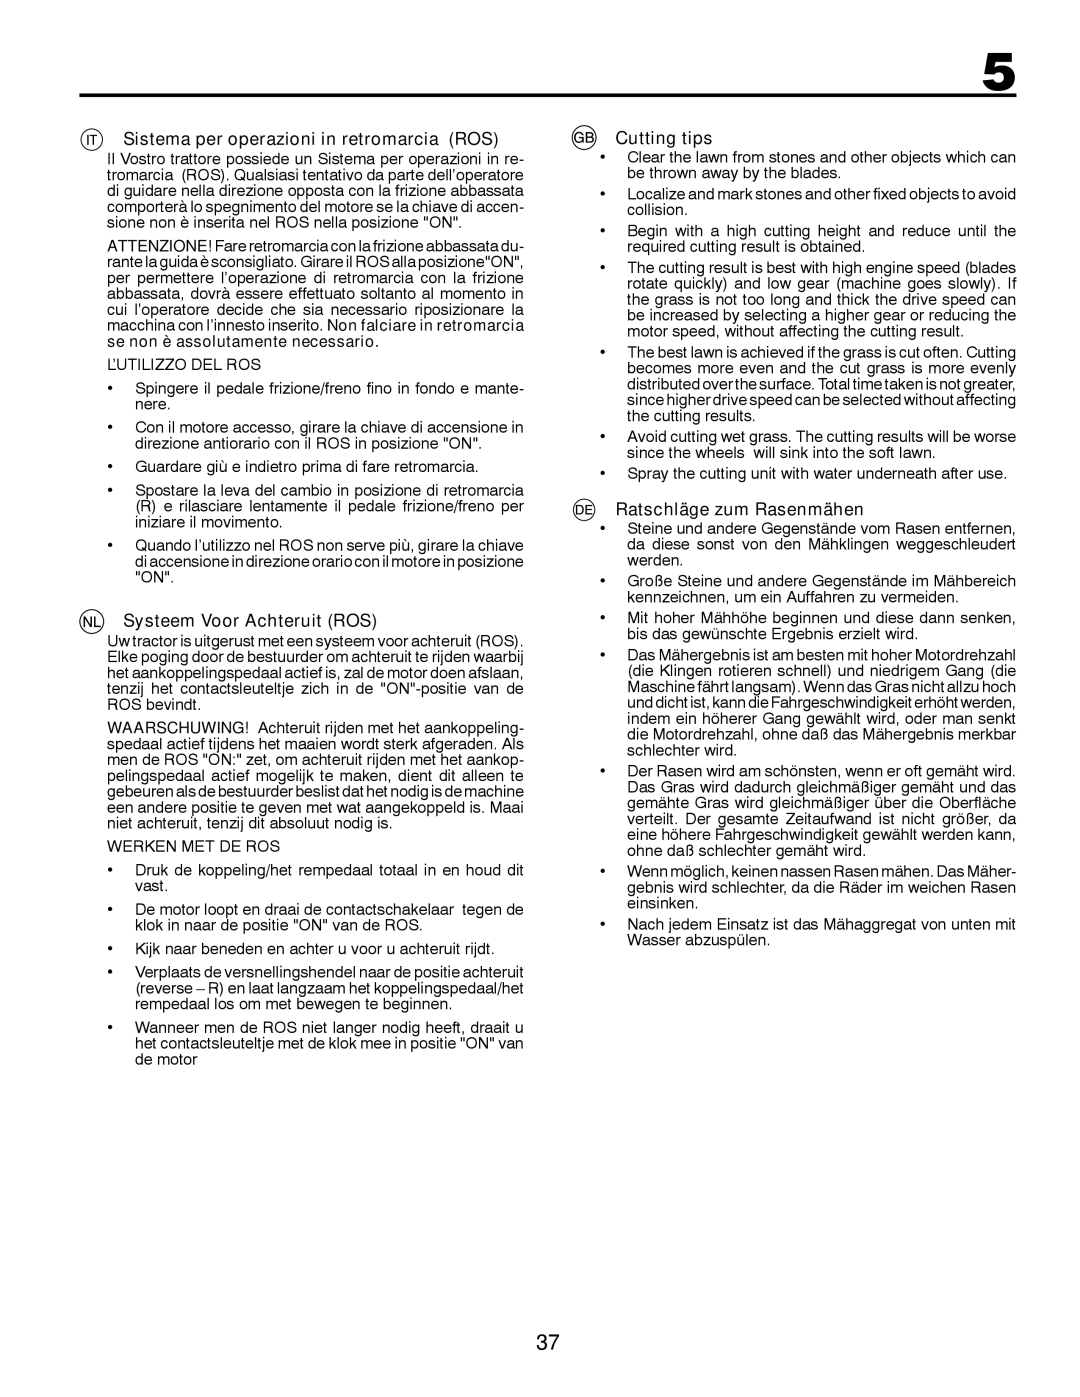
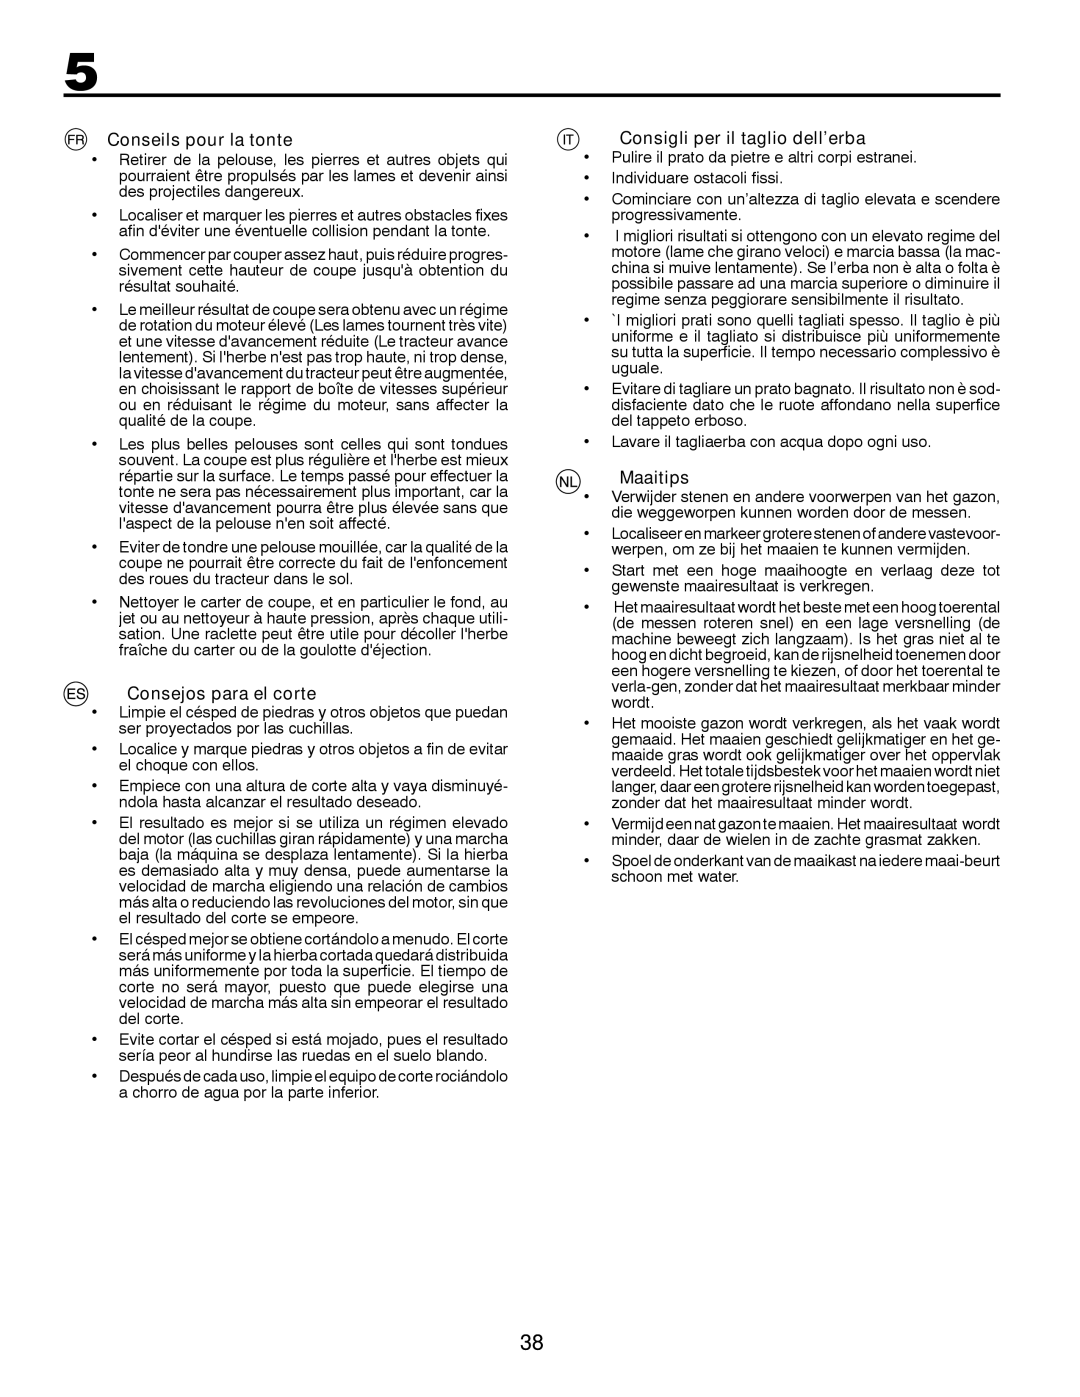
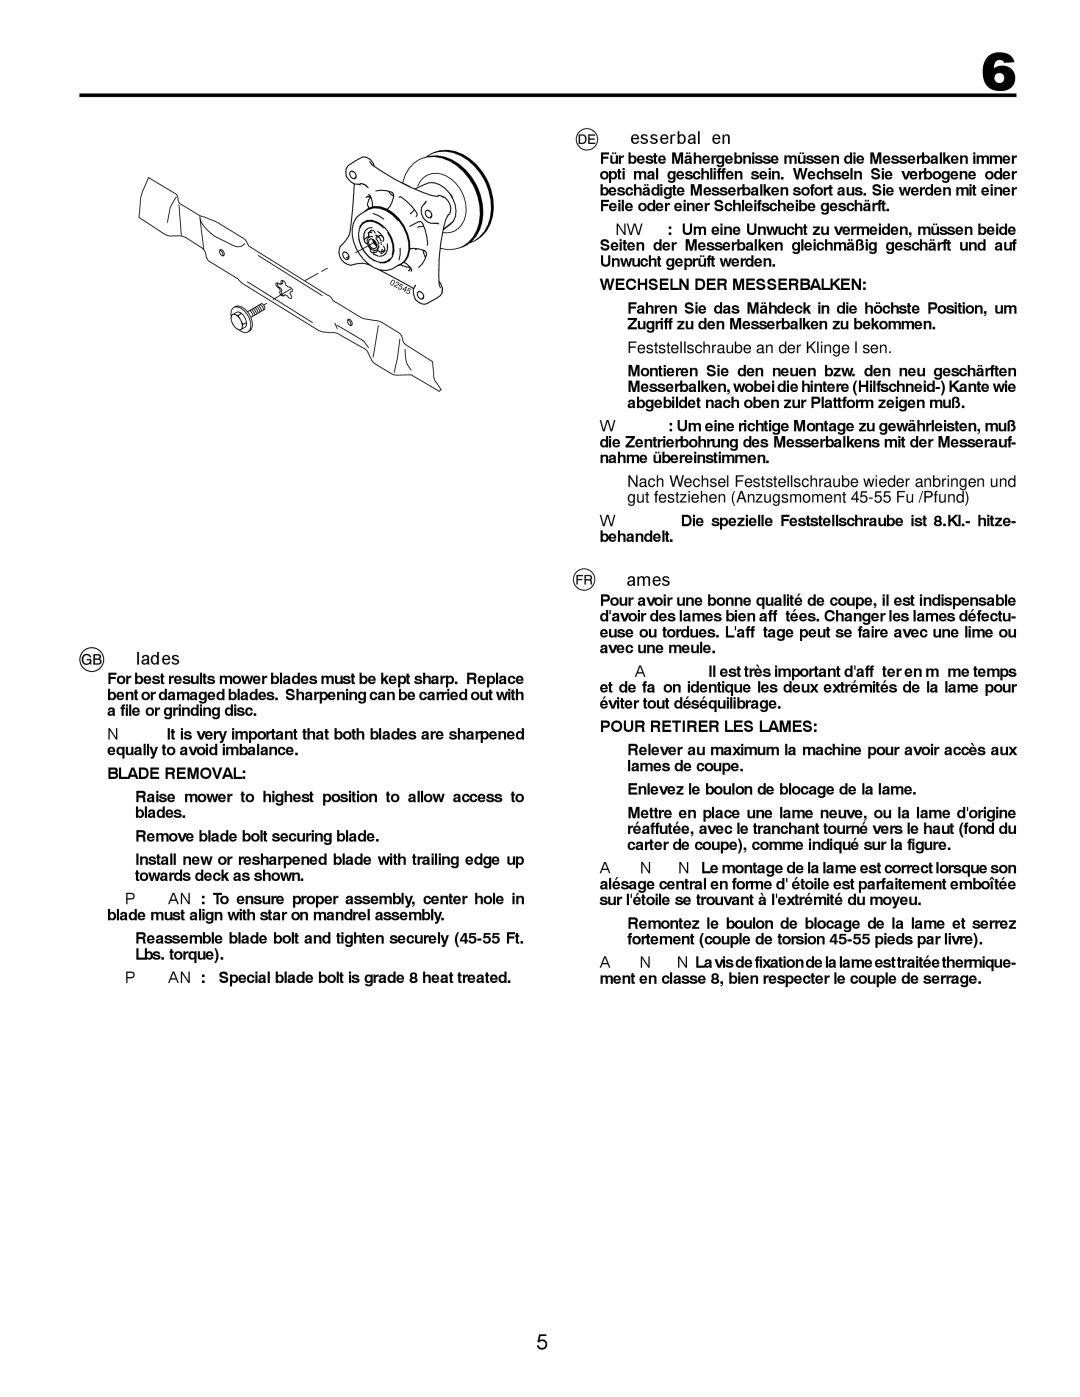
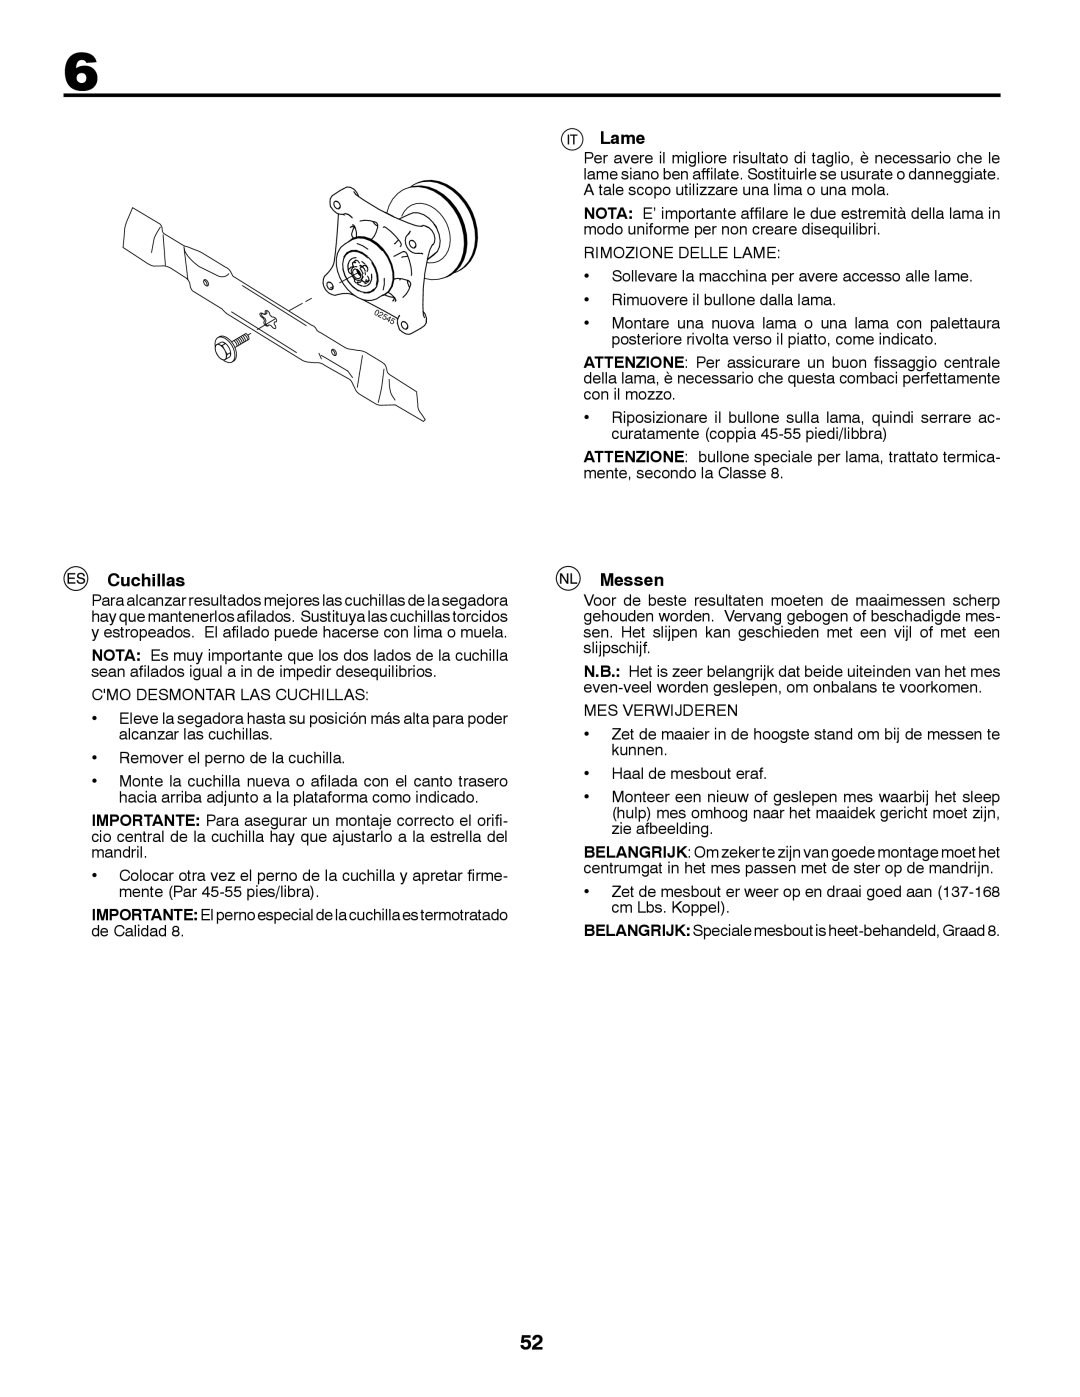
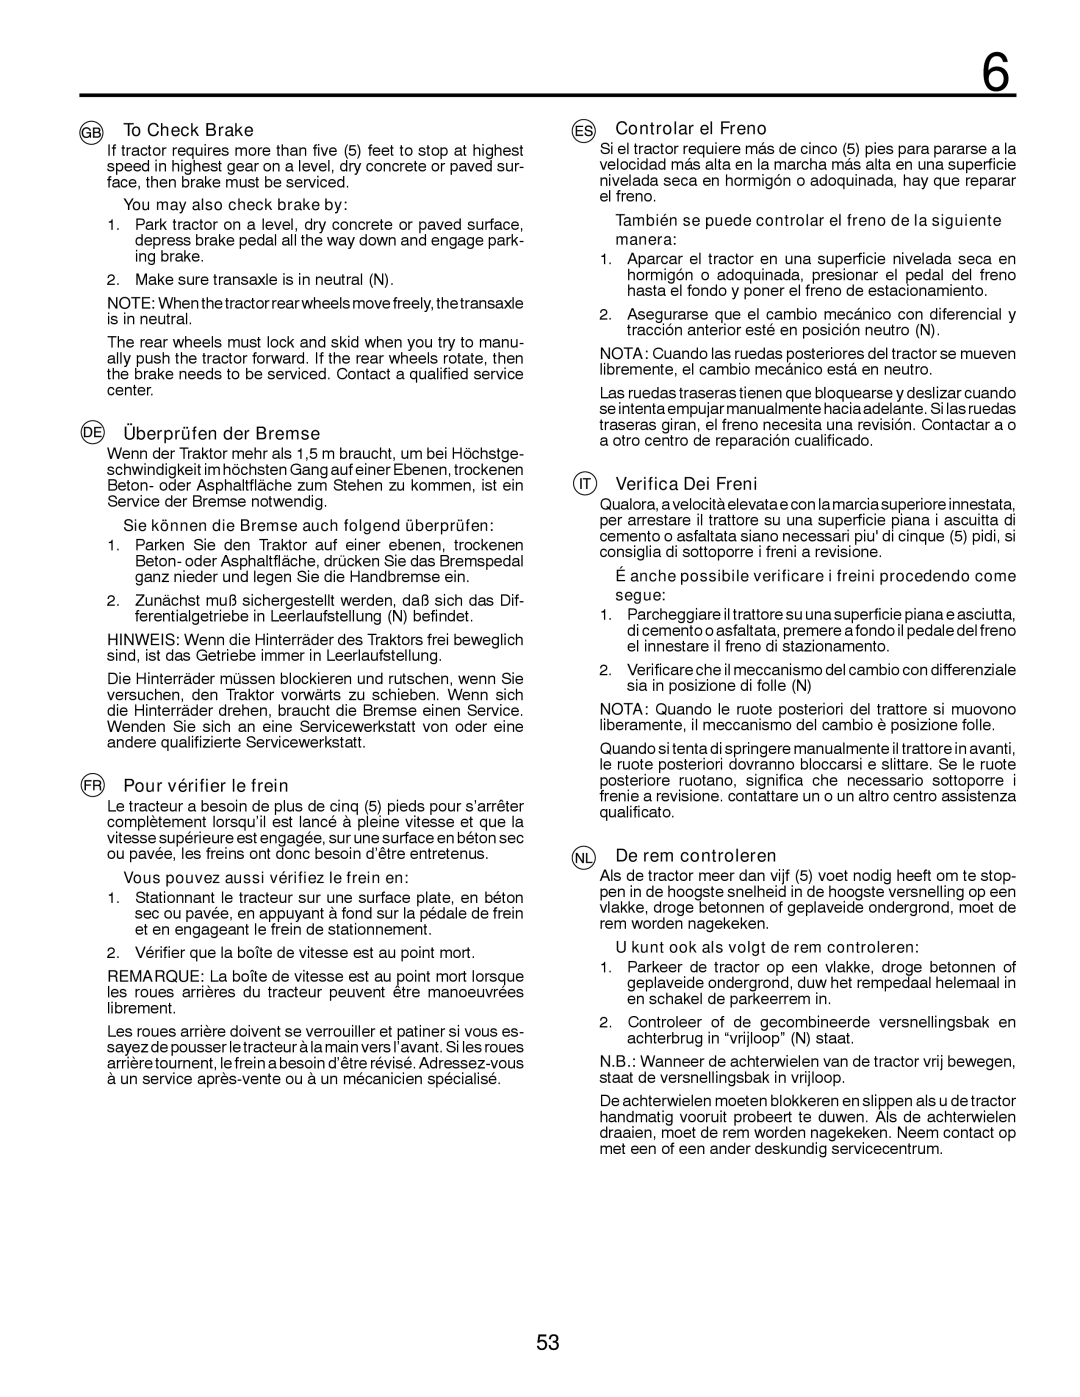
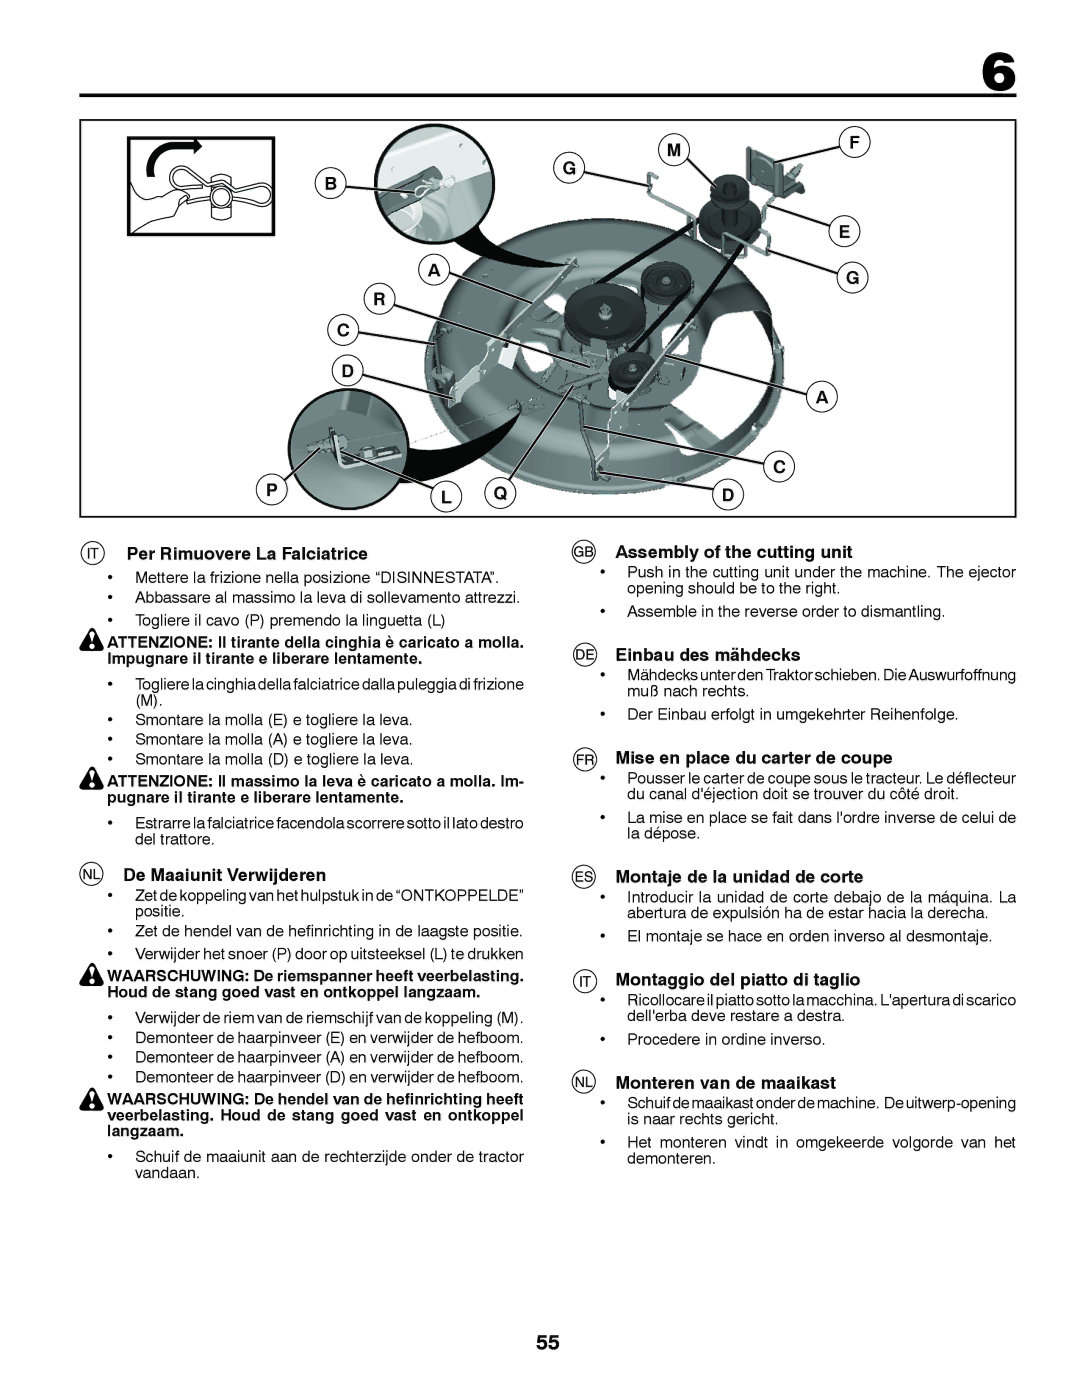
Husqvarna LT126 Oil level, Ölstand, Niveau d’huile, Nivel de aceite, Livello dell’olio, Oliepeil

Page 32

4

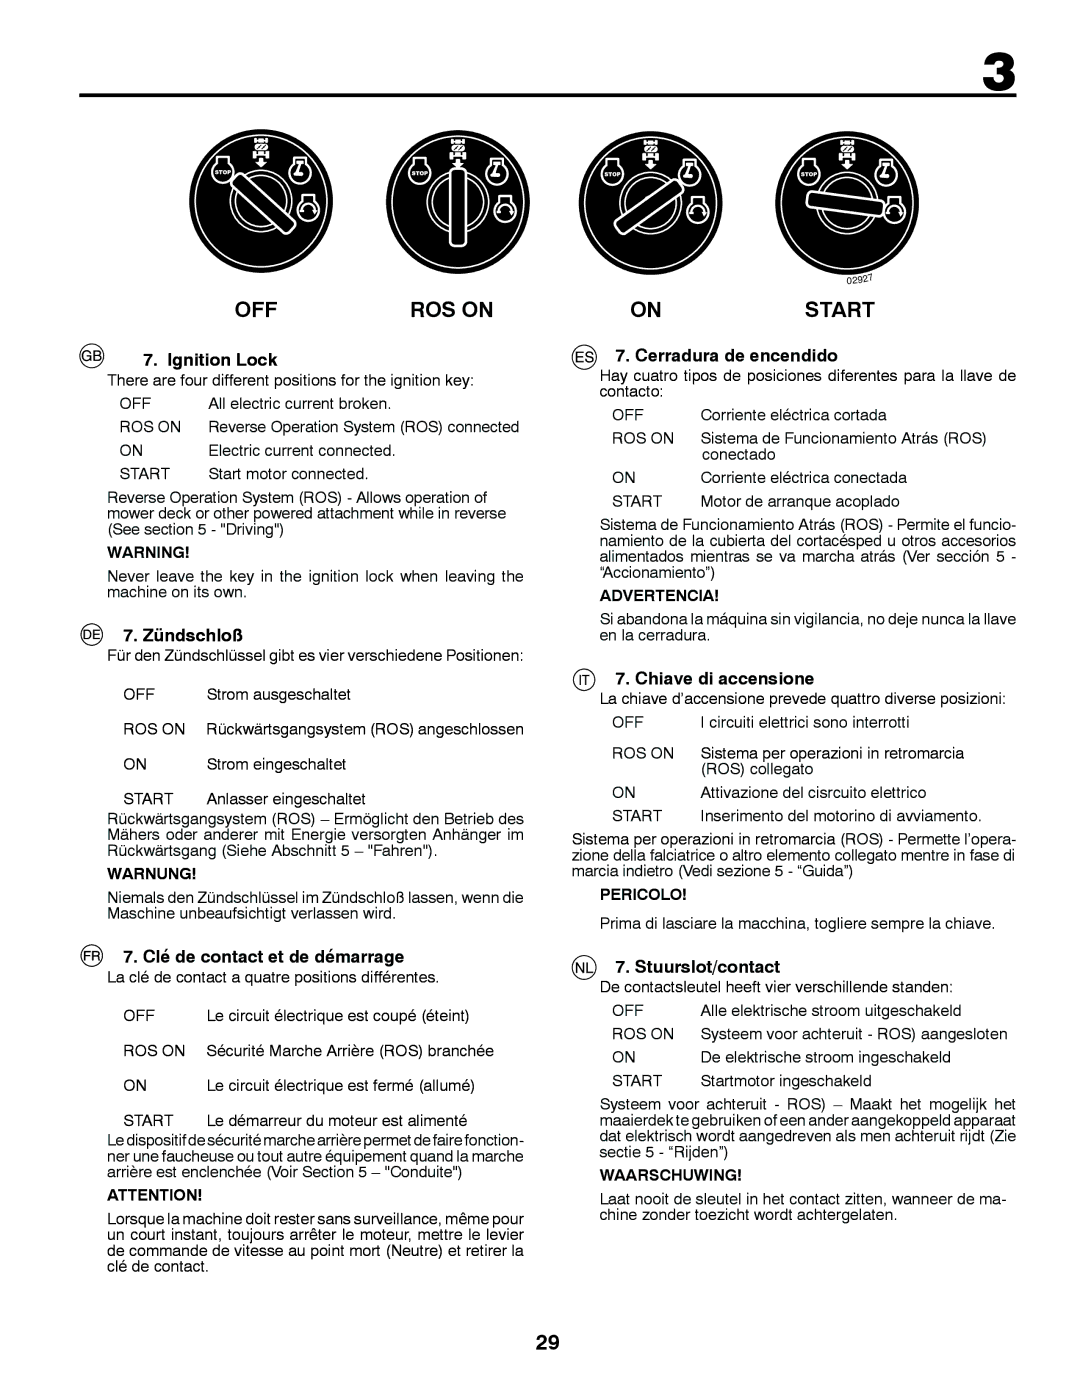
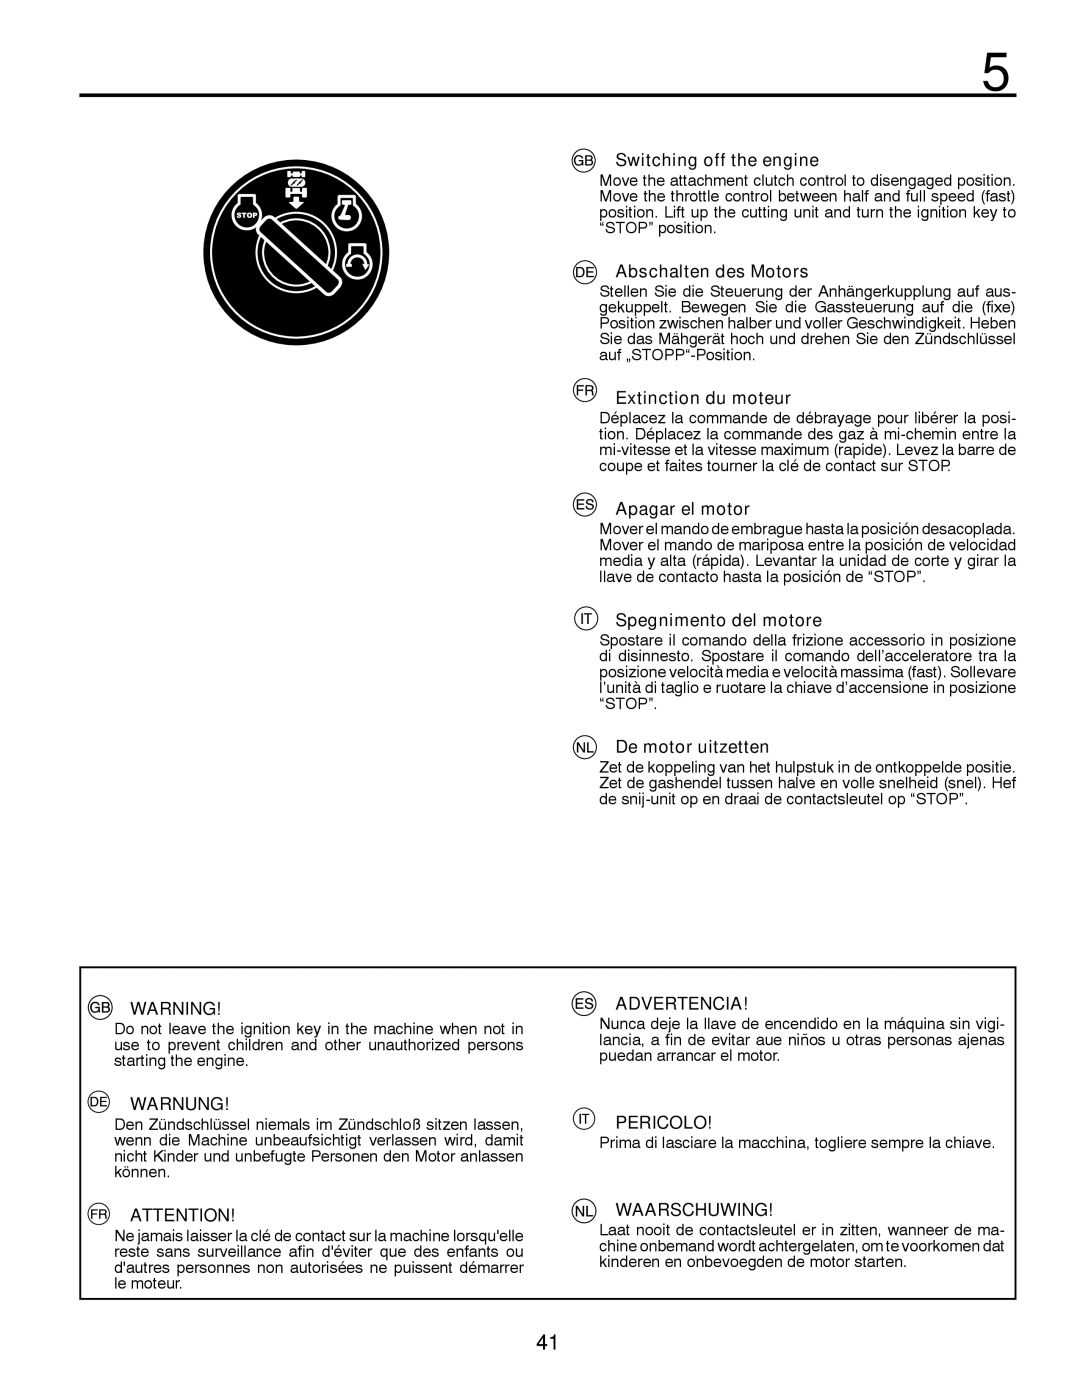
Oil level

The combined oil refilling cap and the oil stick is accessible when the bonnet is lifted forwards. The oil level in the engine should be checked before each run. Make sure that the tractor is horizontal. Unscrew the oil stick and wipe clean. Replace the oil stick and screw tight. Remove again and check the level.

Ölstand

Der mit dem Meßstab kombinierte Öleinfülldeckel ist nach Aufklappen der Motorhaube zugänglich. Den Ölstand im Motor vor jeder Fahrt prüfen. Dabei darauf achten, daß die Maschine waagrecht steht. Ölmeßstab herausschrauben und abwischen. Meßstab wieder fest einschrauben, nochmals herausnehmen und den Ölstand ablesen.

Niveau d’huile

L'orifice de remplissage avec son bouchon/jauge est ac- cessible après basculement du capot moteur vers l'avant. Le niveau d'huile du moteur doit être contrôlé avant chaque utilisation. S'assurer que le tracteur se trouve bien à plat, dévisser le bouchon avec sa jauge, essuyer cette dernière. Remettre en place le bouchon/jauge et le revisser. Attendre quelques secondes et retirer à nouveau la jauge. Contrôler le niveau de l'huile sur la jauge.

37420

02473

ADD

FULL CAUTION - DO


01341

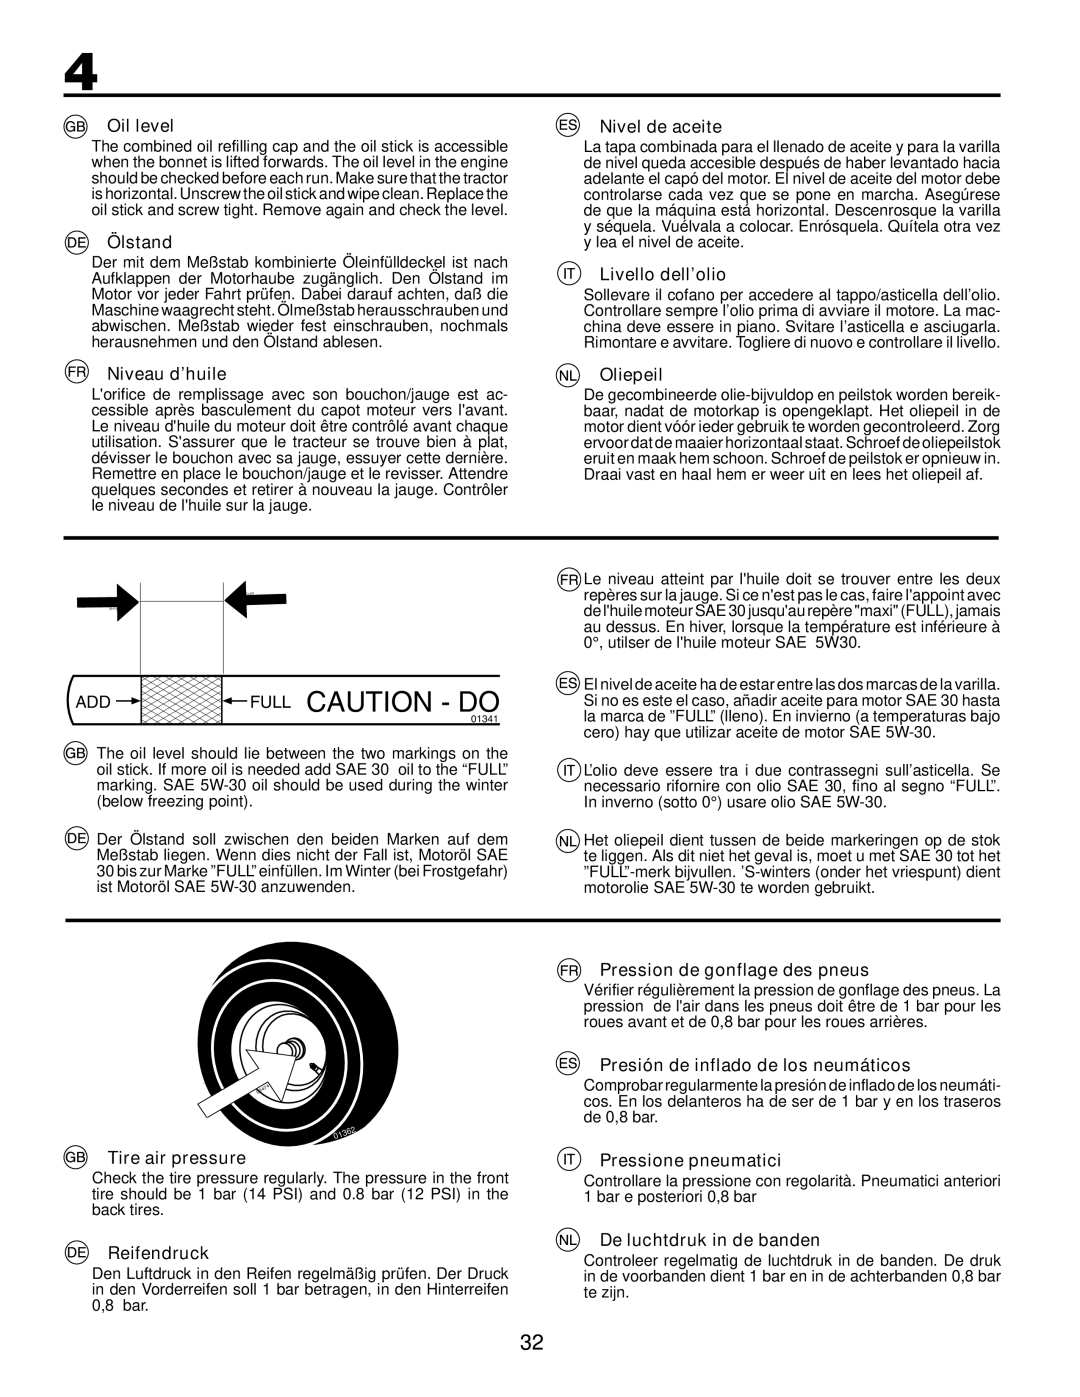
The oil level should lie between the two markings on the oil stick. If more oil is needed add SAE 30 oil to the “FULL” marking. SAE 5W-30 oil should be used during the winter (below freezing point).

Der Ölstand soll zwischen den beiden Marken auf dem Meßstab liegen. Wenn dies nicht der Fall ist, Motoröl SAE 30 bis zur Marke ”FULL” einfüllen. Im Winter (bei Frostgefahr) ist Motoröl SAE 5W-30 anzuwenden.

Nivel de aceite

La tapa combinada para el llenado de aceite y para la varilla de nivel queda accesible después de haber levantado hacia adelante el capó del motor. El nivel de aceite del motor debe controlarse cada vez que se pone en marcha. Asegúrese de que la máquina está horizontal. Descenrosque la varilla y séquela. Vuélvala a colocar. Enrósquela. Quítela otra vez y lea el nivel de aceite.

Livello dell’olio

Sollevare il cofano per accedere al tappo/asticella dell’olio. Controllare sempre l’olio prima di avviare il motore. La mac- china deve essere in piano. Svitare l’asticella e asciugarla. Rimontare e avvitare. Togliere di nuovo e controllare il livello.

Oliepeil

De gecombineerde olie-bijvuldop en peilstok worden bereik- baar, nadat de motorkap is opengeklapt. Het oliepeil in de motor dient vóór ieder gebruik te worden gecontroleerd. Zorg ervoor dat de maaier horizontaal staat. Schroef de oliepeilstok eruit en maak hem schoon. Schroef de peilstok er opnieuw in. Draai vast en haal hem er weer uit en lees het oliepeil af.

Le niveau atteint par l'huile doit se trouver entre les deux repères sur la jauge. Si ce n'est pas le cas, faire l'appoint avec de l'huile moteur SAE 30 jusqu'au repère "maxi" (FULL), jamais au dessus. En hiver, lorsque la température est inférieure à 0°, utilser de l'huile moteur SAE 5W30.

El nivel de aceite ha de estar entre las dos marcas de la varilla. Si no es este el caso, añadir aceite para motor SAE 30 hasta la marca de ”FULL” (lleno). En invierno (a temperaturas bajo cero) hay que utilizar aceite de motor SAE 5W-30.

L’olio deve essere tra i due contrassegni sull’asticella. Se necessario rifornire con olio SAE 30, fino al segno “FULL”. In inverno (sotto 0°) usare olio SAE 5W-30.

Het oliepeil dient tussen de beide markeringen op de stok te liggen. Als dit niet het geval is, moet u met SAE 30 tot het ”FULL”-merk bijvullen. ’S-winters (onder het vriespunt) dient motorolie SAE 5W-30 te worden gebruikt.

4 0247

01362

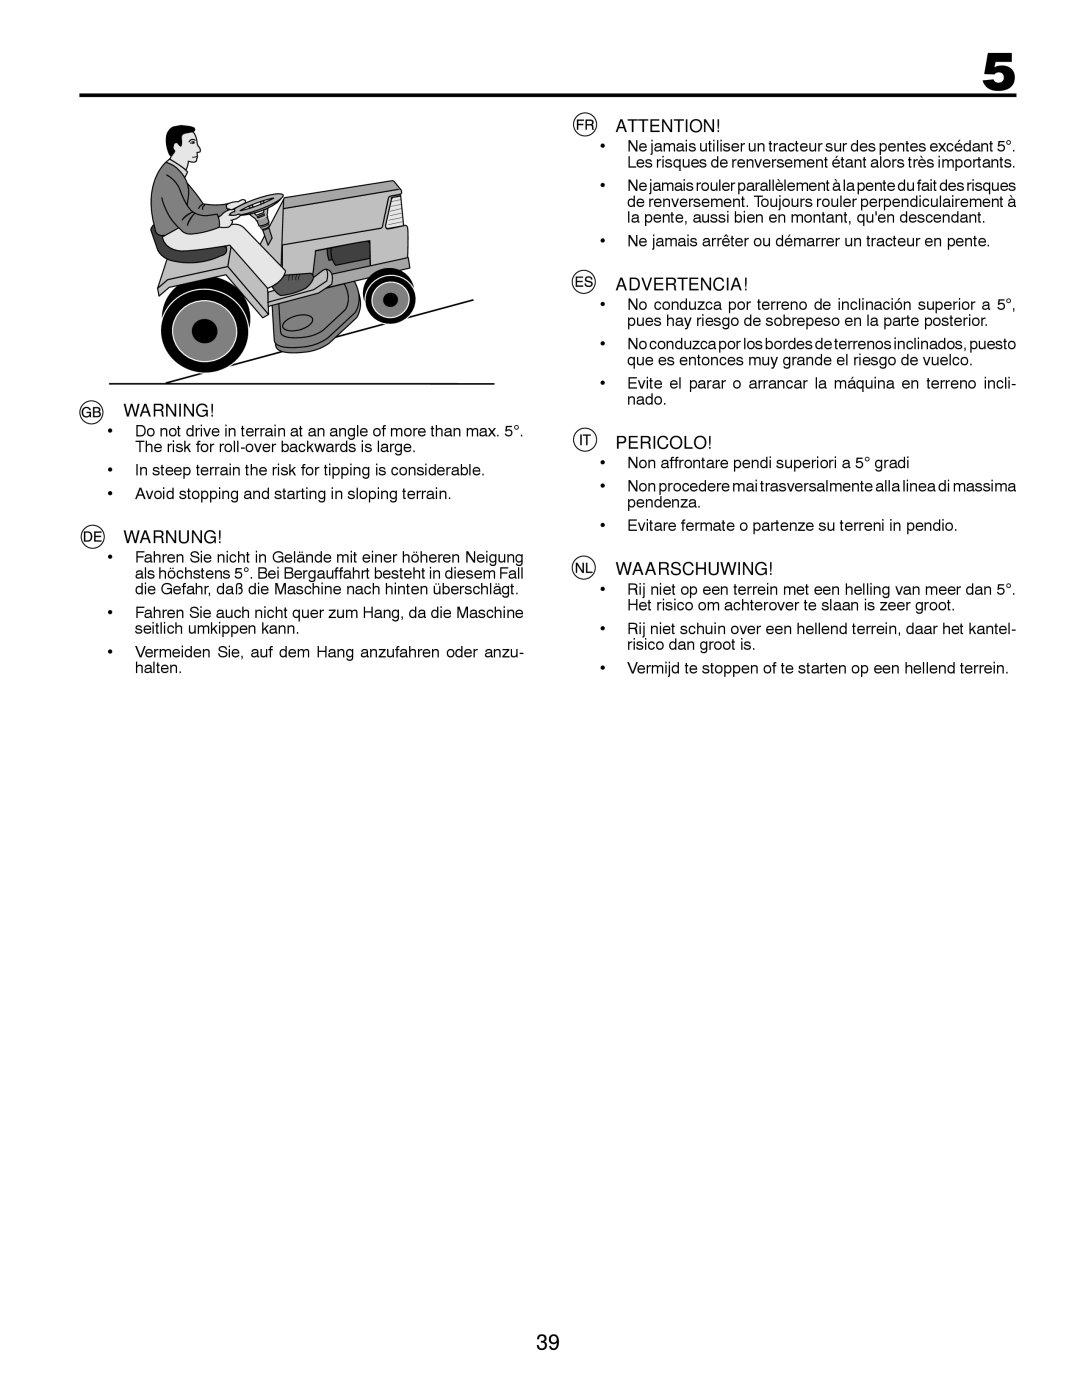
Tire air pressure

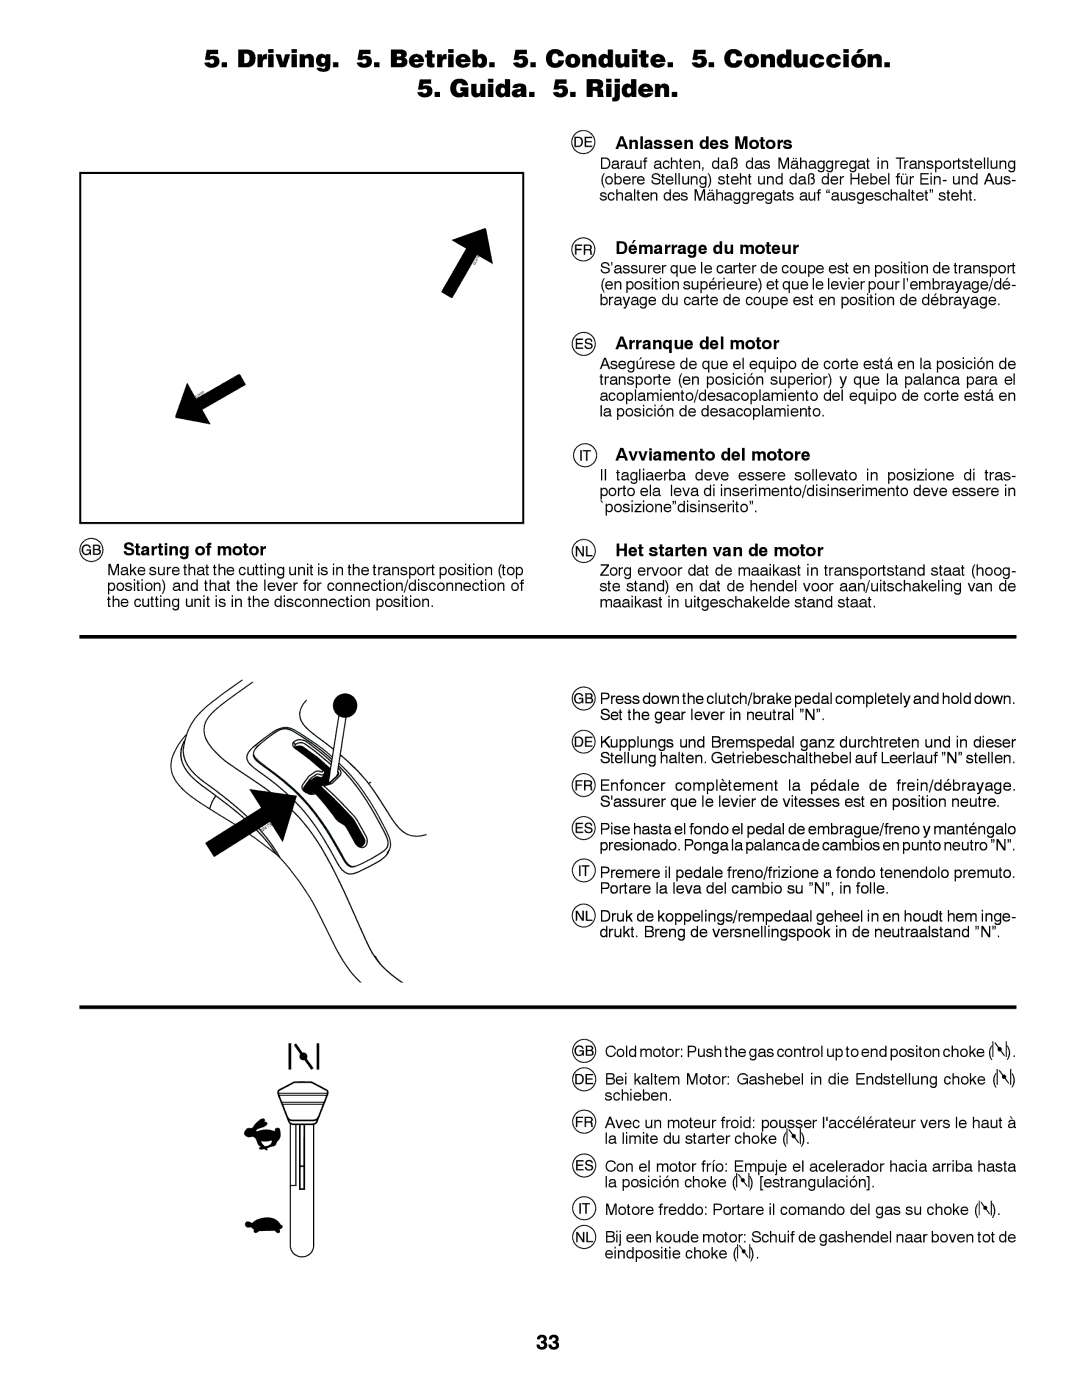
Check the tire pressure regularly. The pressure in the front tire should be 1 bar (14 PSI) and 0.8 bar (12 PSI) in the back tires.

Reifendruck

Den Luftdruck in den Reifen regelmäßig prüfen. Der Druck in den Vorderreifen soll 1 bar betragen, in den Hinterreifen 0,8 bar.

Pression de gonflage des pneus

Vérifier régulièrement la pression de gonflage des pneus. La pression de l'air dans les pneus doit être de 1 bar pour les roues avant et de 0,8 bar pour les roues arrières.

Presión de inflado de los neumáticos

Comprobar regularmente la presión de inflado de los neumáti- cos. En los delanteros ha de ser de 1 bar y en los traseros de 0,8 bar.

Pressione pneumatici

Controllare la pressione con regolarità. Pneumatici anteriori 1 bar e posteriori 0,8 bar

De luchtdruk in de banden

Controleer regelmatig de luchtdruk in de banden. De druk in de voorbanden dient 1 bar en in de achterbanden 0,8 bar te zijn.

32

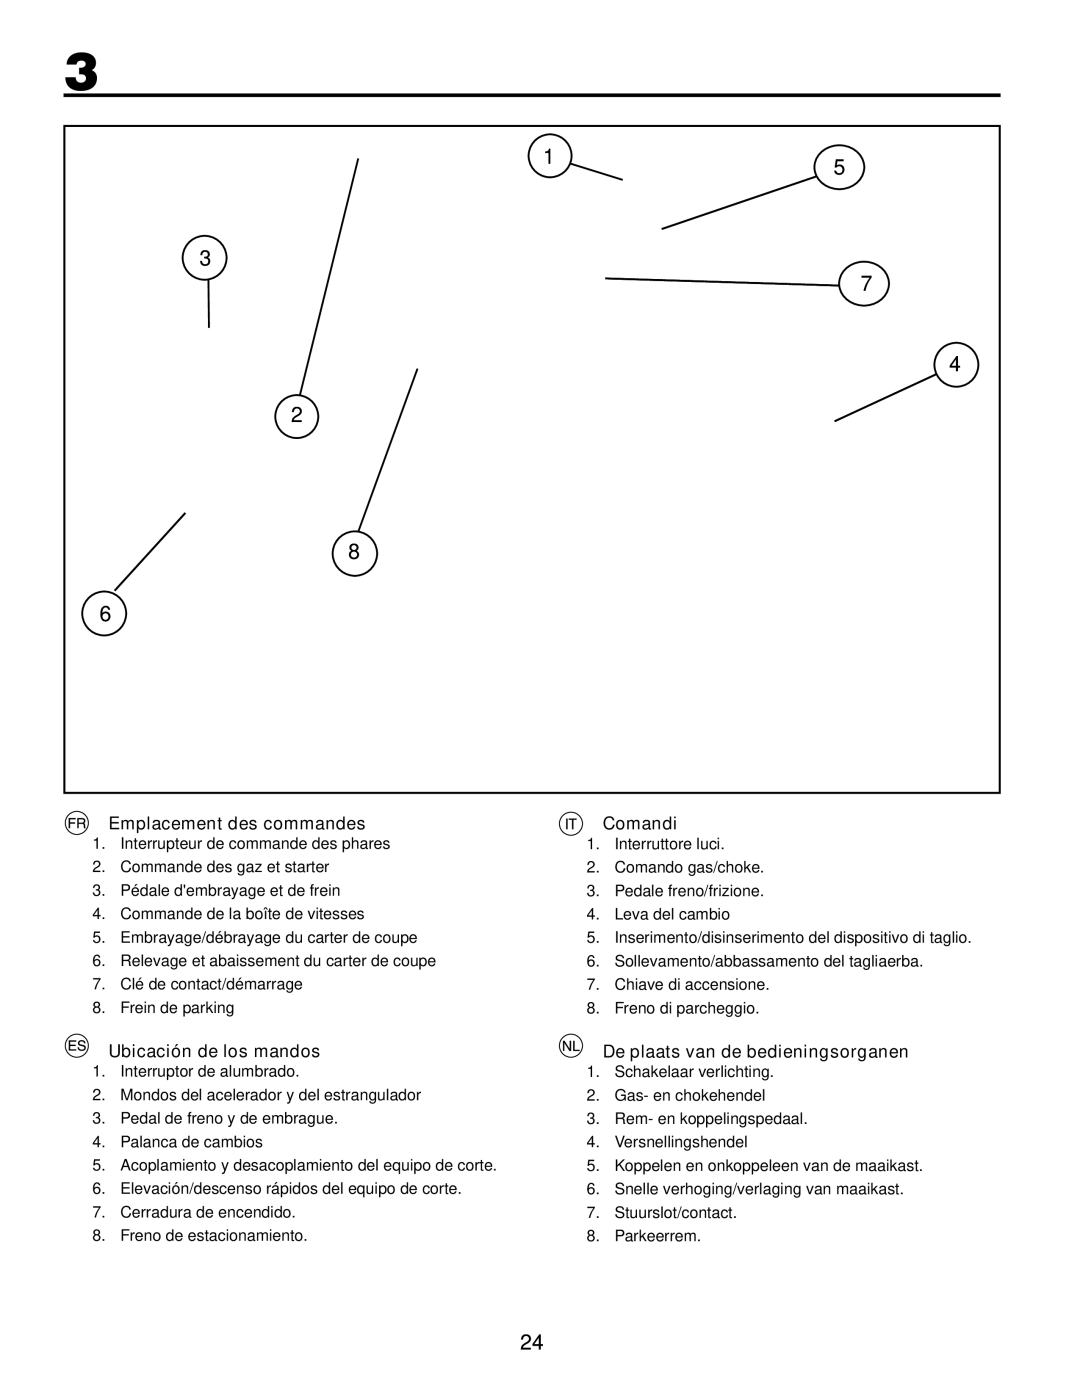
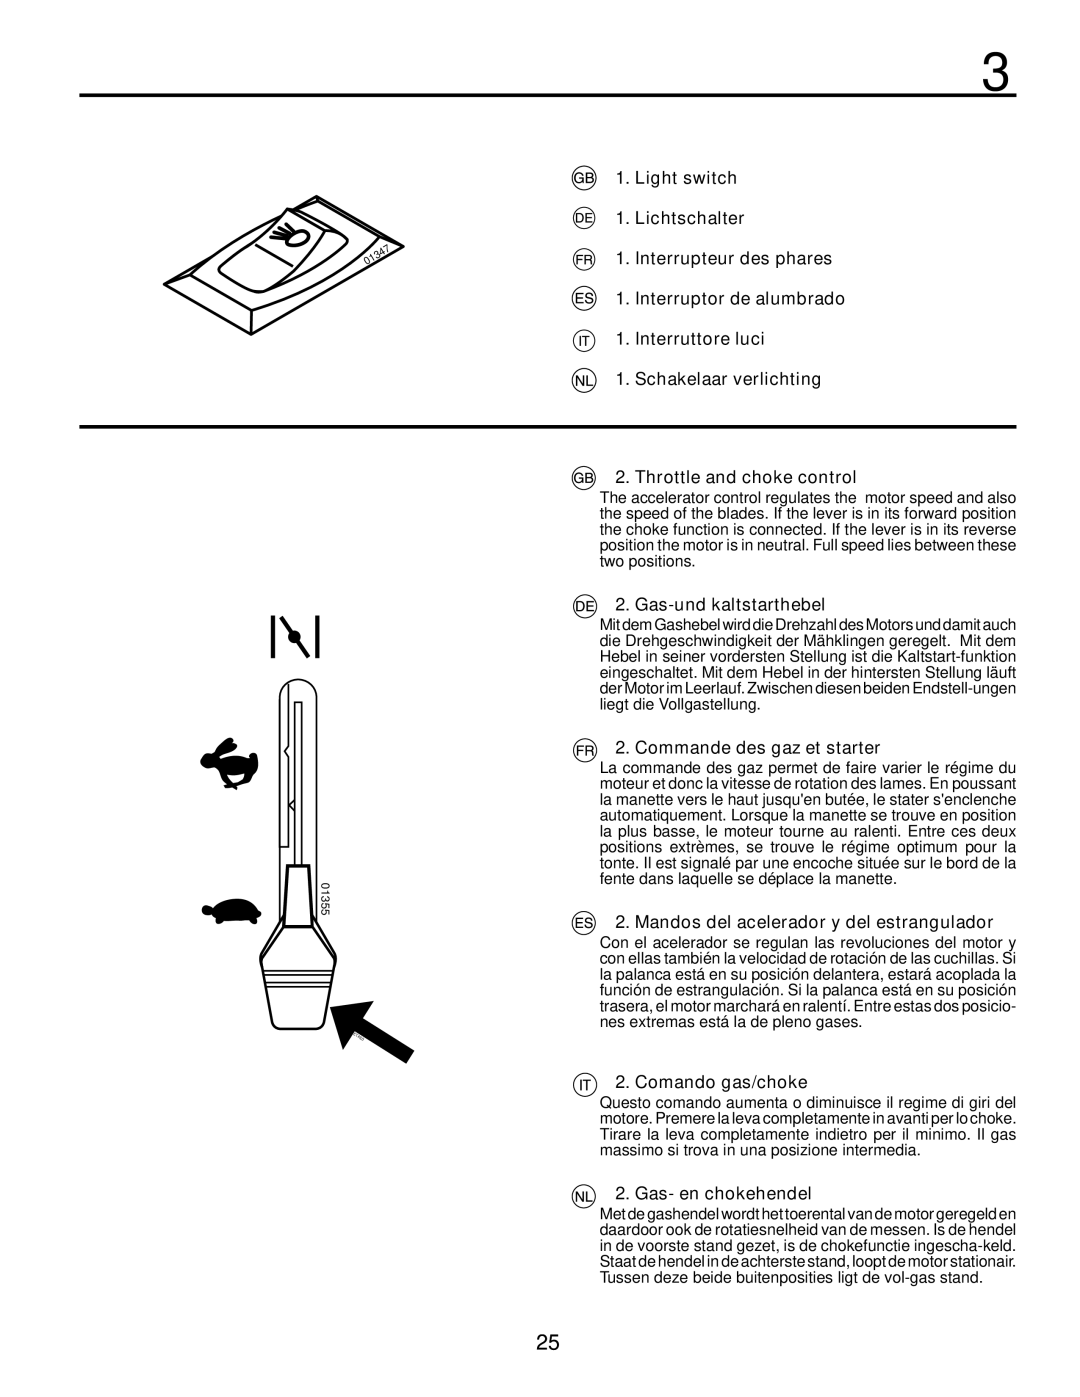
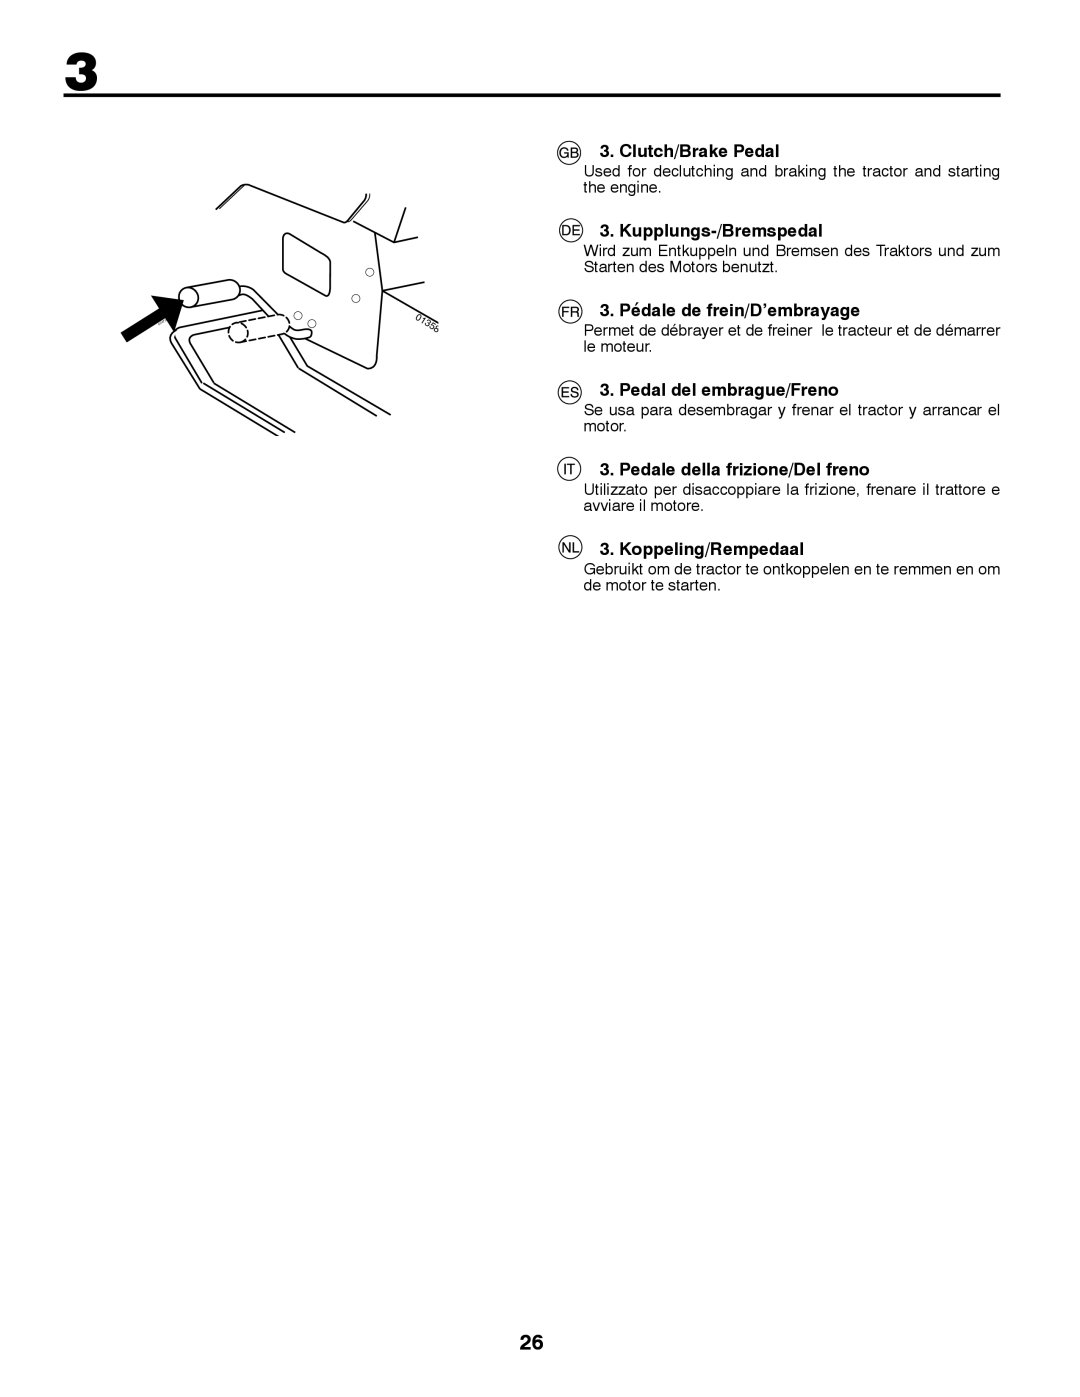
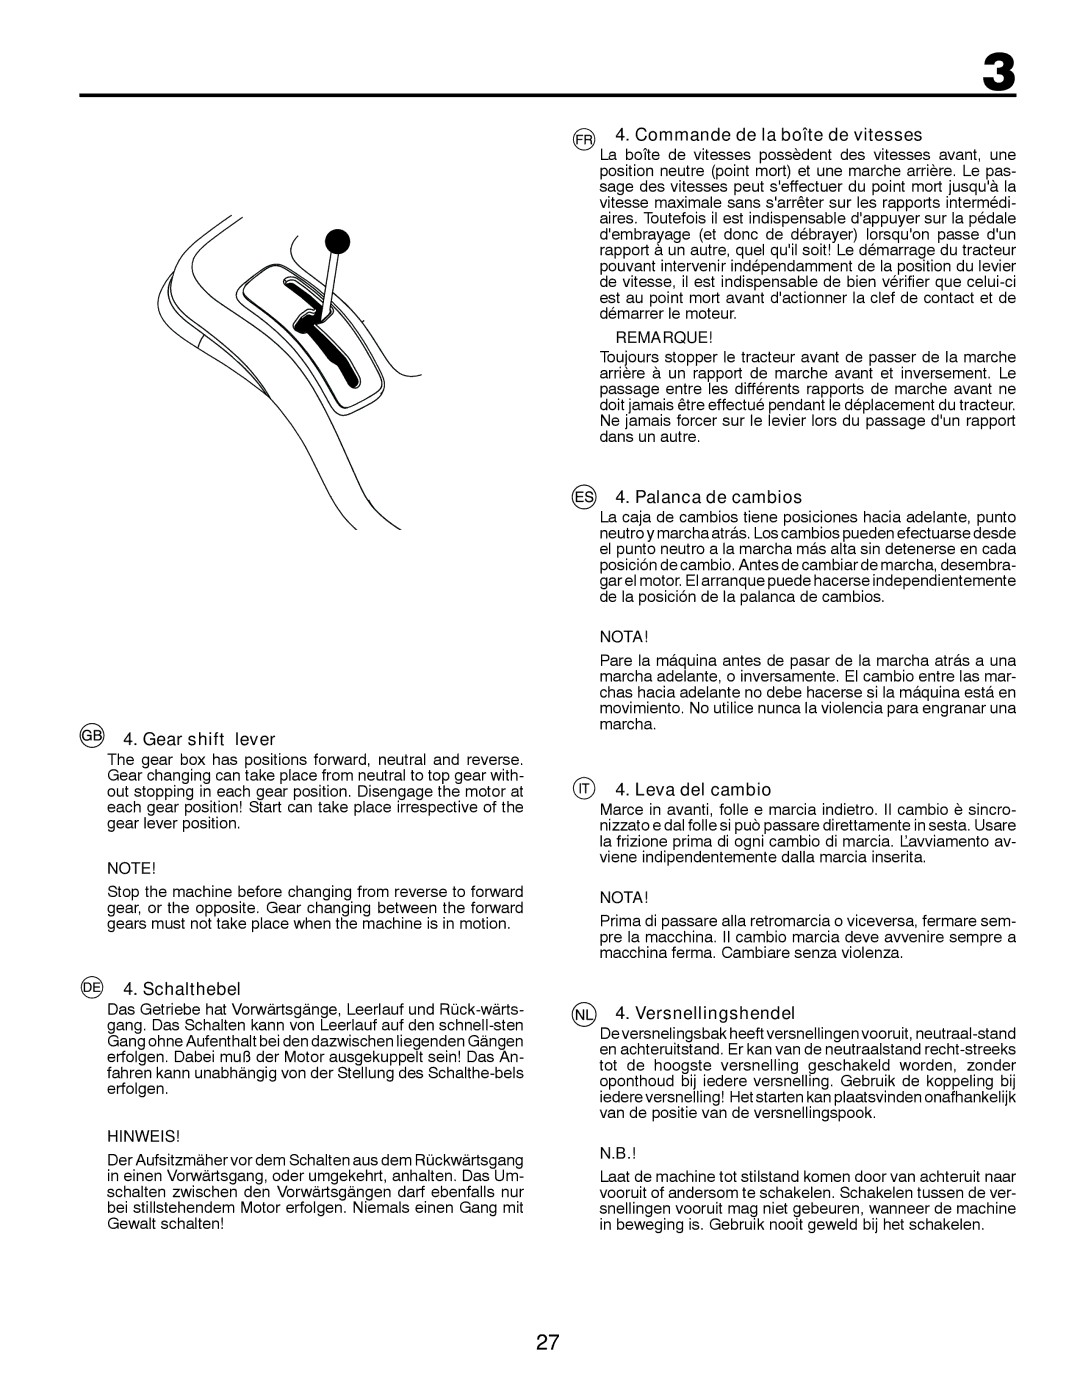
Image 32
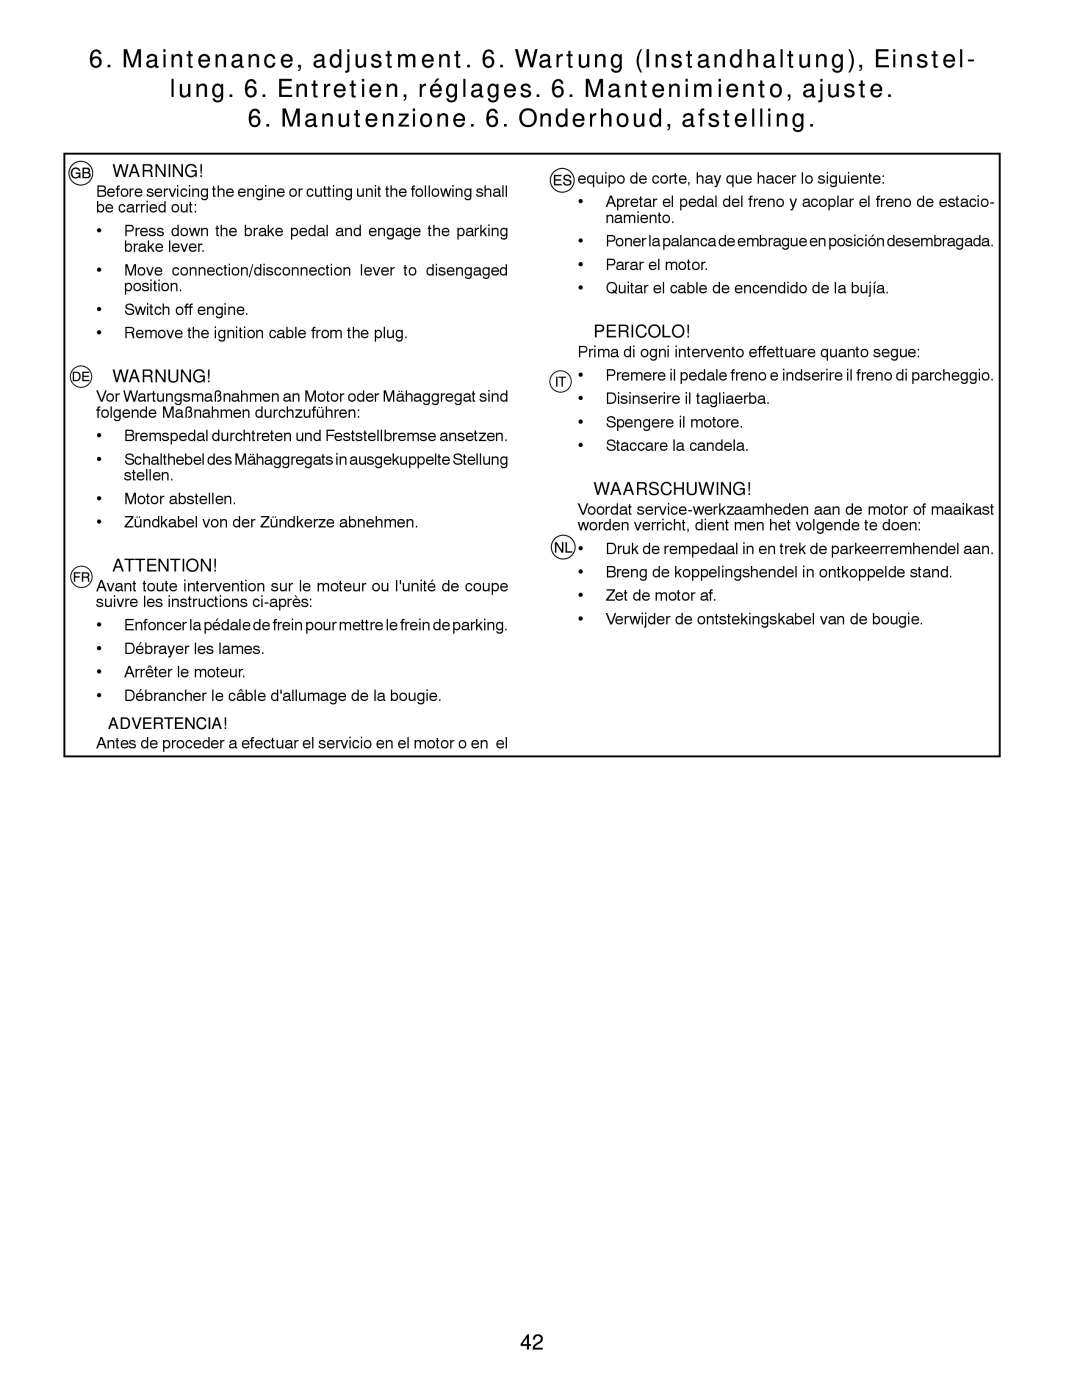
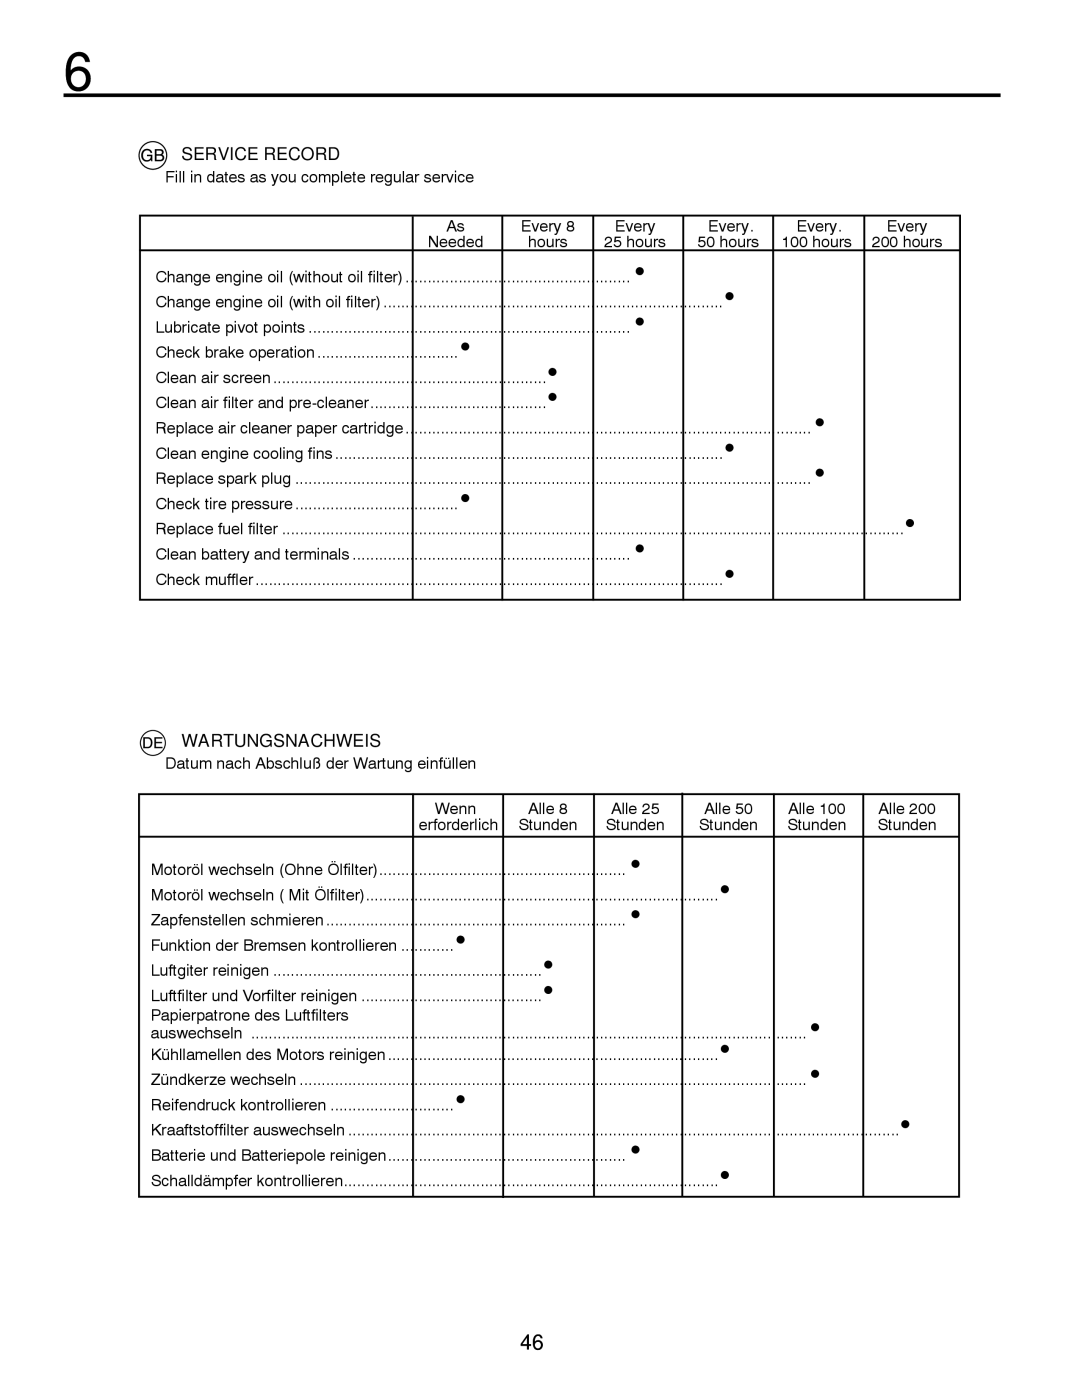
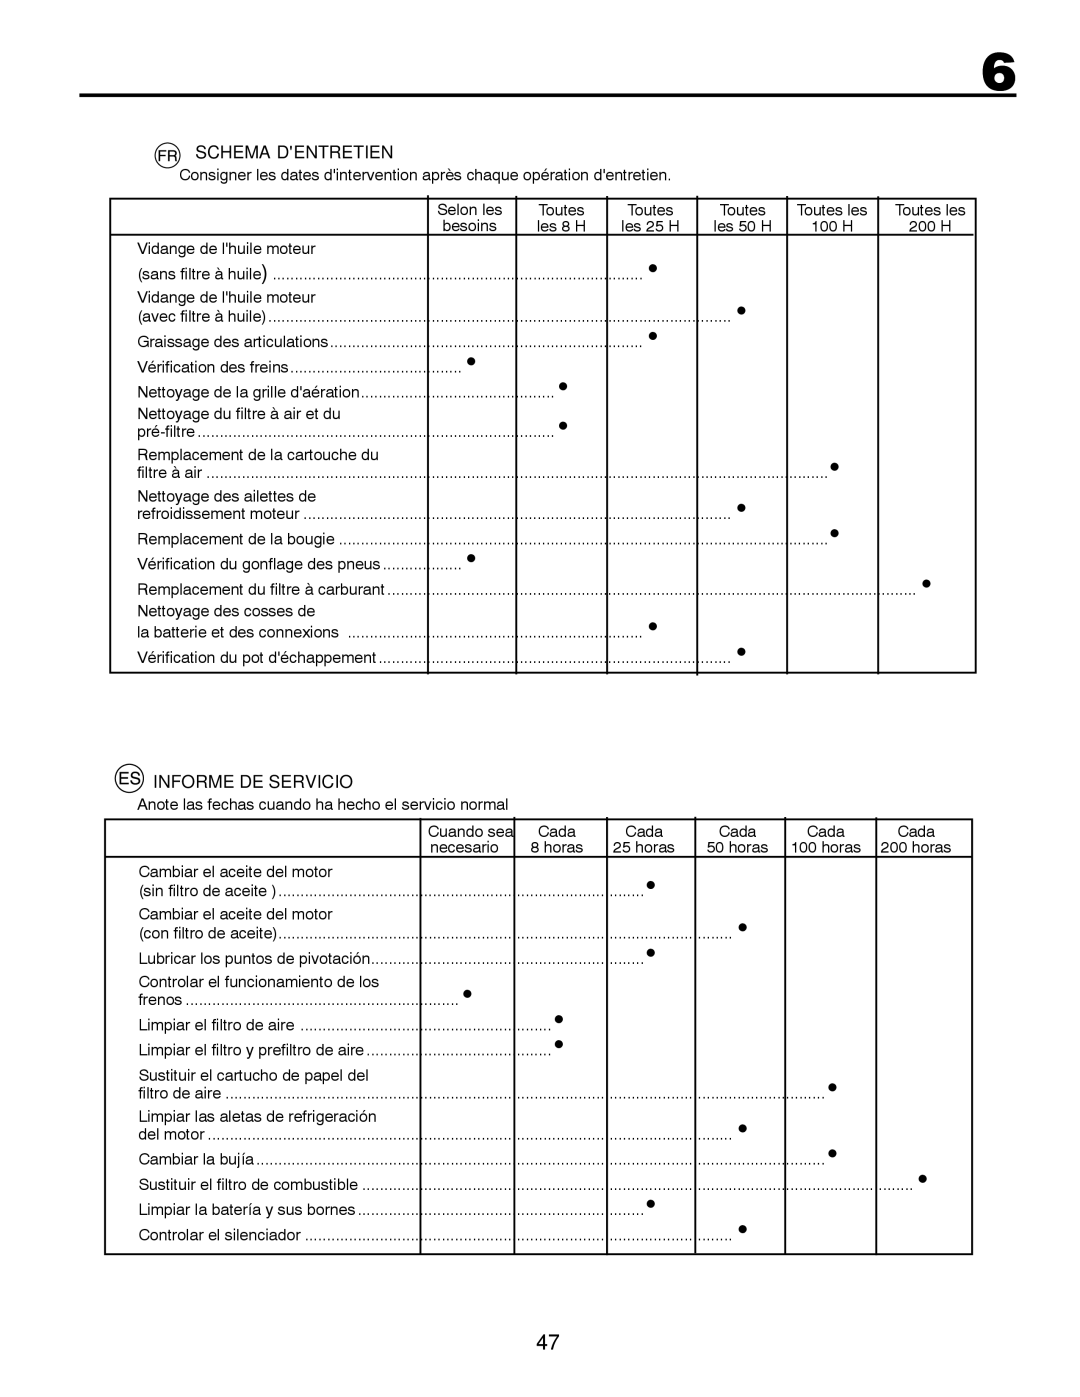
Contents LT126 Page Safety Rules TrainingII. Preparation III. OperationIV. Maintenance and Storage Sicherheitsvorschriften SchulungII. Vorbereitung III. BetriebIV. Wartung UND Lagerung Règles de Sécurité Précautions D’UTILISATIONII. Préparation III. UtilisationIV. Entretien ET Entreposage Reglas De Seguridad InstrucciónII. Preparación III. OperaciónIV. Mantenimiento Y Almacenamiento Norme Antinfortunistiche Addestramento ALL’USOII. Preparazione III. FunzionamentoIV. Manutenzione E Periodi DI INATTIVITA’ Veiligheidsregels II. VoorbereidingIII. Bediening Maai alleen bij daglicht of goed kunstlichtIV. Onderhoud EN Opslag 12,5/9,3190 As rated by the engine manufacturerReverse Neutral LEA EL Manual DE Züglich MIT WAS Explosive Gase SER AusspülenSofort Ärztliche Hilfe AufsuchenVolant DE Direction Volante DE DirecciónSteering Wheel LenkradInstall Seat Adjust SeatSitz Montieren Einstellen DES SitzesInstallazione DEL Sedile Installatie VAN DE StoelInstalación DEL Asiento Ajustar EL AsientoInstall Battery Einbau DER Batterie Installazione Della BatteriaAccu Installeren Mise EN Place DE LA Batterie02604 Positioning of controls Anordnung der BedienungseinrichtungenUbicación de los mandos De plaats van de bedieningsorganen Emplacement des commandesComandi Commande des gaz et starter Gas-und kaltstarthebelMandos del acelerador y del estrangulador Comando gas/chokeClutch/Brake Pedal Kupplungs-/BremspedalPédale de frein/D’embrayage Pedal del embrague/FrenoCommande de la boîte de vitesses Palanca de cambiosGear shift lever SchalthebelCommande dembrayage et de débrayage du carter de coupe Connection/disconnection of the cutting unitAcoplamiento y desacoplamiento del equipo de corte Inserimento/disinserimento del dispositivo di taglioIgnition Lock ZündschloßClé de contact et de démarrage Cerradura de encendidoParking brake FeststellbremseFrein de stationnement Freno de estacionamientoFilling up Reposición de combustibleTanken Plein de carburantOil level ÖlstandNiveau d’huile Nivel de aceiteDriving . Betrieb . Conduite . Conducción Guida . Rijden Nota HinweisRemarque Driving BetriebConduite ConducciónReverse Operation System ROS Rückwärtsgangsystem ROSSécurité Marche Arrière ROS Sistema de Funcionamiento Atrás ROSSistema per operazioni in retromarcia ROS Systeem Voor Achteruit ROSCutting tips Ratschläge zum RasenmähenConseils pour la tonte Consejos para el corteConsigli per il taglio dell’erba MaaitipsWarnung AdvertenciaPericolo WaarschuwingPage Switching off the engine Abschalten des MotorsExtinction du moteur Apagar el motorAdvertencia Engine hood MotorhaubeCapot moteur Cubierta del motorMaintenance WartungEntretien MantenimientoTo service engine Wartung des MotorsPour assurer lentretien du moteur Mantenimiento del motorService Record WartungsnachweisSchema Dentretien Informe DE ServicioService Aantekeningen Dati DI ServizioOperator Presence System and Reverse Opera- tion System ROS Fahrer-Anwesenheitssystem und Rückwärts- gangsystem ROSControl Sistema Presencia Operador Control Sistema DE Funcionamiento Atrás ROSControllo DEL Sistema DI Presenza Operatore Controllo DEL Sistema PER Operazioni in RE- Tromarcia ROSLames BladesMesserbalken Messen CuchillasLame To Check Brake Überprüfen der BremsePour vérifier le frein Controlar el FrenoPL Q To Remove MowerEntfernen Des Mähers Pour Démonter La FaucheusePL QD To Replace Mower Drive Belt Austauschen des Antriebsriemens des MähersSustituir la correa de transmisión cortacésped Pour remplacer la courroie de transmissionSostituzione della cinghia di trasmissione del rasaerba De aandrijfriem van de maaiunit vervangenFRONT-TO-BACK Adjustment Visual SIDE-TO-SIDE AdjustmentPrecision SIDE-TO-SIDE Adjustment To Level MowerAusnivellieren des Mähers Visuelle Justierung AN Beiden SeitenGenaue justierung an beiden seiten Gleich sindPour mettre la tondeuse à niveau Réglage Visuel BilatéralRéglage Bilatéral DE Précision Réglage D’AVANT EN ArrièreNivelar el cortacésped Ajuste Visual DE Lado a LadoAjuste DE Precisión DE Lado a Lado Ajuste DE LA Parte Delantera a LA TraseraLivellamento del rasaerba Regolazione Visiva LATO-LATORegolazione DI Precisione LATO-LATO Regolazione DAVANTI-DIETRODe maaiunit nivelleren Beide Kanten OP HET OOG UitlijnenPRECISIE-AFSTELLING BAN Beide Kanten BAN DE Maaiunit Afstelling BOOR-EN AchterzijdeTransaxle Gear Shift Lever Neutral Adjustment Einstellung DES Schalthebels DES DifferentialgetriebesPage Replacement of drive belt Remplacement de la courroie dentraînementAuswechsein des Treibriemens Cambio de correa propulsoraTroubleshooting . Störungssuche Recherche des pannes . Búsqueda de averías Ricerca guasti . Het localiseren van fouten Service Storage . Aufbewahrung . Remisage . ConservaciónEntretien et réparations ServicioRismessaggio . Stallen Servizio532 42 24-61 12.10.08 BAD

LT126 specifications

The Husqvarna LT126 is a standout model within the compact lawn tractor market, known for its robust construction, user-friendly design, and versatile features. It is primarily designed for homeowners looking for an efficient and reliable solution for maintaining their lawns. Built with a focus on comfort and ease of use, the LT126 boasts a number of characteristics that enhance both performance and user experience.

One of the key features of the LT126 is its powerful engine. Equipped with a reliable 547cc Briggs & Stratton engine, this tractor ensures efficient performance while providing ample power for routine mowing tasks. The engine is designed with easy starting features and efficient fuel consumption, making it an ideal choice for any yard size.

The LT126 features a 42-inch cutting deck, which enables quick and efficient mowing. This cutting deck is designed with specified cutting heights, allowing users to adjust it according to their lawn's needs. With a simple lever mechanism, users can easily customize their mowing height for a clean, even cut.

Maneuverability is another highlight of the Husqvarna LT126. The tractor is equipped with a tight turning radius, which facilitates easy navigation around obstacles like flower beds and trees. Additionally, the hydrostatic transmission allows for smooth speed adjustments, enabling users to maintain controlled and confident operation even in tight spaces.

Comfort is paramount in the Husqvarna LT126 design. The high back seat provides good back support, allowing users to tackle mowing tasks for extended periods without discomfort. The ergonomically designed steering wheel and pedals ensure that operators can easily maintain control, making the tractor accessible to a wide range of users.

Furthermore, the Husqvarna LT126 integrates advanced technologies, such as the easy-to-use dashboard that provides real-time information about fuel levels, cutting height, and service reminders. This feature ensures that users are constantly informed about their tractor’s performance, contributing to overall maintenance and efficiency.

The model also supports optional attachments, such as mulching kits, baggers, and snow blades, making it a versatile tool for year-round yard care. This adaptability allows homeowners to maximize their investment by utilizing the tractor beyond traditional mowing.

In summary, the Husqvarna LT126 is a powerful and versatile lawn tractor that combines efficiency, comfort, and advanced technology. With its emphasis on user-friendly features and adaptability, it stands out as an essential tool for maintaining a beautiful lawn, making it an excellent choice for both novice and experienced lawn care enthusiasts.