MOUNTING KIT INSTRUCTIONS
The Baseline Dual Speed Hub is supplied with two mounting brackets and four screws. These are used for rack mounting the unit. When mounting the unit, you should take note of the guidelines given in “Positioning the Baseline Dual Speed Hub”on page 3.
The Baseline Dual Speed Hub is 1U high and will fit a standard
CAUTION: Disconnect all cables from the unit before continuing. Remove the
To rack mount the unit:
1Place the unit the right way up on a hard, flat surface with the front facing towards you.
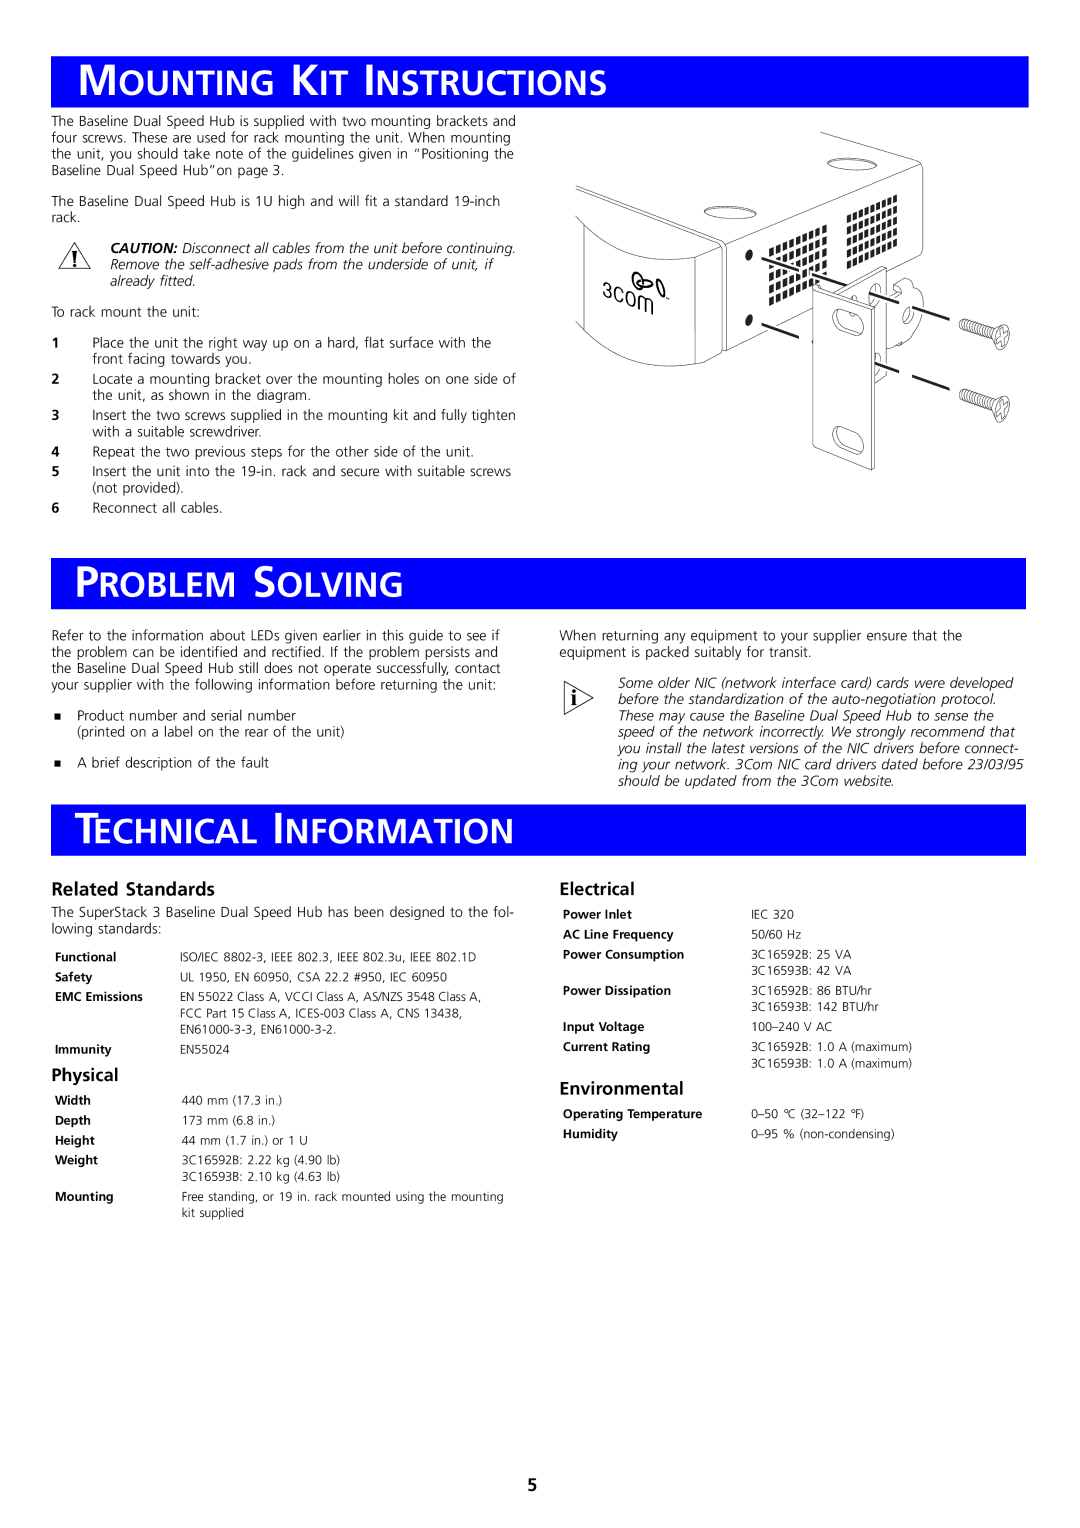
2Locate a mounting bracket over the mounting holes on one side of the unit, as shown in the diagram.
3Insert the two screws supplied in the mounting kit and fully tighten with a suitable screwdriver.
4Repeat the two previous steps for the other side of the unit.
5Insert the unit into the
6Reconnect all cables.
PROBLEM SOLVING
Refer to the information about LEDs given earlier in this guide to see if the problem can be identified and rectified. If the problem persists and the Baseline Dual Speed Hub still does not operate successfully, contact your supplier with the following information before returning the unit:
!Product number and serial number (printed on a label on the rear of the unit)
!A brief description of the fault
When returning any equipment to your supplier ensure that the equipment is packed suitably for transit.
Some older NIC (network interface card) cards were developed before the standardization of the
TECHNICAL INFORMATION
Related Standards
The SuperStack 3 Baseline Dual Speed Hub has been designed to the fol- lowing standards:
Functional | ISO/IEC |
Safety | UL 1950, EN 60950, CSA 22.2 #950, IEC 60950 |
EMC Emissions | EN 55022 Class A, VCCI Class A, AS/NZS 3548 Class A, |
| FCC Part 15 Class A, |
| |
Immunity | EN55024 |
Physical |
|
Width | 440 mm (17.3 in.) |
Depth | 173 mm (6.8 in.) |
Height | 44 mm (1.7 in.) or 1 U |
Weight | 3C16592B: 2.22 kg (4.90 lb) |
| 3C16593B: 2.10 kg (4.63 lb) |
Mounting | Free standing, or 19 in. rack mounted using the mounting |
| kit supplied |
Electrical
Power Inlet | IEC 320 |
AC Line Frequency | 50/60 Hz |
Power Consumption | 3C16592B: 25 VA |
| 3C16593B: 42 VA |
Power Dissipation | 3C16592B: 86 BTU/hr |
| 3C16593B: 142 BTU/hr |
Input Voltage | |
Current Rating | 3C16592B: 1.0 A (maximum) |
| 3C16593B: 1.0 A (maximum) |
Environmental |
|
Operating Temperature | |
Humidity |
5
