Manuals
/
3M
/
Computer Equipment
/
Projector
3M
MP8630
manual
Dimension Diagram
Models:
MP8630
1
27
28
28
Download
28 pages
42.19 Kb
21
22
23
24
25
26
27
28
Specification
Machine Characteristics
Install
Dimension Diagram
Connection to Signal Terminals
Warranty
Maintenance
Symptom Cause Solution
Adjustment and Functions
Safety
Page 27
Image 27
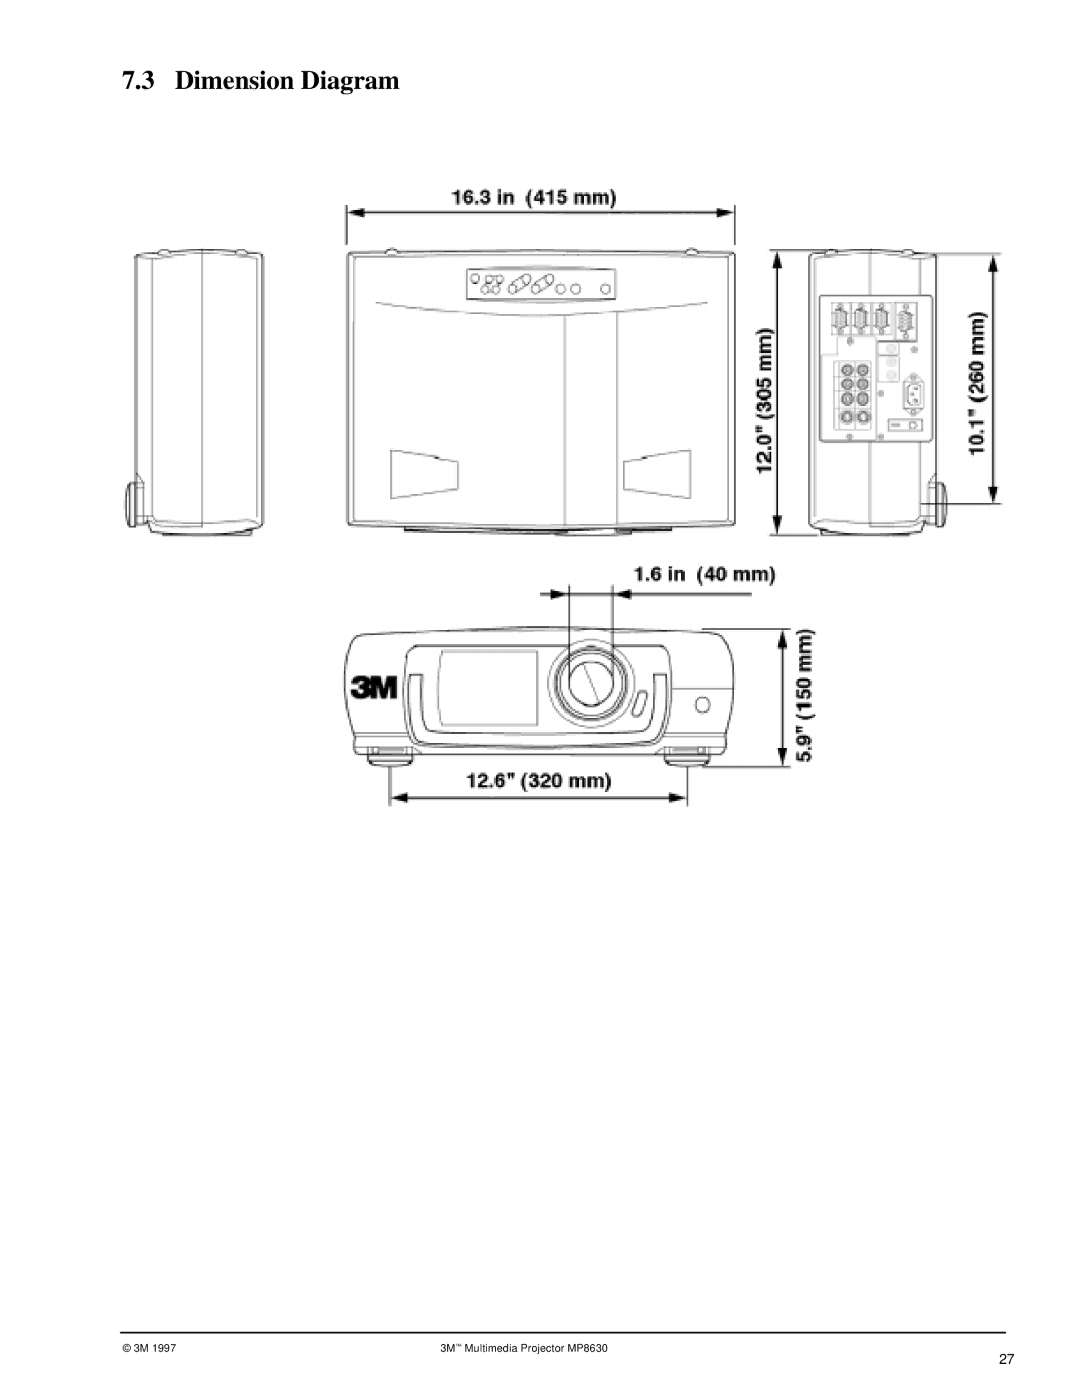
7.3 Dimension Diagram
© 3M 1997
3M
™
Multimedia Projector MP8630
27
Page 26
Page 28
Page 27
Image 27
Page 26
Page 28
Contents
MP8630 Multimedia Projector
Table of Contents
Thank YOU for Choosing 3M
Warranty
Important Safeguards
Safeguards
Keep Your Packaging Materials
Contents of Shipping Box
Optional Accessories
Unpack
Product Description
Machine Characteristics
Input button
Main Unit Identification
System Set Up connecting various equipment
Stick Switch
Remote Control Transmitter Identification
Basic Operations
Installation
Turn the Main Power switch of the projector on
Hold the STANDBY/ON button for 3-5 seconds
Turn Off the Power
Memory function
Adjustment and Functions
To return to the factory default setting
Menu
Side view
How To Use Foot Adjusters
Brightness
Color
Size
VIDEO2
RGB1
RGB2
VIDEO1
Image
Blank
Reveal
Language
OPT
Connection to Signal Terminals
Connection to the Video Signal Terminal
Connection to the RGB Signal Terminal
Example of computer signal
Mouse emulation
Connection to the Control Signal Terminal
RS 232 Control Cable not included with basic packout
Maintenance
Cleaning the Air Filter
Message Table
Lamp
Display Lamp Operation Hours
Replacing the Lamp
Symptom Cause Solution
When You Think Something Is Wrong
Technical Specifications
Specifications
Accessories
Dimension Diagram
3M Austin Center 3M Canada 3M Mexico, S.A. de C.V 3M Europe
Top
Page
Image
Contents