ASSEMBLY INSTRUCTION | ASSEMBLY INSTRUCTION | PAGE 8 |
ASSEMBLY STAGE # 3
Attach Plate Holder & Press Arm to the Main Upright
| 27 | 8 |
|
| 26 |
| |
|
|
| |
17 | 20 |
| 23 |
|
| ||
25 | 26 |
|
|
7 | 9 | 24 | |
|
|
Assembly Hardware Required: | (Some Hardware is Preinstalled in the Assembly Locations) | ||||
#17 | Plate Spacer | Qty. 1 | #25 | Button Head Allen Screw | Qty. 1 |
#20 | Spacer | Qty. 1 | #26 | Curved Washer | Qty. 2 |
#24 | End Cap | Qty. 1 | #27 | Nylon Nut | Qty. 1 |
Assembly Description:
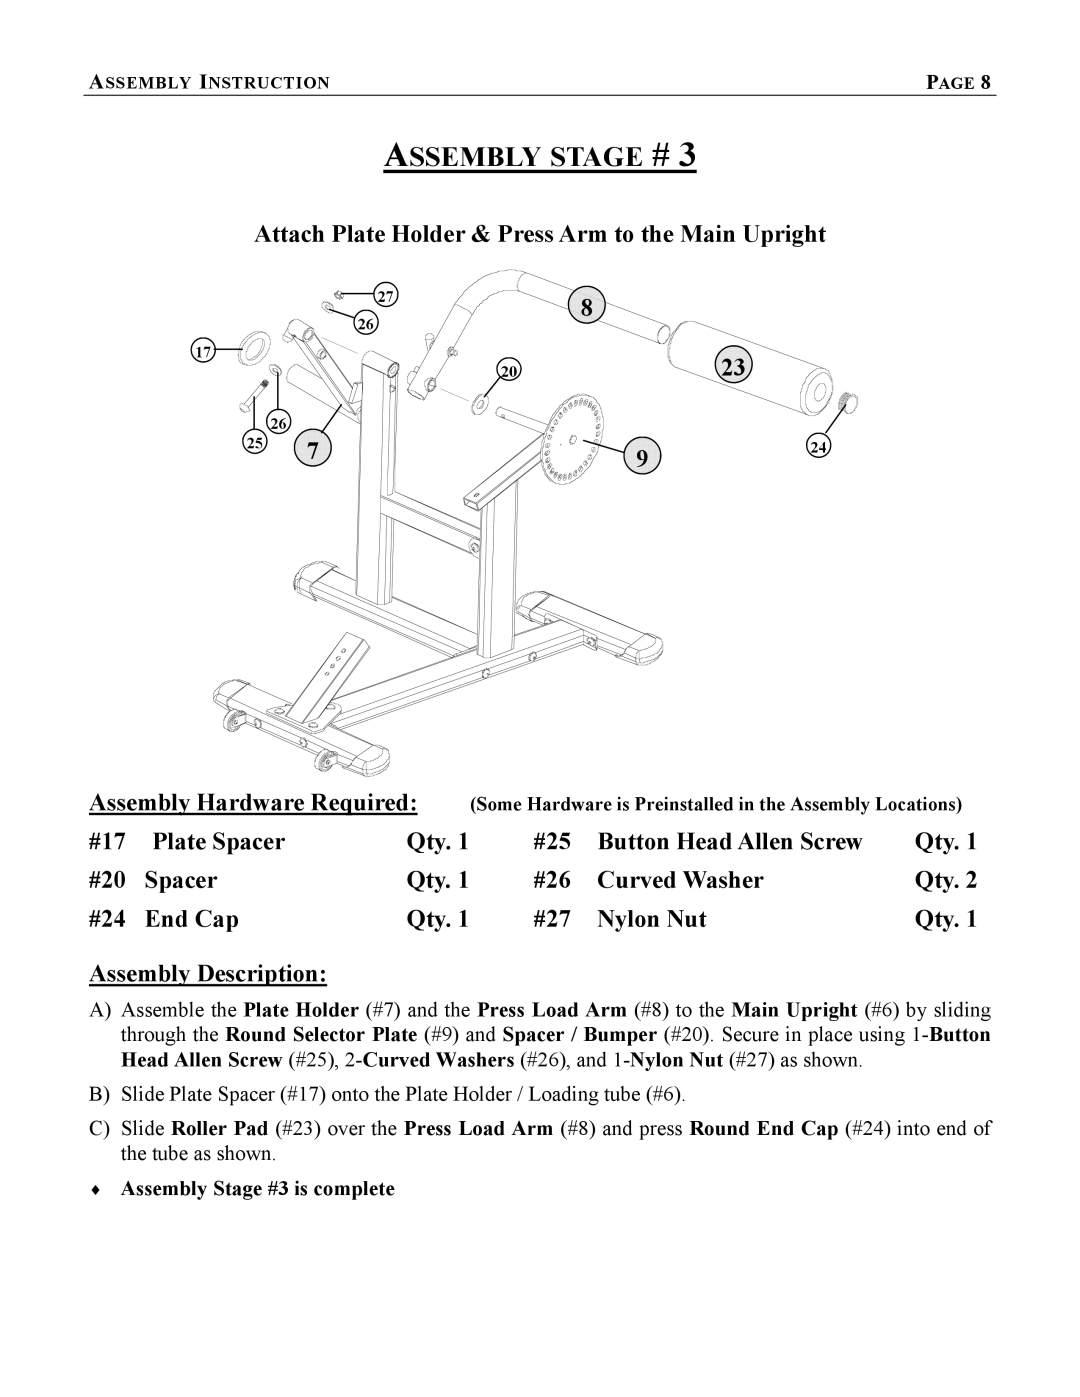
A)Assemble the Plate Holder (#7) and the Press Load Arm (#8) to the Main Upright (#6) by sliding through the Round Selector Plate (#9) and Spacer / Bumper (#20). Secure in place using
B)Slide Plate Spacer (#17) onto the Plate Holder / Loading tube (#6).
C)Slide Roller Pad (#23) over the Press Load Arm (#8) and press Round End Cap (#24) into end of the tube as shown.
♦Assembly Stage #3 is complete
