Manuals
/
Acer
/
Computer Equipment
/
Projector
Acer
65PE
specifications
Connecting the Projector to Macintosh/Power Book, Connection to Macintosh
Models:
65PE
1
1
2
3
4
5
6
7
8
9
10
11
12
13
14
15
16
17
18
19
20
21
22
23
24
25
26
27
28
29
30
31
32
33
33
Download
33 pages
36.55 Kb
7
8
9
10
11
12
13
14
15
16
Troubleshooting
Specification
Install
Indicator Status
Connecting the Box
Resetting Lamp Timer
Accessories
Adjustable Feet
Temperature is too high
Remote Control
Page 12
Image 12
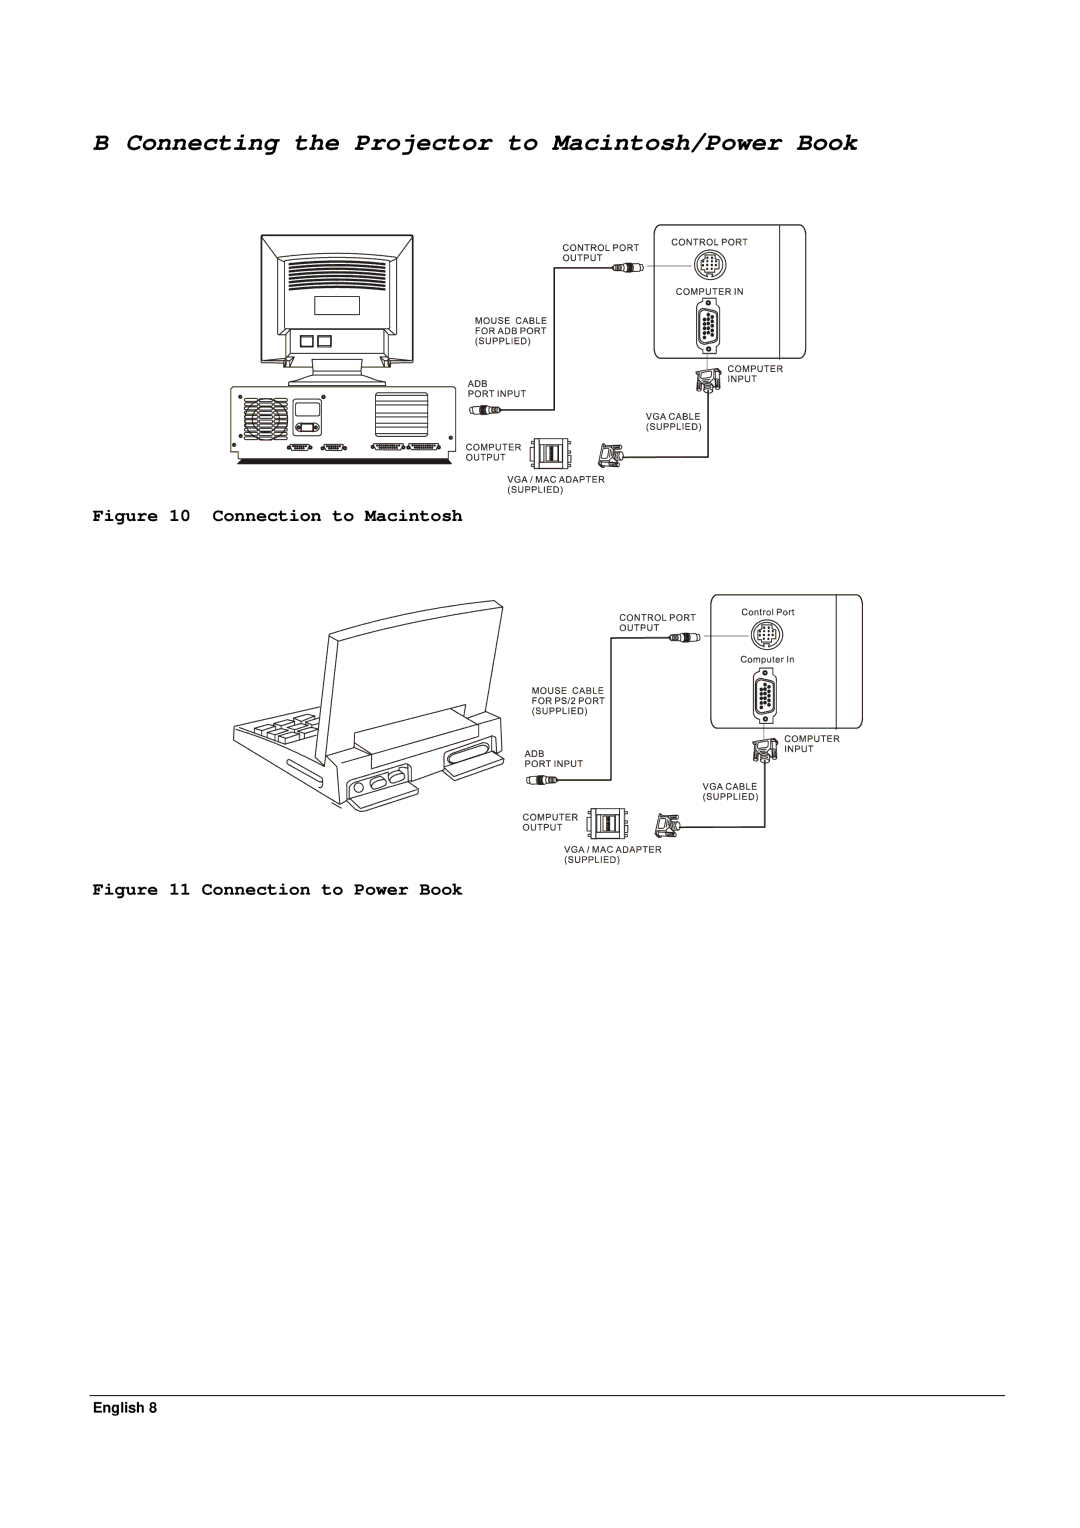
B Connecting the Projector to Macintosh/Power Book
Figure 10 Connection to Macintosh
Figure 11 Connection to Power Book
English 8
Page 11
Page 13
Page 12
Image 12
Page 11
Page 13
Contents
PalmPro 7763P/65PE
Fill this
English
Table of Contents
Introduction
Ceiling Mount and Rear Screen Projection
AV box
Description
Front figure
Installation
Bottom figure
Positioning
Adjustable Feet
Moving the Projector
Accessories
Moving the projector
Accessories of 7763P/65PE
Connecting the Projector to Computer/Notebook
Connection
Connecting the Projector to Macintosh/Power Book
Connection to Macintosh
Power on
Operation
Standby
Control Pad
Indicator Status
Indicator
Menu
Exit
Remote Control
Usage and Replacement of Lamp
Light source lamp has a limited service life
Lamp/temperature Status LED Indicator
Lamp in excess of service hours
Temperature is too high
Replacing the Lamp
Lamp is not well attached
Normal status
English
Lamp Replacement Procedure
Step
Resetting Lamp Timer
Main OSD Menu
Display
Image
Control
Image Ratio
Tint
Blank Auto Off Reset
Source
Other Correspondent Remote Functions and Messages
English
Maintenance Troubleshooting
Lamp Replacement
Cleaning the Lens
Troubleshooting
Adjust audio source
Press Volume + button
Stand within 4 meters 13 feet of the unit
Make sure nothing is blocking the receiver on
Specifications5
Optical
Electrical
Mechanical
Preset Display Resolution Table
70.1
Volume up
Volume Down
Appendix
AV Connection Port
Connecting the Box
Please follow the instruction here to place the AV box
Top
Page
Image
Contents