English
60 | 6 Upgrading your computer |
To remove a memory module:
1Observe the ESD precautions described on page 48.
2Lay the system on its side (components showing).
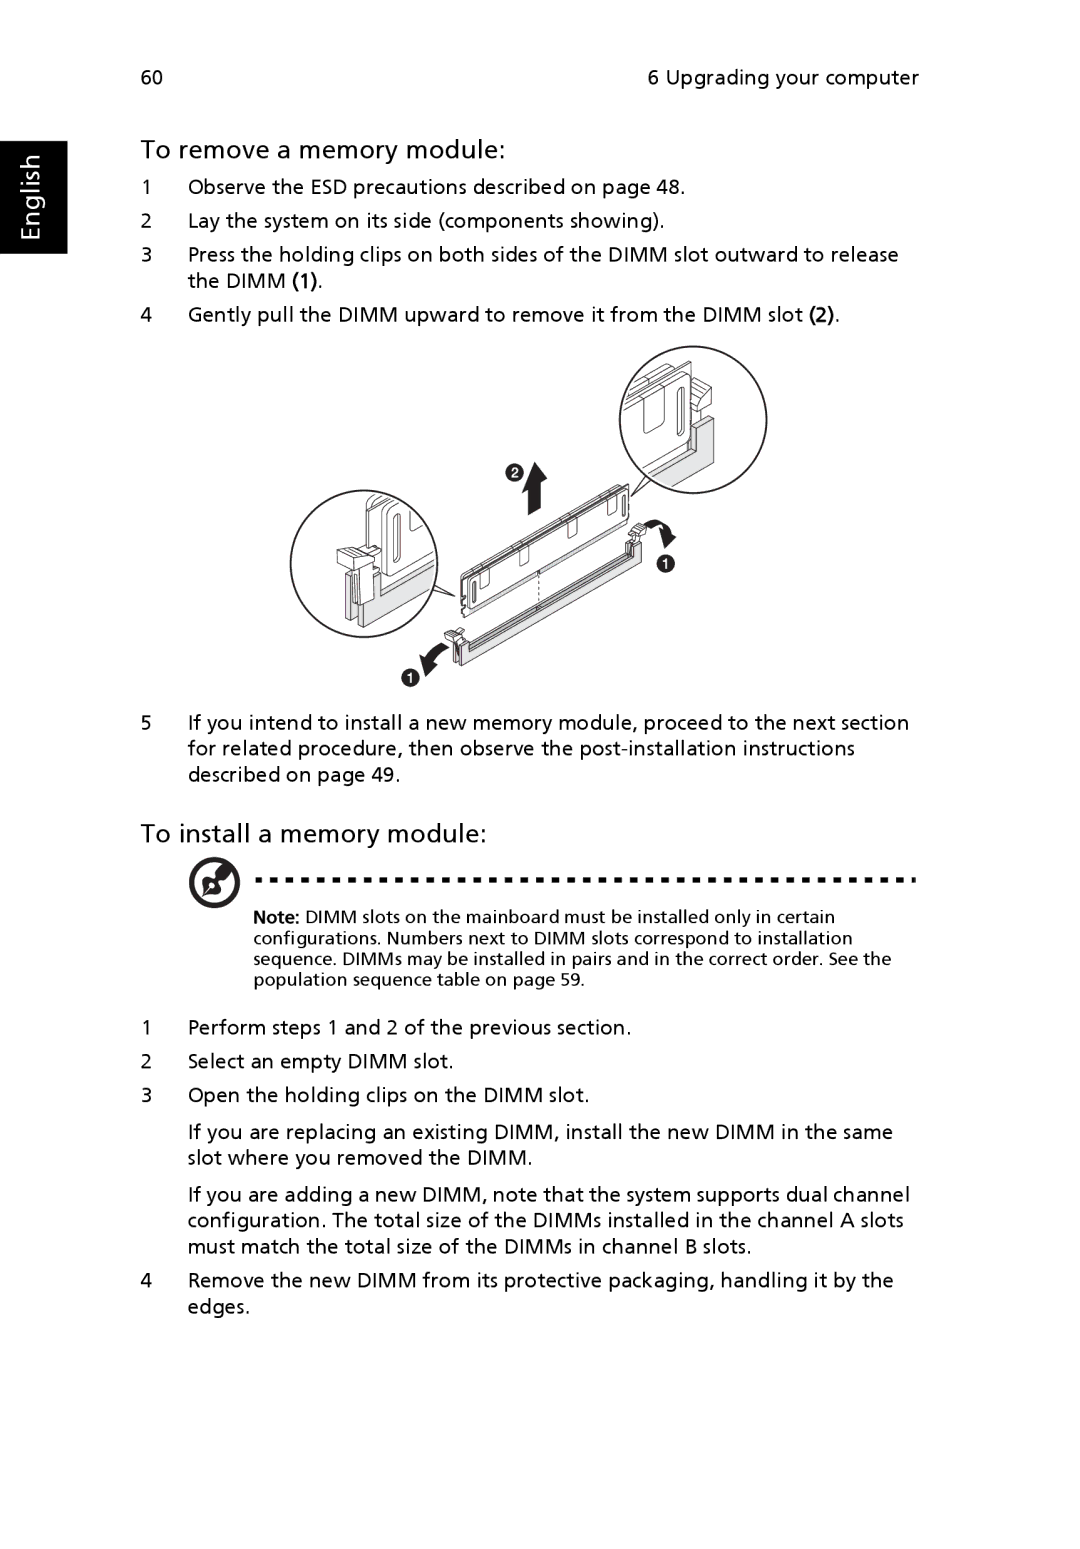
3Press the holding clips on both sides of the DIMM slot outward to release the DIMM (1).
4Gently pull the DIMM upward to remove it from the DIMM slot (2).
5If you intend to install a new memory module, proceed to the next section for related procedure, then observe the
To install a memory module:
Note: DIMM slots on the mainboard must be installed only in certain configurations. Numbers next to DIMM slots correspond to installation sequence. DIMMs may be installed in pairs and in the correct order. See the population sequence table on page 59.
1Perform steps 1 and 2 of the previous section.
2Select an empty DIMM slot.
3Open the holding clips on the DIMM slot.
If you are replacing an existing DIMM, install the new DIMM in the same slot where you removed the DIMM.
If you are adding a new DIMM, note that the system supports dual channel configuration. The total size of the DIMMs installed in the channel A slots must match the total size of the DIMMs in channel B slots.
4Remove the new DIMM from its protective packaging, handling it by the edges.
