Removing the Processor
IMPORTANT:Before removing a processor from the mainboard, make sure to create a backup file of all important data.
WARNING:The processor becomes very hot when the system is on. Allow it to cool off first before handling.
1.See “Removing the Side Panel” on page 30.
2.See “Removing the Heat Sink Fan Assembly” on page 32.
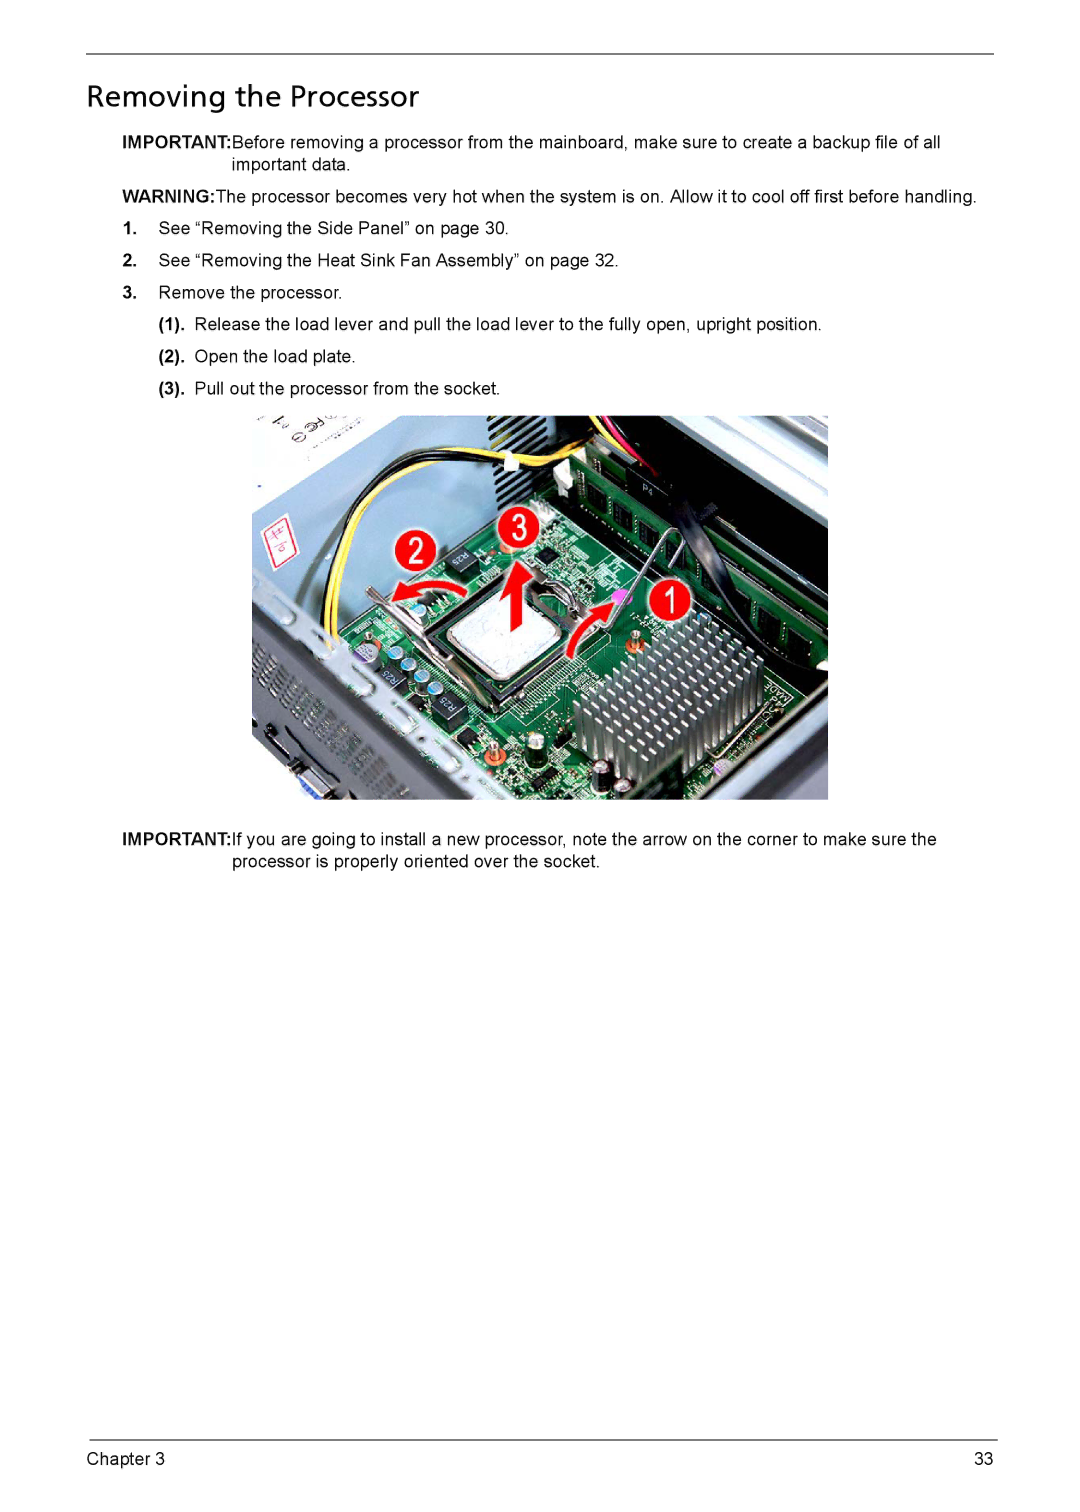
3.Remove the processor.
(1). Release the load lever and pull the load lever to the fully open, upright position.
(2). Open the load plate.
(3). Pull out the processor from the socket.
IMPORTANT:If you are going to install a new processor, note the arrow on the corner to make sure the processor is properly oriented over the socket.
Chapter 3 | 33 |
