Programming the Aux Output
The Aux Output can be programmed to mirror the Main Outputs (bit for bit), or it can provide an independent
Note that no matter how the Aux Output is programmed it does not affect the Main Outputs in any way.
To program the Aux Output
Press down on the Mode Switch repeatedly to cycle through the Aux Output mode settings until the
Exact Copy of | 44.1 kHz | 48 kHz | |
Main Outputs | |||
|
| ||
|
|
|
ADAT or AES/EBU on the Optical Output
The Optical Output (on of the three Main Outputs) can provide either AES/EBU or ADAT format. The bottom LED in the middle column of LEDs indicates what mode the Optical Output is in.
When ADAT is active, S/MUX is automatically enabled at all 2X and 4X sample rates (88.2 kHz, 96 kHz, 176.4 kHz, and 192 kHz).
To select between ADAT or AES/EBU on the Optical Output
Press and hold the Mode Switch down until the Optical Output mode LED matches the desired mode based on the diagram below.
ADC1 Instruction Manual
Off = AES/EBU on Optical
Output
On – ADAT on Optical Output
Resetting the ADC1 to Factory Default Settings
The ADC1 can be easily reset to Factory Default settings.
To reset the ADC1 to Factory Default settings
•Press and hold the Mode Switch up for approximately 3 seconds.
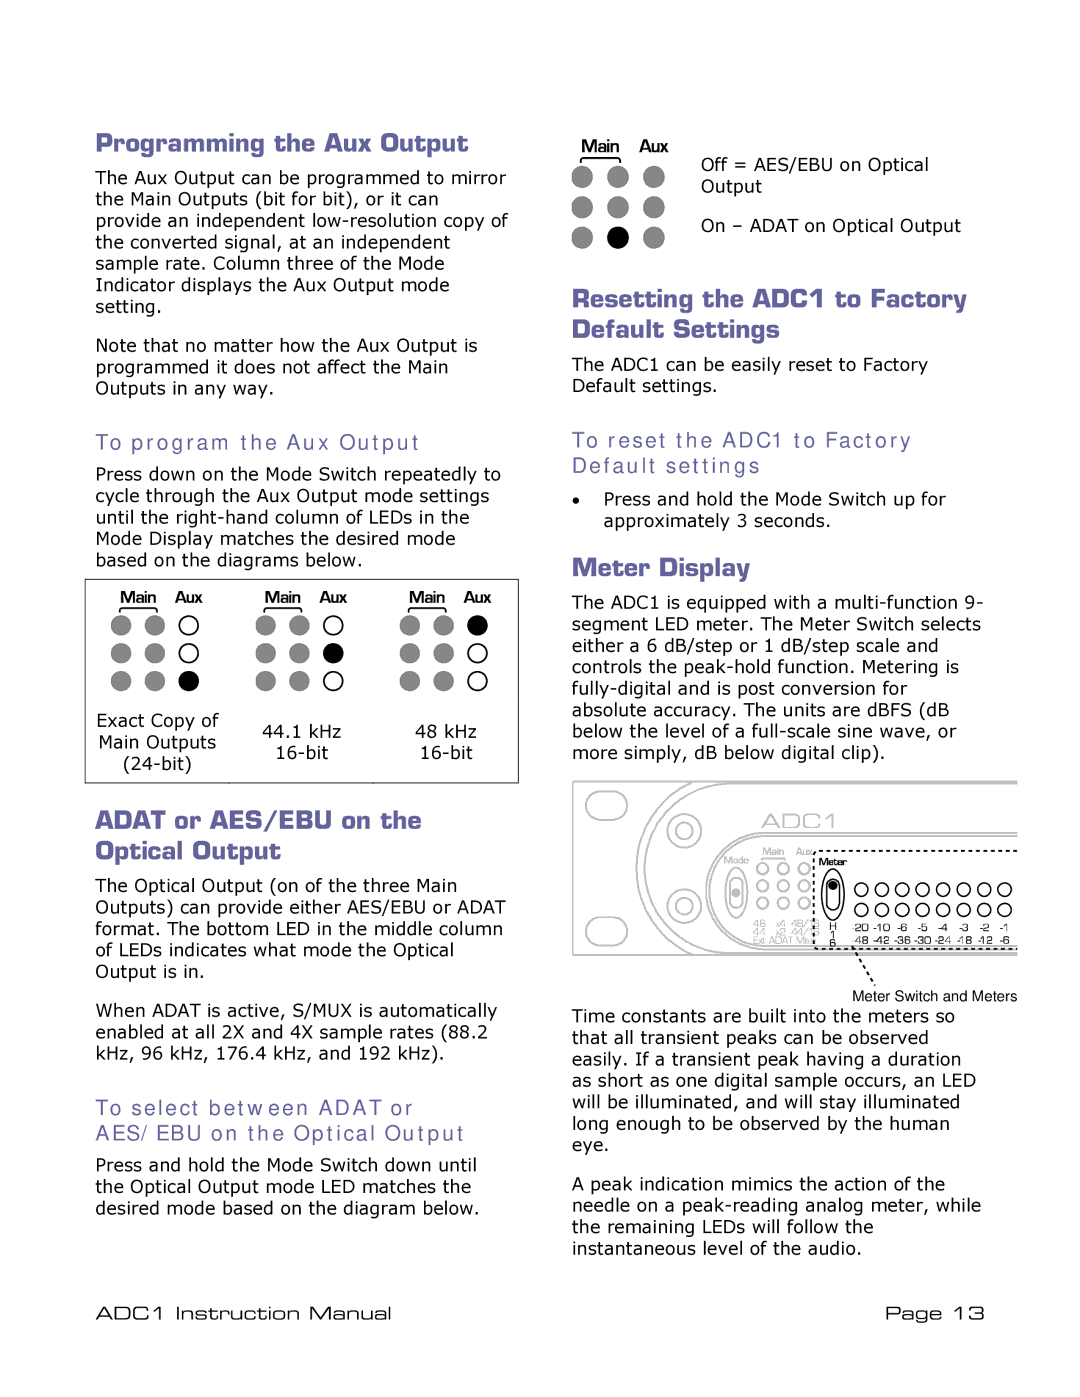
Meter Display
The ADC1 is equipped with a
Meter Switch and Meters
Time constants are built into the meters so that all transient peaks can be observed easily. If a transient peak having a duration as short as one digital sample occurs, an LED will be illuminated, and will stay illuminated long enough to be observed by the human eye.
A peak indication mimics the action of the needle on a
Page 13
