Step 8. Connecting the Ethernet Connector
To connect the FastStor 1 to the Ethernet port, use the provided cable from the accessory kit box.
1.Insert one end of the cable into the FastStor 1 Ethernet port. Push until it snaps into place. (The open port shown in Figure 11 is for Ethernet connection.)
2.Connect the other end of the cable to a normal 10/100 BaseT Ethernet outlet.
Step 9. Restarting Your System
ADIC recommends that all external SCSI devices, including the FastStor 1, are powered on before you restart the computer system. After restarting your system, including the FastStor 1, the FastStor 1 runs a
Note: The tape drive needs up to 40 seconds from power on until it’s active on the SCSI bus. It is recommended to turn on the power at least 40 seconds before the computer system is started.
Step 10. BCR: Labeling cartridges
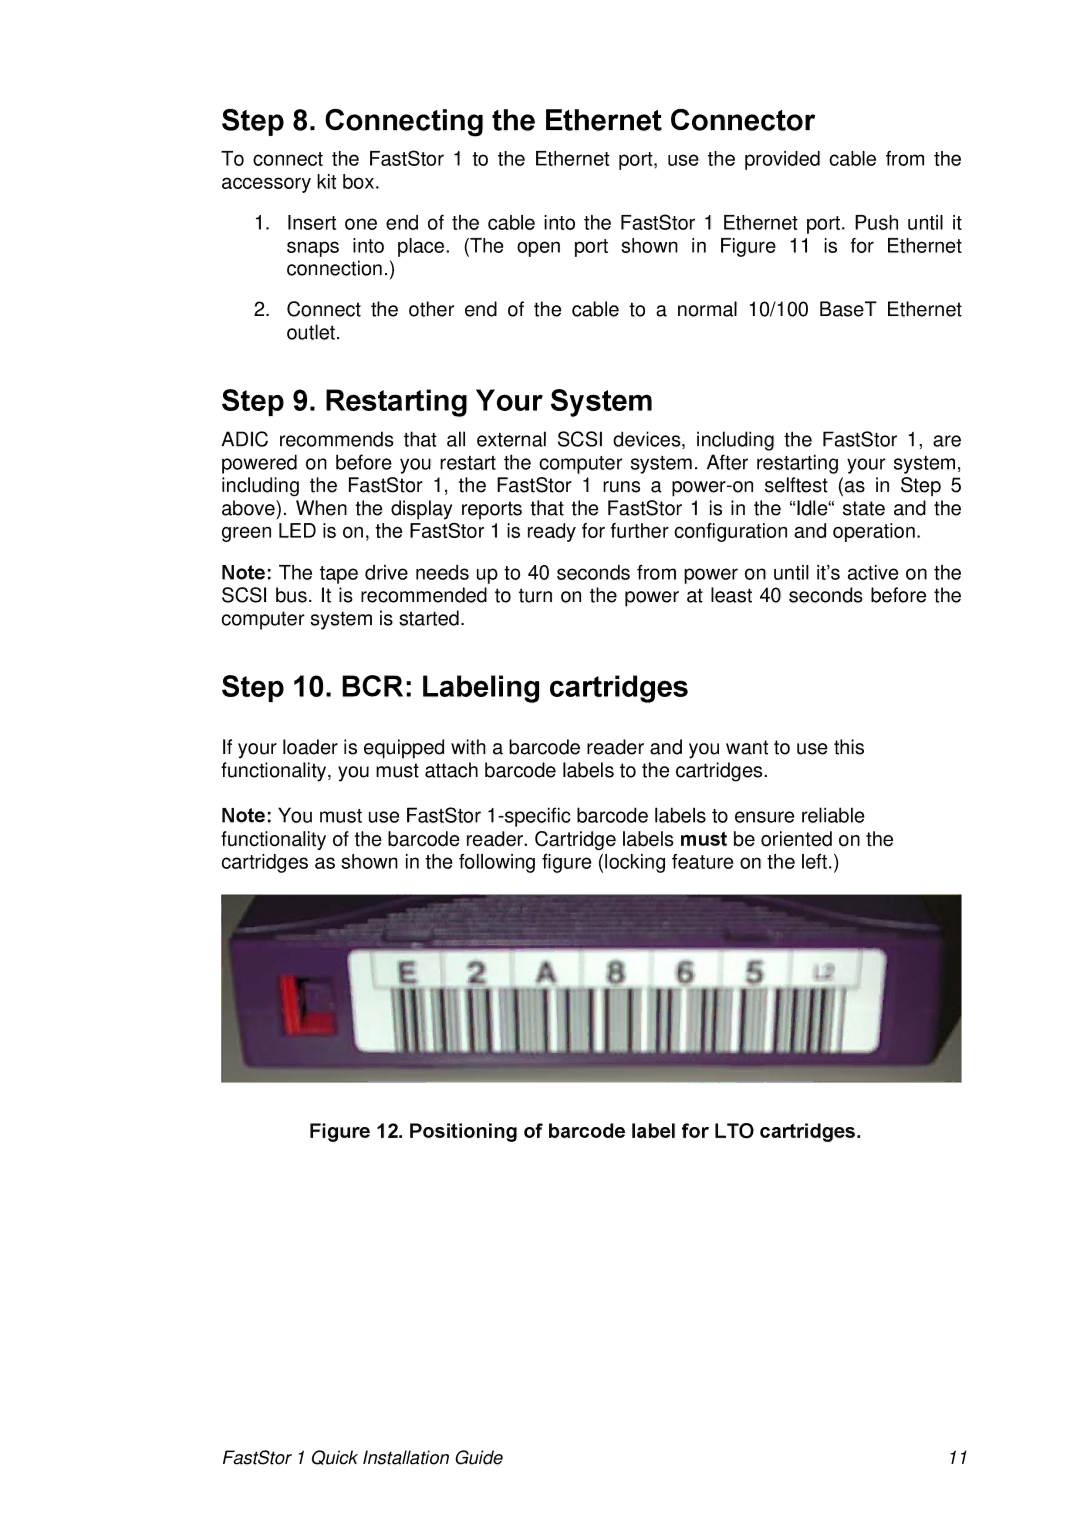
If your loader is equipped with a barcode reader and you want to use this functionality, you must attach barcode labels to the cartridges.
Note: You must use FastStor
Figure 12. Positioning of barcode label for LTO cartridges.
FastStor 1 Quick Installation Guide | 11 |