Advanced Digital Information Corporation | FastStor 1 | |
|
|
|
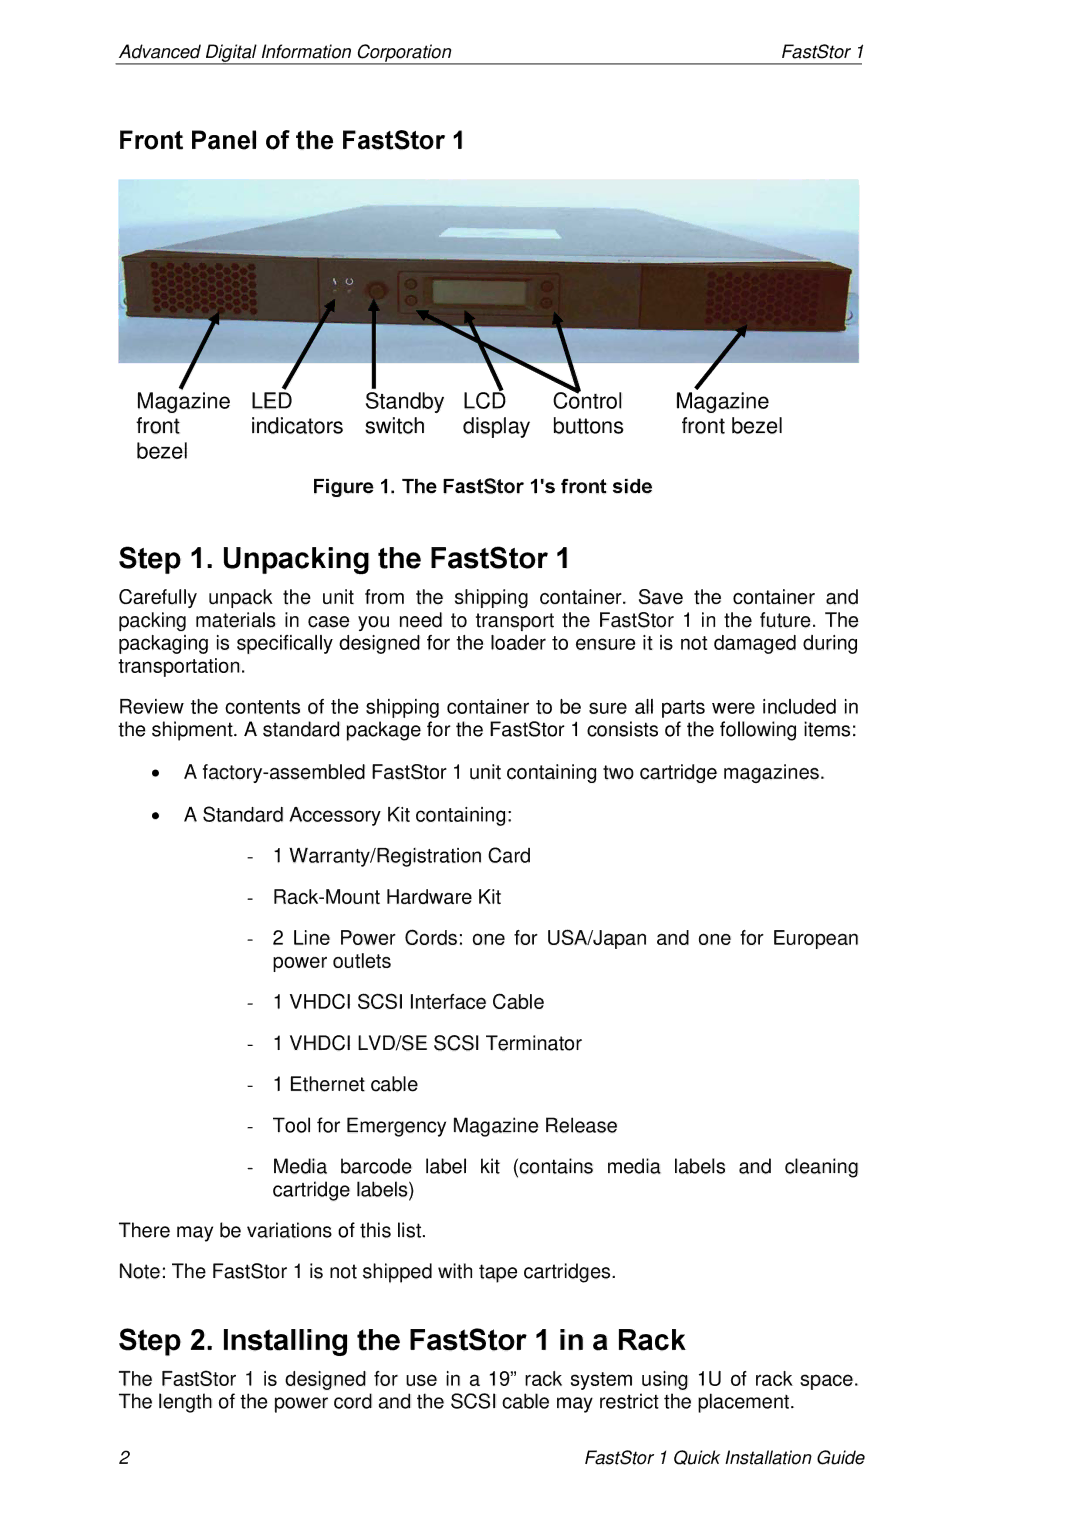
Front Panel of the FastStor 1
Magazine | LED | Standby | LCD | Control | Magazine |
front | indicators | switch | display | buttons | front bezel |
bezel |
|
|
|
|
|
Figure 1. The FastStor 1's front side
Step 1. Unpacking the FastStor 1
Carefully unpack the unit from the shipping container. Save the container and packing materials in case you need to transport the FastStor 1 in the future. The packaging is specifically designed for the loader to ensure it is not damaged during transportation.
Review the contents of the shipping container to be sure all parts were included in the shipment. A standard package for the FastStor 1 consists of the following items:
•A
•A Standard Accessory Kit containing:
-1 Warranty/Registration Card
-
-2 Line Power Cords: one for USA/Japan and one for European power outlets
-1 VHDCI SCSI Interface Cable
-1 VHDCI LVD/SE SCSI Terminator
-1 Ethernet cable
-Tool for Emergency Magazine Release
-Media barcode label kit (contains media labels and cleaning cartridge labels)
There may be variations of this list.
Note: The FastStor 1 is not shipped with tape cartridges.
Step 2. Installing the FastStor 1 in a Rack
The FastStor 1 is designed for use in a 19” rack system using 1U of rack space. The length of the power cord and the SCSI cable may restrict the placement.
2 | FastStor 1 Quick Installation Guide |
