Installing the “Rail Left Assembly”
1.Measure the length between the rear rack mount rails and the front rack mount rails. If the measurement is shorter than the FastStor 1, move the two sets of screws M4x12, washers and nuts shown in Figure 4.
2.Adjust the “Rail Left Assembly” to fit the measurement in step 1.
3.Use a 7 mm
4.Place the “Rail Left Assembly” on the left side of the rack, between the rear rack mount rail and the front rack mount rail.
5.Mount the “Rail Left Assembly” at the desired height using one M6x12 screw in front (upper hole in rail only) and two M6x12 screws at the back. See Figure 5.
Installing the “Rail Right Assembly”
Follow the instruction for left side only using the “Rail Right Assembly” on the right side of the rack.
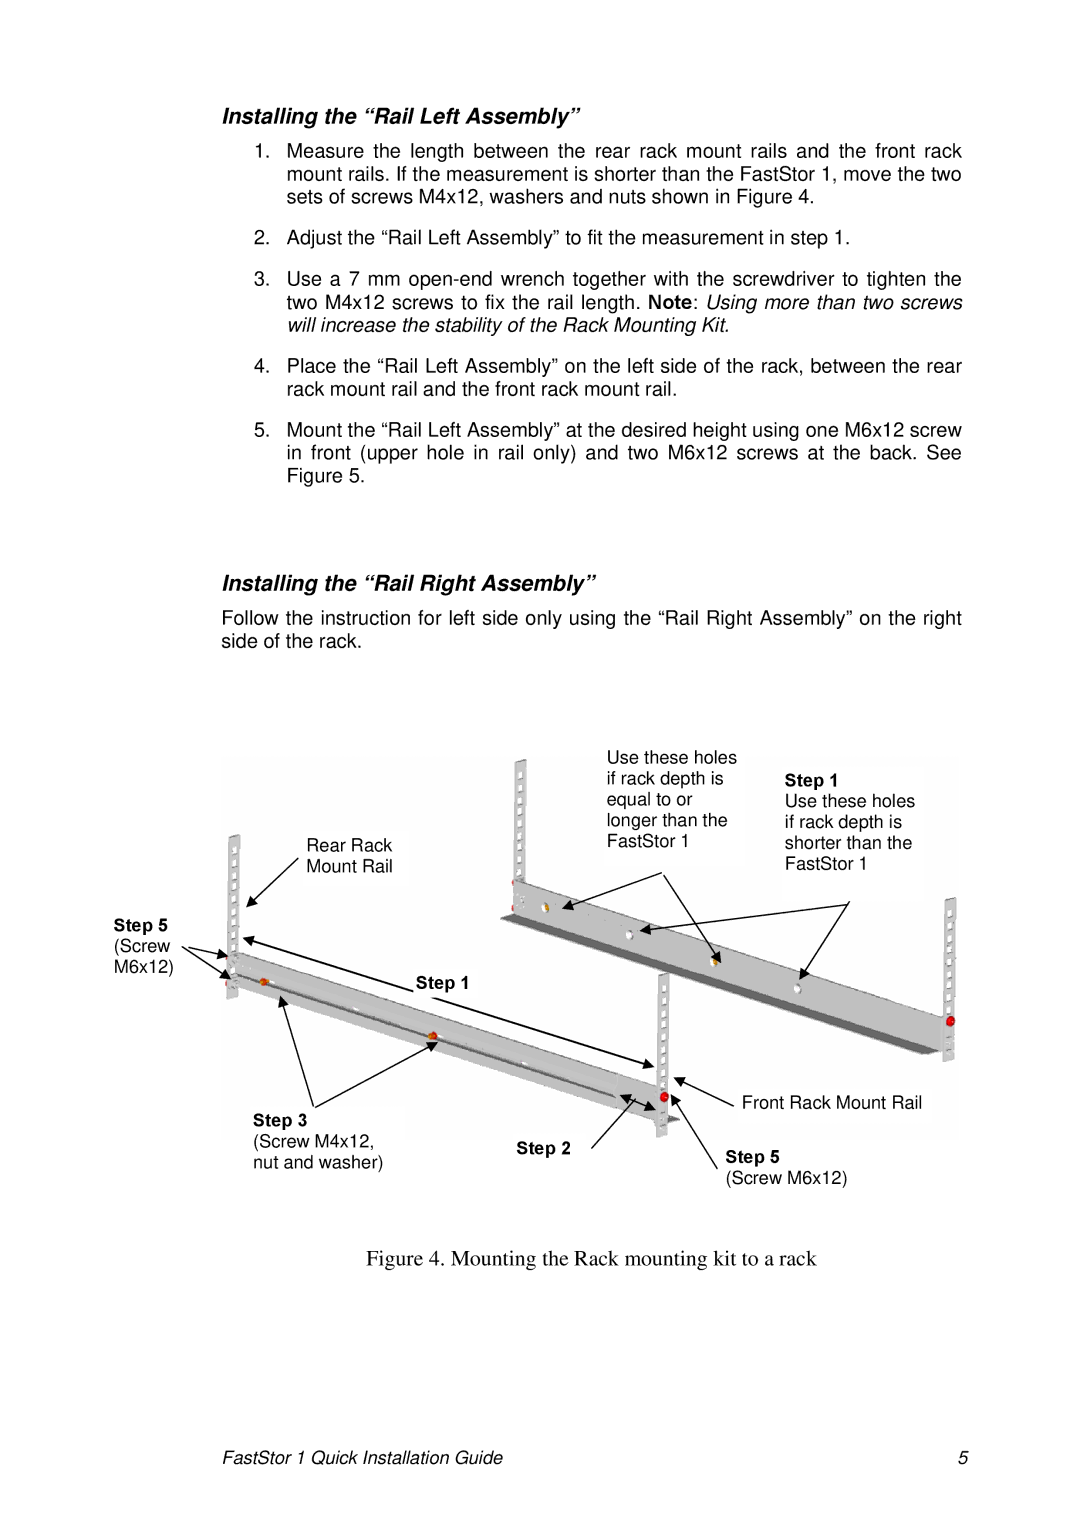
Rear Rack ![]() Mount Rail
Mount Rail
Step 5 (Screw M6x12)
Step 1
Use these holes if rack depth is equal to or longer than the FastStor 1
Step 1
Use these holes if rack depth is shorter than the FastStor 1
|
|
|
| Front Rack Mount Rail | |
Step 3 |
|
|
| ||
|
|
|
| ||
|
|
| |||
(Screw M4x12, |
|
|
|
| |
Step 2 | Step 5 | ||||
nut and washer) |
| ||||
|
| ||||
|
|
| (Screw M6x12) | ||
|
|
| |||
Figure 4. Mounting the Rack mounting kit to a rack
FastStor 1 Quick Installation Guide | 5 |