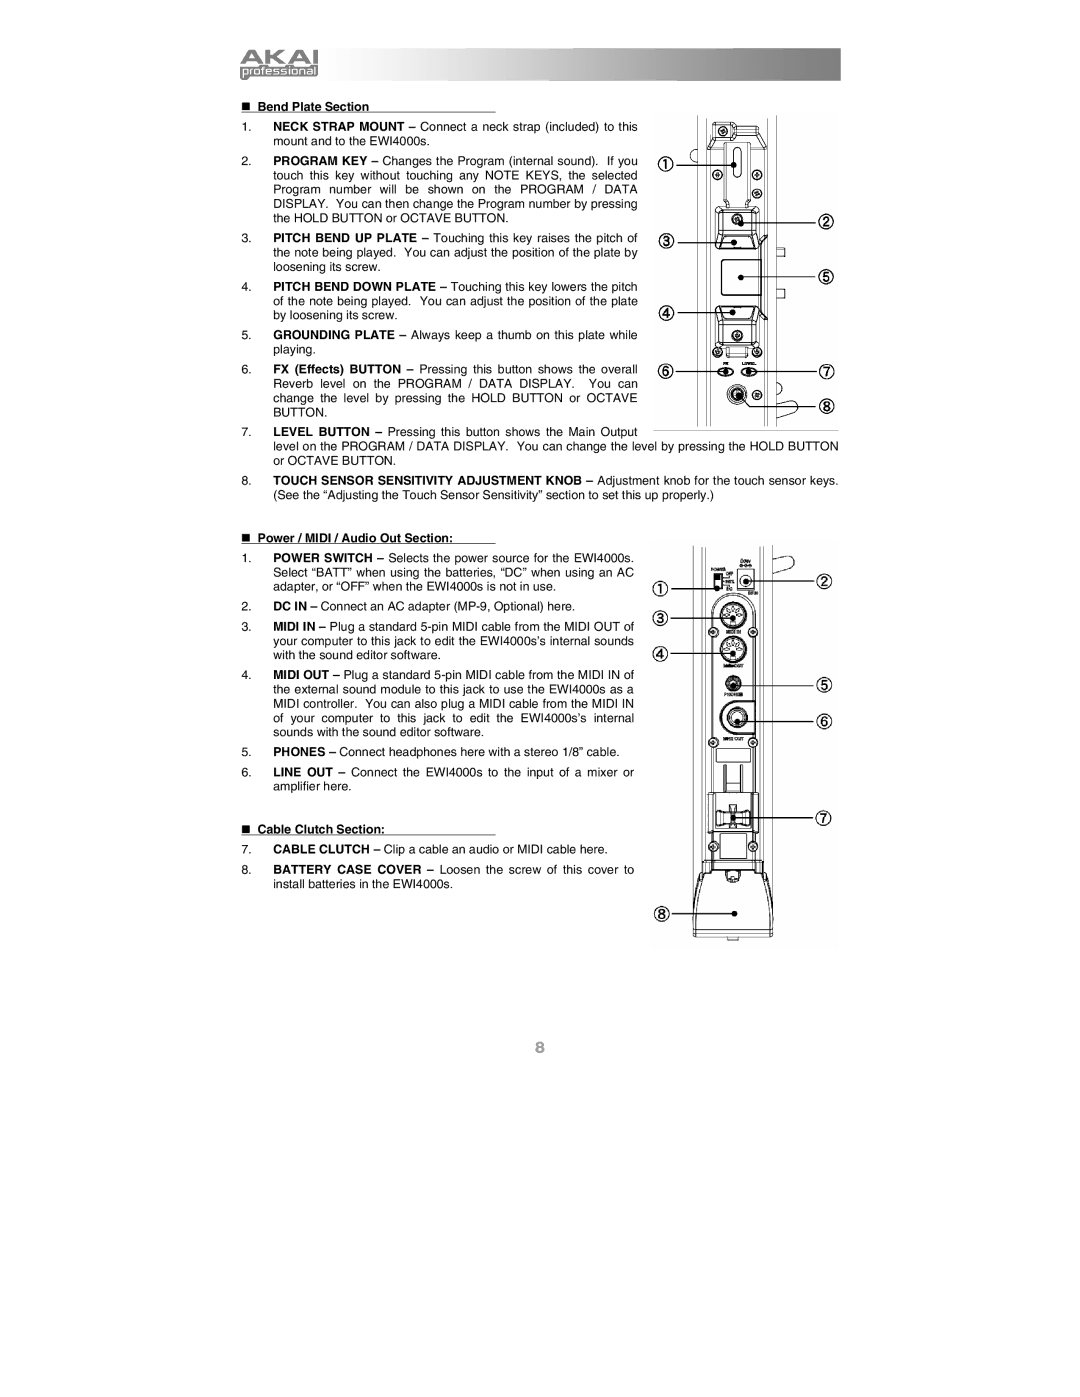
Bend Plate Section
1.NECK STRAP MOUNT – Connect a neck strap (included) to this mount and to the EWI4000s.
2.PROGRAM KEY – Changes the Program (internal sound). If you touch this key without touching any NOTE KEYS, the selected Program number will be shown on the PROGRAM / DATA DISPLAY. You can then change the Program number by pressing the HOLD BUTTON or OCTAVE BUTTON.
3.PITCH BEND UP PLATE – Touching this key raises the pitch of the note being played. You can adjust the position of the plate by loosening its screw.
4.PITCH BEND DOWN PLATE – Touching this key lowers the pitch of the note being played. You can adjust the position of the plate by loosening its screw.
5.GROUNDING PLATE – Always keep a thumb on this plate while playing.
6.FX (Effects) BUTTON – Pressing this button shows the overall Reverb level on the PROGRAM / DATA DISPLAY. You can change the level by pressing the HOLD BUTTON or OCTAVE BUTTON.
7.LEVEL BUTTON – Pressing this button shows the Main Output
level on the PROGRAM / DATA DISPLAY. You can change the level by pressing the HOLD BUTTON or OCTAVE BUTTON.
8.TOUCH SENSOR SENSITIVITY ADJUSTMENT KNOB – Adjustment knob for the touch sensor keys. (See the “Adjusting the Touch Sensor Sensitivity” section to set this up properly.)
Power / MIDI / Audio Out Section:
1.POWER SWITCH – Selects the power source for the EWI4000s. Select “BATT” when using the batteries, “DC” when using an AC adapter, or “OFF” when the EWI4000s is not in use.
2.DC IN – Connect an AC adapter
3.MIDI IN – Plug a standard
4.MIDI OUT – Plug a standard
5.PHONES – Connect headphones here with a stereo 1/8” cable.
6.LINE OUT – Connect the EWI4000s to the input of a mixer or amplifier here.
Cable Clutch Section:
7.CABLE CLUTCH – Clip a cable an audio or MIDI cable here.
8.BATTERY CASE COVER – Loosen the screw of this cover to install batteries in the EWI4000s.
8
