Connecting a Digital Audio System
There are many types of digital audio systems on the market today.
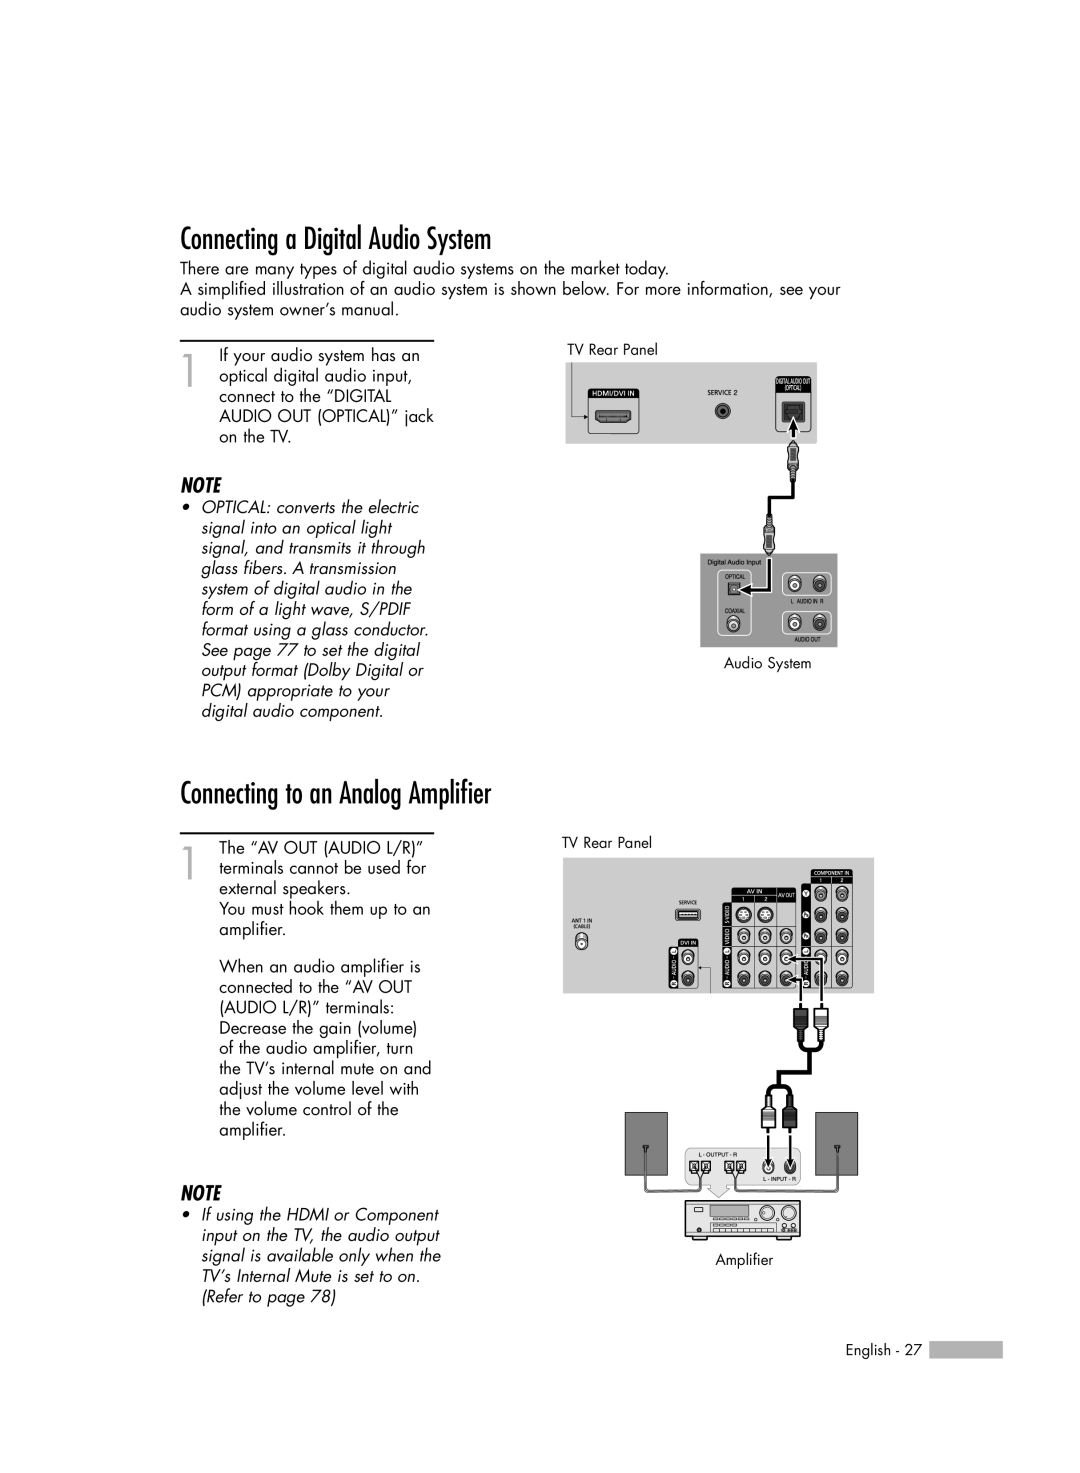
A simplified illustration of an audio system is shown below. For more information, see your audio system owner’s manual.
If your audio system has an | TV Rear Panel | |
1 optical digital audio input, |
| |
connect to the “DIGITAL |
| |
AUDIO OUT (OPTICAL)” jack |
| |
on the TV. |
| |
NOTE |
| |
• OPTICAL: converts the electric |
| |
signal into an optical light |
| |
signal, and transmits it through |
| |
glass fibers. A transmission |
| |
system of digital audio in the |
| |
form of a light wave, S/PDIF |
| |
format using a glass conductor. |
| |
See page 77 to set the digital | Audio System | |
output format (Dolby Digital or | ||
| ||
PCM) appropriate to your |
| |
digital audio component. |
| |
Connecting to an Analog Amplifier |
| |
The “AV OUT (AUDIO L/R)” | TV Rear Panel | |
1 terminals cannot be used for |
| |
external speakers. |
| |
You must hook them up to an |
| |
amplifier. |
|
When an audio amplifier is connected to the “AV OUT (AUDIO L/R)” terminals: Decrease the gain (volume) of the audio amplifier, turn the TV’s internal mute on and adjust the volume level with the volume control of the amplifier.
NOTE
• If using the HDMI or Component |
|
input on the TV, the audio output |
|
signal is available only when the | Amplifier |
TV’s Internal Mute is set to on. |
|
(Refer to page 78) |
|
English - 27 ![]()
