Adjusting the Time Correction
9 Press the BAND button to select the channel to be adjusted.
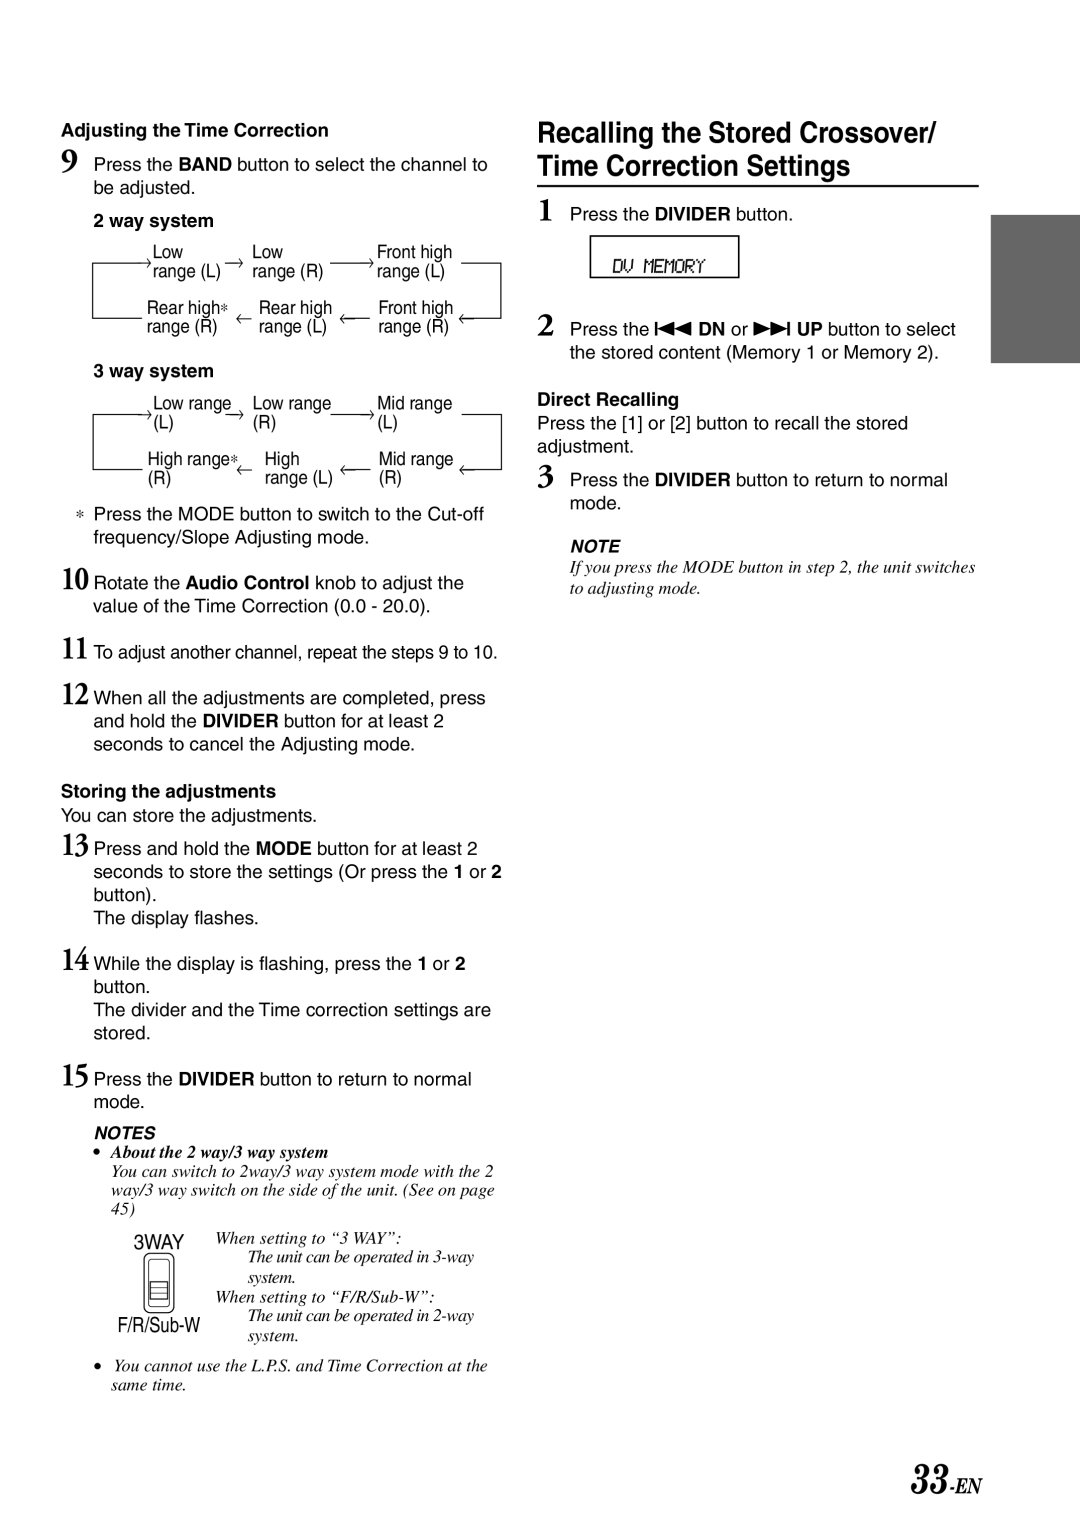
2 way system |
|
|
|
|
|
|
|
|
|
|
| |||
→Low |
| → | Low |
|
|
| → Front high |
|
| |||||
|
| range (L) |
|
|
| range (R) |
|
|
|
|
| range (L) |
|
|
|
| Rear high∗ |
| ← Rear high | ← |
|
| Front high |
| ← | ||||
|
| range (R) |
|
| range (L) |
|
|
| range (R) |
|
| |||
3 way system |
|
|
|
|
|
|
|
| ||||||
|
|
|
|
|
|
|
|
|
|
| ||||
|
| Low range |
|
| Low range |
|
| → | Mid range |
|
| |||
→ | → | (R) |
|
| (L) |
|
| |||||||
|
| (L) |
|
|
|
|
|
|
|
| ||||
|
| High range∗ |
| High |
|
|
| Mid range |
|
| ||||
|
| (R) |
| ← range (L) | ← |
|
| (R) |
| ← | ||||
|
|
|
|
|
|
|
| |||||||
|
|
|
|
|
|
|
|
|
| |||||
∗Press the MODE button to switch to the
10 Rotate the Audio Control knob to adjust the
value of the Time Correction (0.0 - 20.0).
11 To adjust another channel, repeat the steps 9 to 10.
12 When all the adjustments are completed, press and hold the DIVIDER button for at least 2 seconds to cancel the Adjusting mode.
Storing the adjustments
You can store the adjustments.
13 Press and hold the MODE button for at least 2 seconds to store the settings (Or press the 1 or 2 button).
The display flashes.
14 While the display is flashing, press the 1 or 2 button.
The divider and the Time correction settings are stored.
15 Press the DIVIDER button to return to normal mode.
NOTES
•About the 2 way/3 way system
You can switch to 2way/3 way system mode with the 2 way/3 way switch on the side of the unit. (See on page 45)
3WAY | When setting to “3 WAY”: | |
| The unit can be operated in | |
| system. | |
| When setting to | |
| The unit can be operated in | |
system. | ||
|
•You cannot use the L.P.S. and Time Correction at the same time.
Recalling the Stored Crossover/ Time Correction Settings
1 Press the DIVIDER button.
2 Press the g DN or f UP button to select the stored content (Memory 1 or Memory 2).
Direct Recalling
Press the [1] or [2] button to recall the stored adjustment.
3 Press the DIVIDER button to return to normal mode.
NOTE
If you press the MODE button in step 2, the unit switches to adjusting mode.