Changing the Audio Level Display Pattern
You can select the Audio Level display from three display patterns. You can also deactivate the display.
Press DISP/B.OUT to switch the display pattern.
For
AUDIO ADJUSTMENT → EQ ADJUSTMENT →
For CDA-9812RX:
AUDIO ADJUSTMENT → BASS ADJUSTMENT → TREBLE ADJUSTMENT → OFF → AUDIO ADJUSTMENT
The indicators show the value that is set in each mode as shown below.
| AUDIO | EQ/BASS/TREBLE | |
| ADJUSTMENT | ADJUSTMENT | ADJUSTMENT |
Level | VOLUME | LEVEL | LEVEL |
Indicator |
|
|
|
|
|
|
|
Width | BALANCE | WIDTH | SLOPE |
indicator |
|
|
|
Frequency | FADER | FREQUENCY | FREQUENCY |
Indicator |
|
|
|
- | - | ||
Indicator |
|
|
|
|
| ∗Only when | |
AUDIO Adjustment Display
Example for
VOLUME : 18
BALANCE : L6
FADER : F6
EQ Adjustment Display
Example for
LEVEL : +2
WIDTH : 2
FREQUENCY: 200Hz
Example for
LEVEL :
SLOPE : 2
FREQUENCY : 2k
Detaching and Attaching the Front Panel
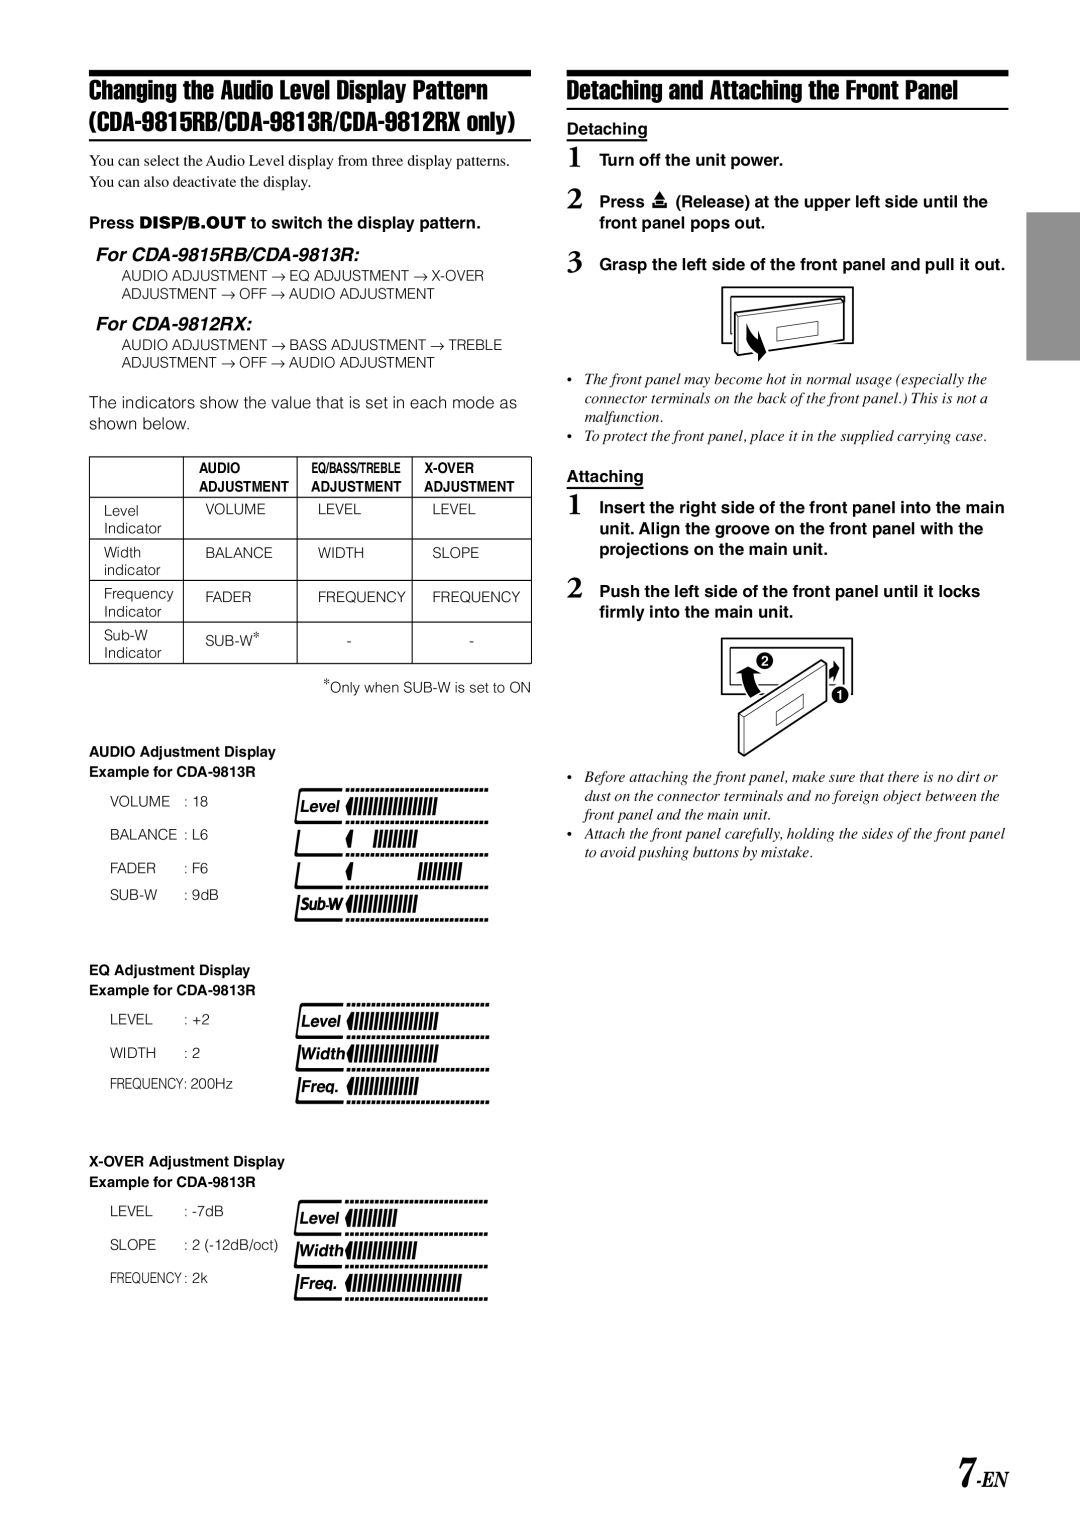
Detaching
1 Turn off the unit power.
2 Press ![]() (Release) at the upper left side until the front panel pops out.
(Release) at the upper left side until the front panel pops out.
3 Grasp the left side of the front panel and pull it out.
•The front panel may become hot in normal usage (especially the connector terminals on the back of the front panel.) This is not a malfunction.
•To protect the front panel, place it in the supplied carrying case.
Attaching
1 Insert the right side of the front panel into the main unit. Align the groove on the front panel with the projections on the main unit.
2 Push the left side of the front panel until it locks firmly into the main unit.
2 |
1 |
•Before attaching the front panel, make sure that there is no dirt or dust on the connector terminals and no foreign object between the front panel and the main unit.
•Attach the front panel carefully, holding the sides of the front panel to avoid pushing buttons by mistake.