Appendix A: XL Information
When used with external battery packs, the extended run (XL) UPS offers longer run times than a standard UPS and extra load protection during battery replacement. When replacing the batteries either in the UPS or battery pack(s), the UPS can still respond to a power disturbance using the remaining connected batteries. Please refer to the main sections of this User’s Manual for basic information about the UPS. This appendix provides additional information needed to use extended run versions of the UPS.
XL Installation
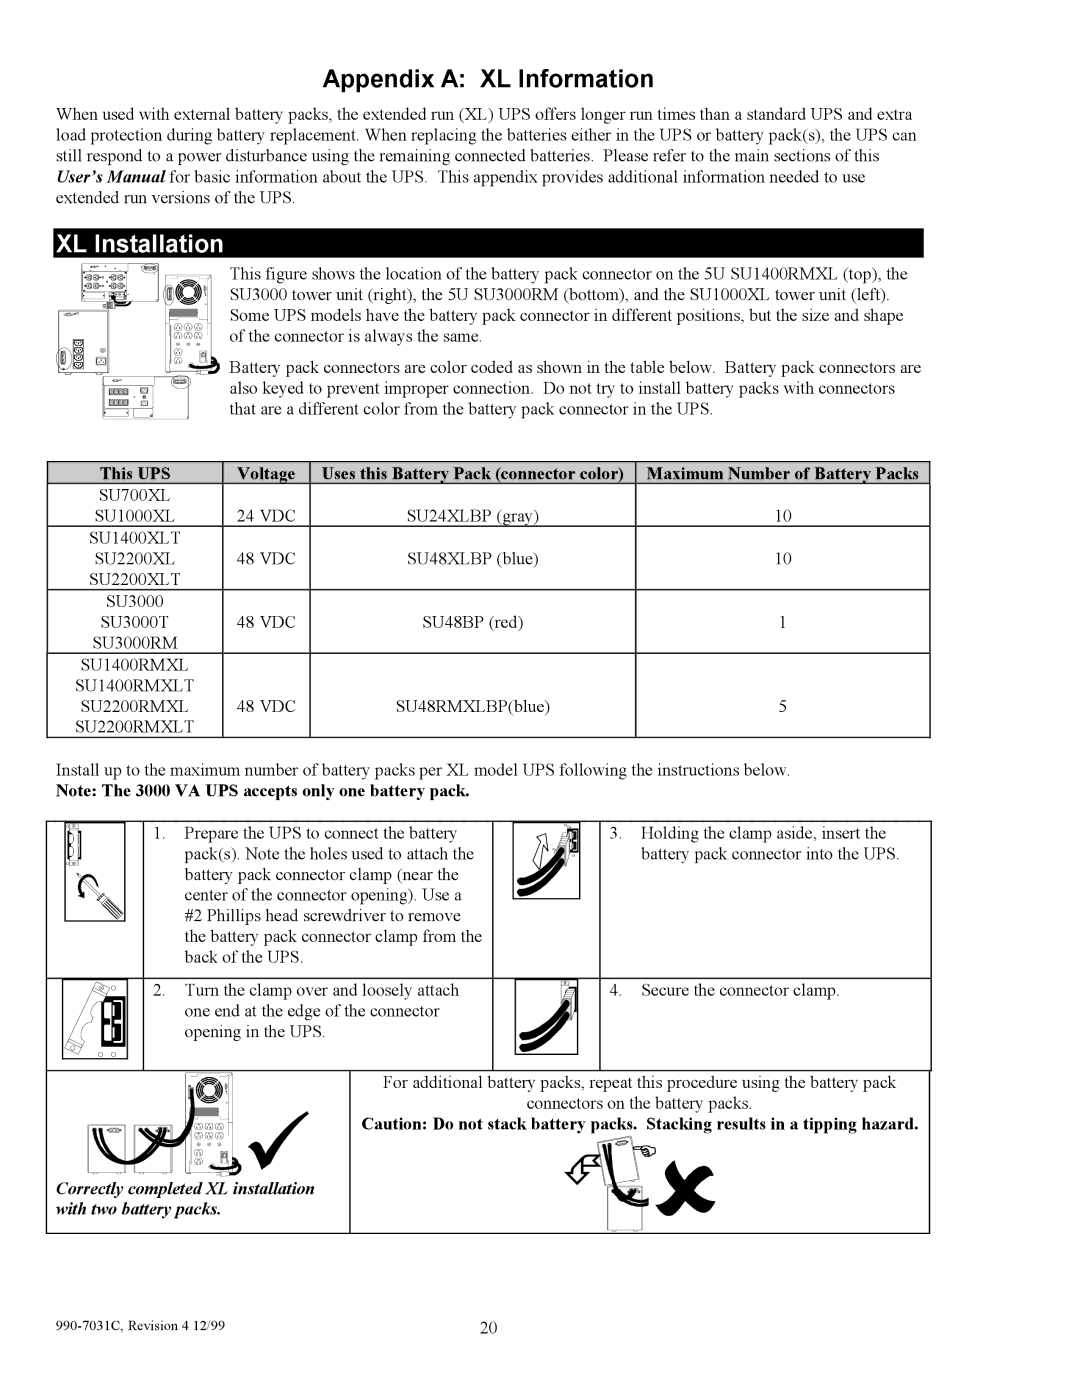
This figure shows the location of the battery pack connector on the 5U SU1400RMXL (top), the SU3000 tower unit (right), the 5U SU3000RM (bottom), and the SU1000XL tower unit (left). Some UPS models have the battery pack connector in different positions, but the size and shape of the connector is always the same.
Battery pack connectors are color coded as shown in the table below. Battery pack connectors are also keyed to prevent improper connection. Do not try to install battery packs with connectors that are a different color from the battery pack connector in the UPS.
This UPS | Voltage | Uses this Battery Pack (connector color) | Maximum Number of Battery Packs |
SU700XL |
|
|
|
SU1000XL | 24 VDC | SU24XLBP (gray) | 10 |
SU1400XLT |
|
|
|
SU2200XL | 48 VDC | SU48XLBP (blue) | 10 |
SU2200XLT |
|
|
|
SU3000 |
|
|
|
SU3000T | 48 VDC | SU48BP (red) | 1 |
SU3000RM |
|
|
|
SU1400RMXL |
|
|
|
SU1400RMXLT |
|
|
|
SU2200RMXL | 48 VDC | SU48RMXLBP(blue) | 5 |
SU2200RMXLT |
|
|
|
Install up to the maximum number of battery packs per XL model UPS following the instructions below.
Note: The 3000 VA UPS accepts only one battery pack.
1. Prepare the UPS to connect the battery | 3. Holding the clamp aside, insert the |
pack(s). Note the holes used to attach the | battery pack connector into the UPS. |
battery pack connector clamp (near the |
|
center of the connector opening). Use a |
|
#2 Phillips head screwdriver to remove |
|
the battery pack connector clamp from the |
|
back of the UPS. |
|
2. Turn the clamp over and loosely attach | 4. Secure the connector clamp. |
one end at the edge of the connector |
|
opening in the UPS. |
|
Correctly completed XL installation with two battery packs.
For additional battery packs, repeat this procedure using the battery pack
connectors on the battery packs.
Caution: Do not stack battery packs. Stacking results in a tipping hazard.
| 20 |
