Firmware Upgrades
Firmware Upgrades
Firmware upgrades allow you to install the latest available operating system for the
You will need a Phillips screwdriver and a
Replacing the Firmware Chip
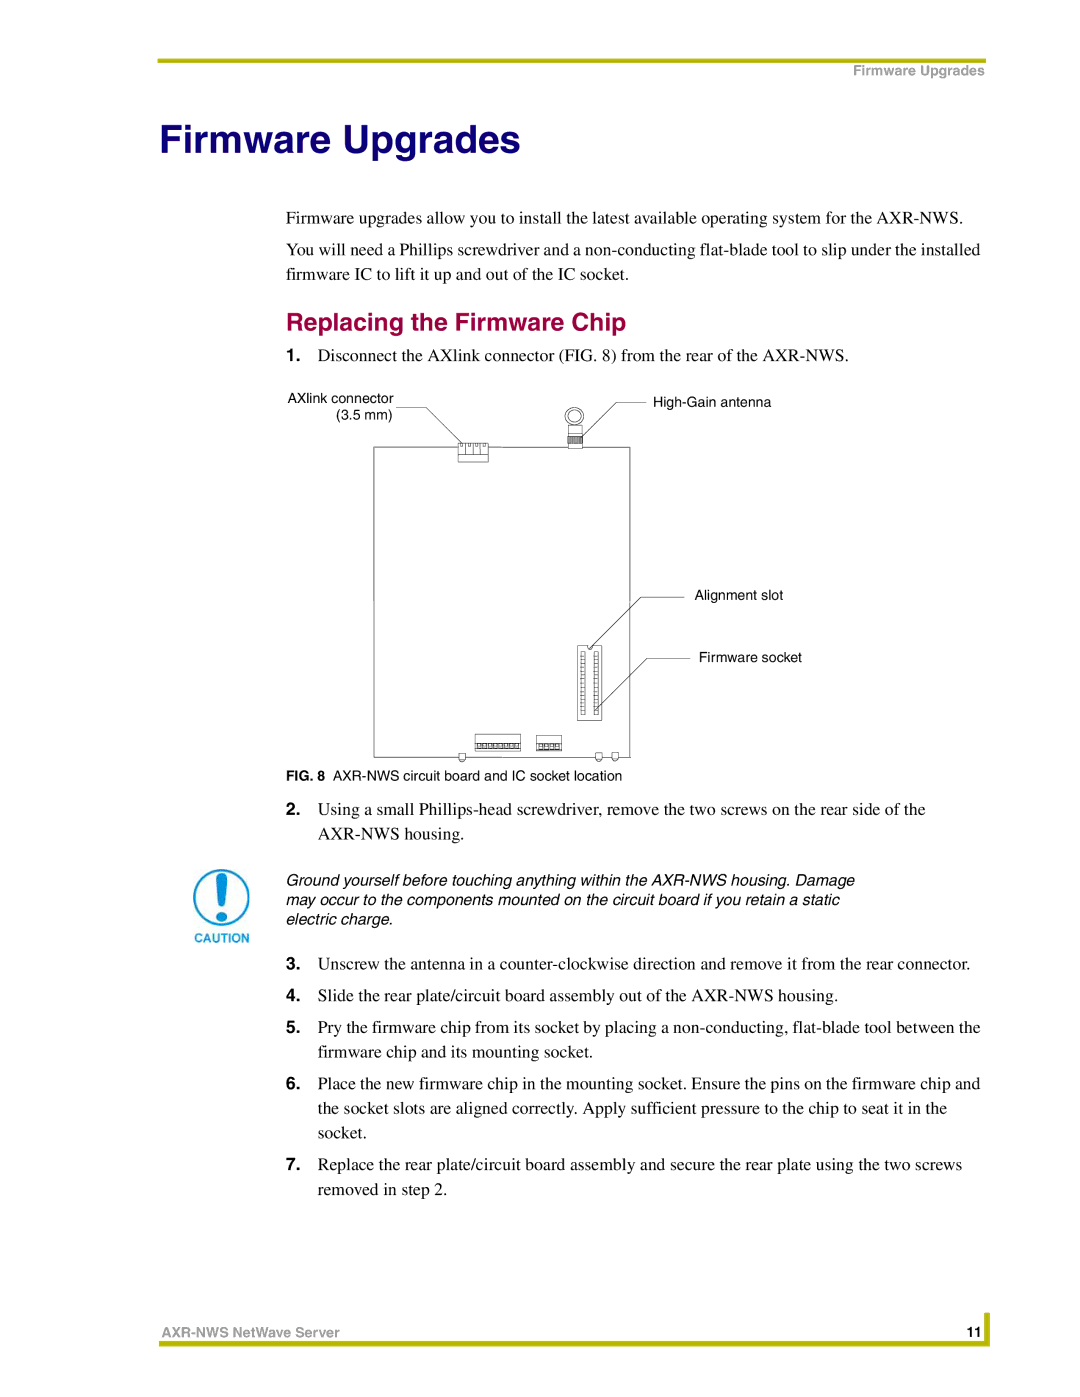
1.Disconnect the AXlink connector (FIG. 8) from the rear of the
AXlink connector | |
(3.5 mm) |
|
Alignment slot
Firmware socket
FIG. 8 AXR-NWS circuit board and IC socket location
2.Using a small
Ground yourself before touching anything within the
3.Unscrew the antenna in a
4.Slide the rear plate/circuit board assembly out of the
5.Pry the firmware chip from its socket by placing a
6.Place the new firmware chip in the mounting socket. Ensure the pins on the firmware chip and the socket slots are aligned correctly. Apply sufficient pressure to the chip to seat it in the socket.
7.Replace the rear plate/circuit board assembly and secure the rear plate using the two screws removed in step 2.
11 |
| |
|
|
|
