2.7
INTERNAL 3.5” AND 2.5” INSTALLATION (TRAY MOUNTS AND SUSPENSION MOUNTING SYSTEM)
The following text outlines the preparatory stages for installing 3.5” / 2.5” drives using drives trays and the suspension mounting system.
1.If you have reattached it, remove the left side panel. Loosen the side panel screws and swing the panel outward, pulling it back towards you; this will completely remove it.
2.Remove the front bezel by locating the bezel tabs and pulling them to release the bezel .The bezel will swing outward like a door. Lift the bezel upwards to remove it from its hinges.
3. Open the drive cage by loosening the top thumbscrew.
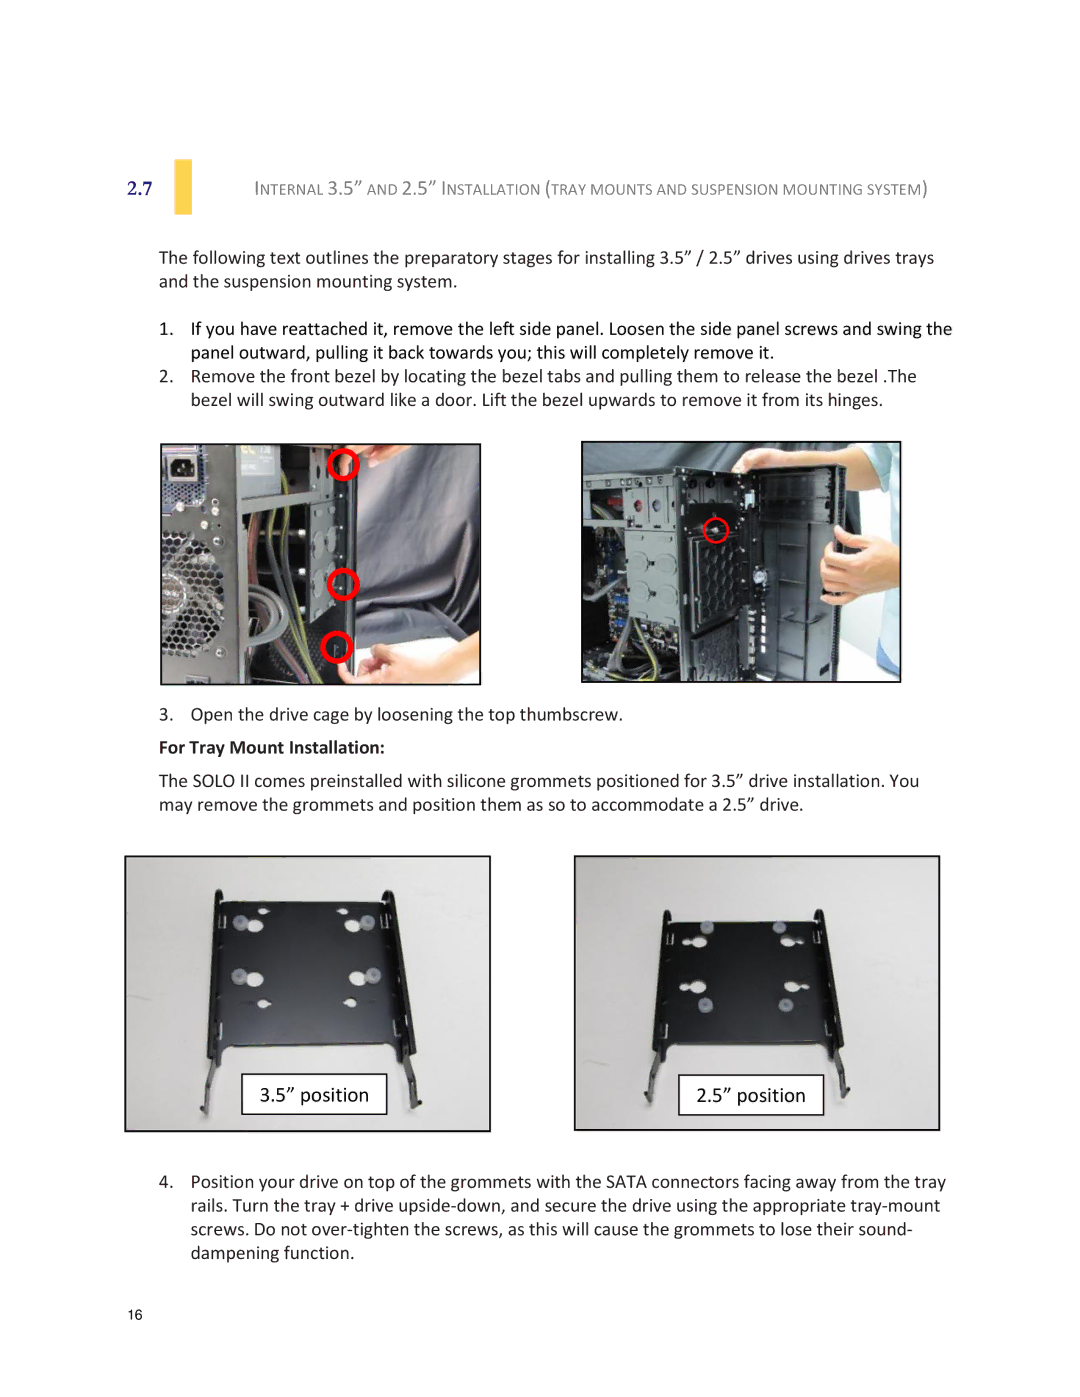
For Tray Mount Installation:
The SOLO II comes preinstalled with silicone grommets positioned for 3.5” drive installation. You may remove the grommets and position them as so to accommodate a 2.5” drive.
3.5” position
2.5” position
4.Position your drive on top of the grommets with the SATA connectors facing away from the tray rails. Turn the tray + drive
16