Typhoon Speednet Wireless Access Point
C h a p t e r
2
Installation Procedure
This chapter will walk you through the hardware and Device Manager
Installing the Hardware
Perform the following steps to install the Wireless Access Point (AP).
1.If applicable, insert the Ethernet cable into the RJ45 connector (labeled "WAN") on the AP to connect to a hub, router, cable or DSL modem.
2.Next, apply power to the AP by plugging in the power adapter supplied with the evaluation kit. This completes the hardware portion of the installation.
3.The next step is to add the AP into the wireless network. There are three configuration options of the AP:
•"Enroll" the AP in the network (Multimedia Mode only). Using the Network Management application on a wireless active PC node to enroll the AP into the network.
•The AP provides an SNMPv1 agent and the support for the standard IEEE 802.11 MIB and proprietary extensions (MIB files are included in the evaluation CD). These objects can be read and configured via a standard SNMP MIB Browser.
•Alternatively, read the below "Installing the AP Manager" to manually configure the AP Access.
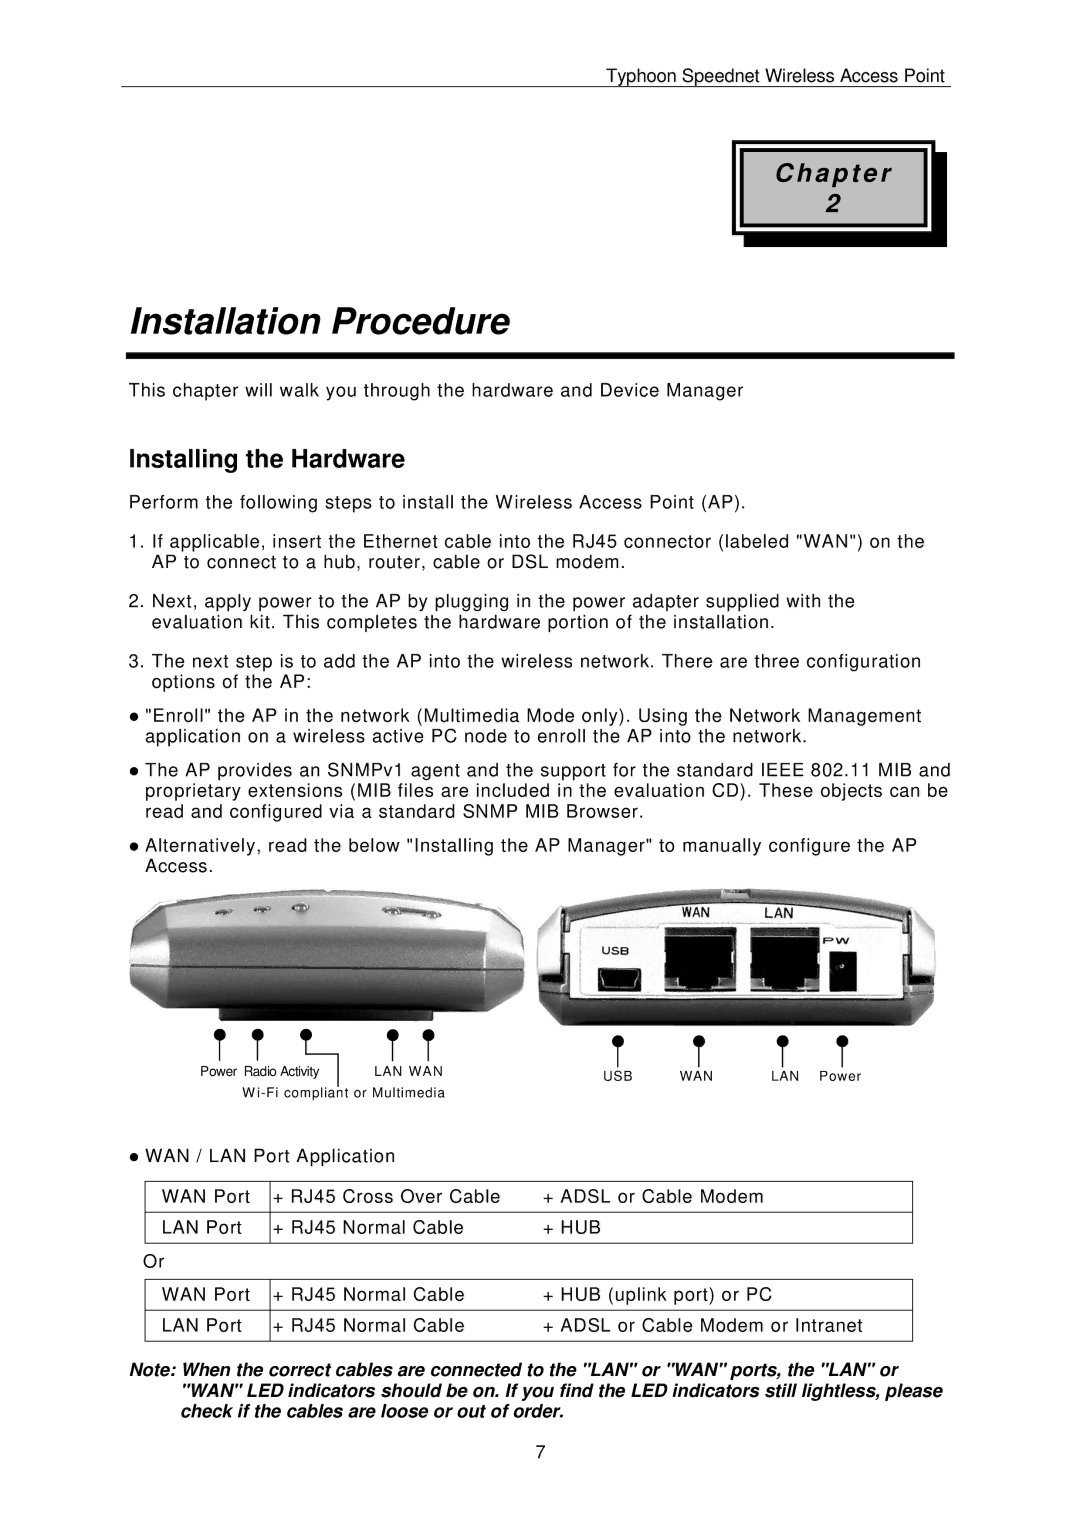
Power Radio Activity
LAN WAN | USB | WAN | LAN Power |
|
W
•WAN / LAN Port Application
WAN Port | + RJ45 Cross Over Cable | + ADSL or Cable Modem |
|
|
|
LAN Port | + RJ45 Normal Cable | + HUB |
|
|
|
Or |
|
|
|
|
|
WAN Port | + RJ45 Normal Cable | + HUB (uplink port) or PC |
|
|
|
LAN Port | + RJ45 Normal Cable | + ADSL or Cable Modem or Intranet |
|
|
|
Note: When the correct cables are connected to the "LAN" or "WAN" ports, the "LAN" or "WAN" LED indicators should be on. If you find the LED indicators still lightless, please check if the cables are loose or out of order.
7