BUILDING INSTRUCTIONS
Note: This model is covered with a very thin layer of film which is then painted with a special lightweight paint to conserve weight. Avoid the use of tape to help position the fuselage components during assembly. Also, Do Not attempt to remove any of the trim markings as this will damage the painted surface beneath.
Also, for simplicity, all of the carbon rods in this ARF are of the same diameter. When identifying the rods for the corresponding step, only the lengths are mentioned.
Join the Wing Halves
❏1. Using epoxy, join the two wing halves together, making sure to align the root sections.
❏2. Epoxy the
❏3. Epoxy the foam inserts into the wing slot over the carbon joiner. Make sure they are fully seated against the joiner. The foam inserts may not be completely flush with the bottom of the wing.
7
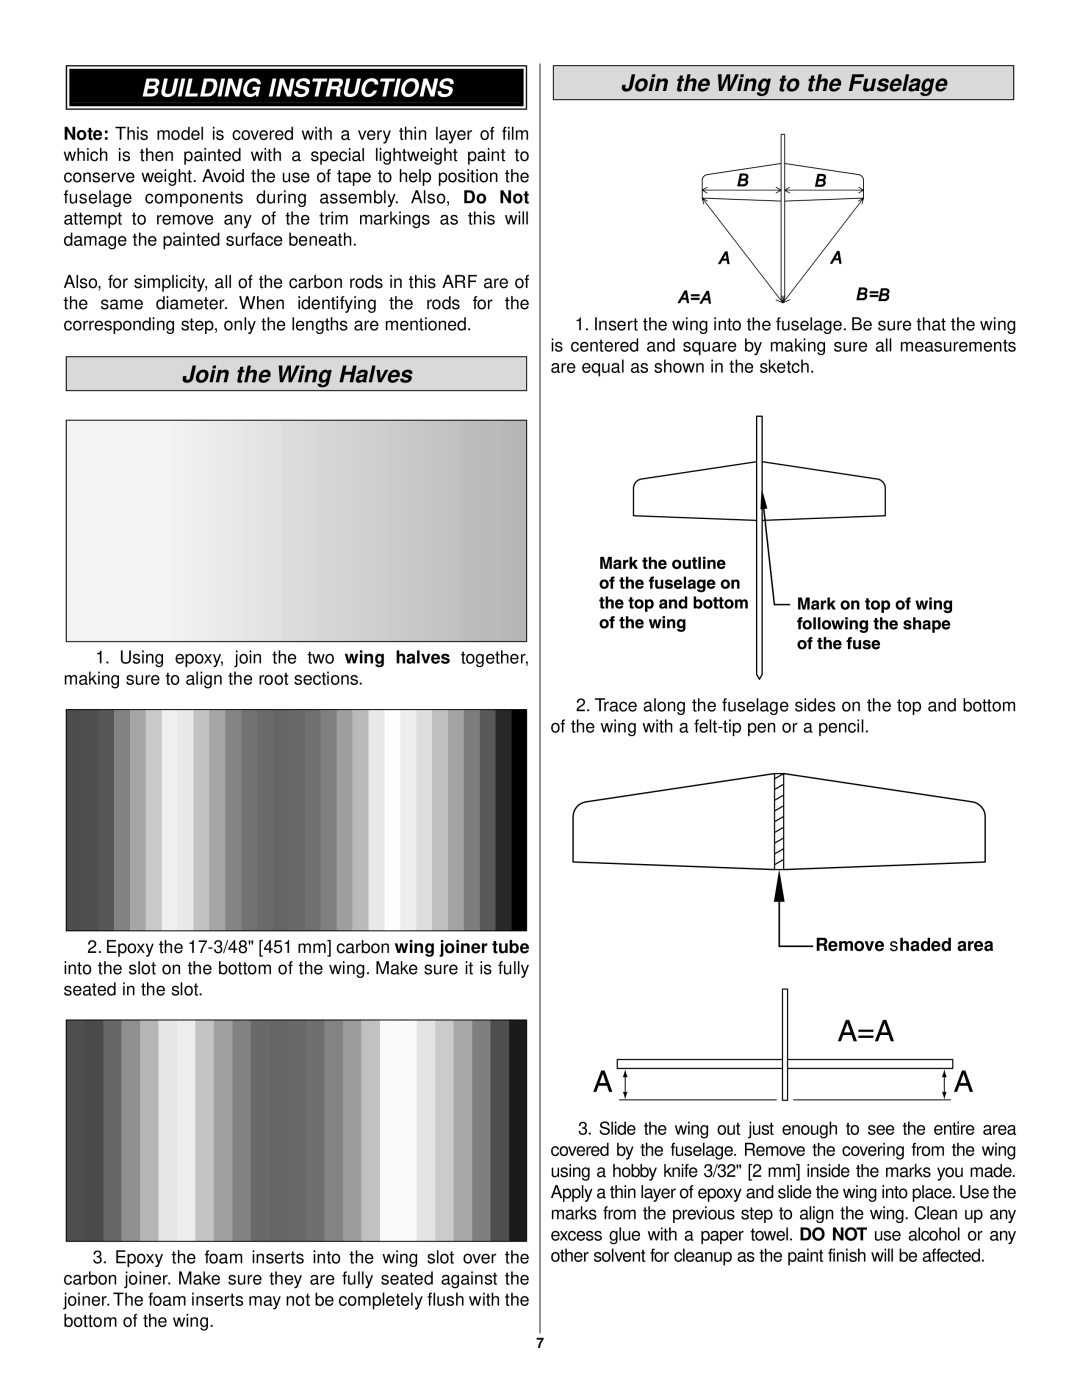
Join the Wing to the Fuselage
❏1. Insert the wing into the fuselage. Be sure that the wing is centered and square by making sure all measurements are equal as shown in the sketch.
❏2. Trace along the fuselage sides on the top and bottom of the wing with a
Remove shaded area
❏3. Slide the wing out just enough to see the entire area covered by the fuselage. Remove the covering from the wing using a hobby knife 3/32" [2 mm] inside the marks you made. Apply a thin layer of epoxy and slide the wing into place. Use the marks from the previous step to align the wing. Clean up any excess glue with a paper towel. DO NOT use alcohol or any other solvent for cleanup as the paint finish will be affected.