Manuals
/
Apple
/
Computer Equipment
/
Computer Accessories
Apple
073-0704 Tighten the first screw, Slide the stand forward to access the two rear screws
Models:
073-0704
1
5
13
13
Download
13 pages
42.66 Kb
1
2
3
4
5
6
7
8
<
>
Install
Slide the stand forward to access the two rear screws
Page 5
Image 5
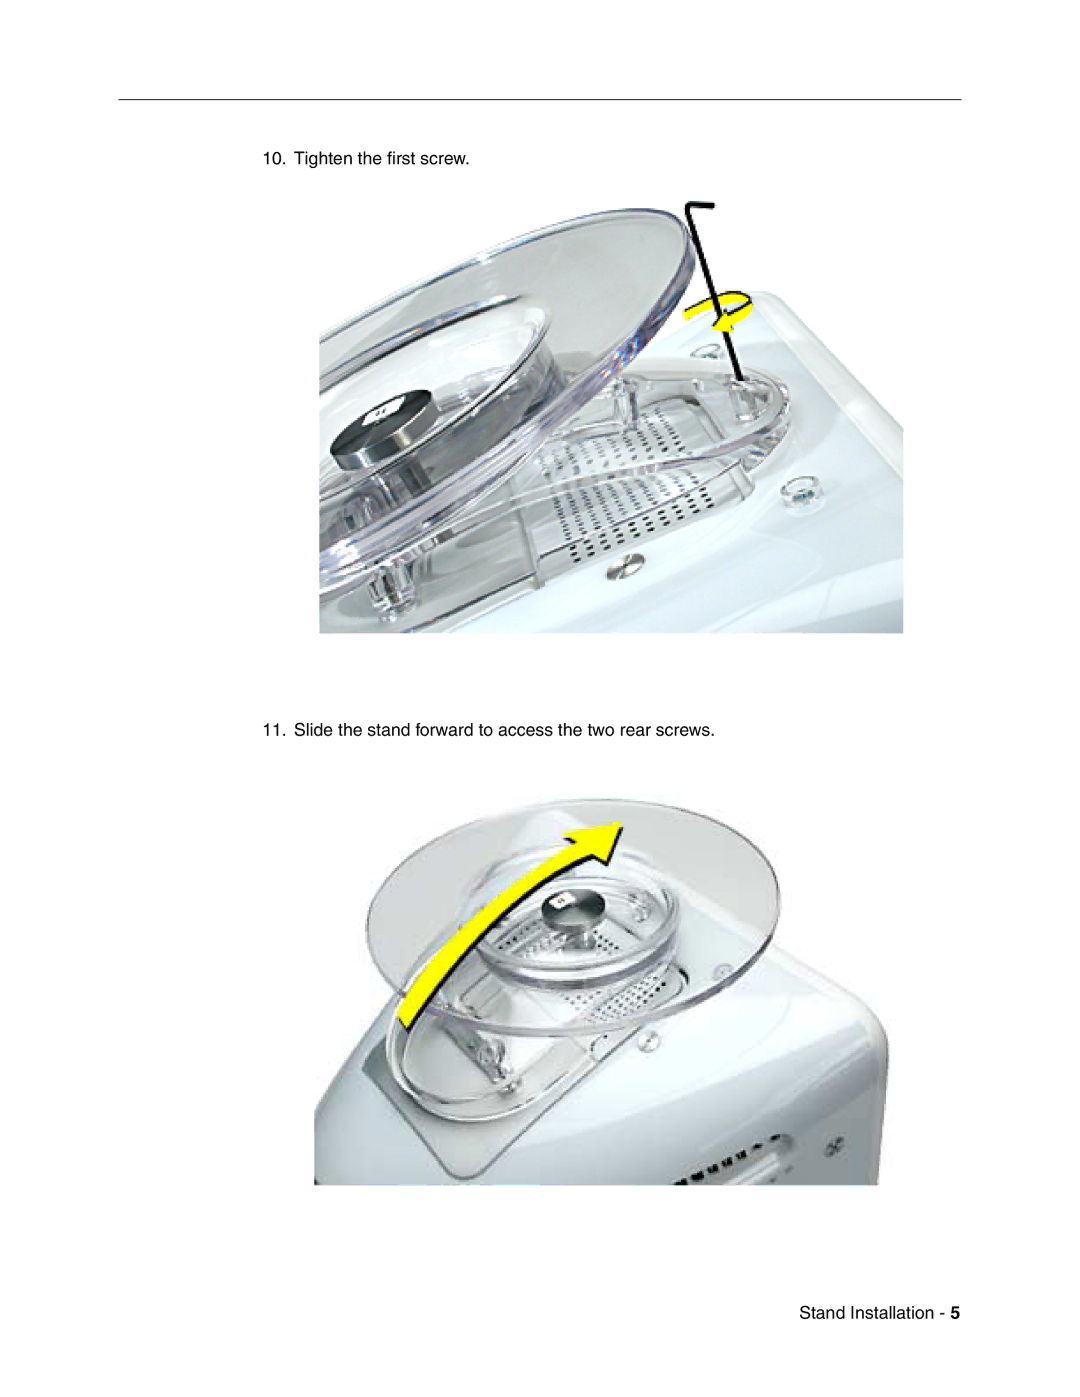
10. Tighten the first screw.
11. Slide the stand forward to access the two rear screws.
Stand Installation -
5
Page 4
Page 6
Page 5
Image 5
Page 4
Page 6
Contents
No tools are required. The tool is supplied with the stand
Tools Required
Installing the Optional Stand
eMac Computers Stand Installation
Stand Installation
To install the eMac stand
1. Save open documents and quit all open applications
3. Unplug all cables
Stand Installation
6. The stand attaches to the locations circled below
7. Remove the screw located between the computer’s feet
Stand Installation
8. Position the stand on top of the screw holes
Stand Installation
11. Slide the stand forward to access the two rear screws
10. Tighten the first screw
Stand Installation
12. Tighten the screw on the left 13. Tighten the screw on the right
Stand Installation
14. Carefully turn the computer over
eMac ATI Graphics and eMac USB 2.0 Installation Procedure
To install the eMac ATI Graphics or eMac USB 2.0 stand
6. The stand attaches to the locations circled below
7. Remove the screw circled below
Stand Installation
Stand Installation
8. Position the stand in place over the screw holes
Stand Installation
10. Push the stand forward. Tighten the second screw
11. Tighten the third screw
Stand Installation
12. Carefully turn the computer over
Apple Computer, Inc