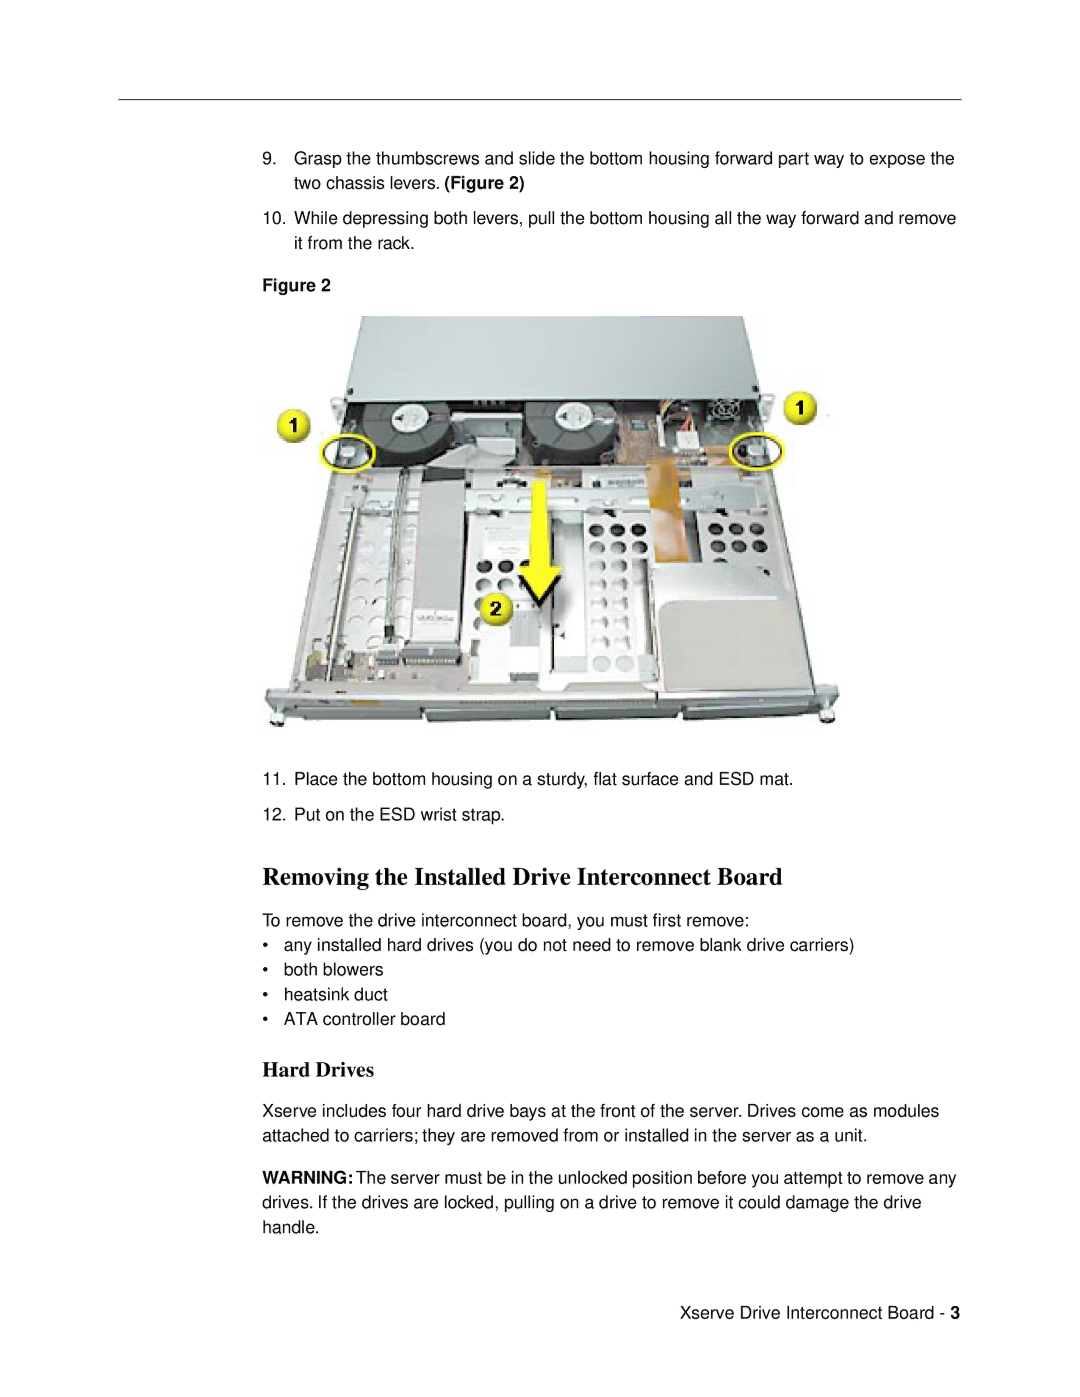
9.Grasp the thumbscrews and slide the bottom housing forward part way to expose the two chassis levers. (Figure 2)
10.While depressing both levers, pull the bottom housing all the way forward and remove it from the rack.
Figure 2
11.Place the bottom housing on a sturdy, flat surface and ESD mat.
12.Put on the ESD wrist strap.
Removing the Installed Drive Interconnect Board
To remove the drive interconnect board, you must first remove:
•any installed hard drives (you do not need to remove blank drive carriers)
•both blowers
•heatsink duct
•ATA controller board
Hard Drives
Xserve includes four hard drive bays at the front of the server. Drives come as modules attached to carriers; they are removed from or installed in the server as a unit.
WARNING: The server must be in the unlocked position before you attempt to remove any drives. If the drives are locked, pulling on a drive to remove it could damage the drive handle.
Xserve Drive Interconnect Board - 3