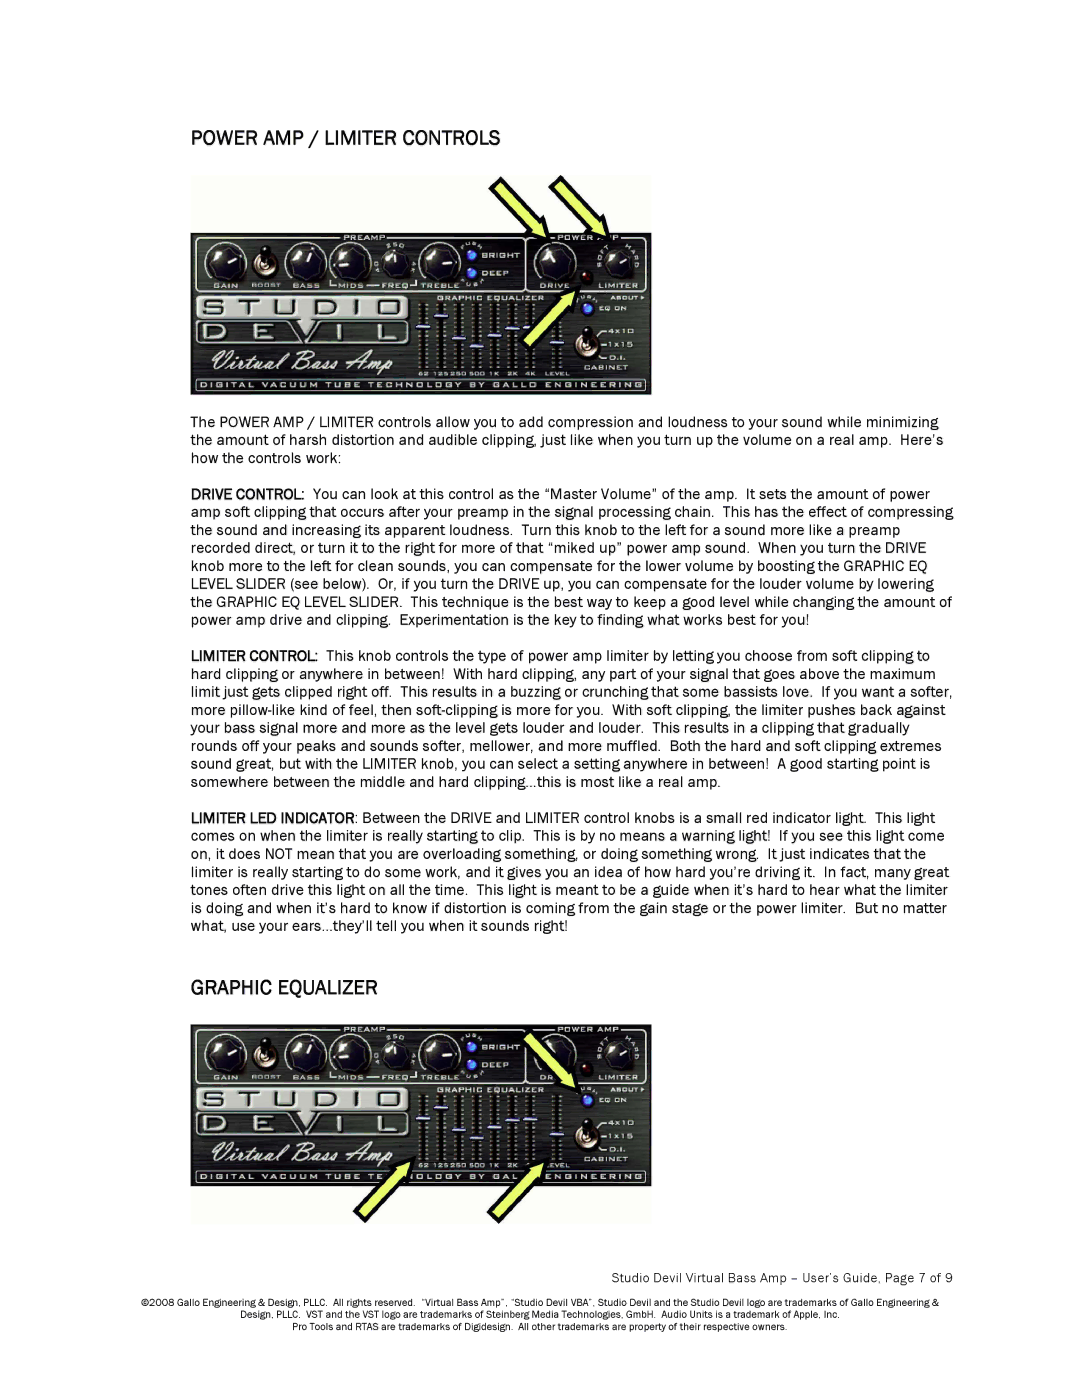
POWER AMP / LIMITER CONTROLS
The POWER AMP / LIMITER controls allow you to add compression and loudness to your sound while minimizing the amount of harsh distortion and audible clipping, just like when you turn up the volume on a real amp. Here’s how the controls work:
DRIVE CONTROL: You can look at this control as the “Master Volume” of the amp. It sets the amount of power amp soft clipping that occurs after your preamp in the signal processing chain. This has the effect of compressing the sound and increasing its apparent loudness. Turn this knob to the left for a sound more like a preamp recorded direct, or turn it to the right for more of that “miked up” power amp sound. When you turn the DRIVE knob more to the left for clean sounds, you can compensate for the lower volume by boosting the GRAPHIC EQ LEVEL SLIDER (see below). Or, if you turn the DRIVE up, you can compensate for the louder volume by lowering the GRAPHIC EQ LEVEL SLIDER. This technique is the best way to keep a good level while changing the amount of power amp drive and clipping. Experimentation is the key to finding what works best for you!
LIMITERCONTROL: This knob controls the type of power amp limiter by letting you choose from soft clipping to hard clipping or anywhere in between! With hard clipping, any part of your signal that goes above the maximum limit just gets clipped right off. This results in a buzzing or crunching that some bassists love. If you want a softer, more
LIMITERLED INDICATOR: Between the DRIVE and LIMITER control knobs is a small red indicator light. This light comes on when the limiter is really starting to clip. This is by no means a warning light! If you see this light come on, it does NOT mean that you are overloading something, or doing something wrong. It just indicates that the limiter is really starting to do some work, and it gives you an idea of how hard you’re driving it. In fact, many great tones often drive this light on all the time. This light is meant to be a guide when it’s hard to hear what the limiter is doing and when it’s hard to know if distortion is coming from the gain stage or the power limiter. But no matter what, use your ears…they’ll tell you when it sounds right!
GRAPHIC EQUALIZER
Studio Devil Virtual Bass Amp – User’s Guide, Page 7 of 9
©2008 Gallo Engineering & Design, PLLC. All rights reserved. “Virtual Bass Amp”, “Studio Devil VBA”, Studio Devil and the Studio Devil logo are trademarks of Gallo Engineering &
Design, PLLC. VST and the VST logo are trademarks of Steinberg Media Technologies, GmbH. Audio Units is a trademark of Apple, Inc.
Pro Tools and RTAS are trademarks of Digidesign. All other trademarks are property of their respective owners.