SYSTEM SET-UP & CHECKOUT
If dehumidifier installation does not include ventilation or zoning and will not be wired to an external control, remote control or the HVAC system, proceed to Installer Test Mode section on page 17..
1.Check all wiring..
2.Make sure the wire access cover has been snapped back onto the
3.Plug unit in and turn power switch to ON..
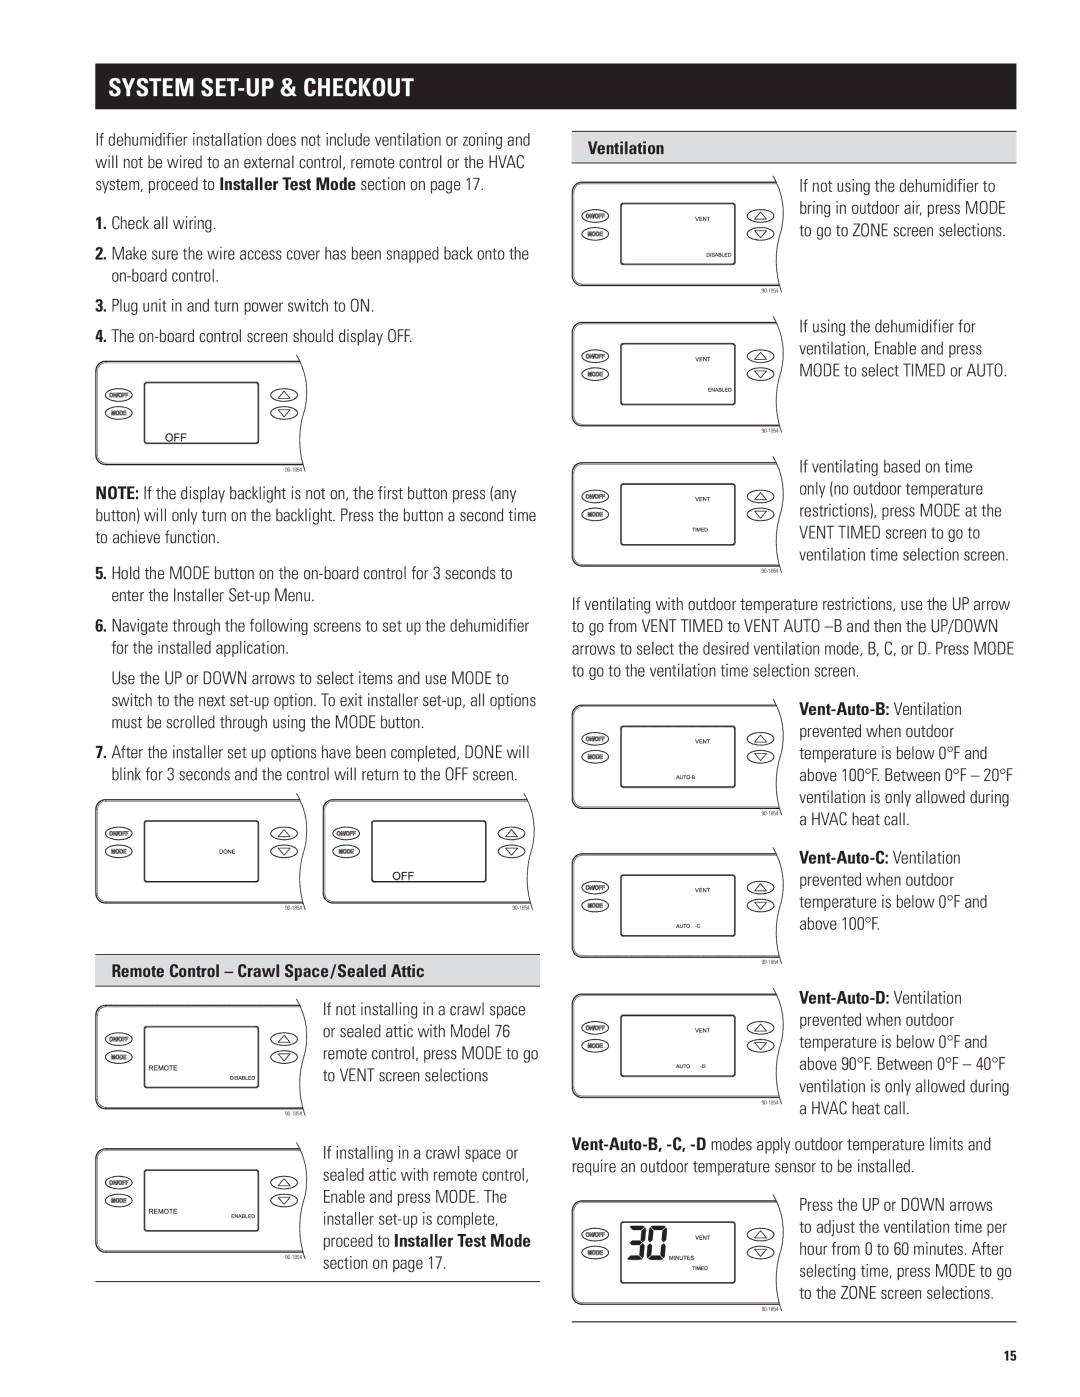
4.The
NOTE: If the display backlight is not on, the first button press (any button) will only turn on the backlight.. Press the button a second time to achieve function..
5.Hold the MODE button on the
6.Navigate through the following screens to set up the dehumidifier for the installed application..
Use the UP or DOWN arrows to select items and use MODE to switch to the next
7.After the installer set up options have been completed, DONE will blink for 3 seconds and the control will return to the OFF screen..
Remote Control – Crawl Space/Sealed Attic
If not installing in a crawl space or sealed attic with Model 76 remote control, press MODE to go to VENT screen selections
| If installing in a crawl space or |
| sealed attic with remote control, |
| Enable and press MODE.. The |
| installer |
| proceed to Installer Test Mode |
section on page 17.. |
Ventilation
If not using the dehumidifier to bring in outdoor air, press MODE to go to ZONE screen selections..
If using the dehumidifier for ventilation, Enable and press MODE to select TIMED or AUTO..
If ventilating based on time only (no outdoor temperature restrictions), press MODE at the VENT TIMED screen to go to ventilation time selection screen..
If ventilating with outdoor temperature restrictions, use the UP arrow to go from VENT TIMED to VENT AUTO
|
|
| prevented when outdoor |
| temperature is below 0°F and |
| above 100°F.. Between 0°F – 20°F |
| ventilation is only allowed during |
a HVAC heat call.. | |
| |
| prevented when outdoor |
| temperature is below 0°F and |
| above 100°F.. |
| |
|
|
| prevented when outdoor |
| temperature is below 0°F and |
| above 90°F.. Between 0°F – 40°F |
| ventilation is only allowed during |
a HVAC heat call.. |
Press the UP or DOWN arrows to adjust the ventilation time per hour from 0 to 60 minutes.. After selecting time, press MODE to go to the ZONE screen selections..
15