REPLACING HYDROSTATIC BELT
Remove
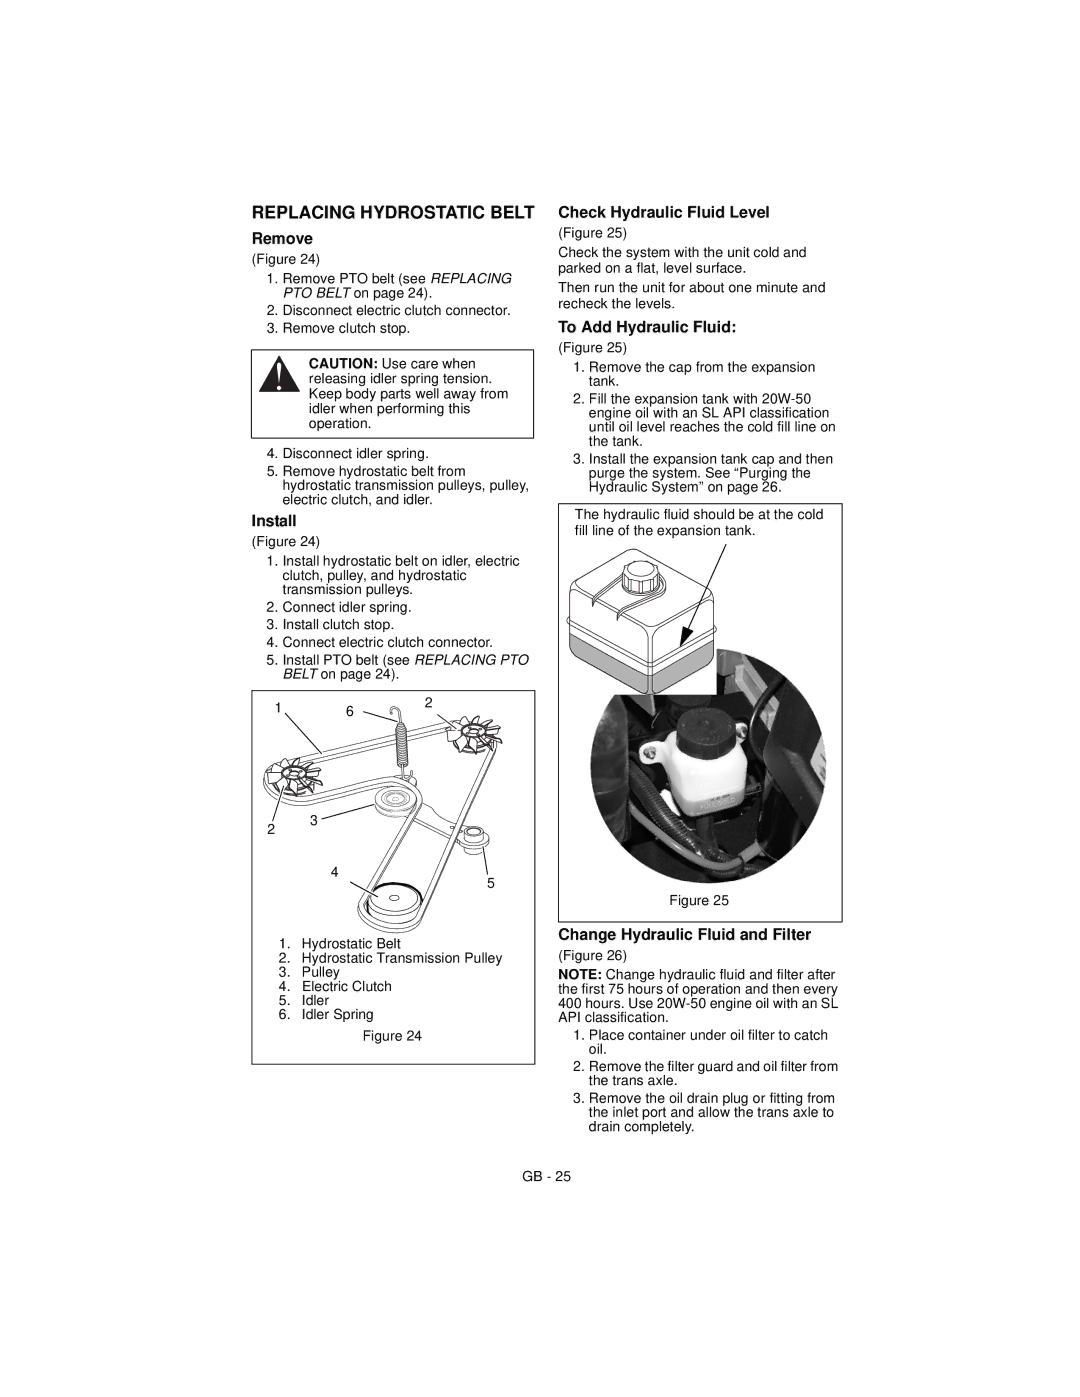
(Figure 24)
1.Remove PTO belt (see REPLACING PTO BELT on page 24).
2.Disconnect electric clutch connector.
3.Remove clutch stop.
CAUTION: Use care when releasing idler spring tension. Keep body parts well away from idler when performing this operation.
4.Disconnect idler spring.
5.Remove hydrostatic belt from hydrostatic transmission pulleys, pulley, electric clutch, and idler.
Install
(Figure 24)
1.Install hydrostatic belt on idler, electric clutch, pulley, and hydrostatic transmission pulleys.
2.Connect idler spring.
3.Install clutch stop.
4.Connect electric clutch connector.
5.Install PTO belt (see REPLACING PTO BELT on page 24).
1 | 6 | 2 |
| ||
2 | 3 |
|
|
| |
| 4 | 5 |
|
| |
1. | Hydrostatic Belt |
|
2. | Hydrostatic Transmission Pulley | |
3. | Pulley |
|
4. | Electric Clutch |
|
5. | Idler |
|
6. | Idler Spring |
|
| Figure 24 |
|
Check Hydraulic Fluid Level
(Figure 25)
Check the system with the unit cold and parked on a flat, level surface.
Then run the unit for about one minute and recheck the levels.
To Add Hydraulic Fluid:
(Figure 25)
1.Remove the cap from the expansion tank.
2.Fill the expansion tank with
3.Install the expansion tank cap and then purge the system. See “Purging the Hydraulic System” on page 26.
The hydraulic fluid should be at the cold fill line of the expansion tank.
Figure 25
Change Hydraulic Fluid and Filter
(Figure 26)
NOTE: Change hydraulic fluid and filter after the first 75 hours of operation and then every 400 hours. Use
1.Place container under oil filter to catch oil.
2.Remove the filter guard and oil filter from the trans axle.
3.Remove the oil drain plug or fitting from the inlet port and allow the trans axle to drain completely.
GB - 25
