2.10Room Thermostat Connection
5
D
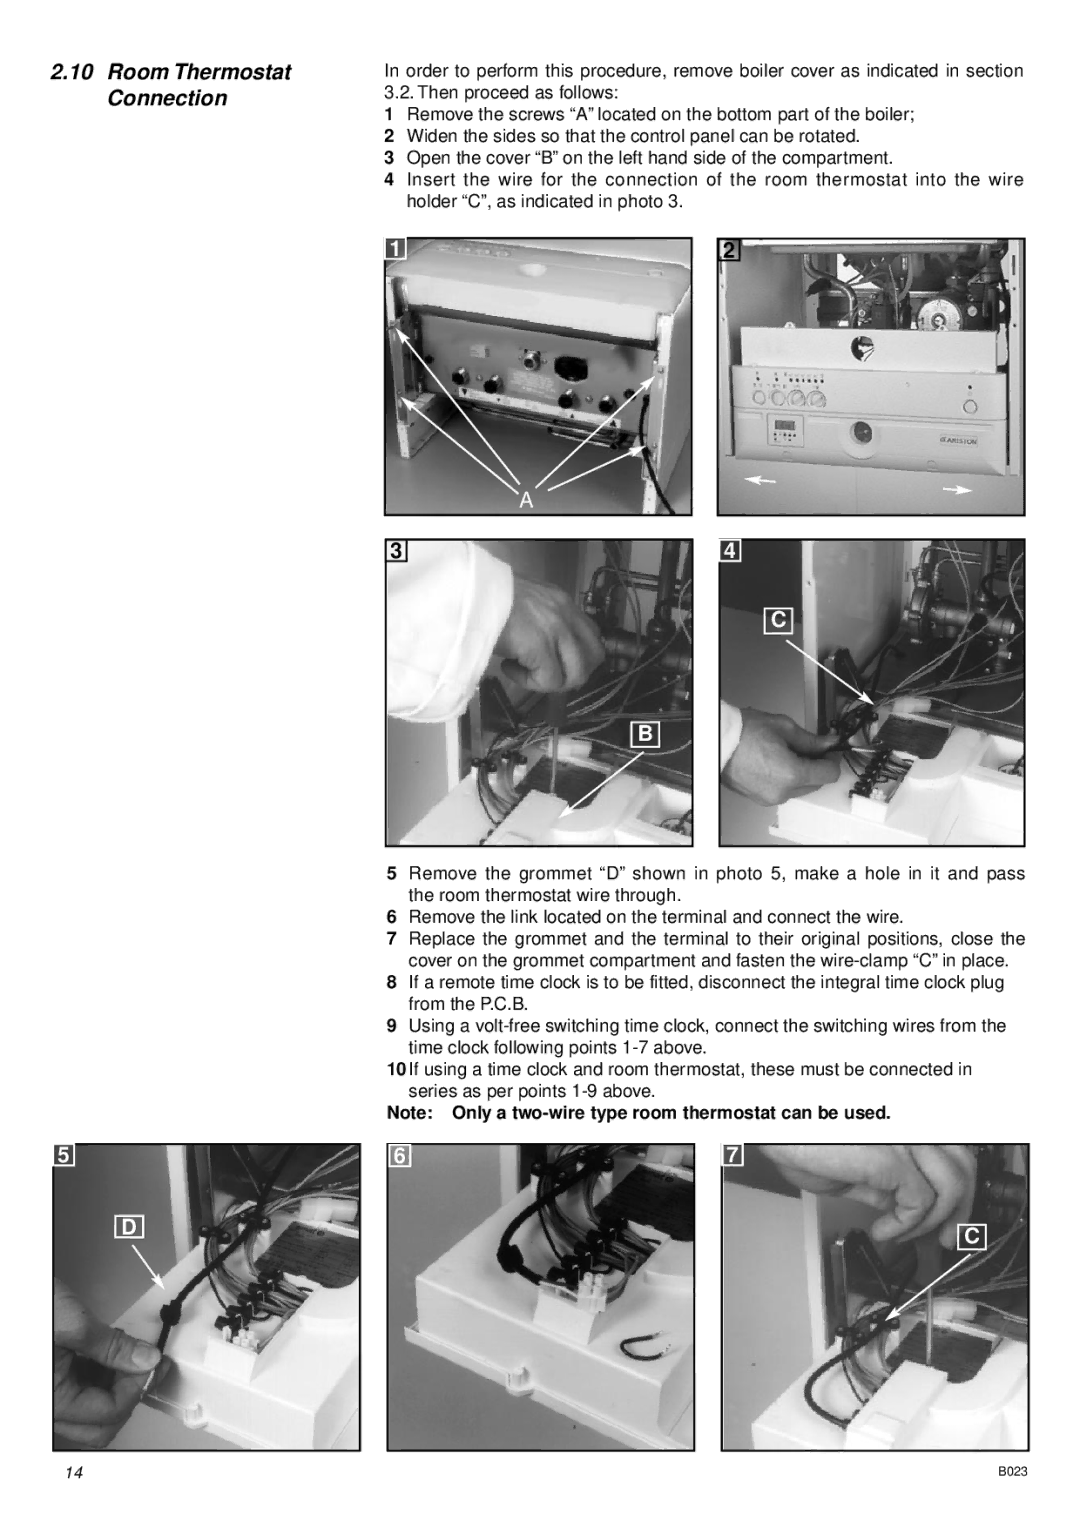
In order to perform this procedure, remove boiler cover as indicated in section 3.2. Then proceed as follows:
1Remove the screws “A” located on the bottom part of the boiler;
2Widen the sides so that the control panel can be rotated.
3Open the cover “B” on the left hand side of the compartment.
4Insert the wire for the connection of the room thermostat into the wire holder “C”, as indicated in photo 3.
1 | 2 |
| A |
3 | 4 |
C
B
5Remove the grommet “D” shown in photo 5, make a hole in it and pass the room thermostat wire through.
6Remove the link located on the terminal and connect the wire.
7Replace the grommet and the terminal to their original positions, close the cover on the grommet compartment and fasten the
8If a remote time clock is to be fitted, disconnect the integral time clock plug from the P.C.B.
9Using a
10If using a time clock and room thermostat, these must be connected in series as per points
Note: Only a
6 | 7 |
C
14 | B023 |