COMPUTER MODE
NORMAL FUNCTION
The normal picture level is preset on this projector at the factory and can be restored anytime you press the NORMAL button (located on the Top Control or on the Remote Control Unit). The “Standard” display will be displayed on the screen for a few seconds.
Standard
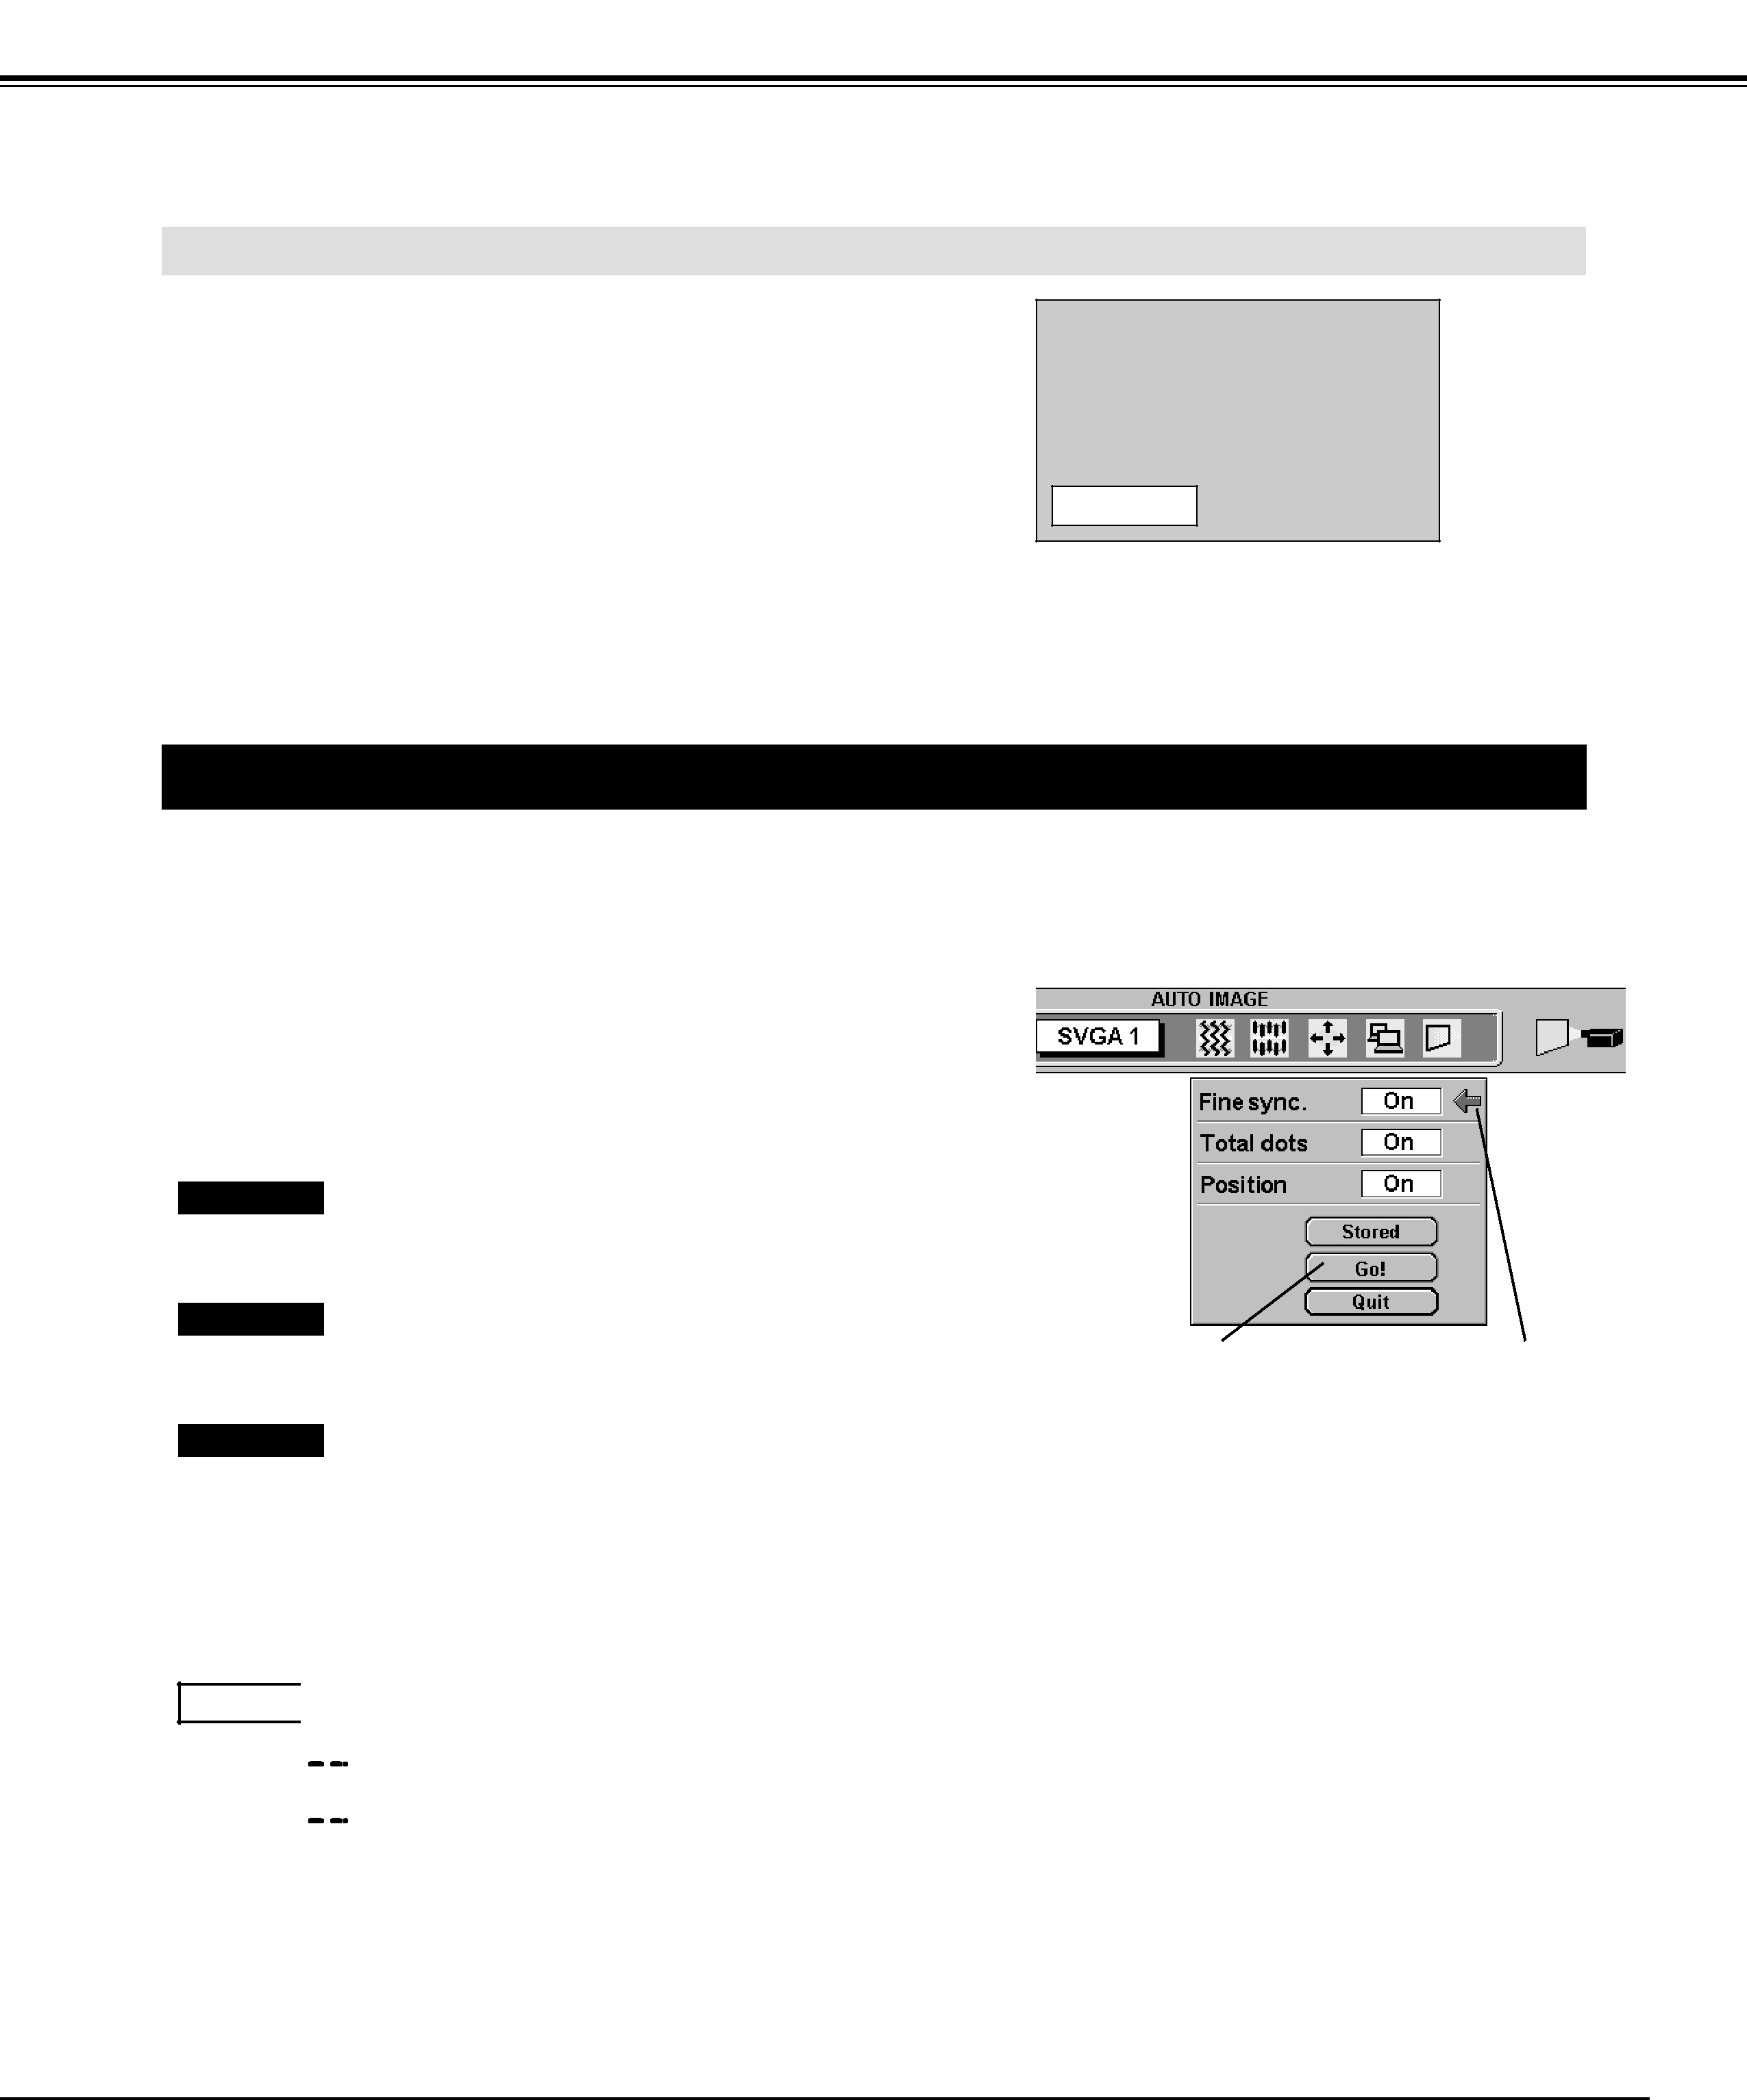
AUTO IMAGE ADJUSTMENTThe Auto Image function is provided to automatically adjust Fine sync., Total dots, and Picture Position for most computers.
1 | Press the MENU button and the |
appear. Press the POINT LEFT/RIGHT buttons to select AUTO | |
| IMAGE and press the SELECT button. |
| Another dialog box AUTO IMAGE Menu will appear. |
2 | Move the arrow to an item that you want to adjust by pressing |
the POINT UP/DOWN button. Change the setting On or Off by |
pressing the SELECT button.
Fine sync
Adjust the picture as necessary to eliminate flicker from the display. This item can be adjusted manually. (Refer to page 28.)
Total dots
The number of the total dots in one horizontal period. This item can be adjusted manually. (Refer to page 28.)
Position
Adjustment of the position of the image. This item can be adjusted manually. (Refer to page 30.)
3 | Move the arrow to “Go!” and press the SELECT button to start |
the Auto Image function. |
This adjustment can be executed by pressing AUTO IMAGE button on the Top Control or on the Remote Control Unit.
Stored 
 Stores the On/Off setting of each item.
Go! | Starts the Auto Image Adjustment. |
|
|
Quit | Closes the AUTO IMAGE ADJUSTMENT Menu. |
Starts the adjustment | Move the arrow to |
on the item set to "On". | the item and then |
| press the SELECT |
| button. |
Terminates the AUTO IMAGE |
|
ADJUSTMENT Menu. |
|
NOTE : This menu cannot be operated when the input signal is from the COMPUTER
The Fine sync., Total dots, and Picture Position of some computers may not be fully adjusted with the Auto Image Function. In that case, manual adjustment is required to make fine image. (Refer to page 28 to adjust "Fine sync." or "Total dots" and page 30 to adjust Picture Position.)
29